Modest progress on the challenge

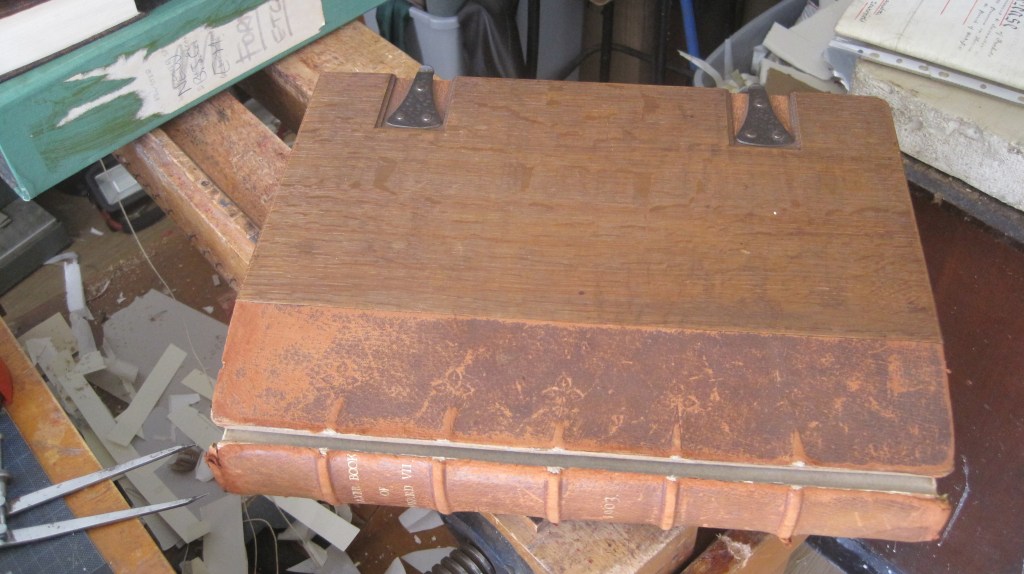
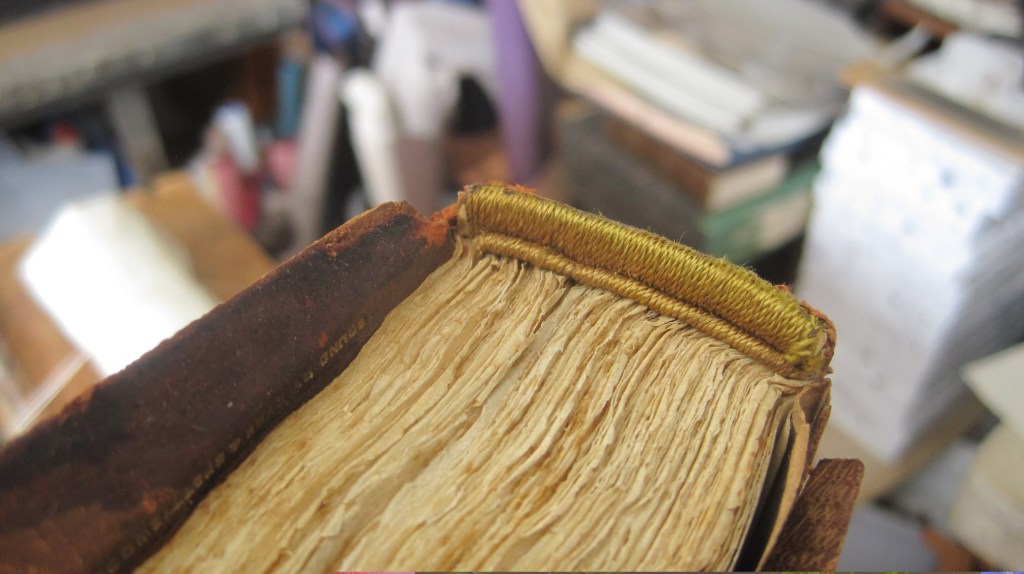
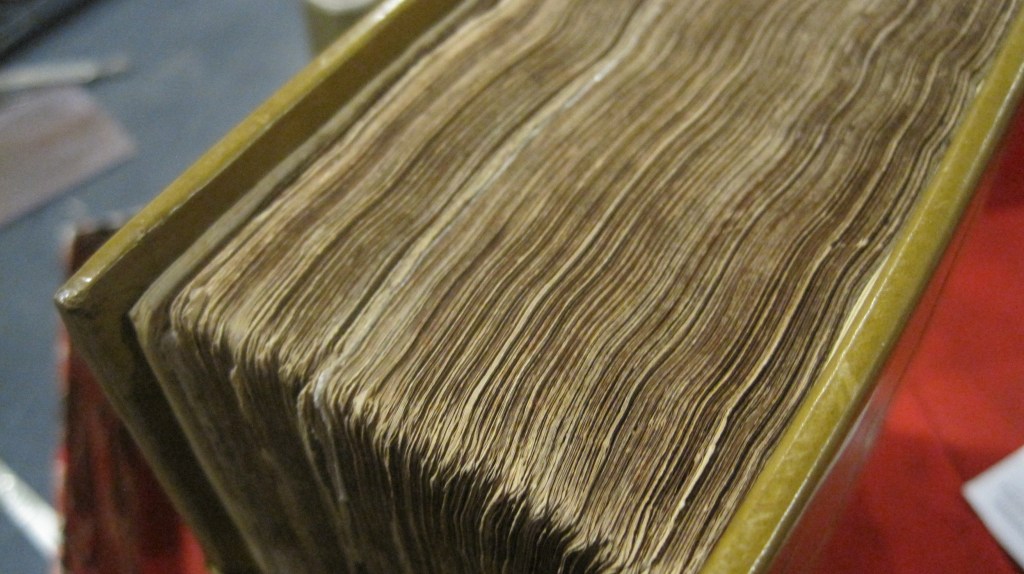
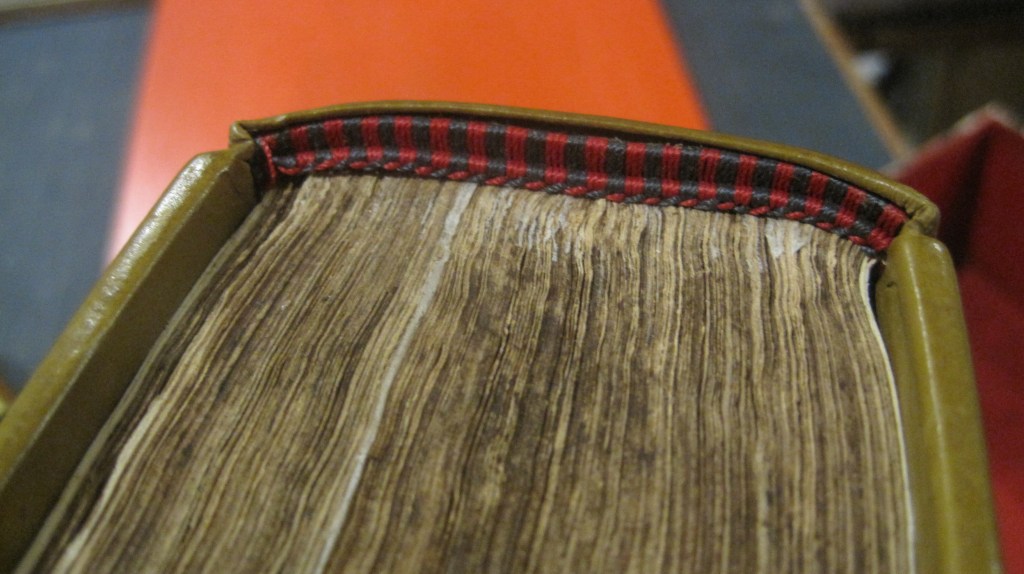
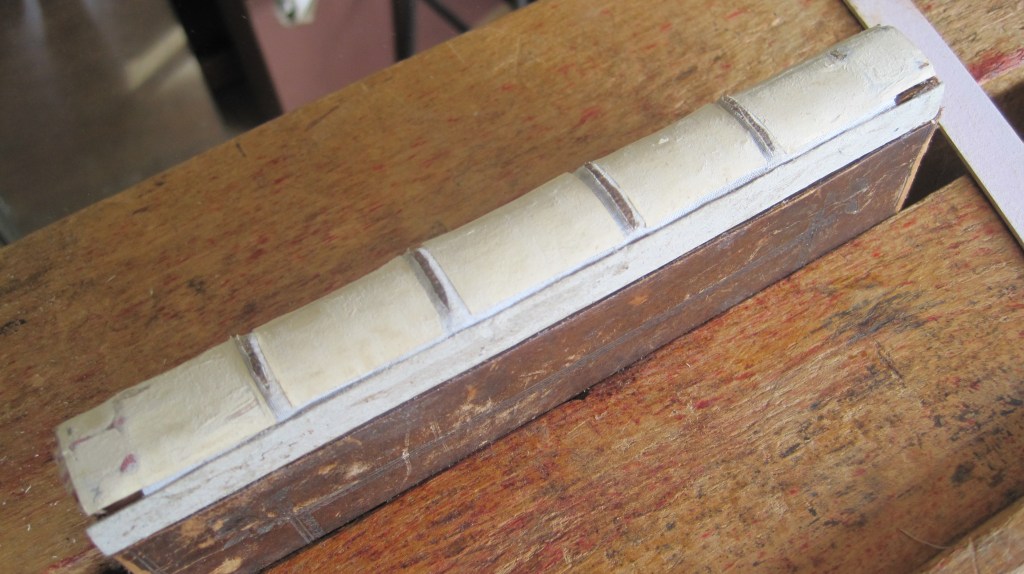
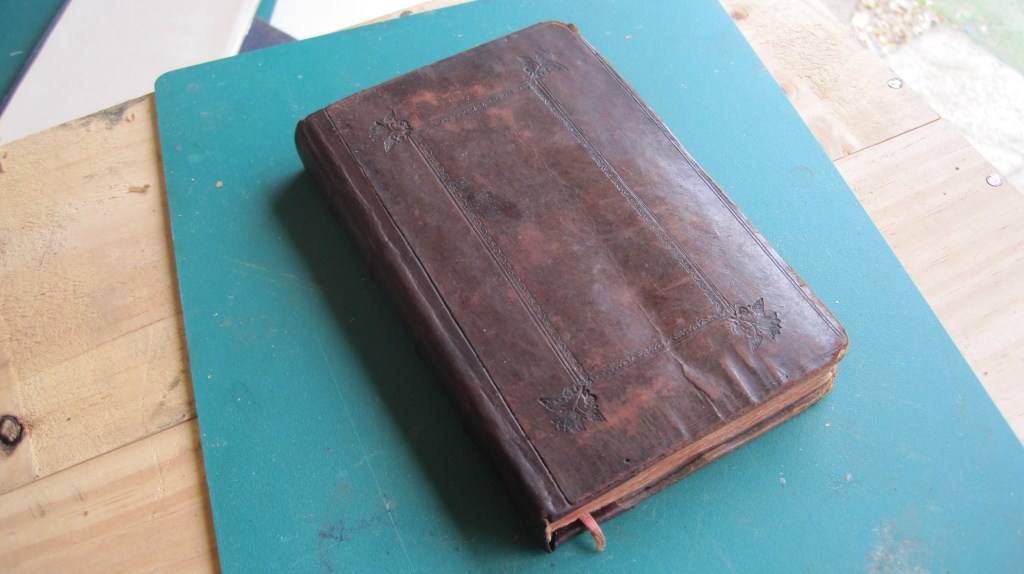
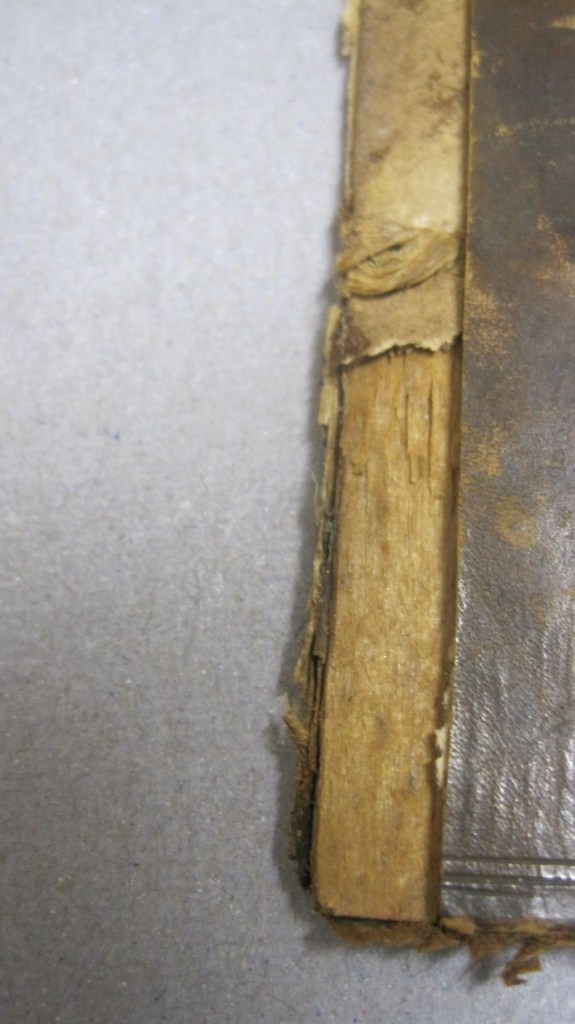
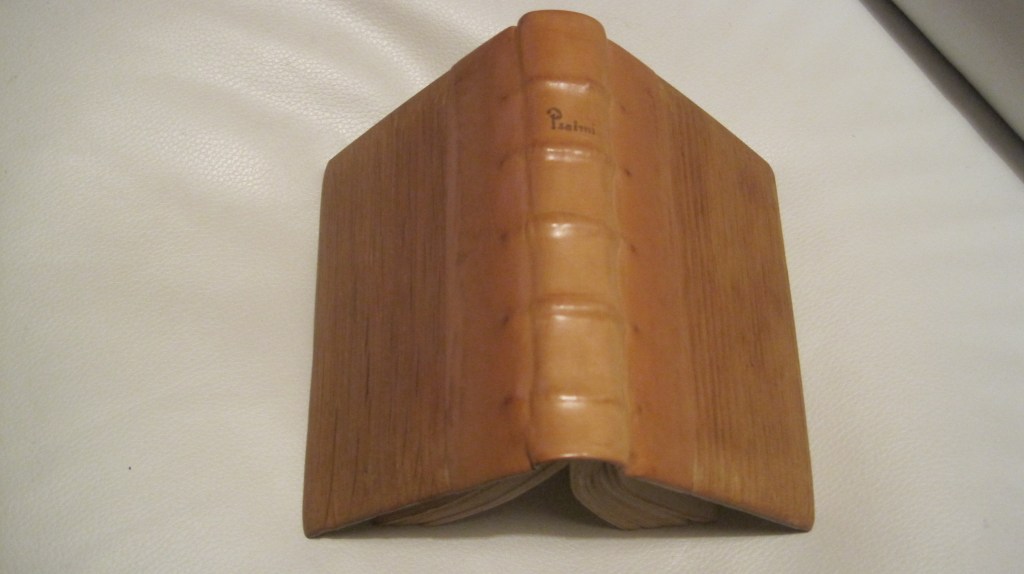
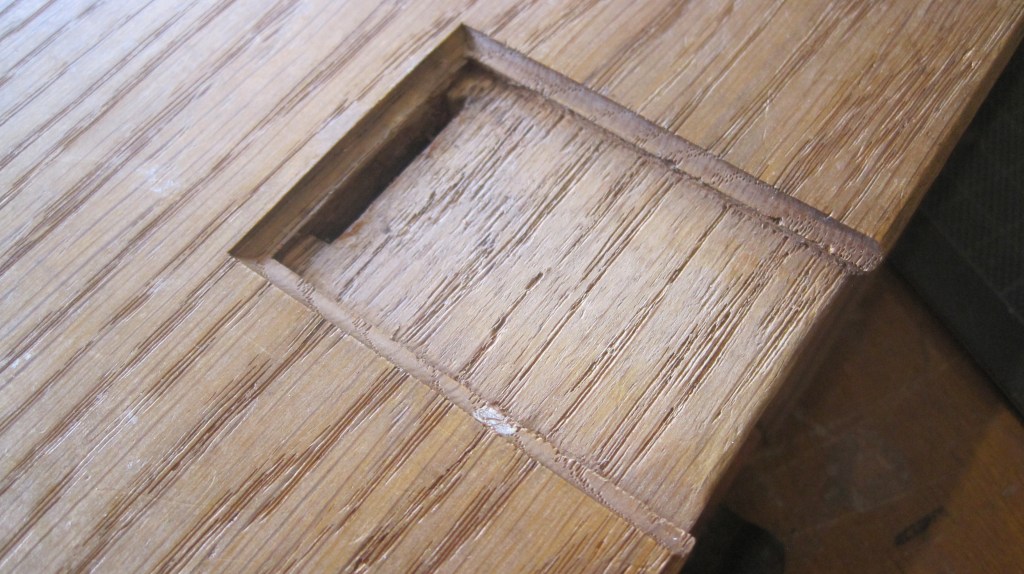
Further work on both the oak boards and the text block. Both boards are now cleaned off, showing how carefully they were shaped with a slanting angle at head and tail so that the deep bevel on the edges was reduced at the headbands position. Otherwise the headbands would have to be very tall.

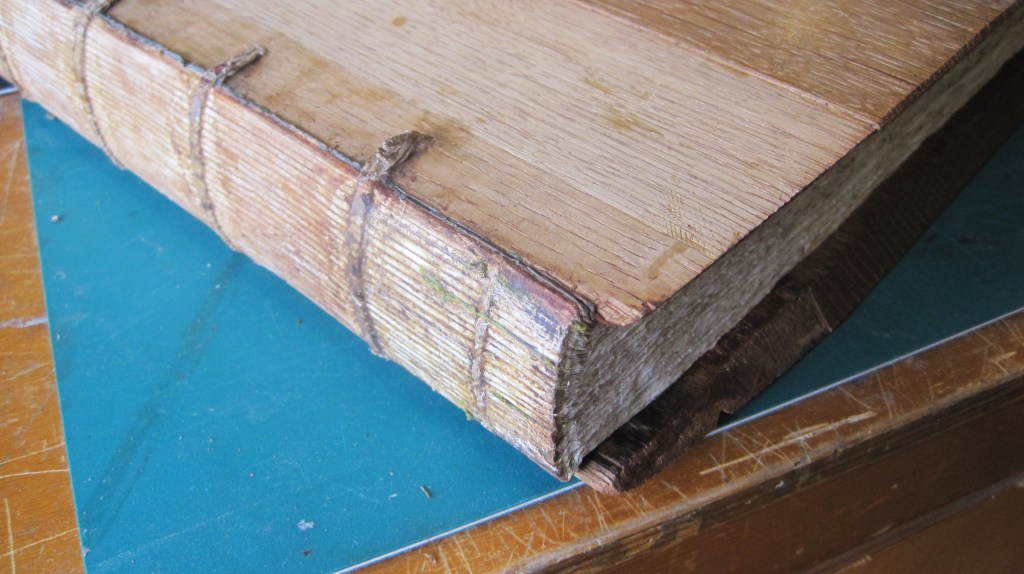
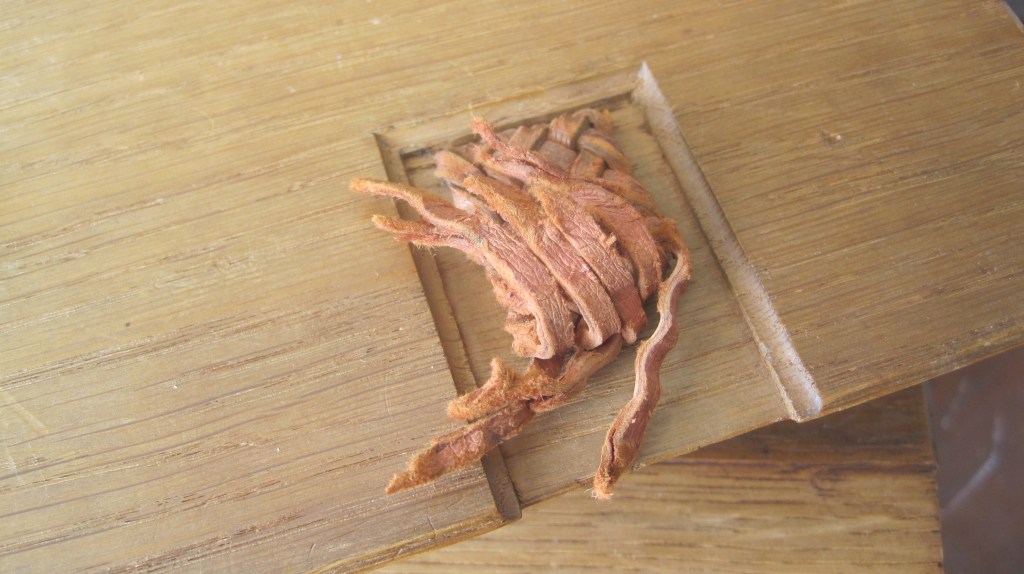
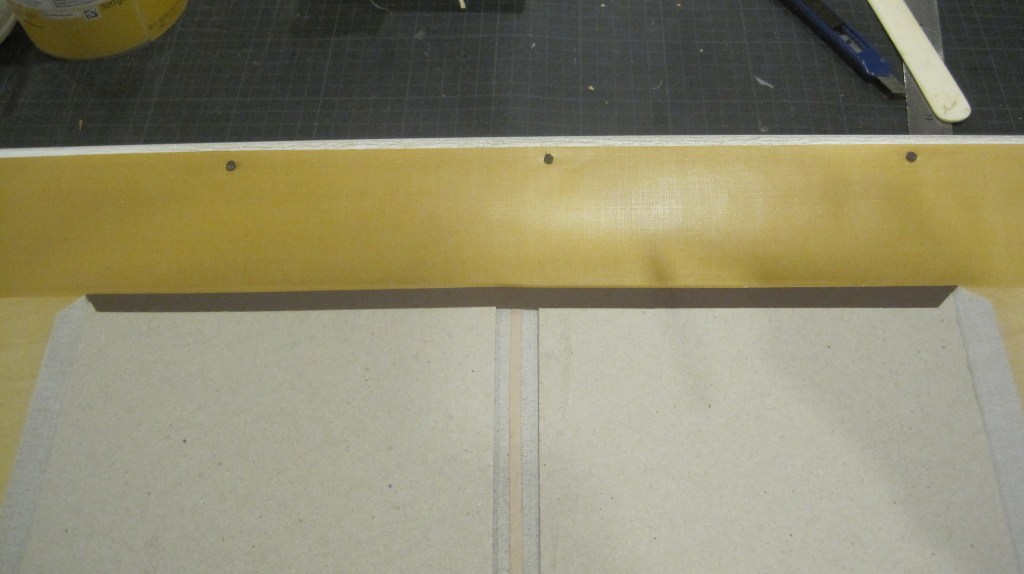
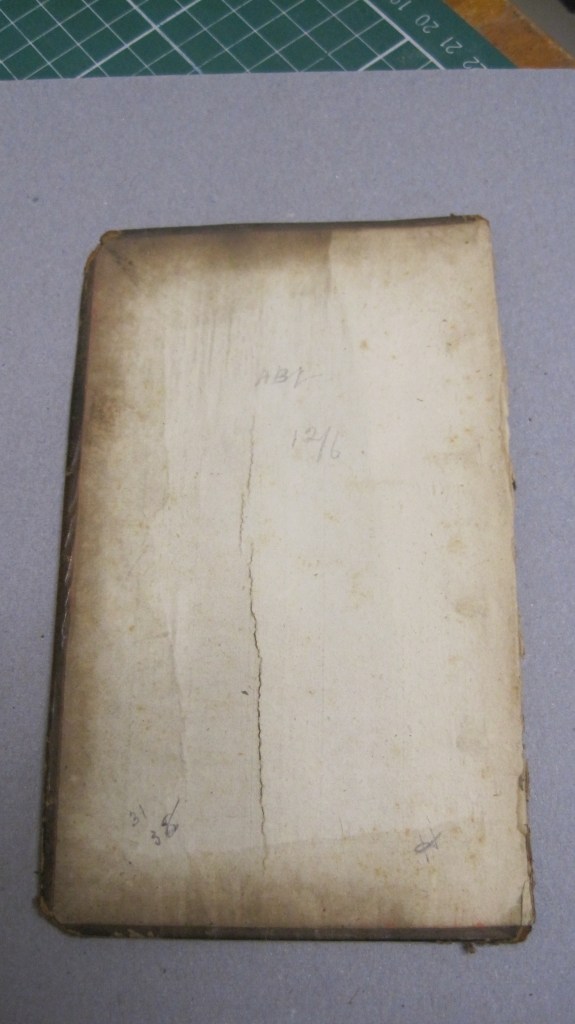
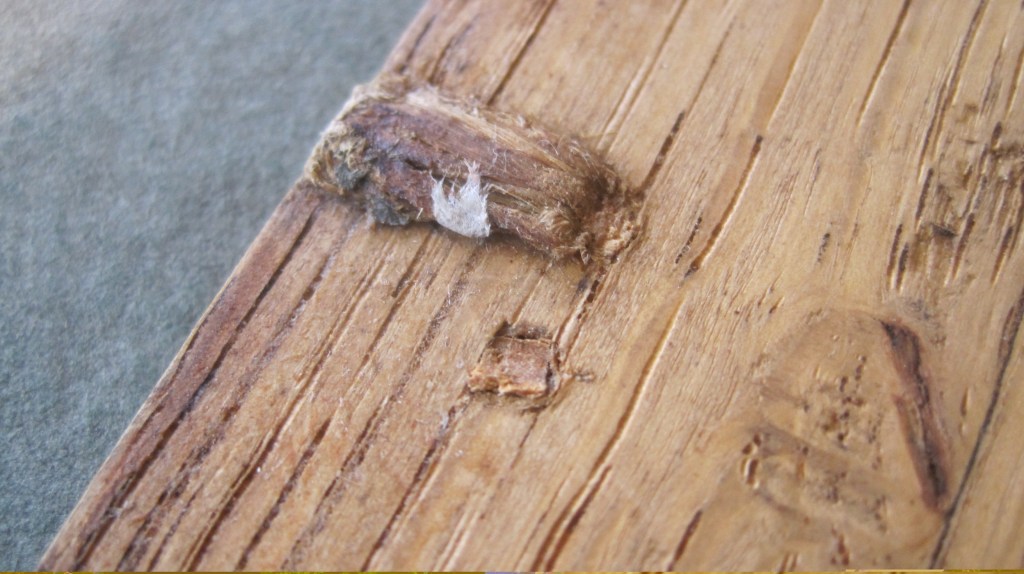
The detached board, when cleaned off, showed that a piece had been scarfed in by the joiner who made it, probably to replace a fault in the oak. Also the method of attaching the boards to the cords on the spine is revealed – the cord goes through a single hole drilled straight through and is then secured with a little peg. This is a simplified (and less robust) method based on that used by medieval binders, where the cord goes through the board and is then returned through another hole and trimmed off, both holes being pegged.

Scarfed piece at hinge edge of upper board
Detail of board attachment: the hemp cord was passed through a hole which was then pegged. The other apparent peg is where a hole was made in the wrong place and then filled in.

The traditional method of re-attaching boards where the cords have broken is to use strong thread tied to the old cord and then passed through the old hole in the board (as described by Middleton and others)

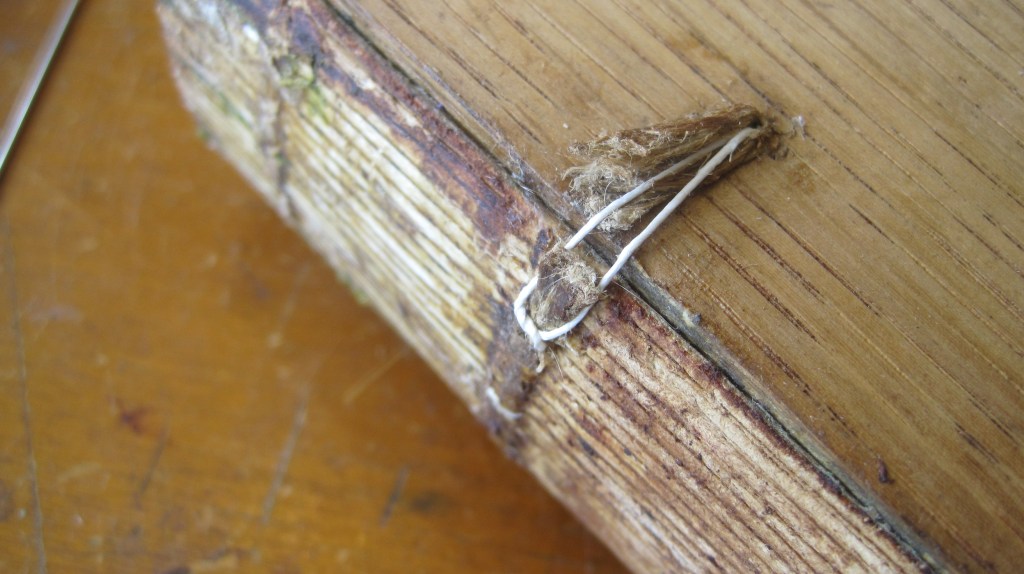
Personally, I don’t use this method – it is time-consuming and actually not very strong. It involves forcing needles under or through the cords which stresses already weakened material and it adds bulk if several threads are used – and if you don’t use several threads you don’t have any strength.

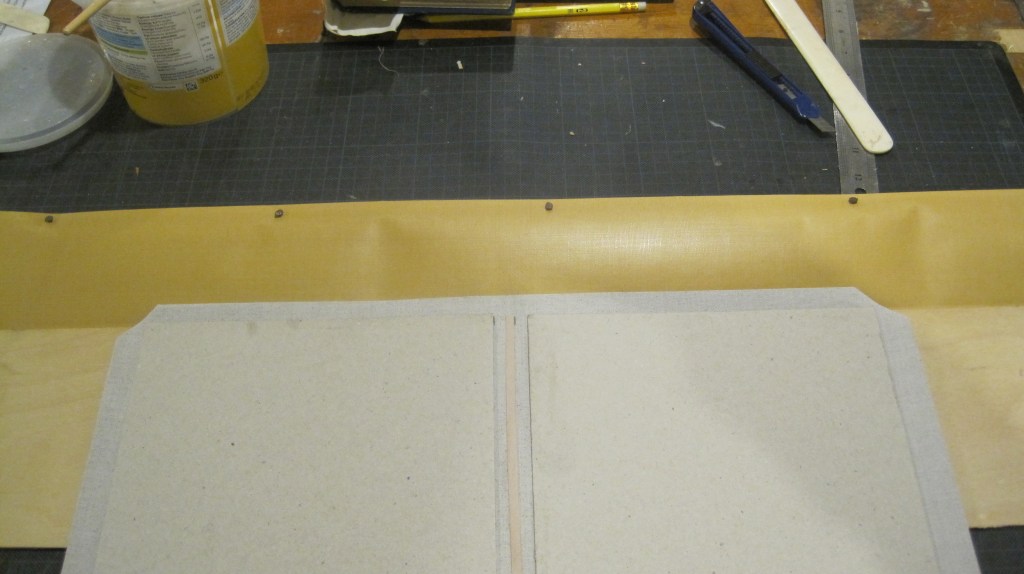
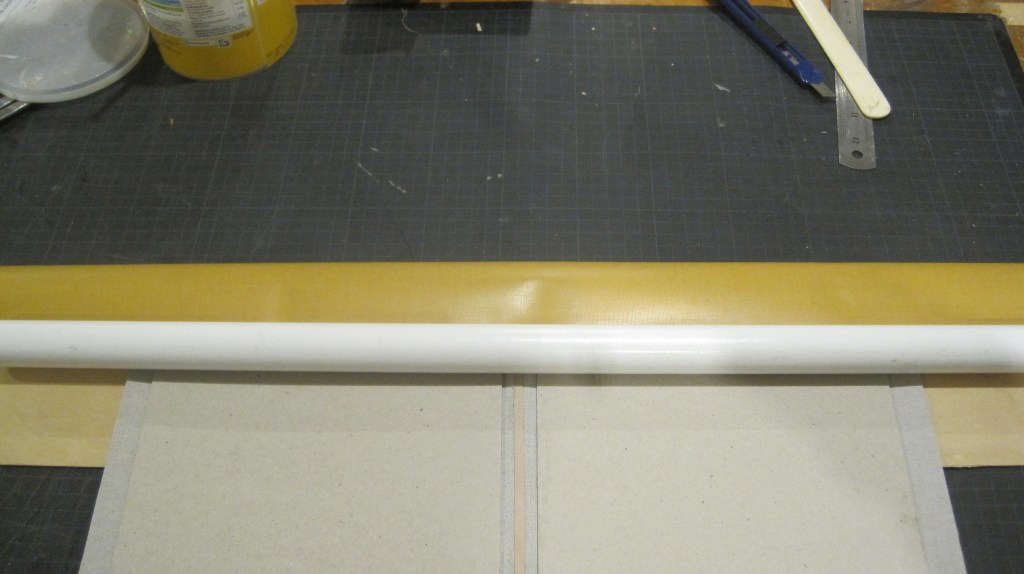
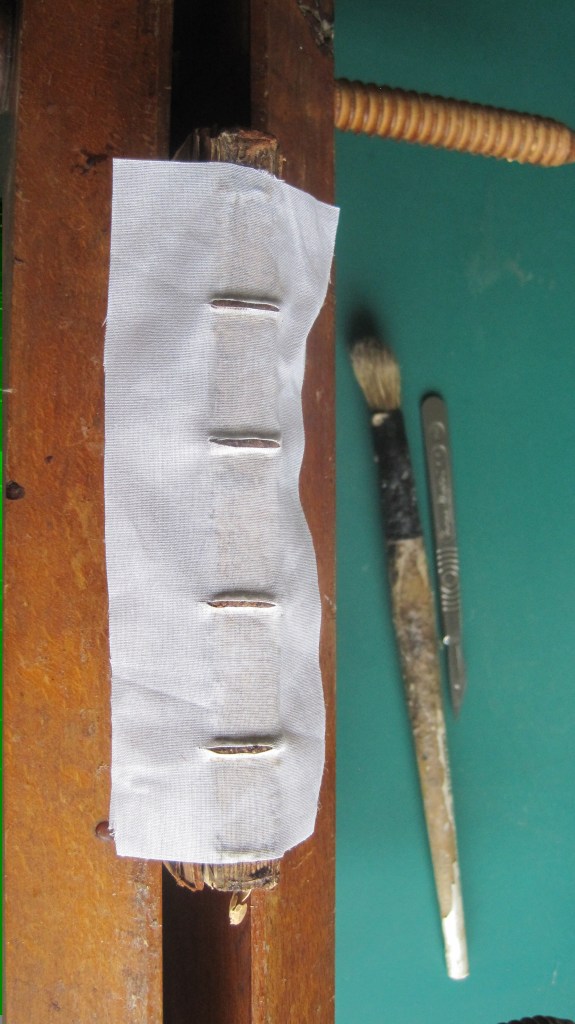
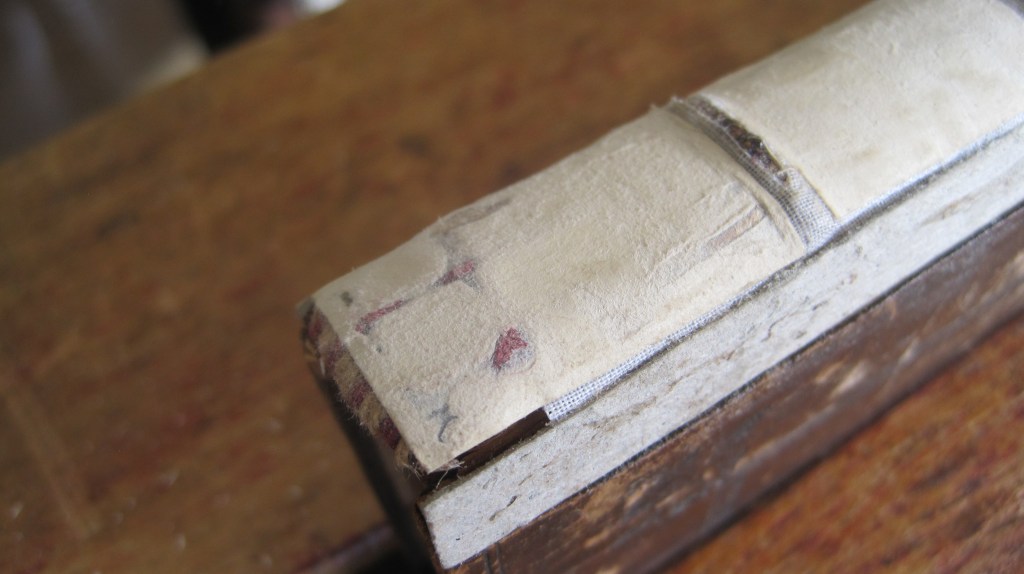
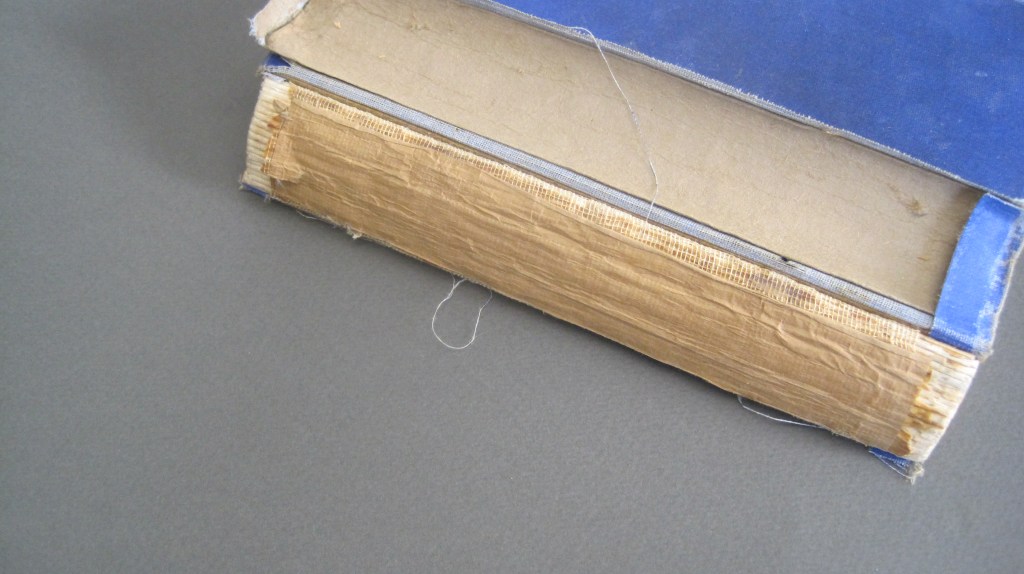
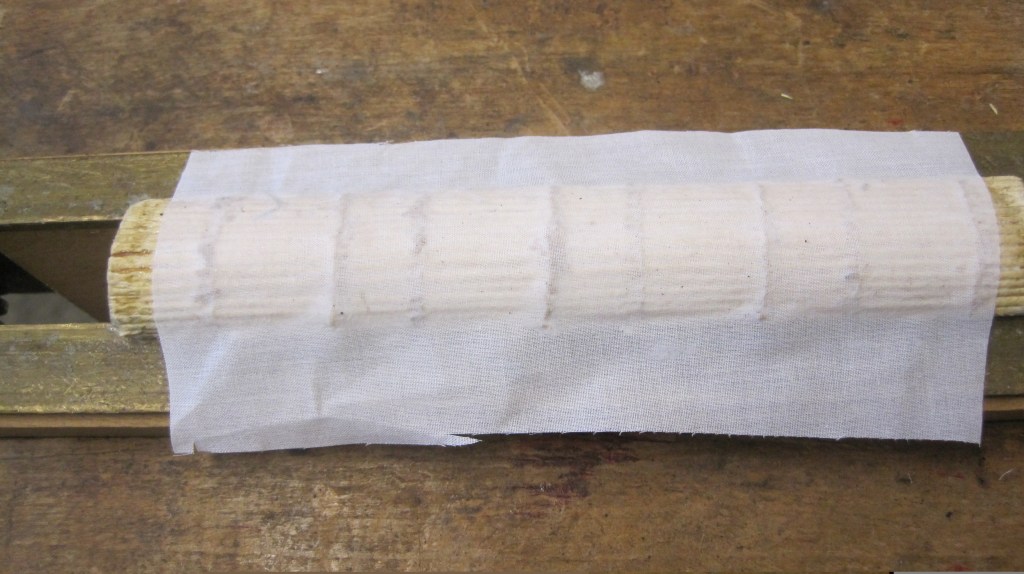
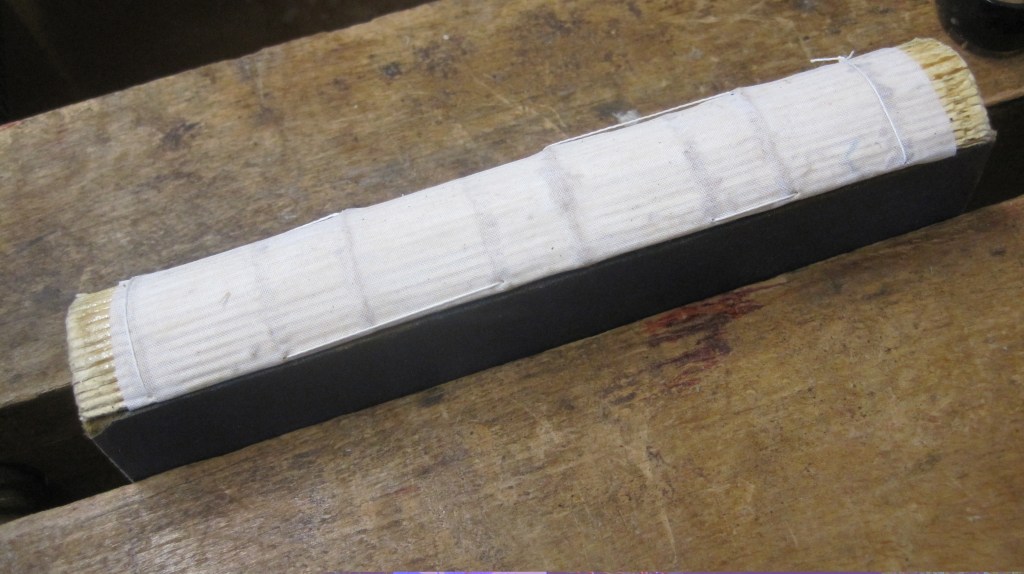
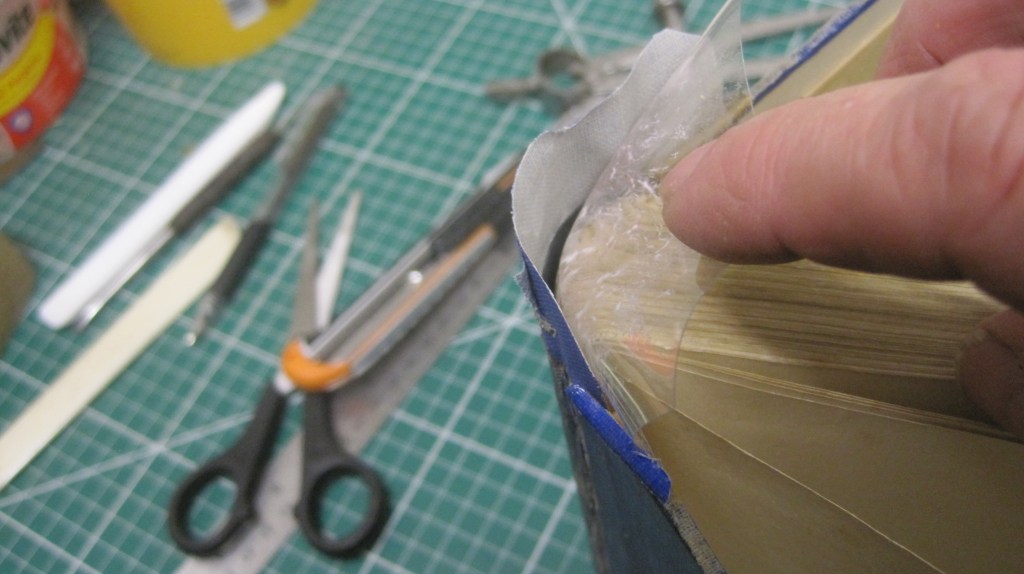
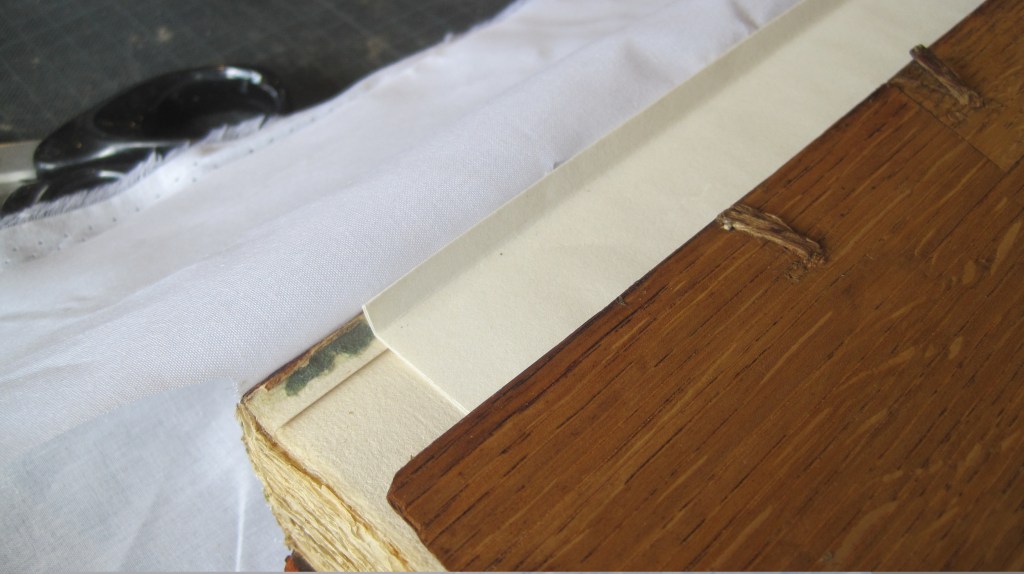
So, as described in an earlier post, I cover the back of the text block with strong cotton fabric – ‘Fraynot’ as sold by suppliers, but a good piece of cotton bedsheet will do perfectly well – and then sew through it from the centre folds of the first section of the text. In this case as it is a large heavy book I will sew though the first two sections, and of course the last two sections as well.

Strong cotton fabric covers the whole spine and is well tamped down with a stiff bristle brush to ensure complete adhesion directly to the text block. The cuts across the original cords just ensure it can be worked right against them. The excess at head and tail is cut off flush.

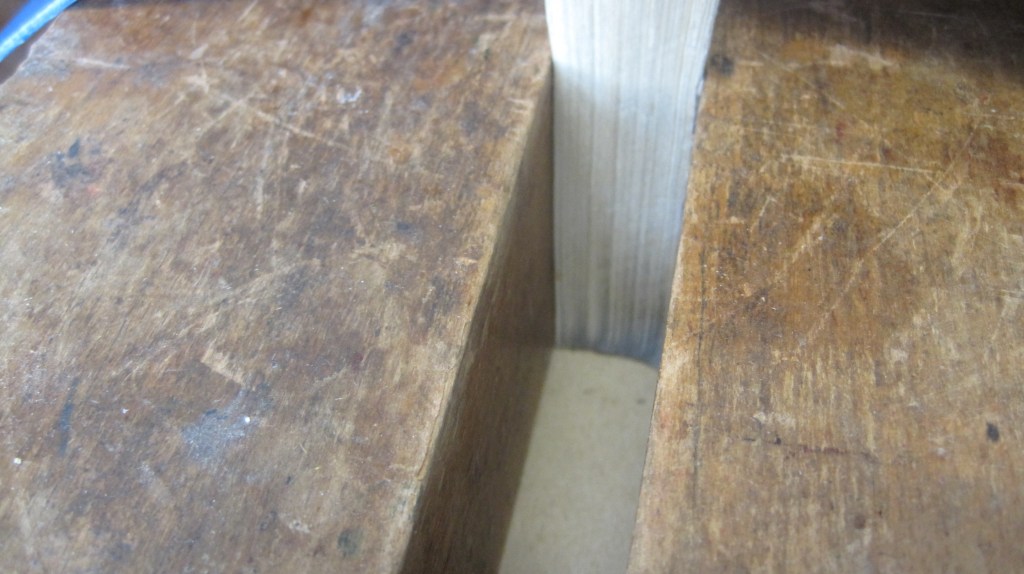
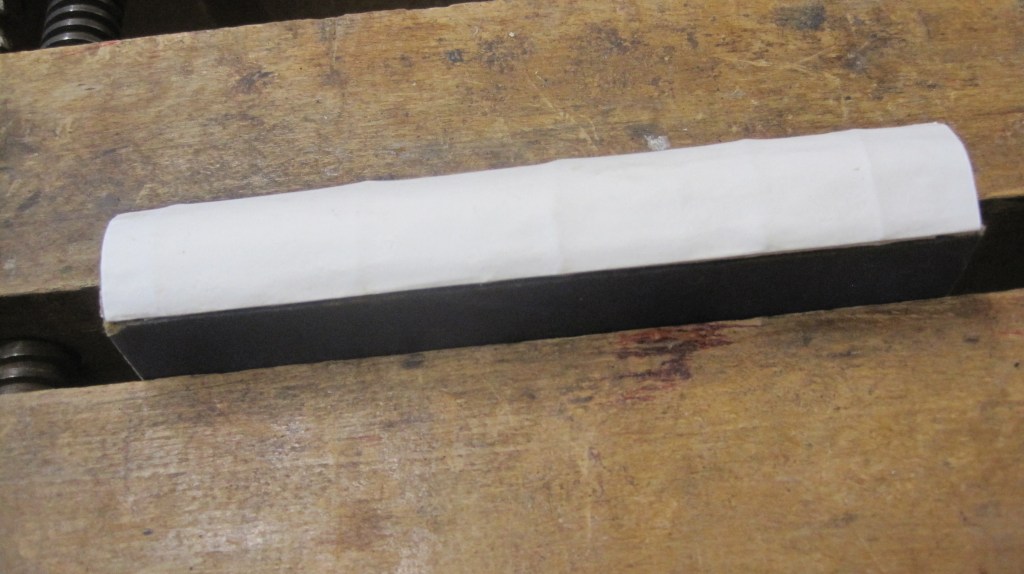
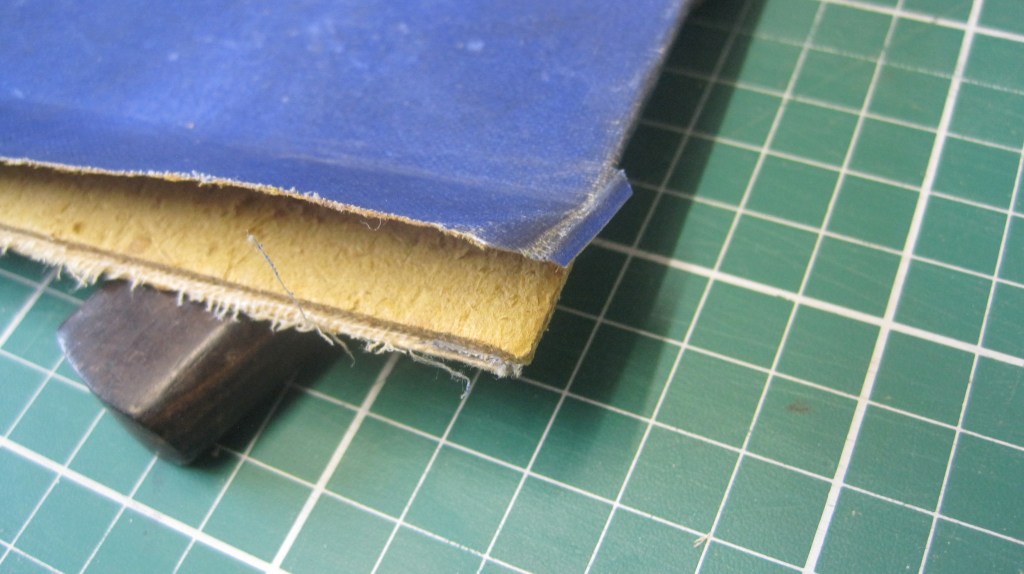
Before gluing the fabric to the boards, place a fold of paper of the same weight as the intended endpaper in the joint to create the correct fit of the board against the shoulder.

I leave the broken cord ends in place. They will show under the new leather when the spine is covered and replicate the original surface profile.

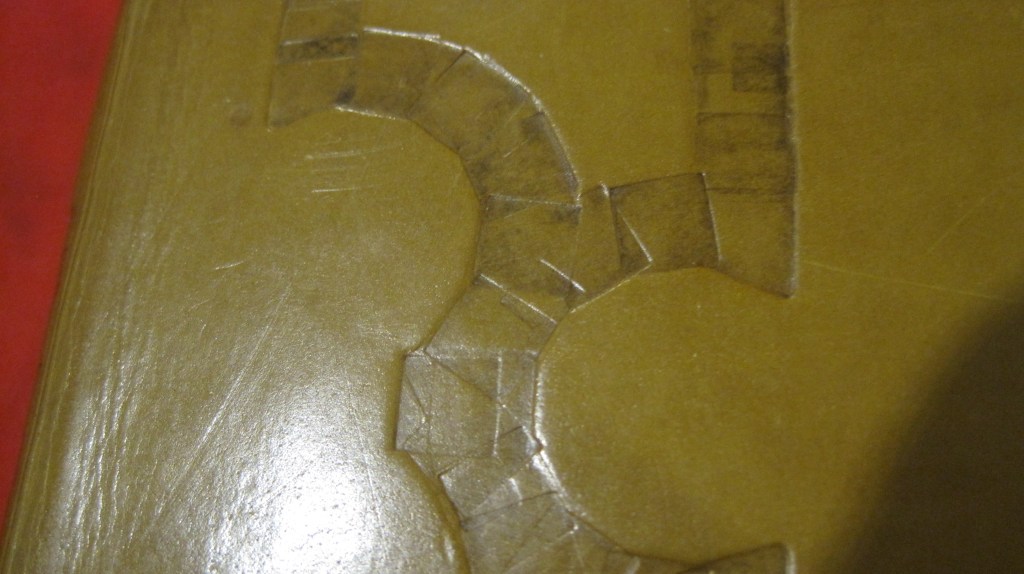
The amount of work that went into preparing the oak boards is impressive. The slots for the attachment of the plaited clasps are very detailed and must have added a lot to the binding cost

Upper surface of board showing how the plaited clasp strap is recessed to avoid wear , and the slot through to the under side.
Underside of board. The strap is glued into the recess and then filled in with a kind of glue-putty on which the endpaper will lie flat.
Same size recess in the upper board with the forged iron hook riveted through a piece of the same leather as the spine.
Underside of the hook attachment showing the ends of two rivets secured with glue-putty. The endpaper has been removed as it was browned and very weak. The dark line across the leather wrap shows the position of the edge of the endpaper

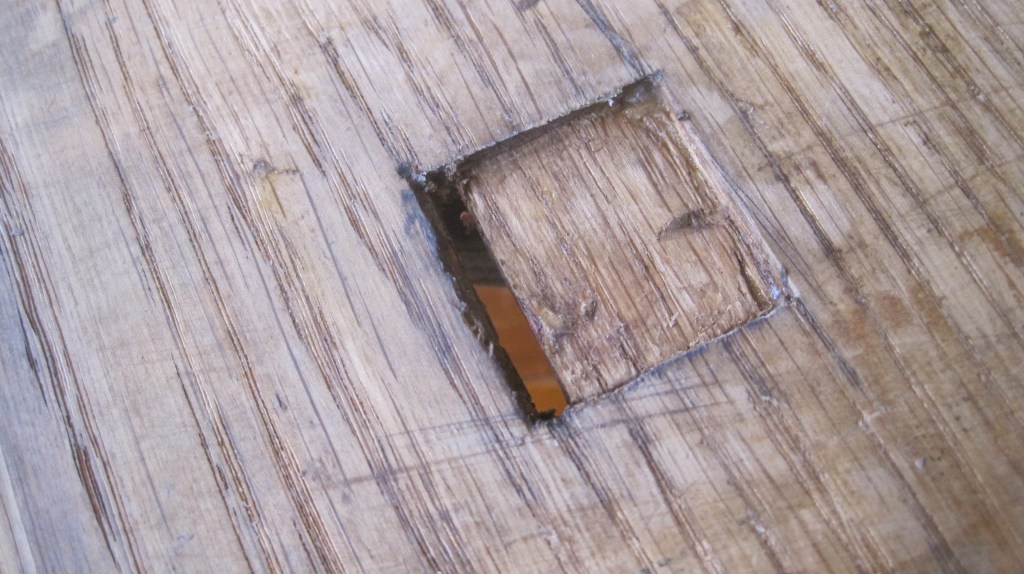
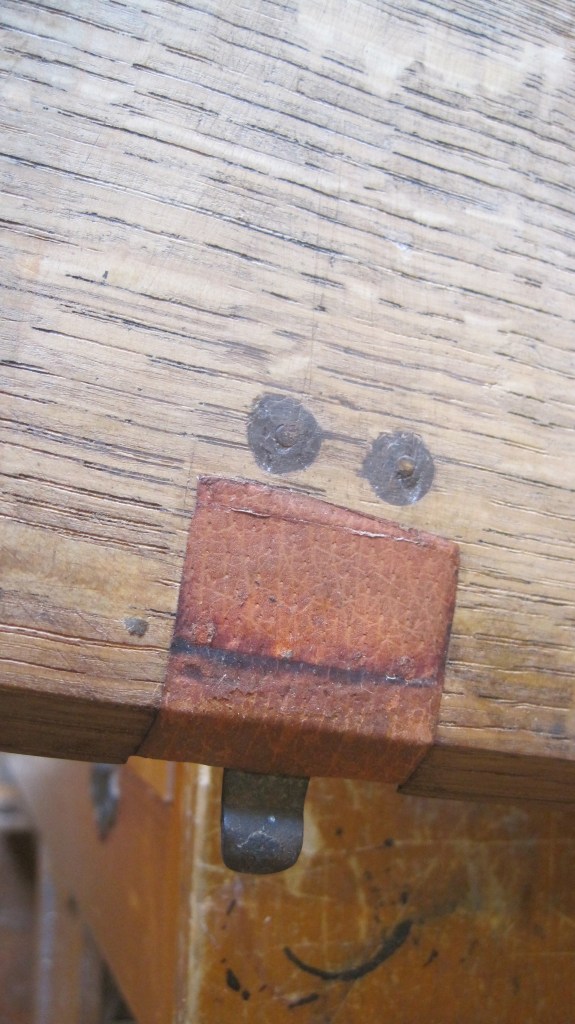
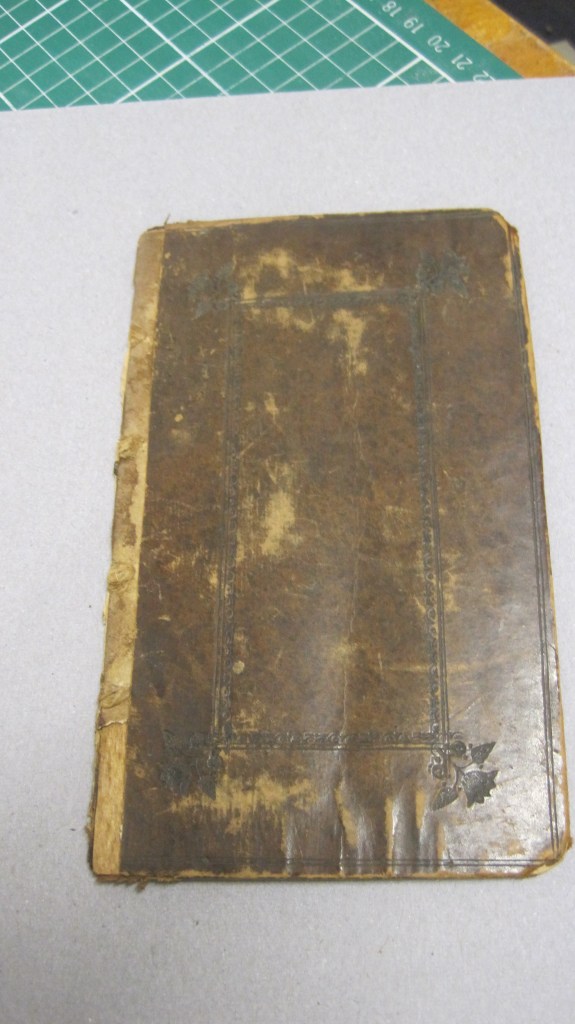
I am fortunate to have located a copy of the book at the Court Barn Museum in Chipping Camden, about 20 miles from my home. It is currently being ‘conserved’ and I will be able to inspect it in a few weeks time. The Museum has sent an image showing that the plaited clasp strap is secured on the hook with a simple iron ring.

More soon!

An Arts and Crafts Challenge

In 1903, at the height of the Arts and Crafts Movement in England, Charles Ashbee’s Essex House Press produced its most ambitious publication: The Prayer Book of King Edward VII. From its workshops in Chipping Camden in the Cotswolds 400 copies were printed in small folio format (just under 14 inches by 10.5 inches), 387 pages of watermarked hand-made paper with over 150 decorations. It was bound in oak boards with iron clasps and a pigskin spine and sold for 12 guineas, equivalent to about £1600 or $2000 in 2021.

Last week I was able to buy a copy at auction, for a great deal less than its equivalent original cost. These pictures reveal why:

Front board detached; pigskin leather spine badly decayed

The lower board had plaited leather clasps, presumably with an iron ring to hook over the catch on the top board. These were also completely decayed

Eight-strand plaited leather clasp, recessed into the lower board but badly decayed.

Powerful evidence of the damaging effect of a combination of chemical tanning of the pigskin and atmospheric pollution, most probably from gas lighting and coal fires in the house in which the book was kept.

The headbands also were affected, the original dark green silk having bleached to a yellow colour.

The original colour of the headbanding thread is revealed when you remove the decayed spine leather to expose the tie-downs

But the text is completely unaffected – pages crisp and clean, print sharp, sewing tight and sound.

So, the challenge is to rebind it, retaining the beautiful oak boards, replacing the bleached endbands and covering the spine in new pigskin stained to match the original, with new plaited leather clasps. I have begun to remove the decayed leather already (revealing, incidentally, that on the spine it had been glued directly to the text block, with no linings). Revealing also that the bands had been emphasised with an extra strip of leather so show more prominently on the finished spine.

I will post regular updates on progress. In the meantime, please ask questions if you wish.

A simple aid for case-making

A binder’s life is not all fine leather, gold and double headbands. Simple cloth cases are frequently called for, and occasionally a run of 20-odd is required. The operation of turning-in the cloth at head, tail and sides needs to be neat and if done with the fingers can leave little pockets of air at the edges, and marking on the cloth. Consistently neat, quick and clean results are achieved by using a simple folding aid.

It comprises a strip of thin plywood about 30 inches long and four inches wide, with a strip of strong buckram bookcloth (grain along the long edge) glued under one edge. Then a length of thick dowel (curtain pole works well) is tacked onto the other edge of the bookcloth.

Place the case on the plywood strip with the top edge of the greyboard in line with the edge of the plywood. Put waste paper under the cloth to be folded over and glue it.

Take the waste paper out, hold the case down with one hand and pull the dowel firmly forward with the other hand.

Rub down through the buckram. Turn the bookcloth back.

Perfectly turned edge – no airpockets and no marking to the case cloth.

Repeat on other edges. I find that it cuts the time to turn all four edges by half.

In the beginning….

I began to learn bookbinding in 1976. About the same time I bought a very well-used copy of a bible printed in 1608, one of the long series of ‘Breeches Bibles’ that began in 1589, I believe. Its leather covers were missing, the boards were broken at the corners, some of the sewing was very loose and a dozen or so pages at the end needed repair. But the text was complete, including all the psalms. I paid £28 for it in an antique shop in Warwick.

It was an obvious candidate for practising both repairs and re-binding. The repairs to the damaged pages were pretty straightforward – heat-set repair tissue did the job, to my satisfaction at least.

Re-sewing the whole text was tedious, but good practice. It also revealed that the edges actually look nicer for being just marginally uneven, rather than perfectly smooth from the plough.

Then there was the question of headbands. I had just learnt how to do a double headband, so that’s what it got.

That was before the leather covers were added, of course. I bought a half skin of light brown calf (I forget from whom) and used part of that, but I had no finishing tools at all. But I had read that several highly-regarded binders made their own tools – William Matthews, Ivor Robinson and Edgar Mansfield, for example – in order to achieve a particular style or effect. I had an idea for a decorative design based on the date of the book – 1608 – and on some ‘strapwork’ bindings I had seen in reference books. Last week I found some tools I made to achieve the effect I had in mind.

I suppose I worked out the design on graph paper first, but if I did I have lost it, but it ended up like this:

Basically, a Jacobean knot-garden concept, worked in blind using small tools that I made from brass screws filed to simple shapes. There were three tools, but I have mislaid one – the surviving two are these:

The ‘lost’ one was a larger square. In close-up, you can see the pattern was worked with repeated blind impressions, creating the effect of brick or stone paving, like the paths around an actual knot garden of 1608.

The title and date were added using type and a typeholder in my evening class at Leicester School of Printing.

I made a few more simple tools from brass screws or brass tube at that time, around 1980, and now I’ve found them again will find a way to use them.

But I still go to Fine Cut for ‘proper’ finishing tools.

Some thoughts on finishing tools

I have recently sold some finishing tools to a young bookbinder in Edinburgh. They were quite old, so he will join the line of binders who have used them, over more than 100 years – certainly four or five binders; possibly a dozen. Coincidentally I have recently acquired quite a lot of tools, all from a retired binder (but I don’t know his/her name) which include four with the same binder’s name stamped on them – Henry Harley. It is certainly the binder’s name, as a separate stamp has the maker’s name, Clark, on three of the tools. These two names fit as regards dates – Henry Harley is recorded as a bookbinder in London (by Packer*) for the years 1876 – 1891 and Thomas and William Clark are listed (in Conroy**) as bookbinders’ toolmakers in London from 1877 to 1901.

Binder’s names on finishing tools are quite rare – I have handled several hundred tools over the past 40 years and have only come across Zaehnsdorf and Fazakerley, both large binderies who no doubt felt that tools might ‘disappear’ if they were not stamped. But there were many other large binderies who clearly did not feel it was necessary.

It was also the case that finishing tools were often – indeed, usually – owned by the finisher himself (in those days it was always, regrettably ‘himself’) rather than the firm he worked for. The vast majority of bookbinders, then as now, were individual craftsmen (and occasionally craftswomen, though it seems that most women recorded as being in charge of a bindery were actually the widows of deceased binders). A master bookbinder would commonly take on one or two apprentices, one of whom might continue the business when his master retired, or died, and take over the equipment of the bindery, including the finishing tools.

Of the four names tools three are unusual designs: only the fleur-de-lis is a standard pattern, and that is the only one not made by Clark. Furthermore, the three Clark tools are also stamped “3” on the shank. Why Henry Harley needed that stamp as well as his name is a mystery, as numbers stamped on tools are usually a maker’s pattern number, always in my experience a French or German toolmaker. Here are three different and rather odd designs all stamped “3”. Strange!

Finally, could there be a connection with the firm of bookbinders near Adelaide, Australia trading as William Harley & Son?

*Maurice Packer, Bookbinders of Victorian London, British Library 1991

**Tom Conroy, Bookbinders’ Finishing Tool Makers 1780 – 1966, Oak Knoll Press 2002

Sad news

Very sad to report that Trevor Hickman, who taught me nearly all I know about bookbinding, died a few days ago. He was 86 and living in quiet retirement in Leicestershire. I was fortunate in speaking to him on the phone some weeks ago for the first time in many years. I am privileged to have known him and learned from him.

The ‘rare find’ repaired

After the last post, about finding an unusual ‘scabboard’ binding, a reader asked to see the finished article. So here is a series of pictures of the rest of the process, with suitable captions.

This is where we left the book three weeks ago – with the degraded leather at the joint edge removed exposing the thin wooden board.
Cloth hinge/lining glued directly on to the back of the sewn sections. All the old glue and degraded spine leather has been softened with paste and removed first. The slits over the raised bands make it easier to mould the cloth evenly on to the spine. Note the missing endband on the right. I always sew replacement endbands after lining the spine so the endband tie-down threads will come out through the cloth, avoiding the risk of tearing the backs of the paper sections. The cloth hinge will be glued directly on to the exposed board and under the cover leather.
Replacement endband sewn (at the left), card strips glued over the hinge cloth to compensate for the thickness of the damaged leather that was removed previously. Pieces of strong paper glued between the bands and over the top and bottom panels and sanded down to remove lumps
Detail of the replacement endband with the covering paper sanded smooth
Calf stained to match old sides and pared quite thin (about 0.2mm) ready to be applied. This is a ‘tight’ back so the head and tail turn-ins will go directly on to the spine. If the turn-ins are, say, 12mm then the paring should be done so that there is an even reduction in thickness from the 24mm points right down to a true ‘feather’ edge. Note the crease along the middle of the spine strip: this is where the leather has been pinched and stretched to make it easier to mould it over the bands.
Dampened and pasted leather moulded over the bands and worked under the lifted side leather. It is darker because damp.
Sides pressed firmly to create a flat surface where the new leather goes under the old. A quick wipe over the old leather with the same stain as was used on the new will even out any variations in colour.
Original title label replaced. No other decoration needed.

So there it is. Rare ‘scabboard’ material of the boards now invisible. But I will tell the client all about it.

A rare find…

Repairing a book involves necessary ‘intervention’ – removing previous repair material or degraded original materials. This exposes the underlying materials – linings, tapes, cords, or the boards themselves.

I am currently re-backing a small leather-bound book of heraldry published in 1682 in Oxford. As is usually the case, the boards were detached and the spine leather completely perished. To attach the boards the old spine leather is removed and a strip of fine fabric is glued directly on to the back, wide enough to glue down on to the boards and under the cover leather. That requires a strip of the cover leather at the hinge edge (which is usually pretty degraded anyway) to be removed so the new fabric hinge can be glued to a sound surface – the board itself.

When I did that on the present book I was very surprised to find that the covers were not the usual pasteboard but wooden; very thin sheets of softwood. I have never come across this before on a 17th century book.

Front board with edge strip removed to give firm attachment for new fabric hinge
Inside of the board shows the wooden core has split along the grain
Detail showing clearly the softwood board

Now, I had read about ‘scaleboard’ or ‘scabboard’ in Edith Diehl’s magisterial work on Bookbinding (vol 1, page 153) as an American alternative to pasteboard, which was not available due a shortage of paper until at least 1690 when the first American paper mill was established. But I had never come across similar use of thin wooden boards in the UK. However, the equally magisterial work on English bookbinding by Bernard Middleton does have a brief mention in a footnote on page 63 (A History of English Bookbinding Technique, 2nd edition, 1978): ‘very thin (boards) are to be found more rarely in small retail bindings… notably at Oxford…’. Middleton also refers to a 1690 book bound in Oxford in this way, but suggests that it is possible that example was bound in America.

So I’ll tell the client when I return the re-backed book to him that he has something quite rare, though by then he won’t be able to see it.

at last! a real Kelmscott

I have been hoping to get a good example of a real Kelmscott Press book for many years. I have a Doves Press item, three Ashendene Press items, an Eragny, an Essex House, but not a Kelmscott. But a couple of weeks ago I acquired, at auction, ‘The Nature of Gothic’, John Ruskin, Kelmscott Press, 1892, for about a third of its retail price. The reason for the low price was the binding – original but damaged.

Thin vellum, over stiff boards, no headbands, four ribbon ties – two broken, two very worn.

Now, the received wisdom among both collectors and the rare book trade is that a collectable book should be in its original binding which should itself be in good condition. And if in ‘fine’ condition, so much the better – i.e. more expensive. But what if the binding in which a private press book, such as a Kelmscott, was initially sold is actually pretty cheap and certainly not durable? That is certainly the case here..

Spine is not rounded or backed. The vellum covering is lined with paper, but very thin – probably India paper. There is a narrow French Groove to the joints. The covers are bowed outwards, from shrinkage of the thin vellum covering.

All in all, a very cheap trade binding by J J Leighton, costing only a few shillings (say. 50 US cents) at the time. So the binding, even if perfectly intact, is still unworthy of the printed book it contains. The printed text not only conveys the words of a famous (if very odd) Victorian writer on art and aesthetics, but does so on fine hand-made paper printed with great skill and enriched by very pleasing mock-medieval initial letters designed by Morris.

So, the text not only needs a new binding but deserves better than the one Morris gave it.

But what?

Forty years ago I experimented on a little Book of Psalms, printed by J M dent in their Temple Bible series in 1902. Quarter ‘fair’ calf over oak boards, with the original four raised bands retained and a manuscript title in ink.

What do you think? Answers, please, on the ‘comments’ page.

It’s nice to be back

The long gap between posts is down to a house move – now complete – and distractions like Christmas. But things are near normal again and I have been able to get into my (temporary) bindery.

Which leads me to a short account of work I have just completed on a book of my own, by A G Macdonell, an English humorist who was highly regarded for about 30 years from the mid-1930s but has now sunk into obscurity. His one book still in print is ‘England their England’ chiefly because it contains the funniest account of a village cricket match ever written.

He also wrote ‘A Visit to America’, published in 1935, which I find amusing though nowadays politically incorrect. My copy is a first edition, ex-library, with the lending list still in place so with a record of its original readership intact. Its life in Perth and Kinross County Library lasted from its accession in November 1936 to May 1954 when it was put into Reserve. During that time it was borrowed 36 times, about once every six months. It must have been sold off some time later. I bought it for a few pounds about five years ago. During its previous 80-odd years it had become badly ‘cocked’ and the backstrip was loose.

Correcting a slant that has probably been there for decades requires fully exposing the backs of the sewn sections, setting them back into place, re-setting the backing joints and re-gluing the back. In this case the old back linings came off very easily as the glue had completely dried out and could simply be prised away from the back folds of the sections with a palette knife.

This revealed a quite unusual example of cheap machine binding – the sections are not sewn on tapes but just link-stitched together. But there are tapes under the mull and under the paste-down endpapers. Clearly the binding process included placing pieces of tape across the spine after sewing and gluing them down with the mull. No physical attachment at all to the text block, but enabling the ends of the three tapes to be attached to the covers, under the endpapers.

Anyway, that made the cleaning off of the spine easier, so now to re-shape it. I have shown my method of putting a tube under the foredge in a lay press in a previous post. It worked well here.

The back is now glued and the glue well rubbed into the creases between the sections and allowed to dry. The covers could have been eased off the book before this – they no longer have any physical attachment to the book block – but they must now come off so the backing joints can be re-set with a backing hammer.

The use of the hammer helps to consolidate the re-glued spine which is now ready for repair Fraynot and sewing the first and last sections through it to give a physical attachment between the hinge cloth and the book.

The back is now lined with two thicknesses of 80 gsm paper.

The case is repaired just as previously demonstrated in earlier posts: bookcloth of a suitable colour inserted under the cover cloth with the Fraynot cloth and sharply pressed.

Cover cloth lifted. Note the cover cloth was first cut inside the board and turned back. This helps to conceal the new cloth repair afterwards.

The new cloth spine is lined with quite thin paper (it will have the old cloth spine glued over it so normal lining paper will result in a spine that is too stiff). The turn-ins at head and tail are best done with a ‘fence’ of thin card or acetate so the glued turn-in does not transfer glue to the text block. I have shown this method also in a previous post.

When head and tail are turned in the scuffed and worn surfaces of the old cloth can be coloured with acrylic and sealed with polish.

Job done.

Please note – this is a repair, not a restoration. The book now works properly and looks at home on a bookshelf. And has cost about £25 in bench time. Full restoration to ‘collector’ standard – add a zero!

Finally, this blog is now one year old. It has been viewed about 2000 times, with hits from more than 40 countries, chiefly USA, UK, Australia and New Zealand. But also from China, Russia, Brazil, Germany etc. In the blogoshere that is tiny, but who cares!