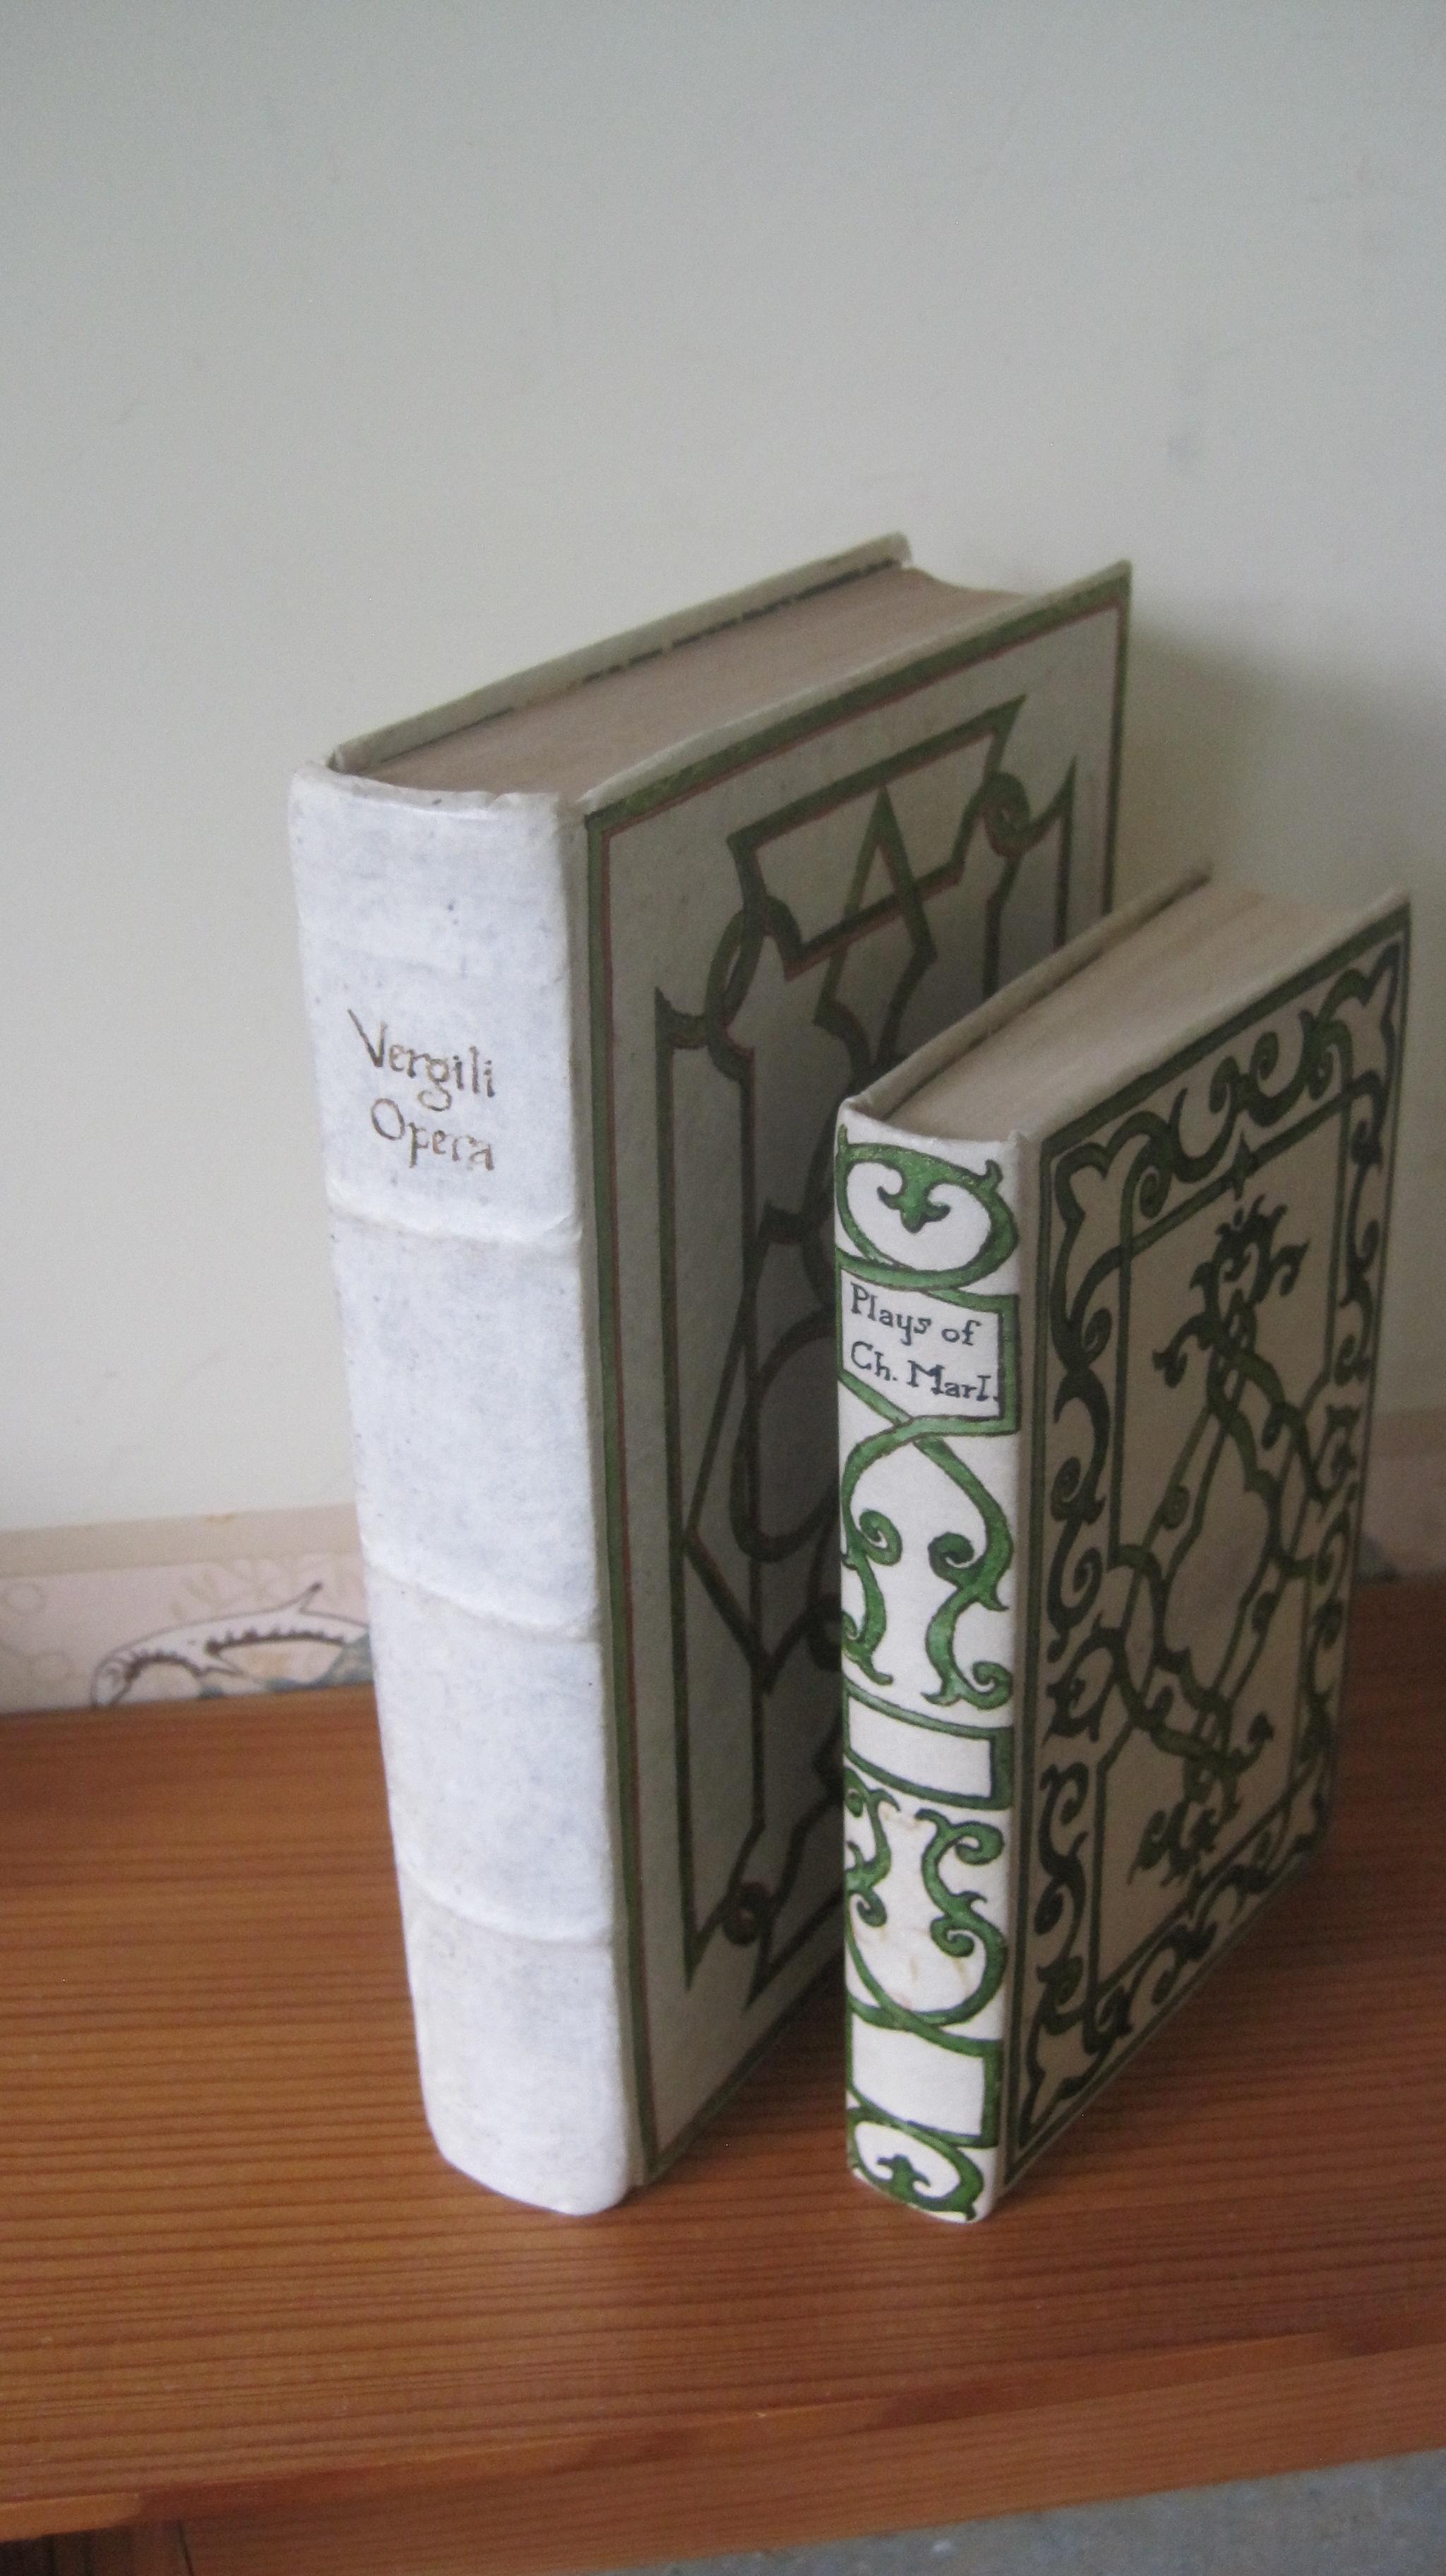
I started bookbinding as a hobby more than 40 years ago. I took evening classes at Leicester Polytechnic (which had recently taken over the Leicester School of Printing, along with its specialist bookbinding staff) in 1976 and continued for five years. Trevor Hickman was the tutor – sadly he died a couple of years ago – very highly respected by all his students. Over the next 25 years I gradually acquired all the tools, equipment and materials necessary to tackle any repair or new binding job, and I joined the UK-based Designer Bookbinders, and later the Society of Bookbinders. Their weekend courses and conferences were important to developing my skills. Initially I bound or repaired just my own books, but people began to ask me to do repairs at which , with practice, I became quite proficient. When I retired from full-time work I took on more repair work and now, fifteen years later, my work book has over 2000 entries, including some new bindings for clients. Now I would like to share some of the techniques and methods I have developed with other binders, however new they may be to the craft, and that is the chief aim of this Blog.
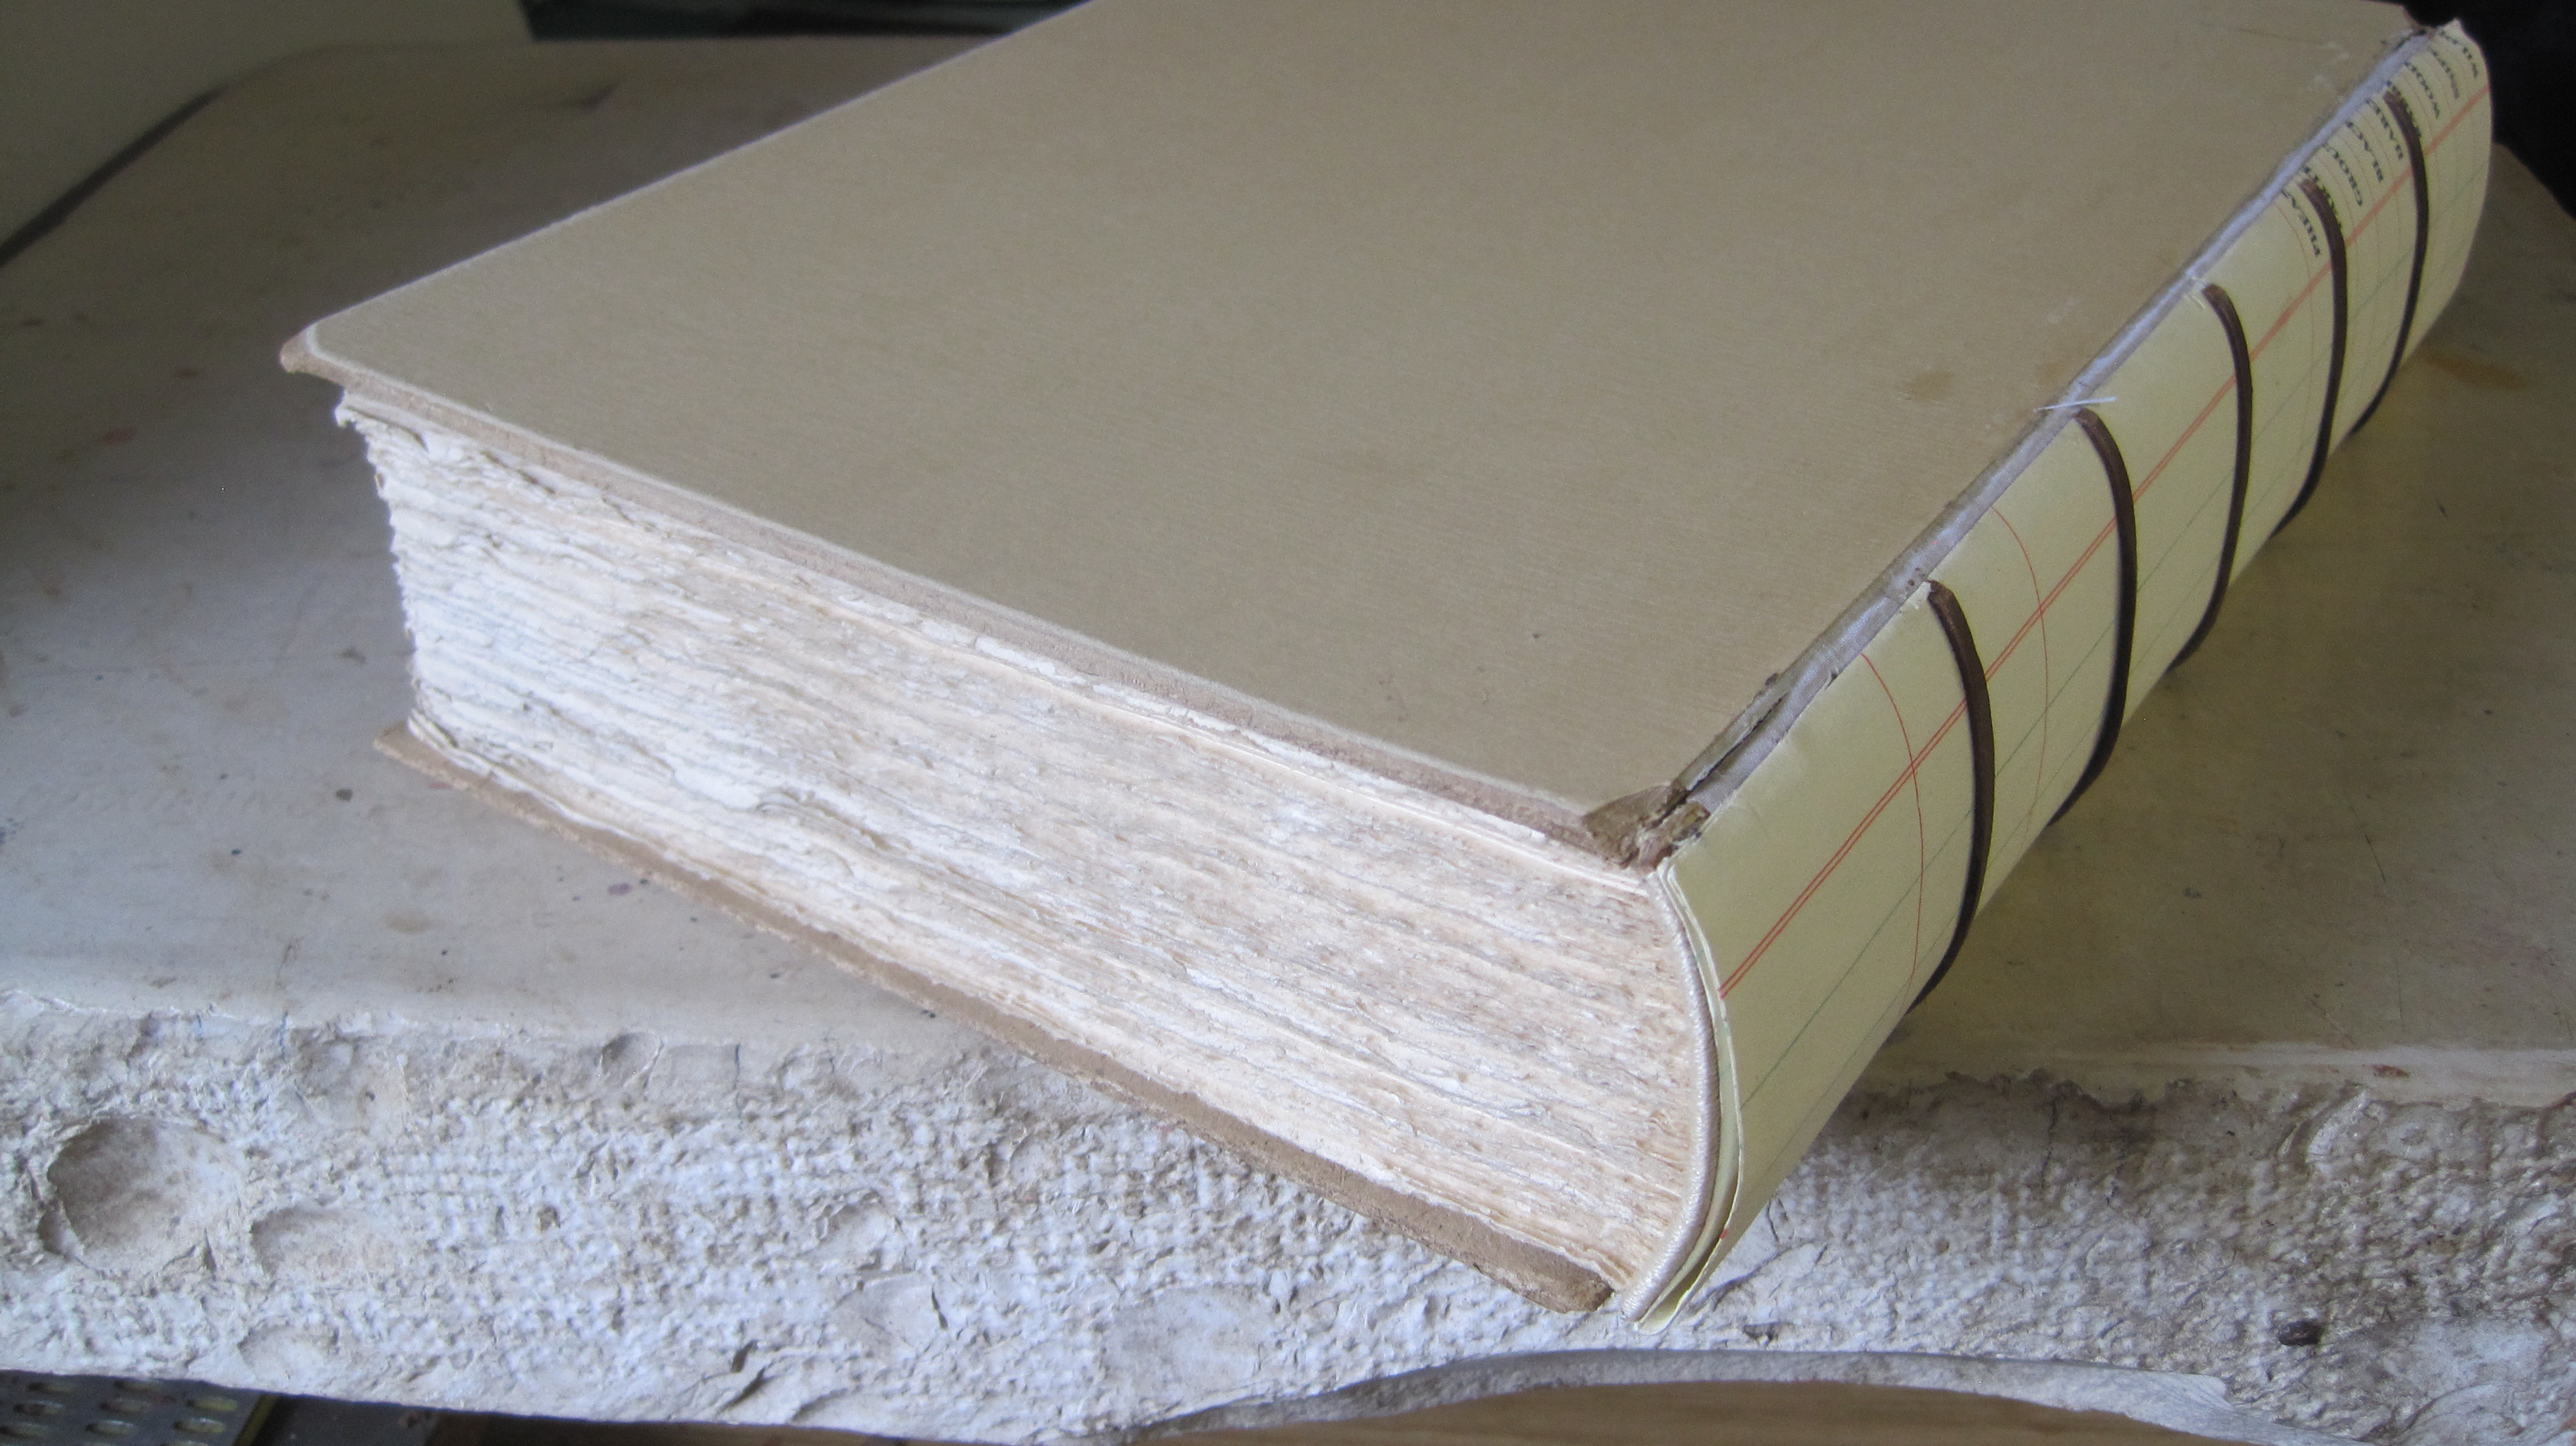
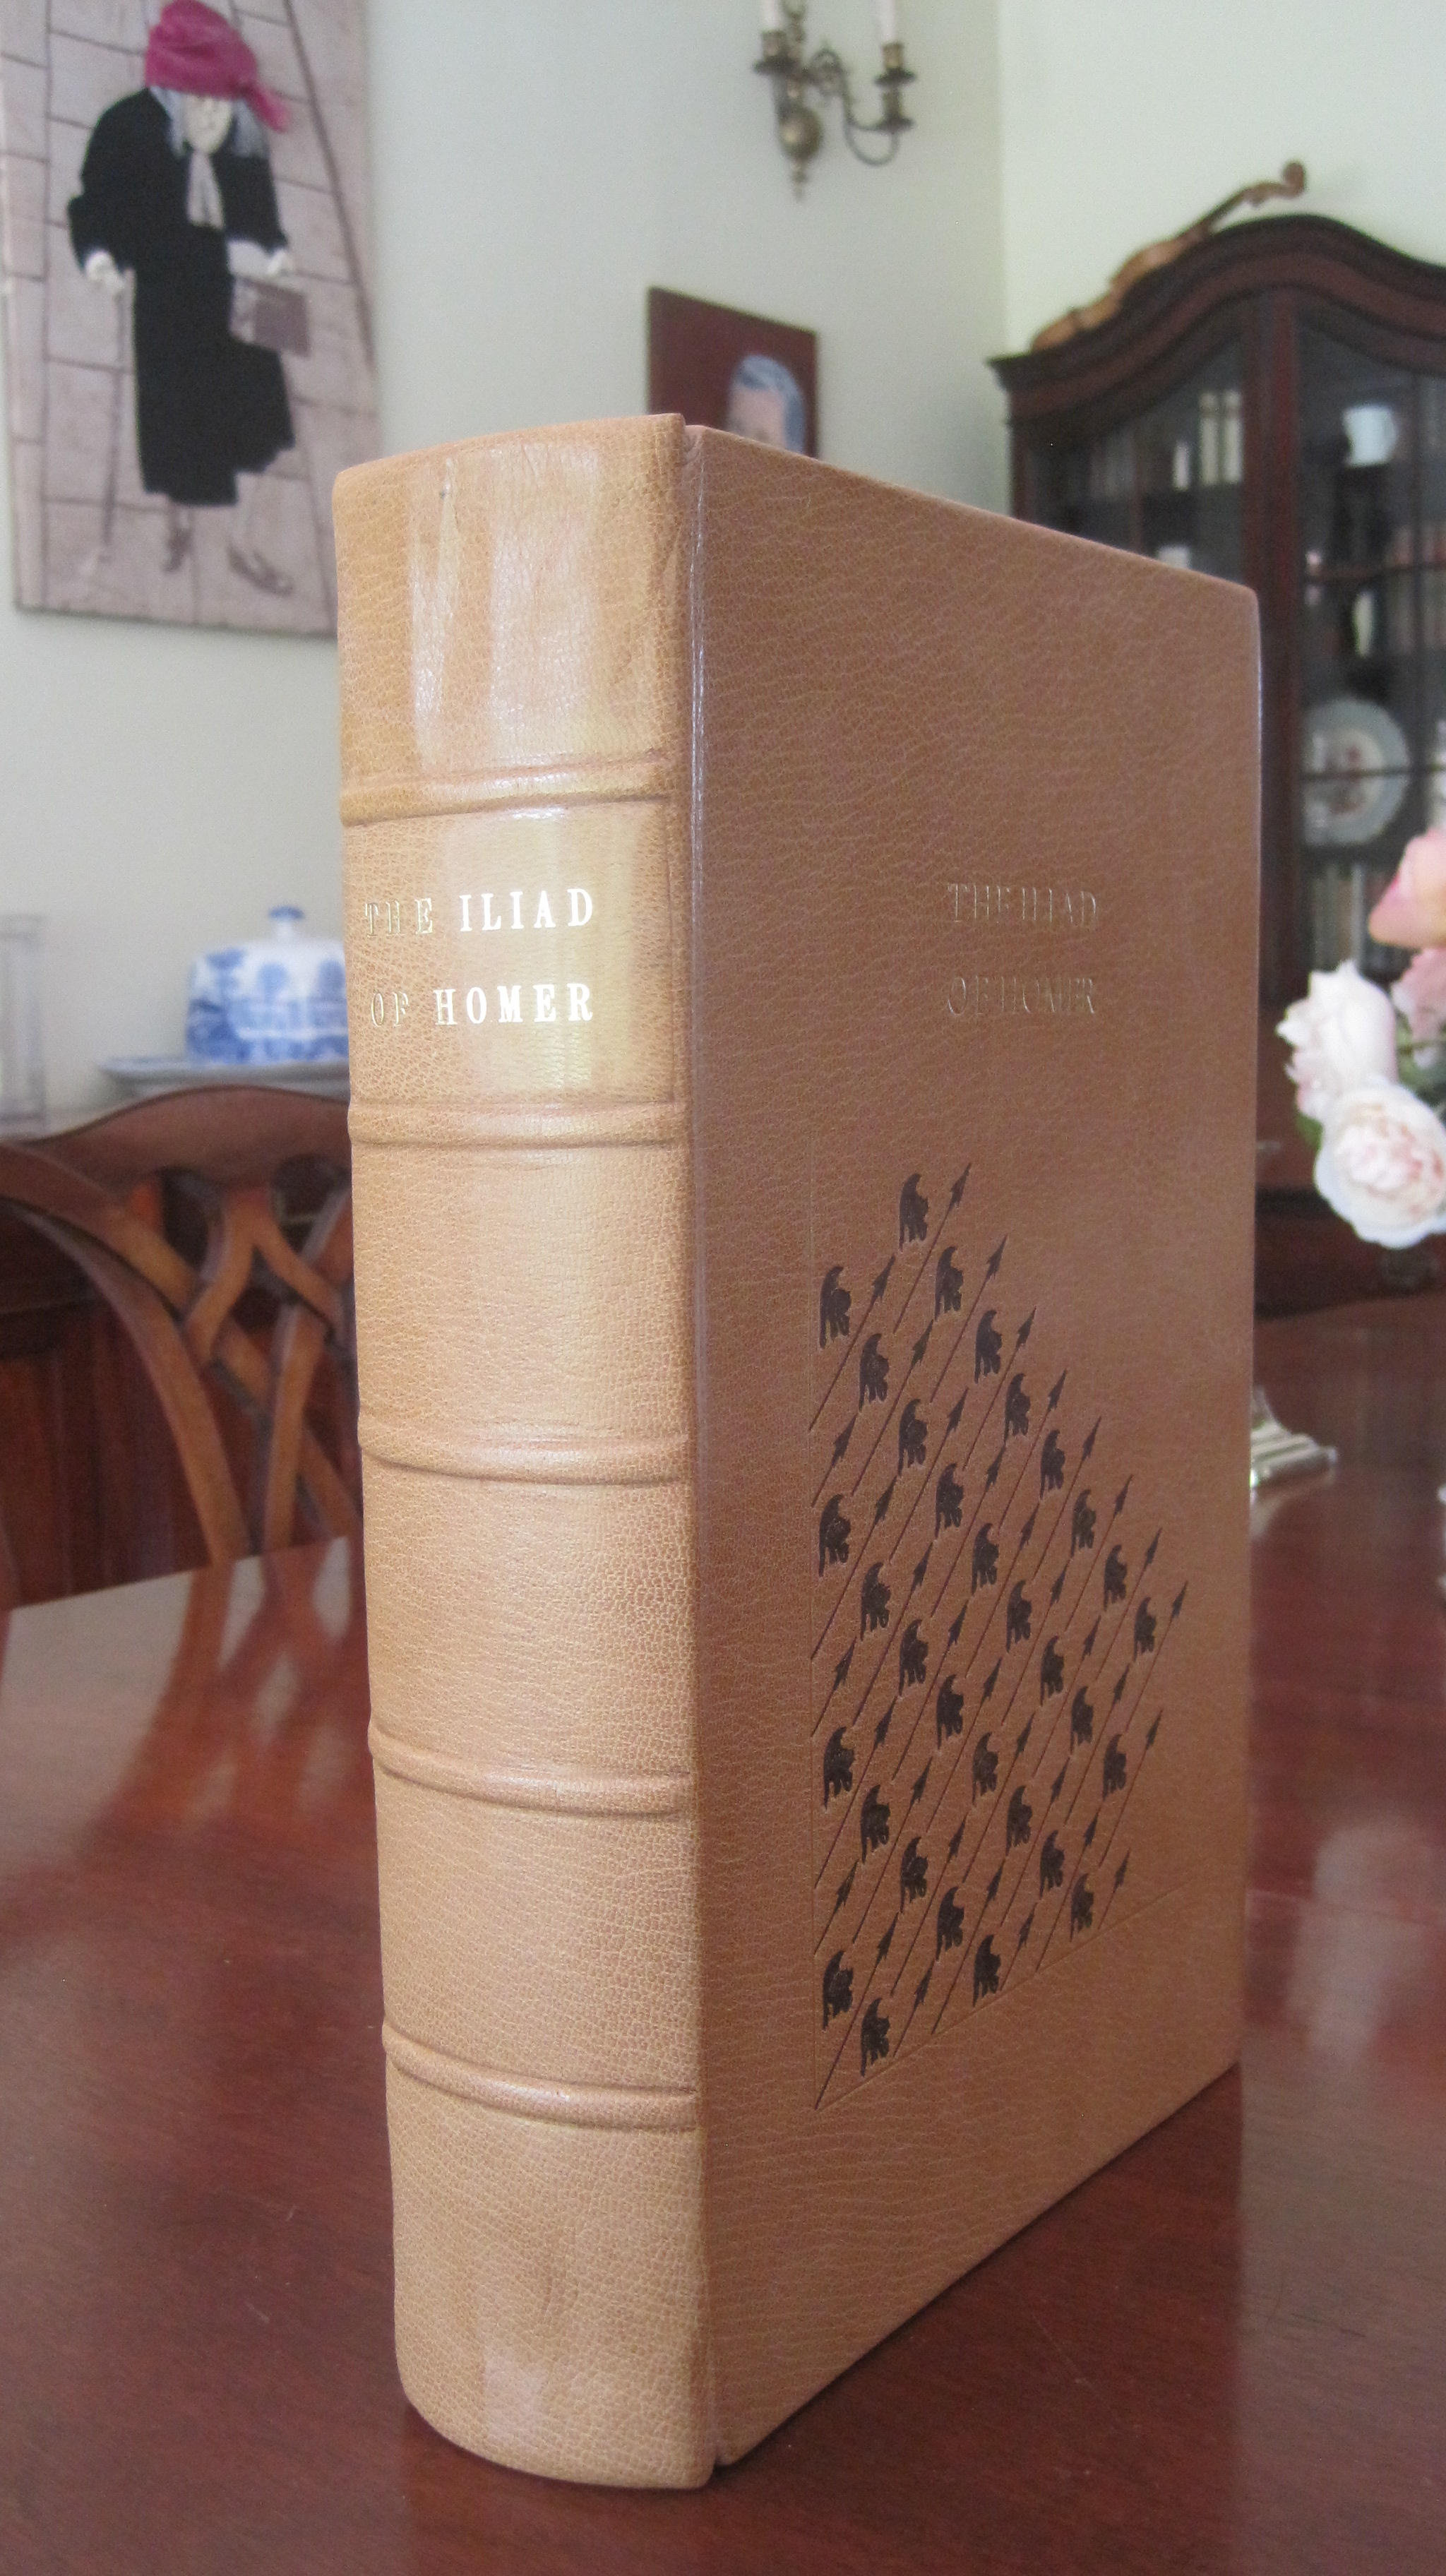
As I’ve said before, in between working on customers’ books I repair or re-bind some of my own. At least 30 years ago I bought a copy of the Limited editions Club edition of Homer’s Iliad, beautifully printed in 1931 but bound in plain red cloth. About ten years ago I started to re-bind it.
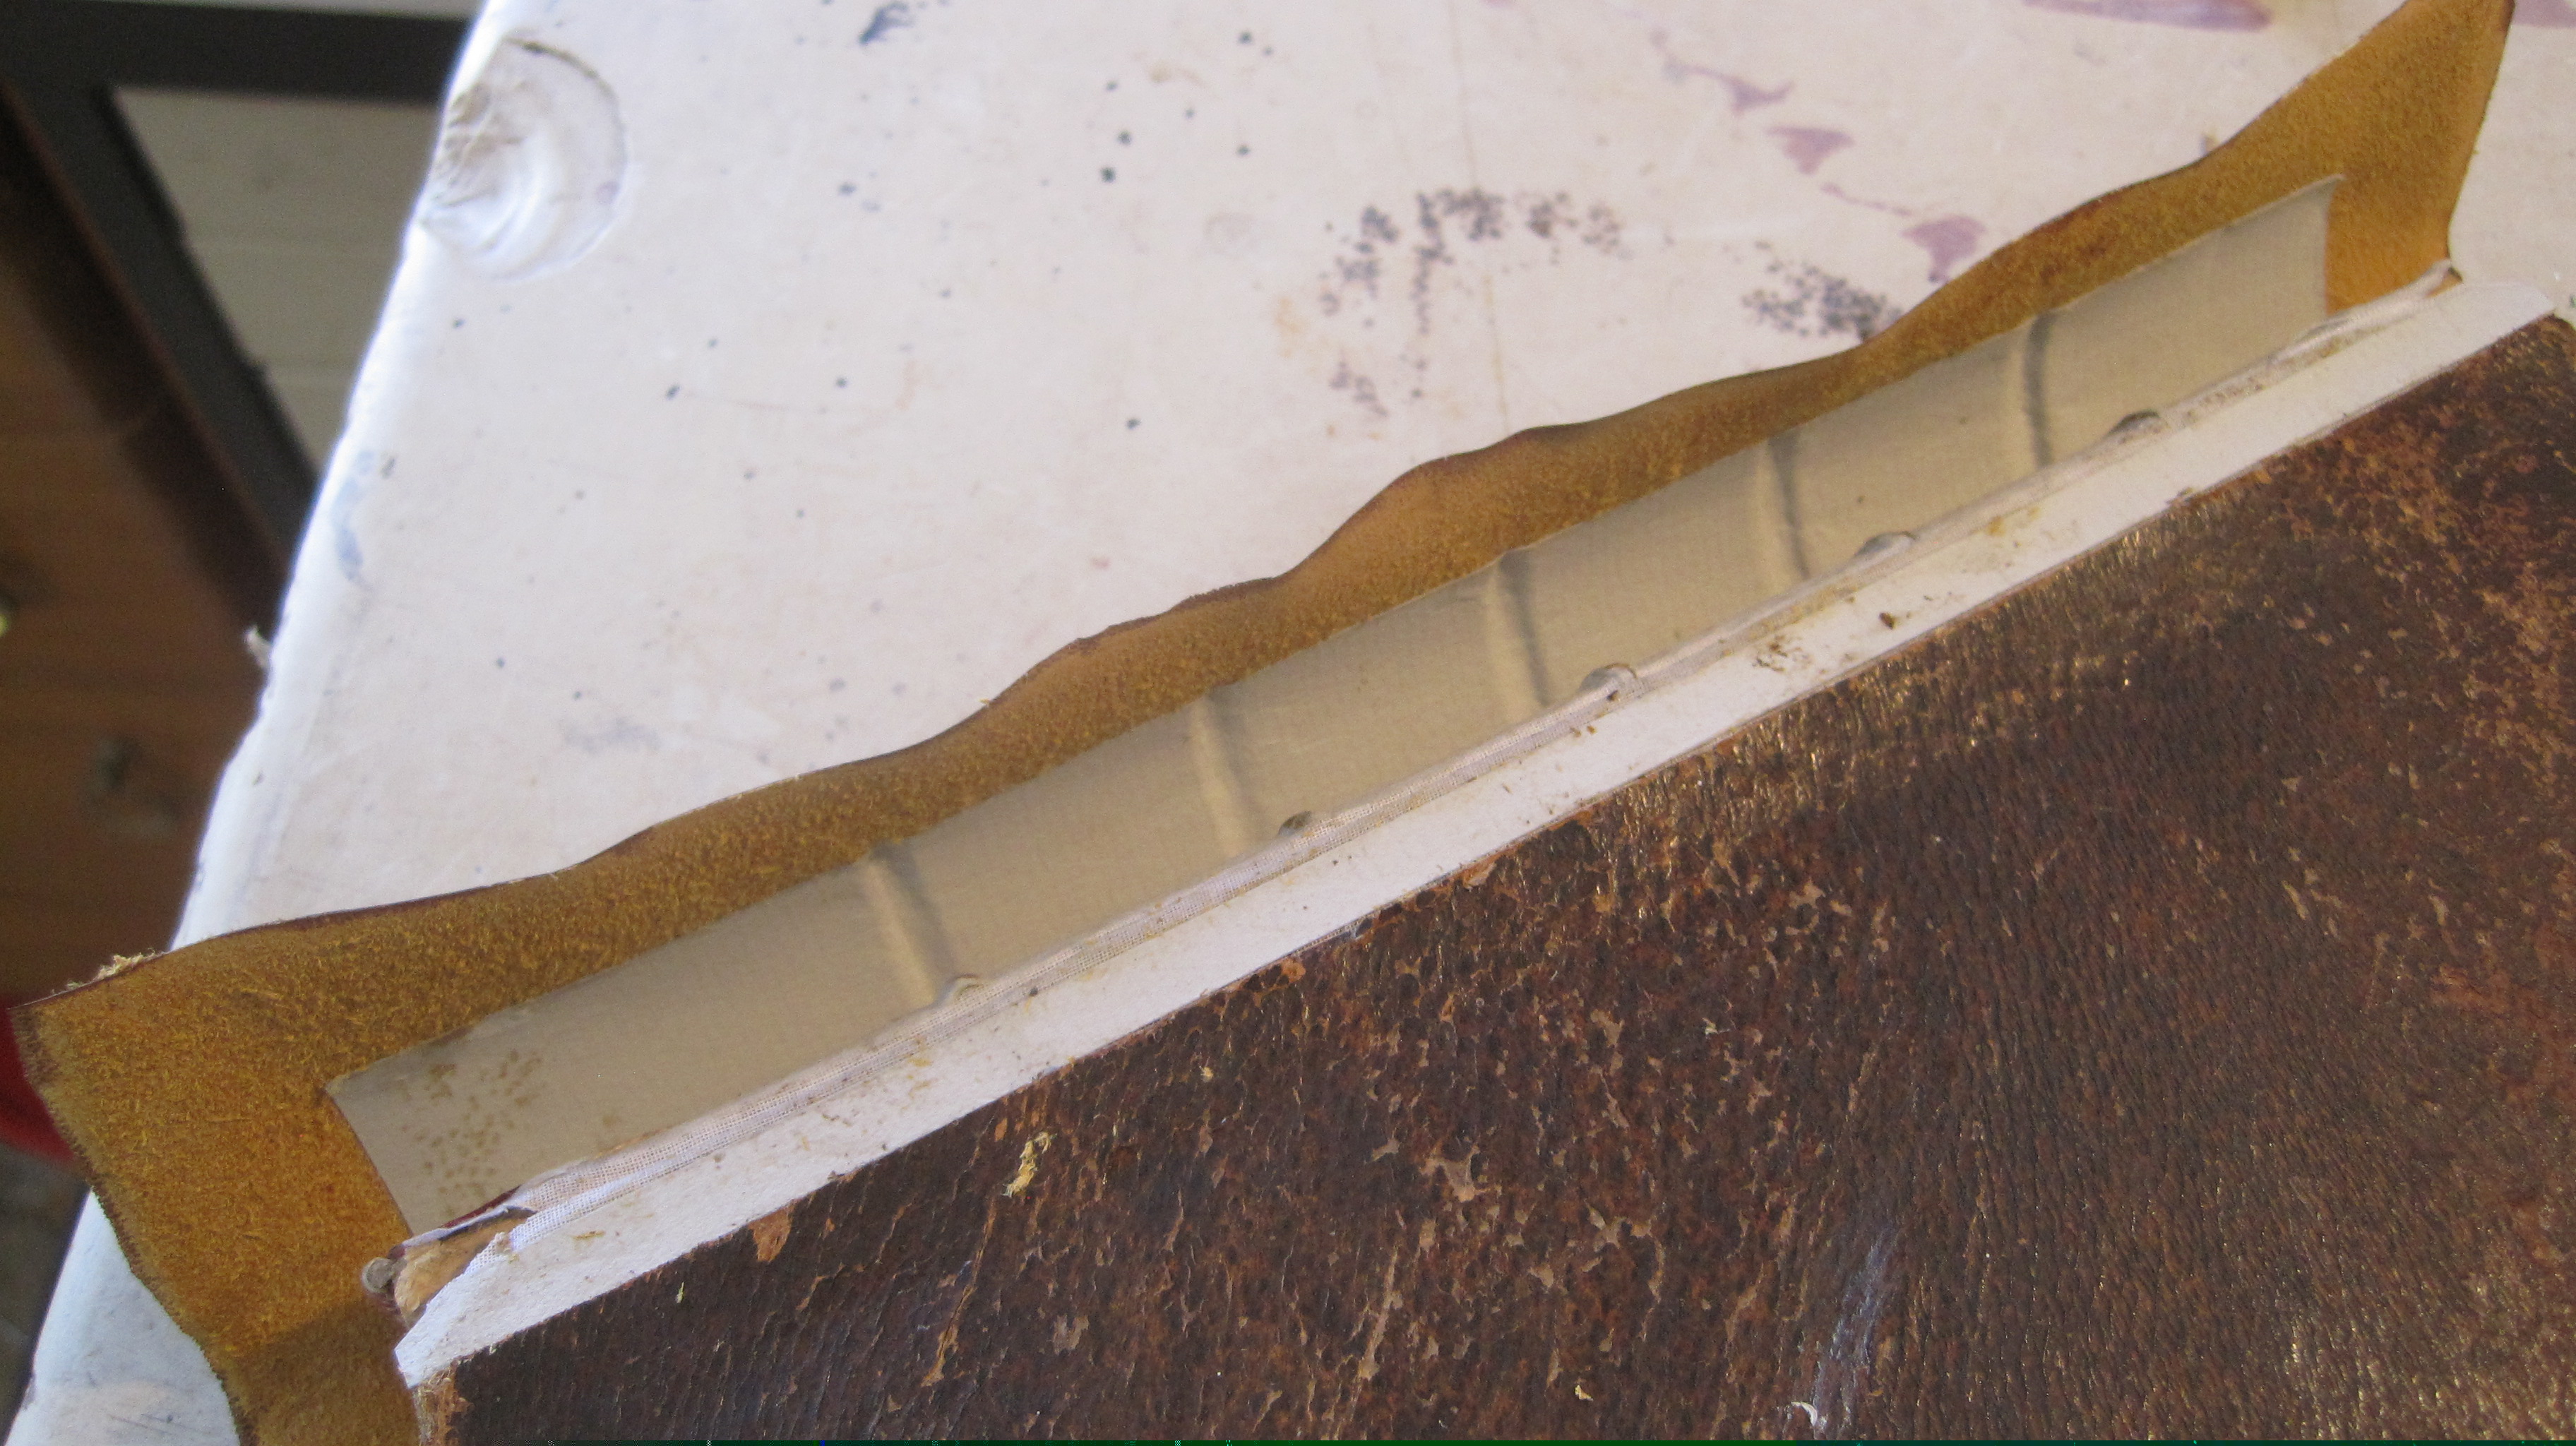
Original cloth case removed, new boards attached, headbands sewn, hollow spine with false bands
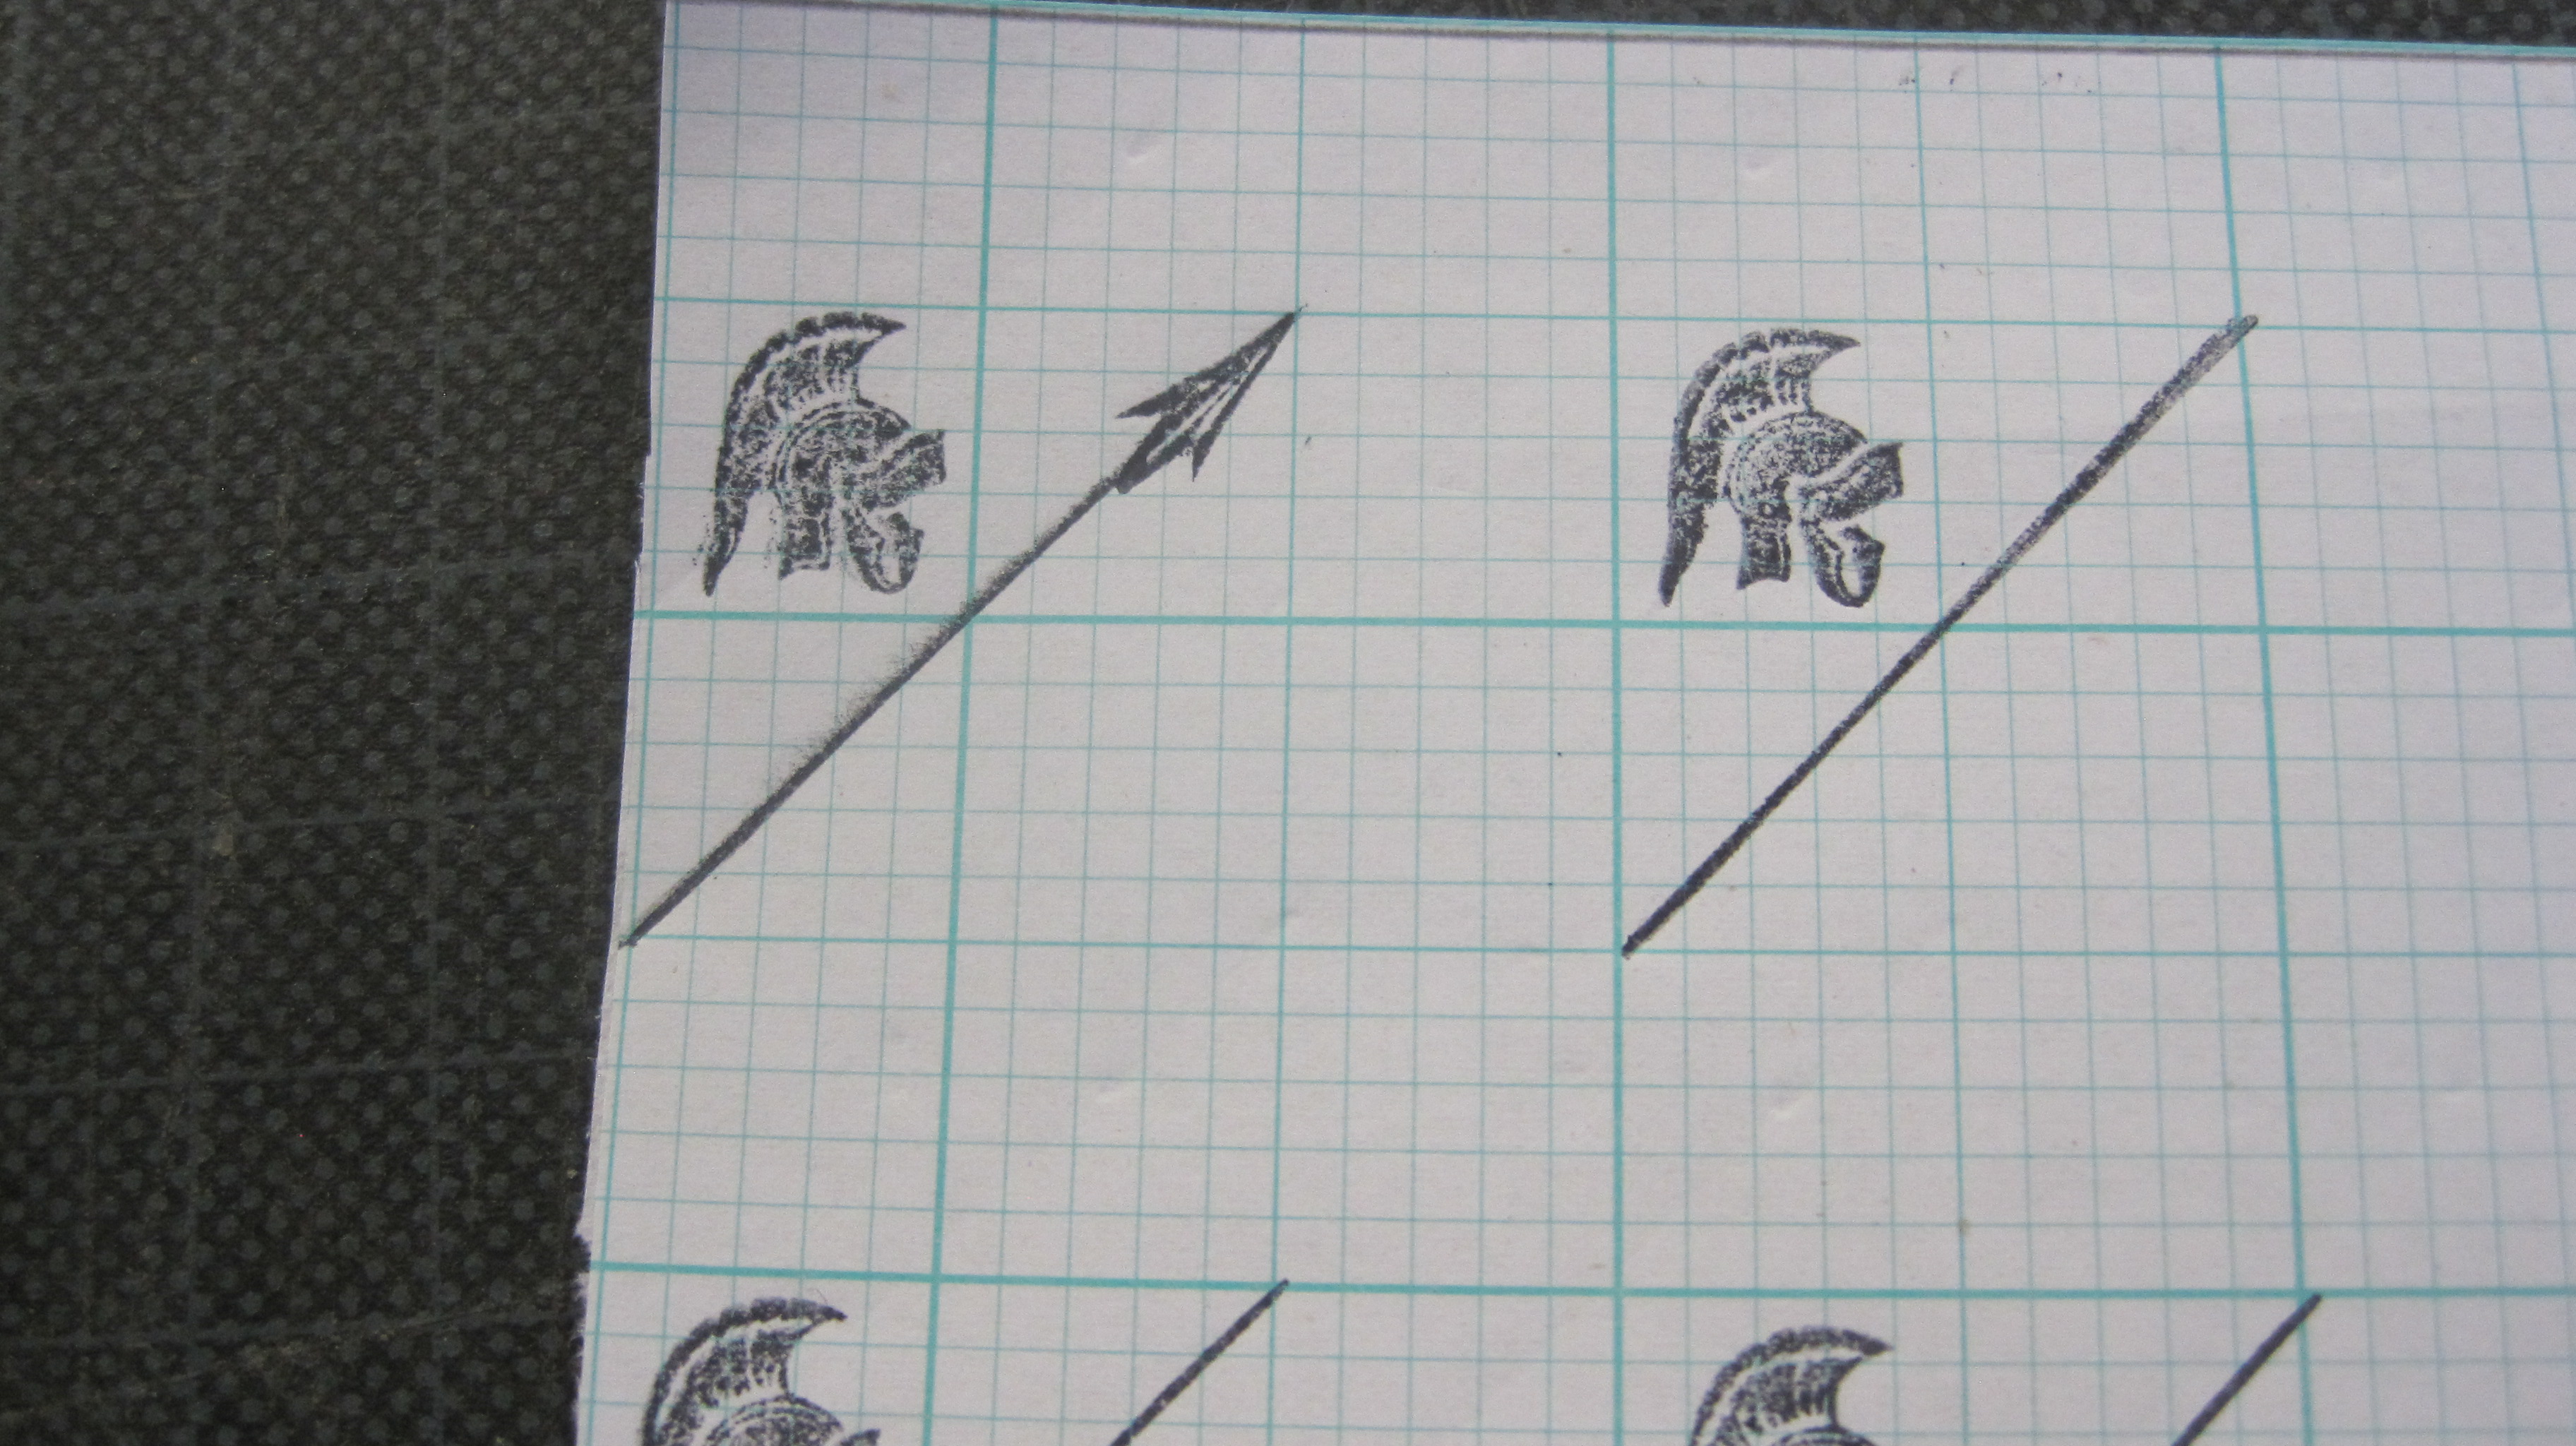
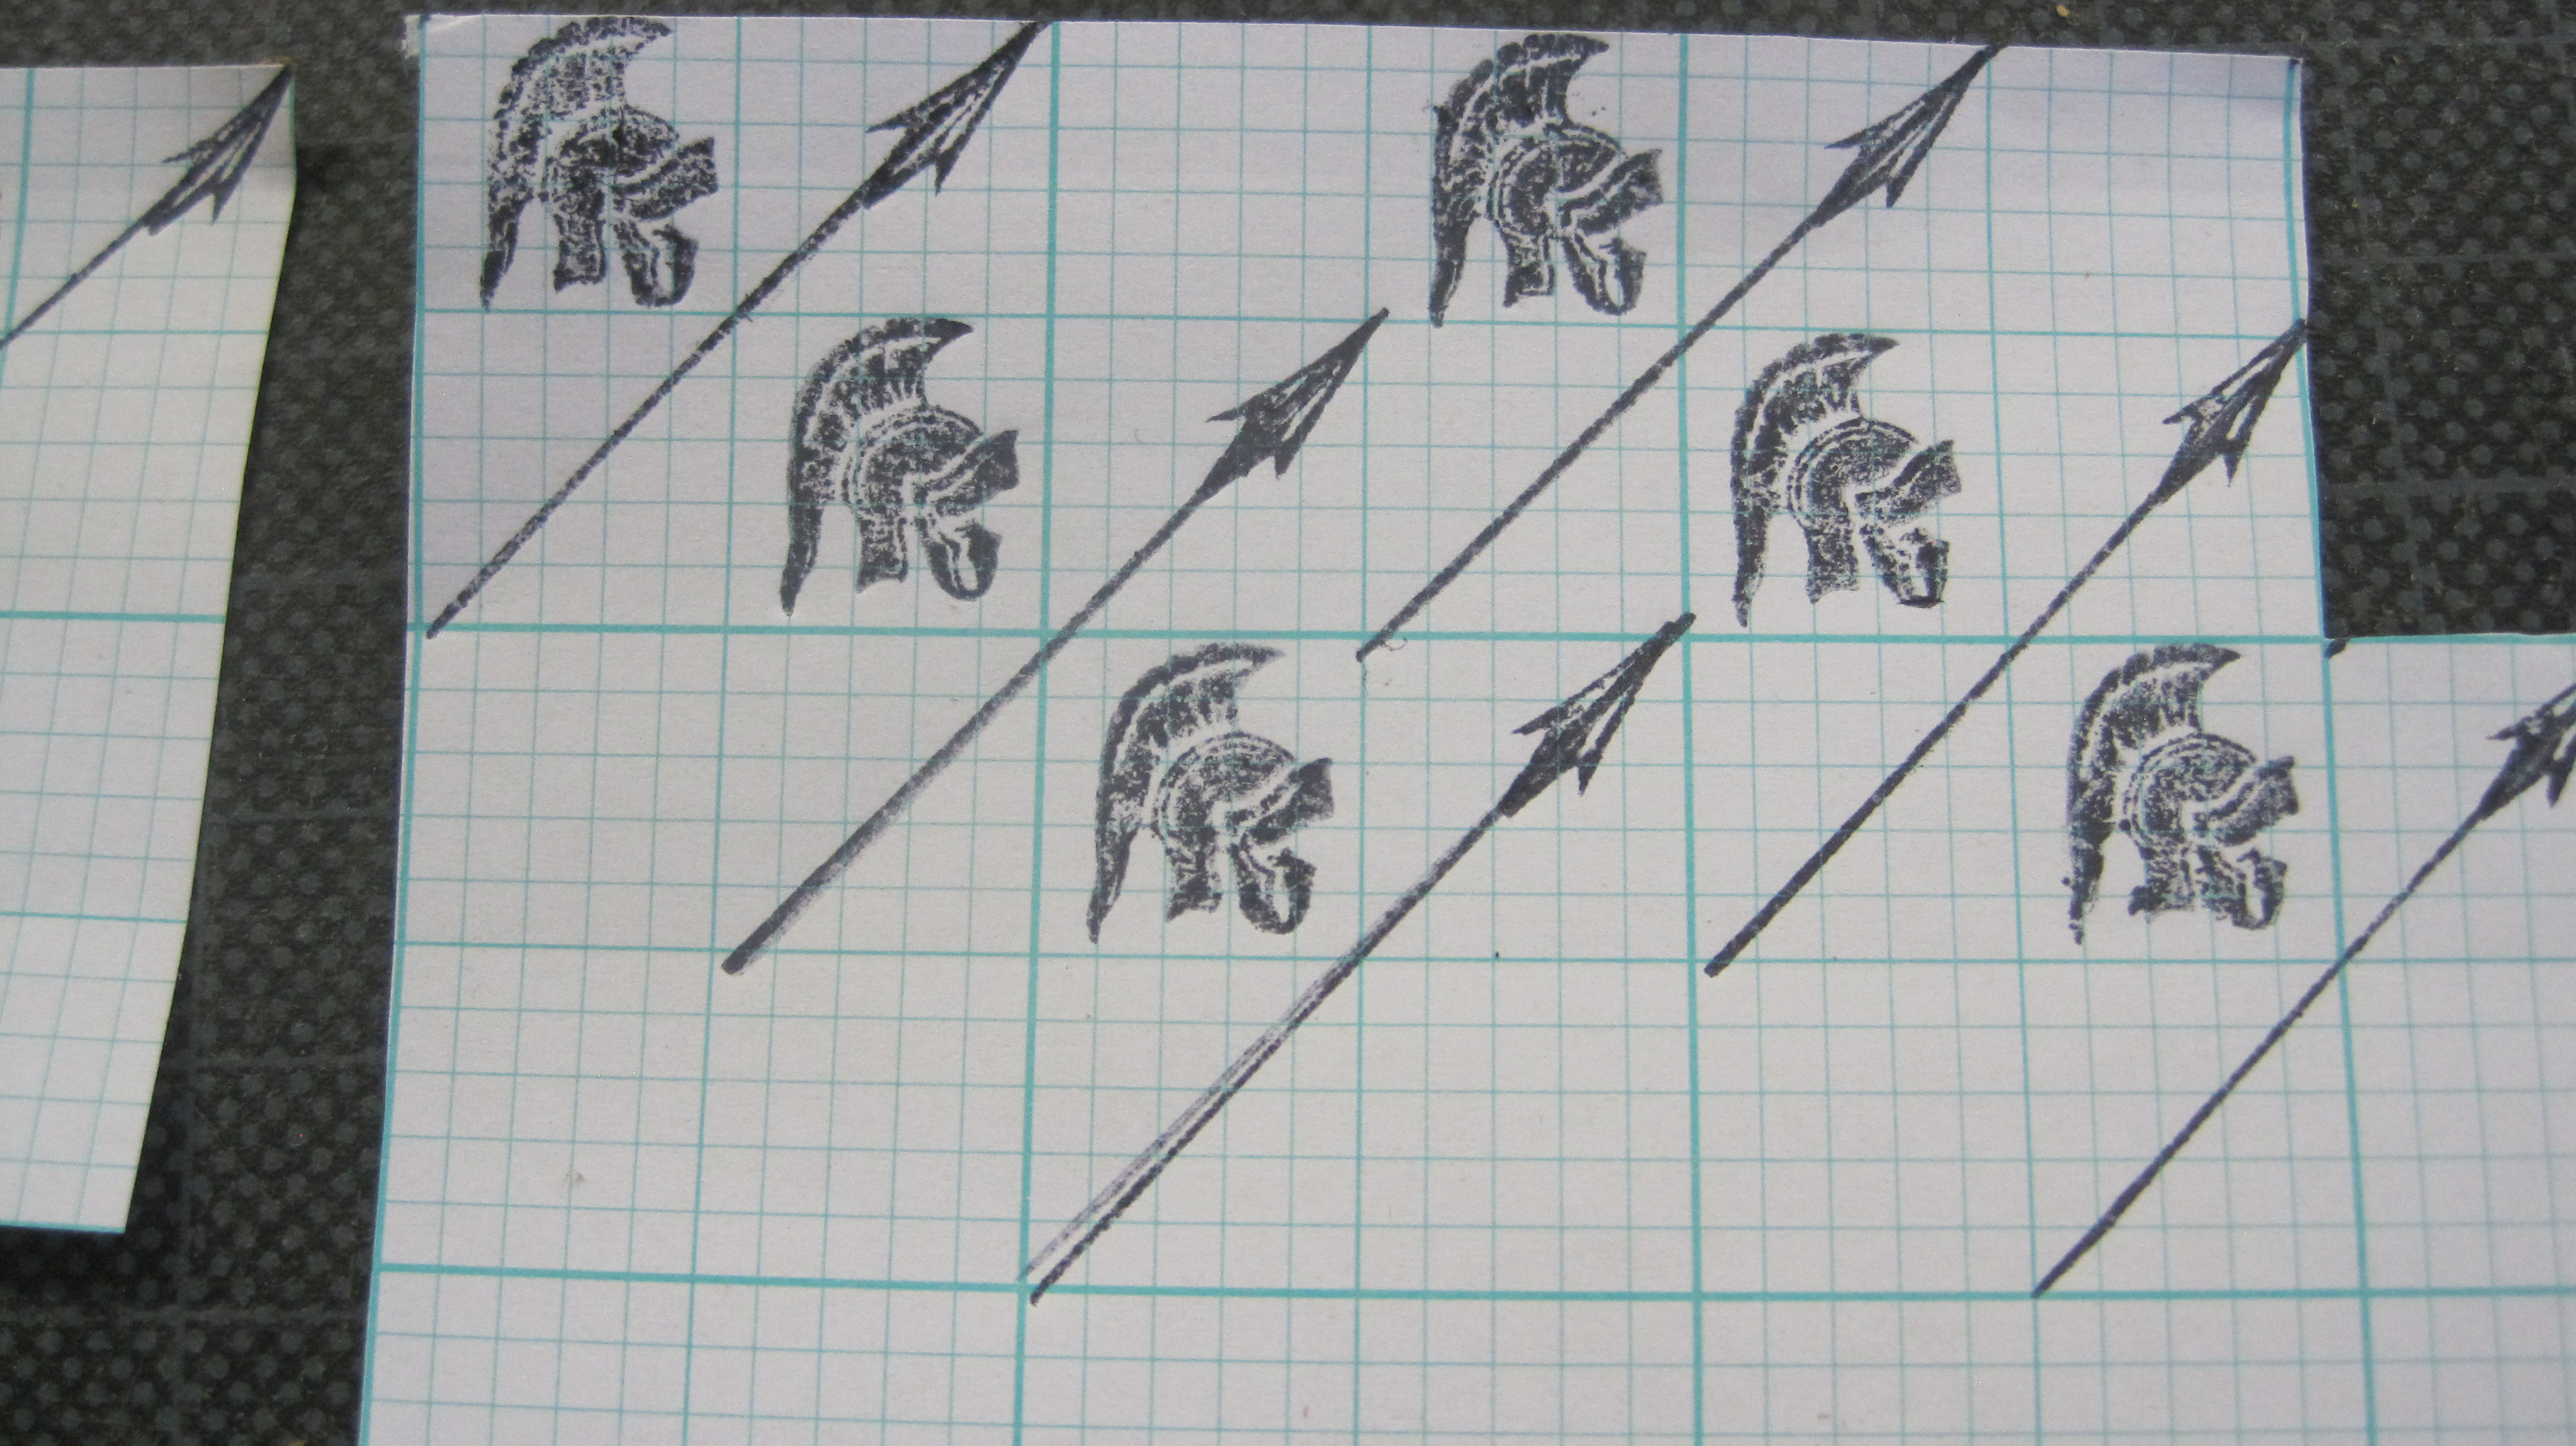
And then it sat on a shelf until last month. In the meantime I had acquired various decorative finishing tools (chiefly on eBay) and when I was scanning the tools racks for something else I came across a Greek helmet tool, and the idea for a design for the unfinished Iliad began to form. I found an ‘arrow’ tool that could pass as a spear head if placed an one end of a line pallet.
And if arranged symmetrically could give the impression of a troop of warriors.
So now I had a design to work with
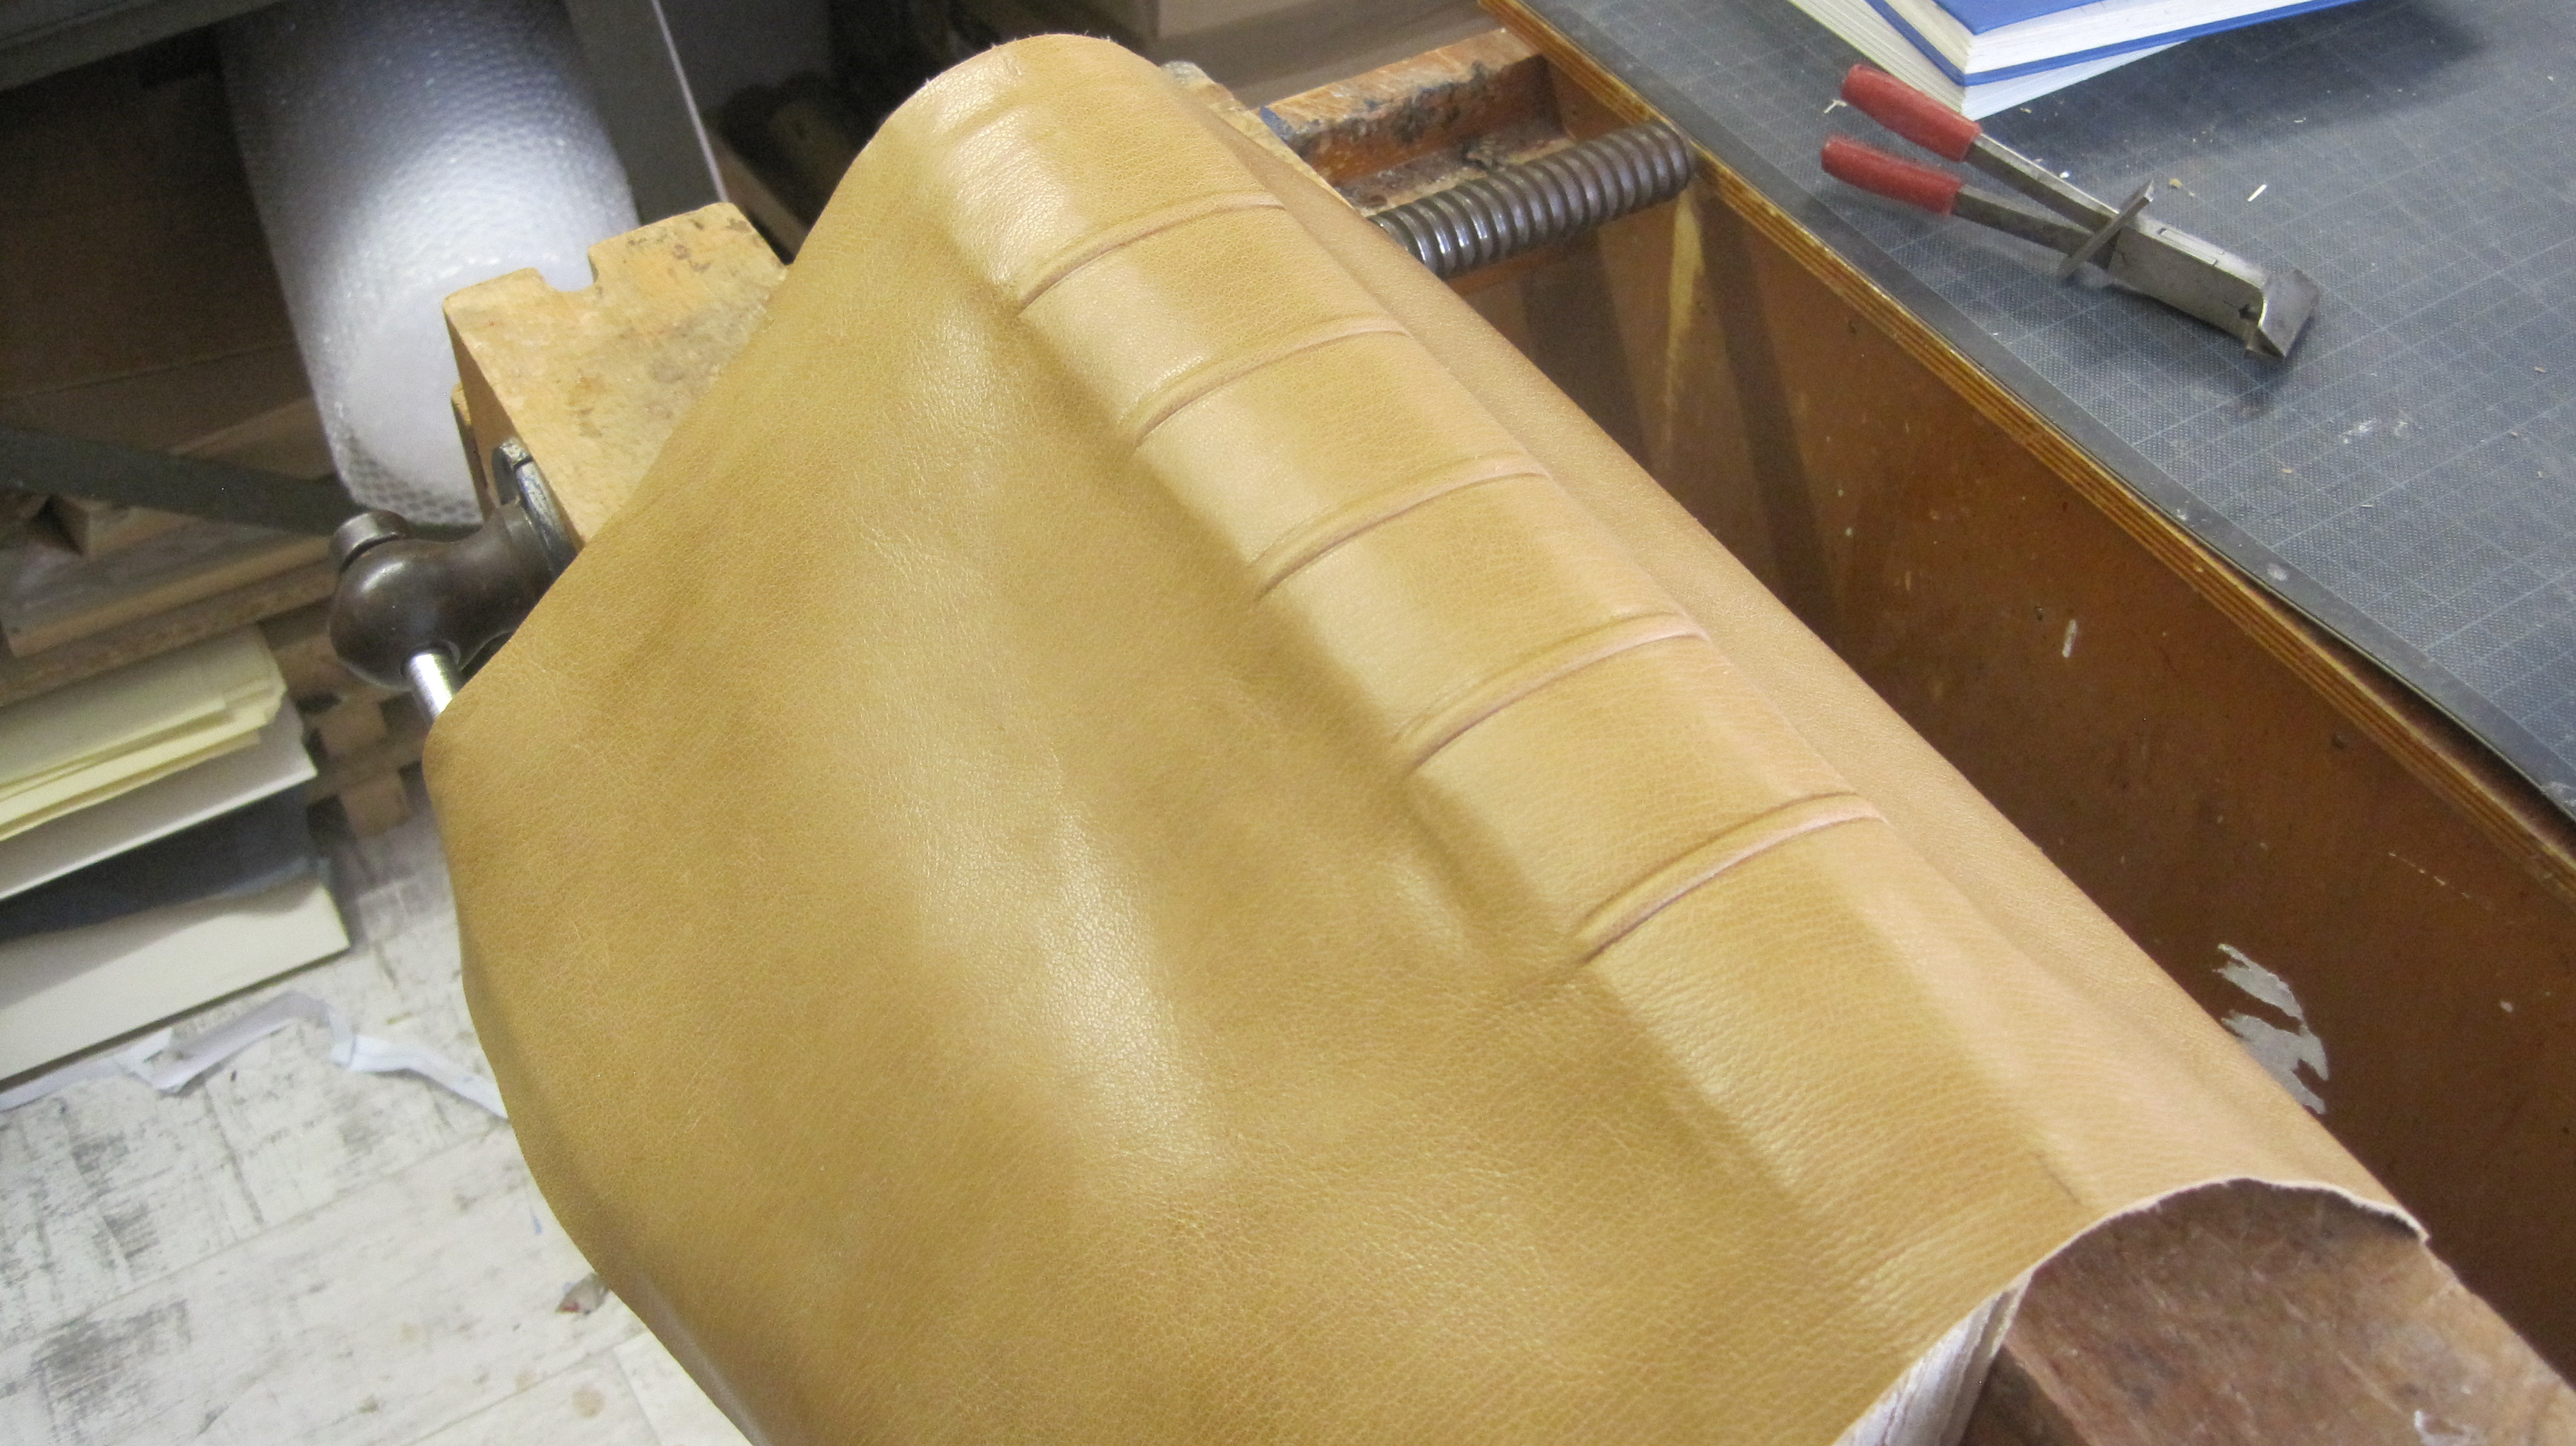
I had a small skin of light tan goat (£35 at a Society of Bookbinders conference three years ago) so used that for the covers.
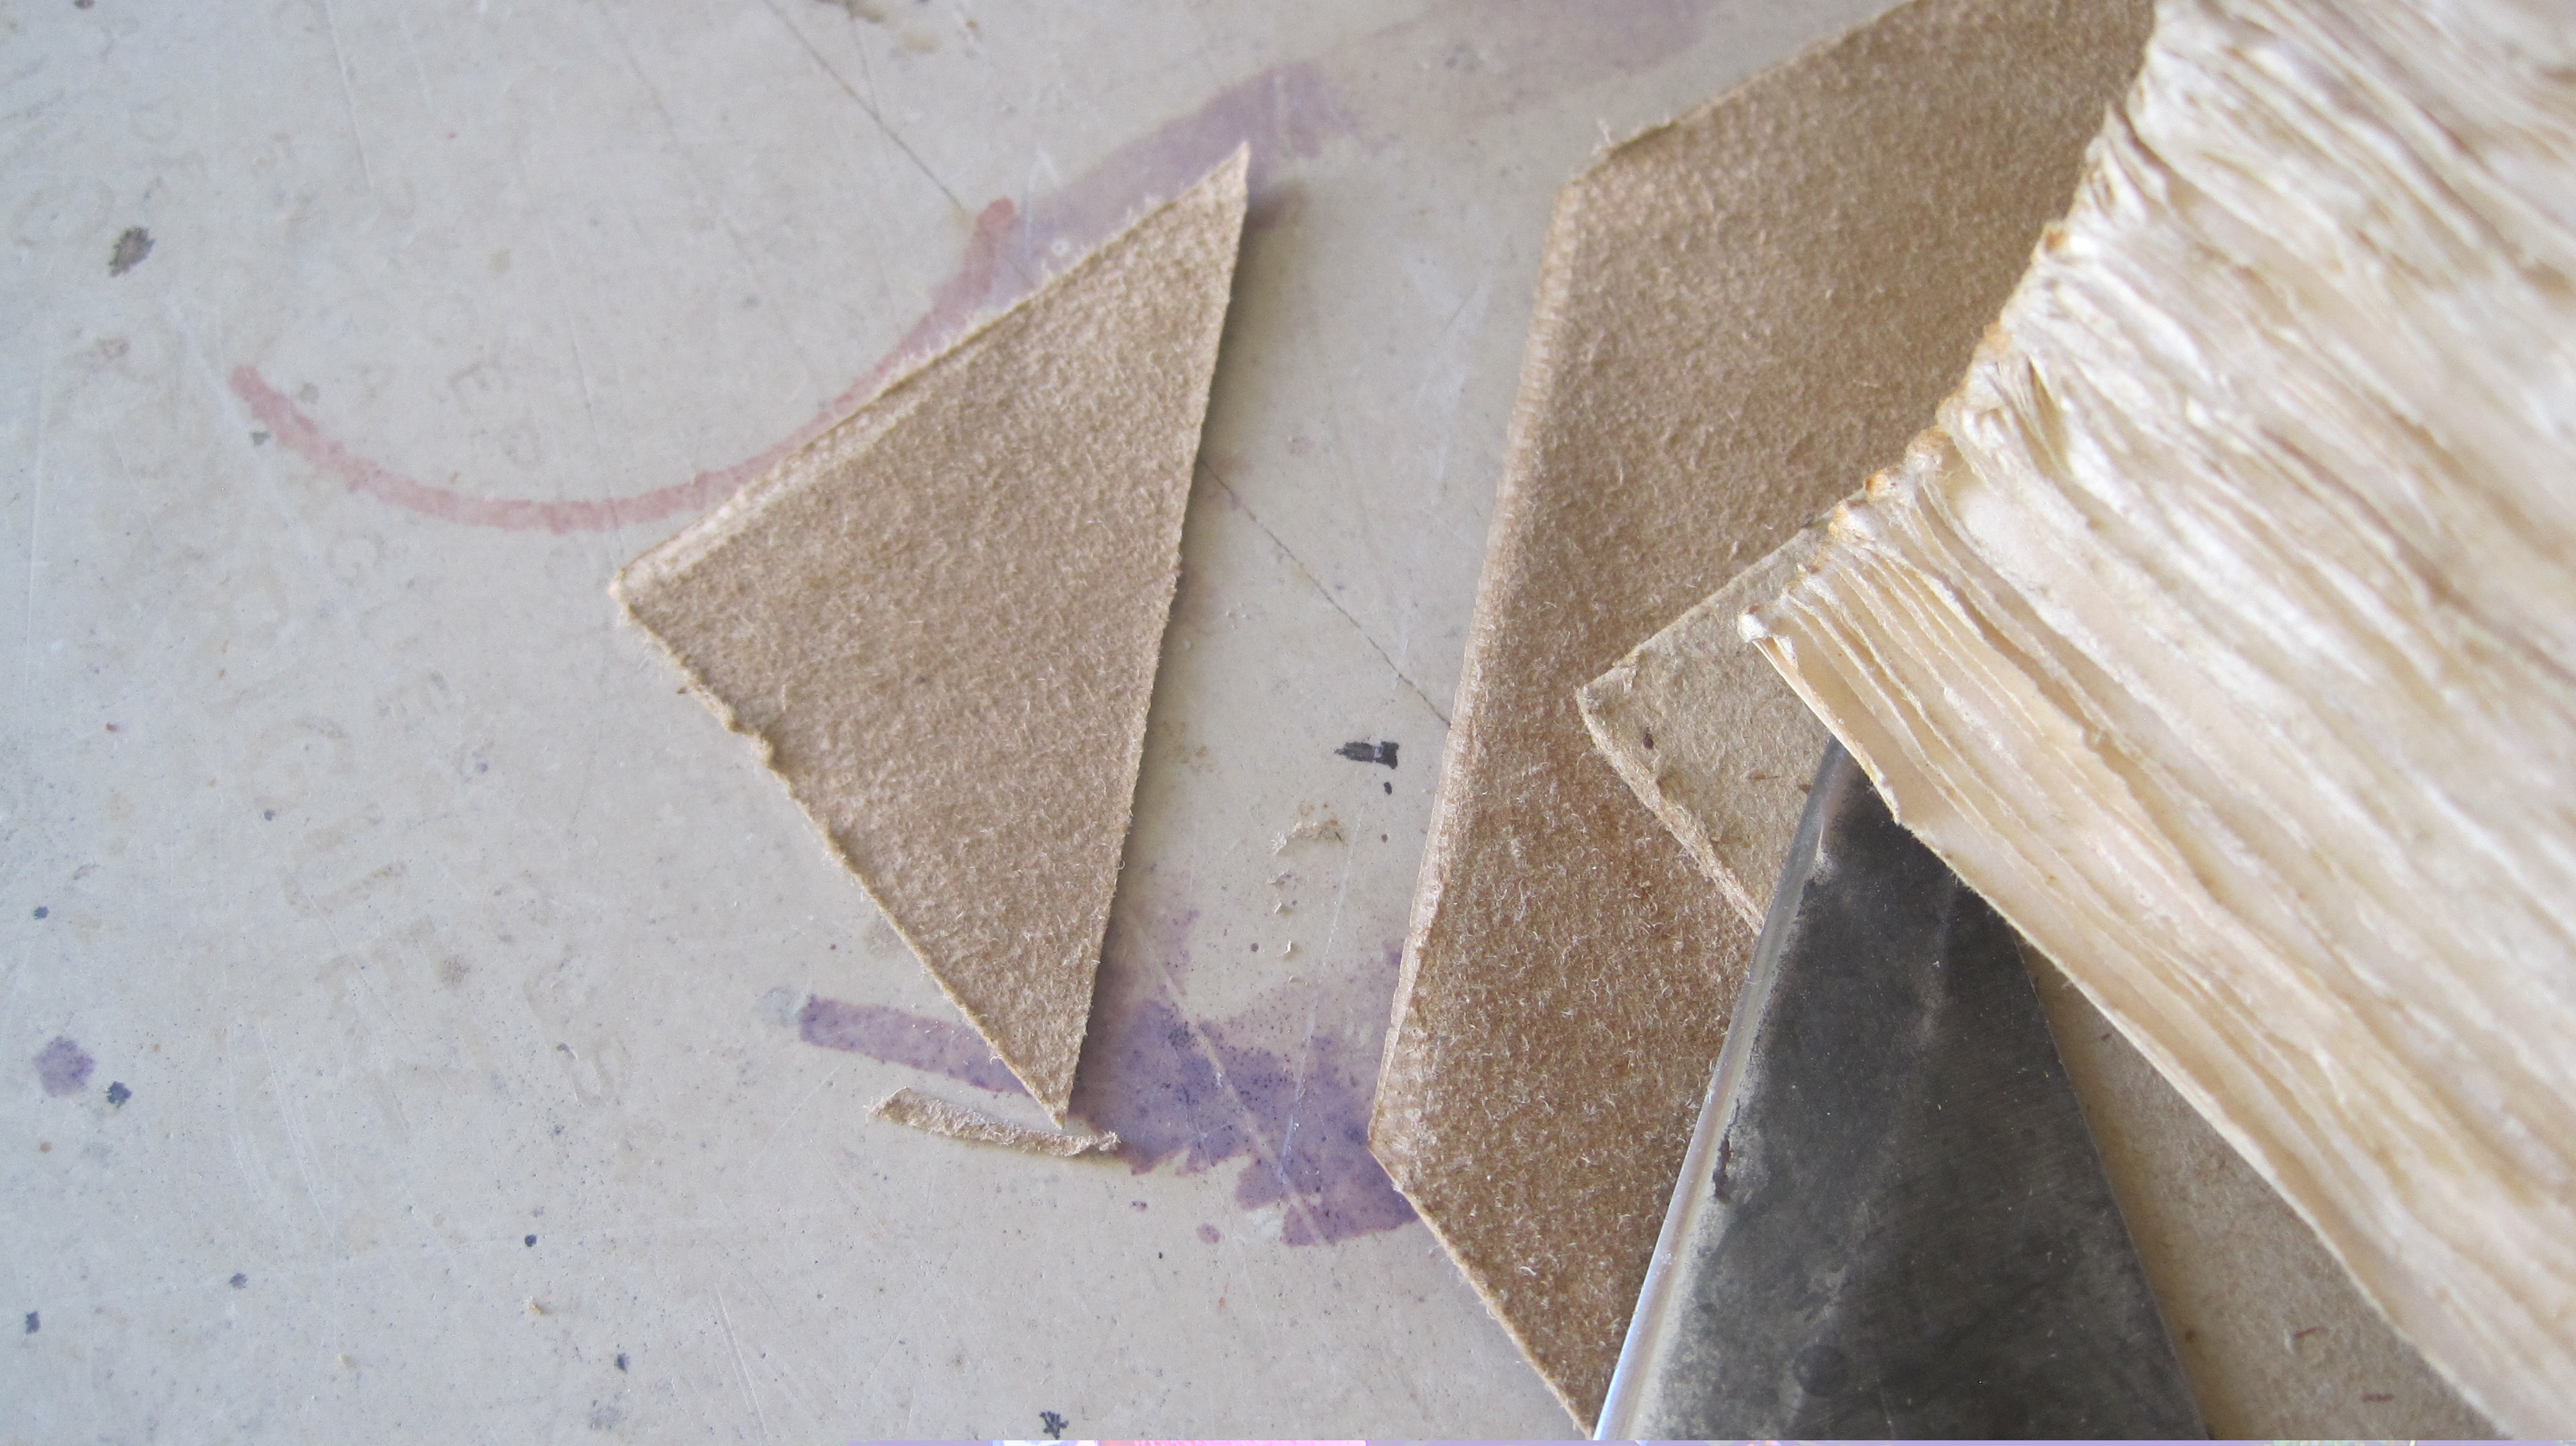
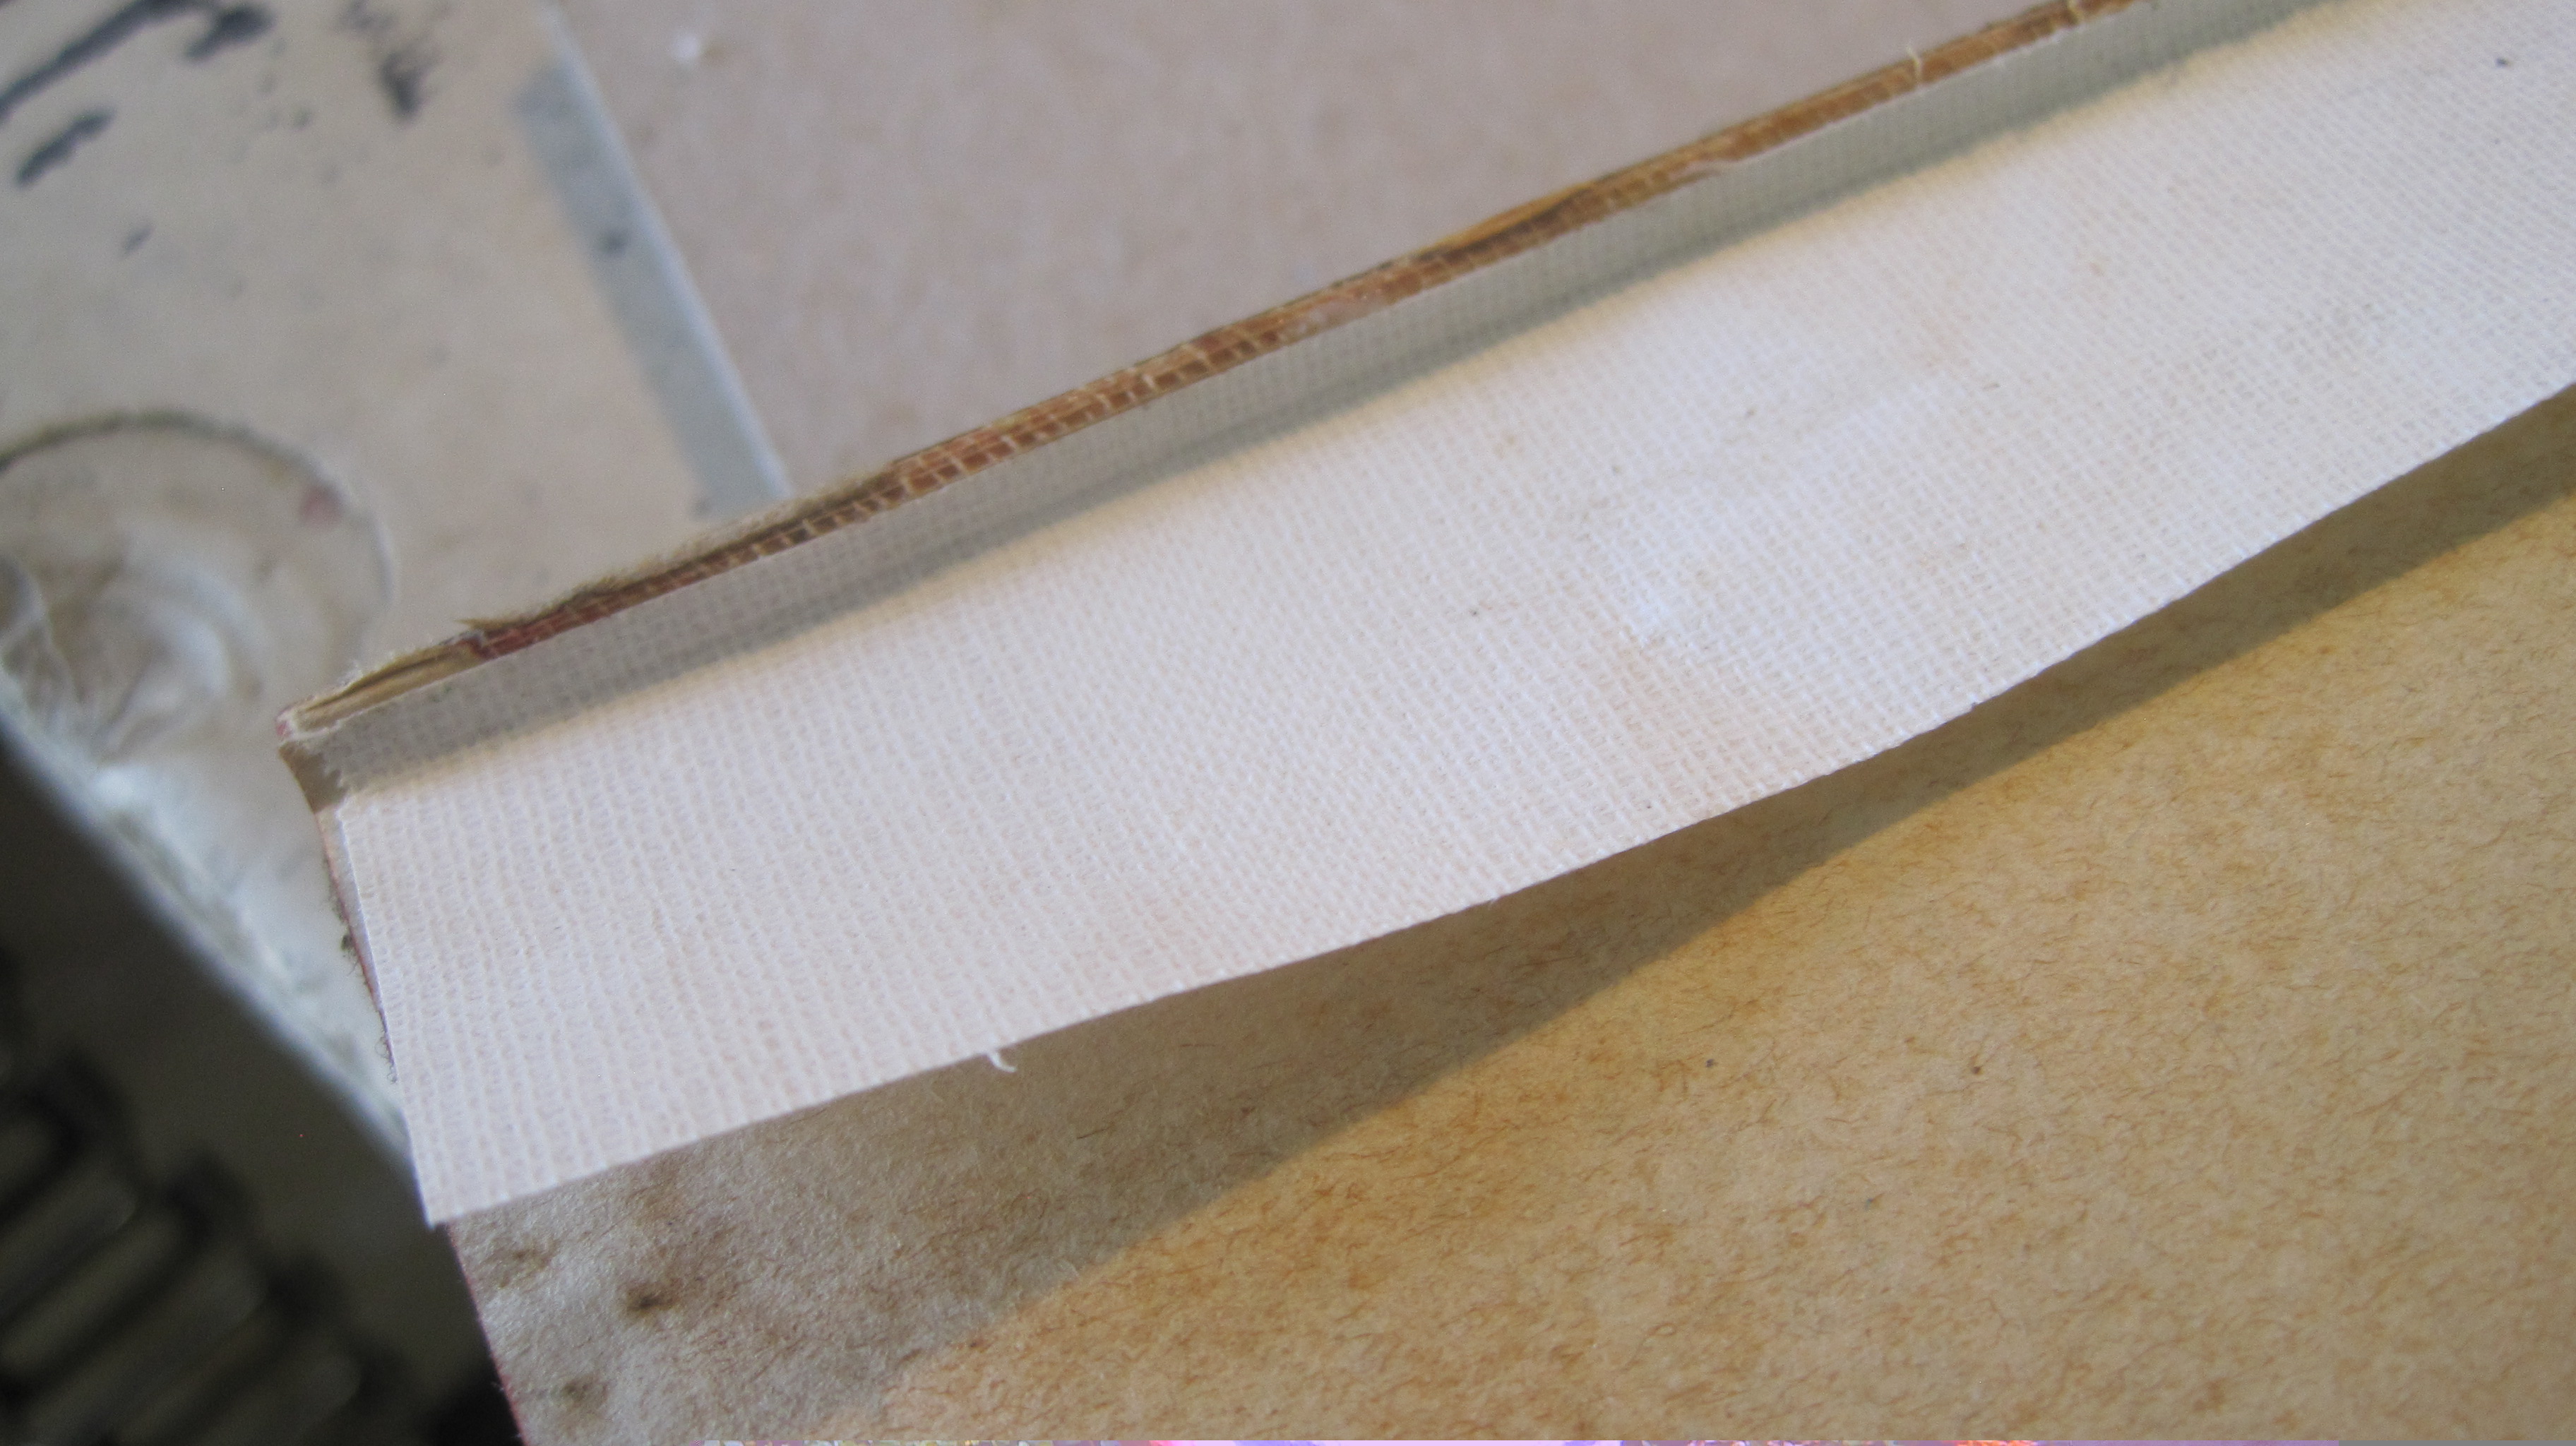
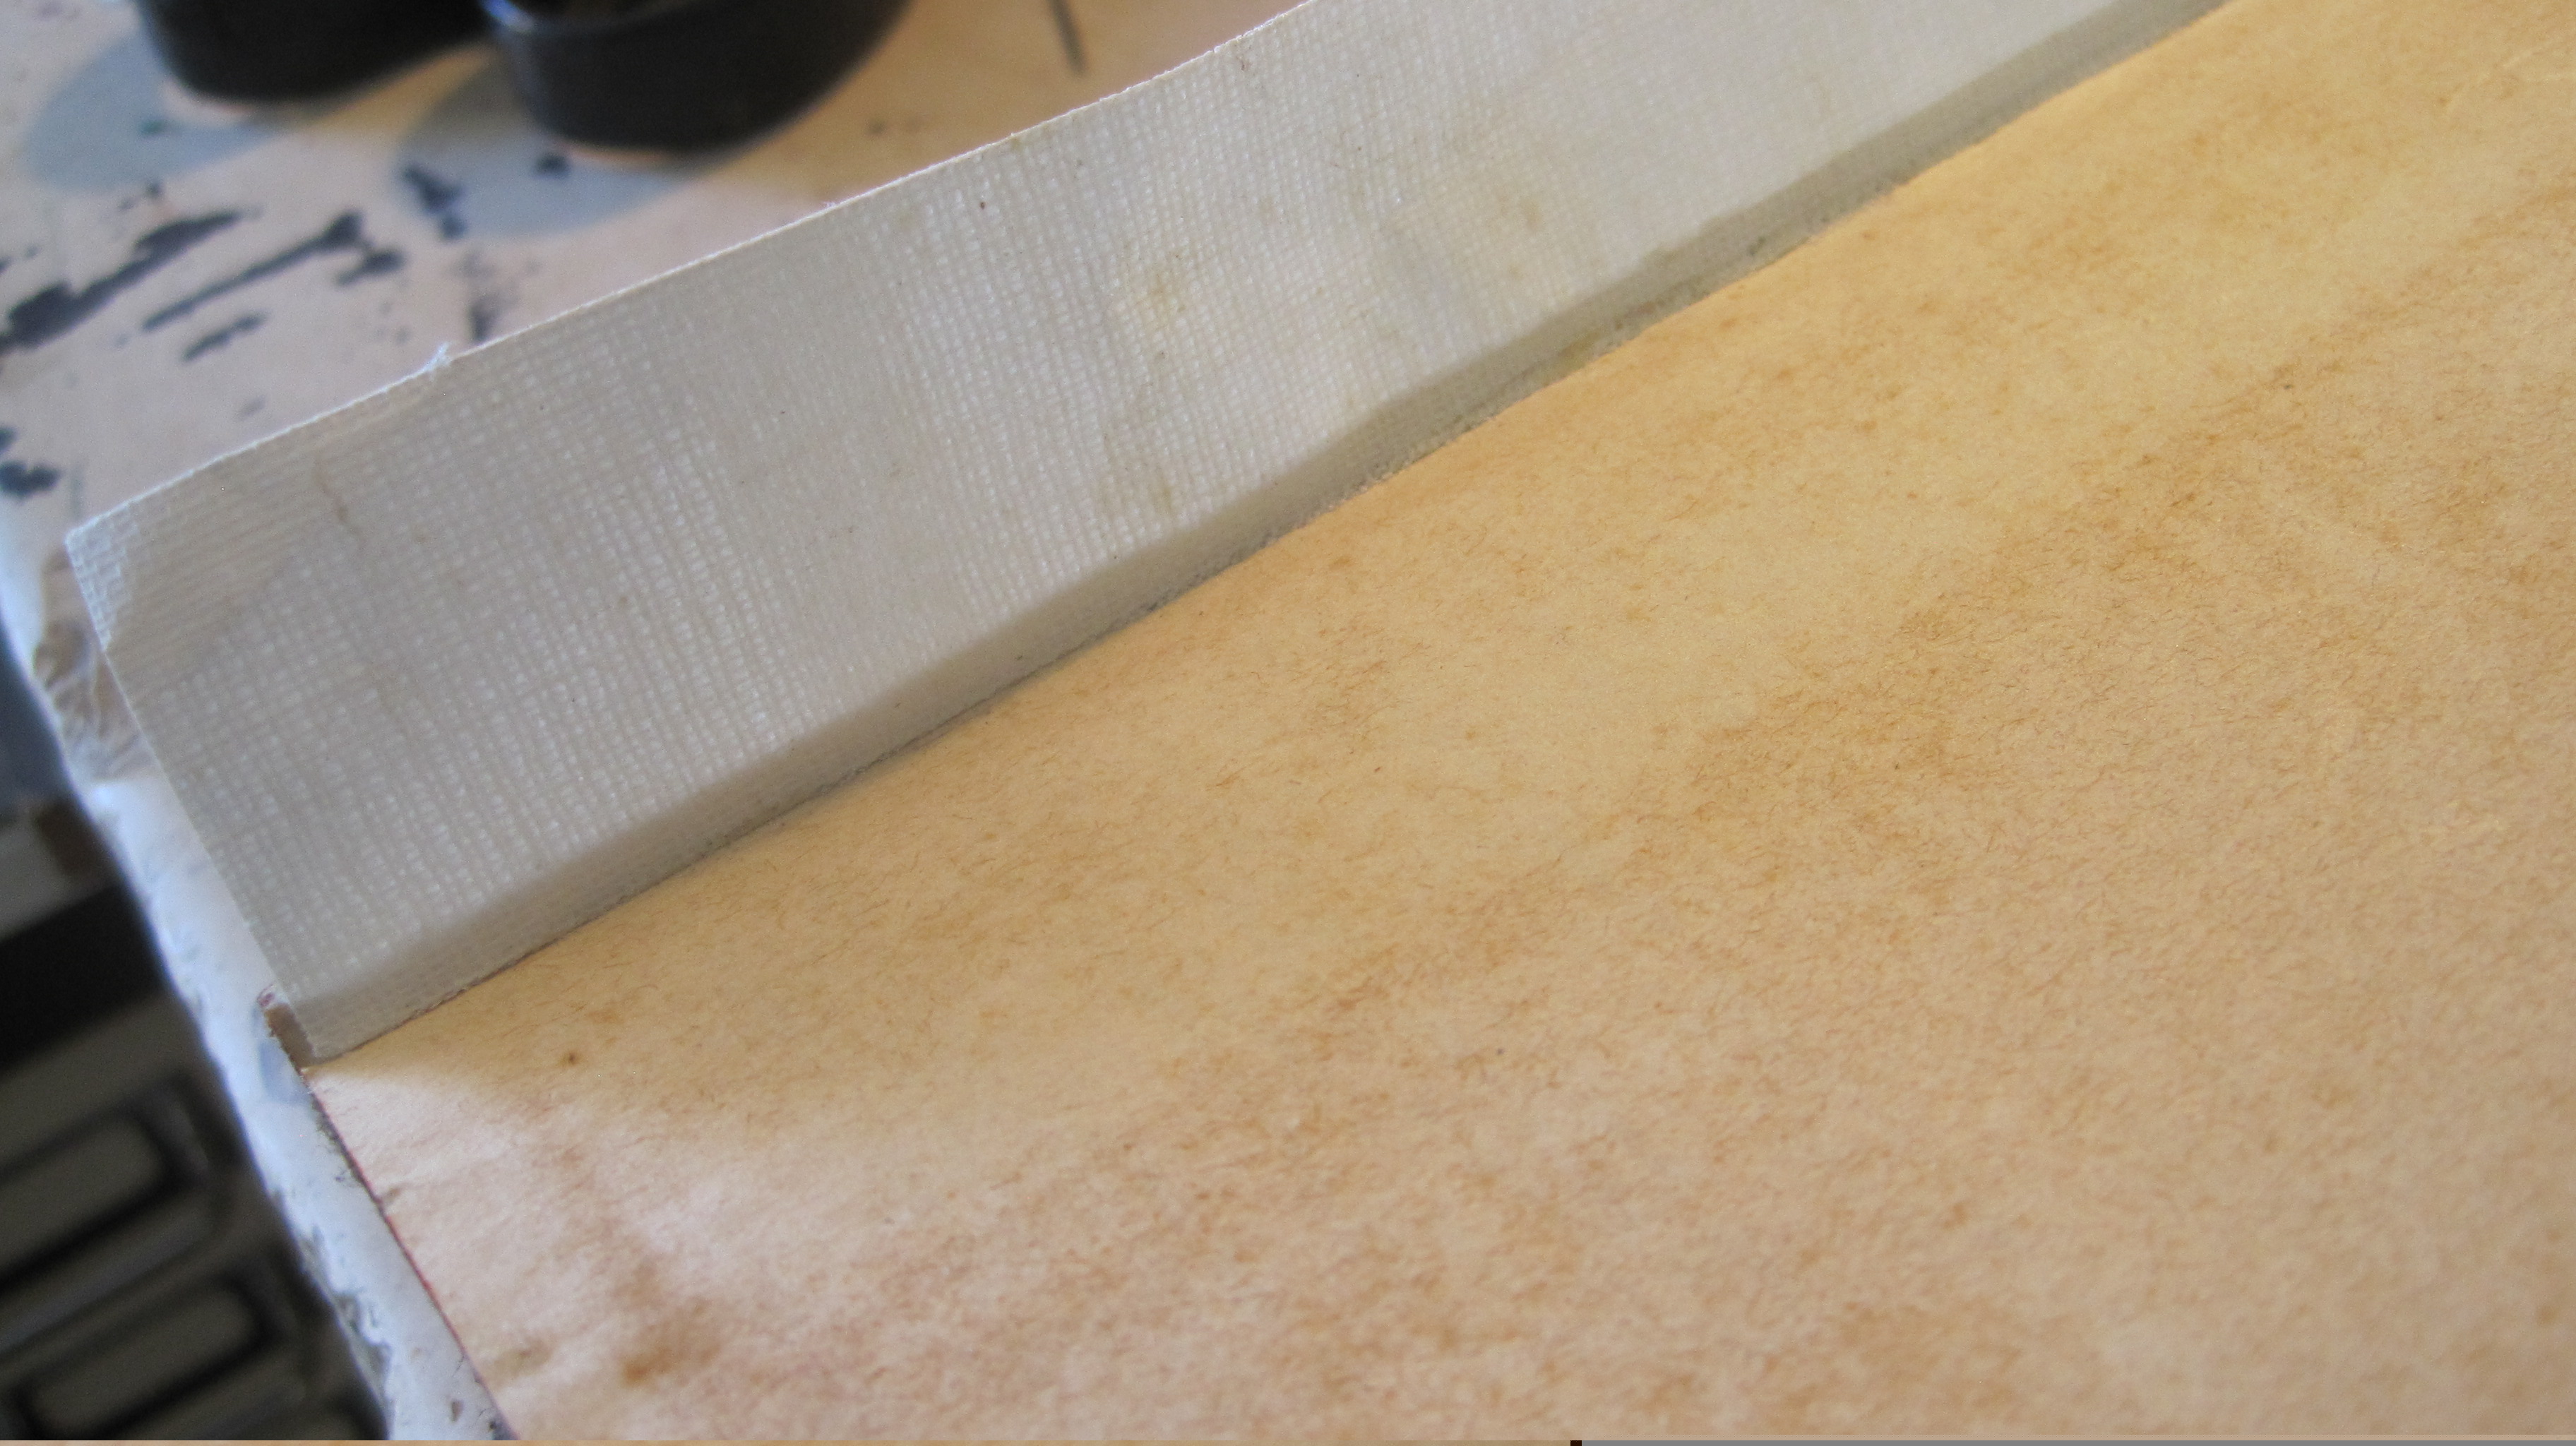
Spine glued first, top and bottom panels unglued just as I normally do it. Lay the book flat on the paring stone to prepare the corners for turning in: first slice off at 45 degrees, then scoop out the area at the corner: Tuck a bone folder between the leather and the board and ‘scoop’ a semi-circle about half the size of a 1p coin with the point of your paring knife down to just paper thickness. This enables a neat pleated corner to be formed.
Now paste or glue the leather onto the boards.
And this is where it went wrong!!
I turned in the top and bottom as usual, working paste into the ‘pocket’ between the leather and the outside of the hollow and forming the headcaps. But when it dried neither surface of the top and bottom panels was smooth. The damping from the paste had moulded the outer part of the hollow to the surface shape of the lined back which must have been ‘lumpy’, probably from the tie-downs of the headbanding thread. So, careless preparation of the spine before making the hollow now produces an irreparable blemish.
Well, I might as well finish the book, having got so far.
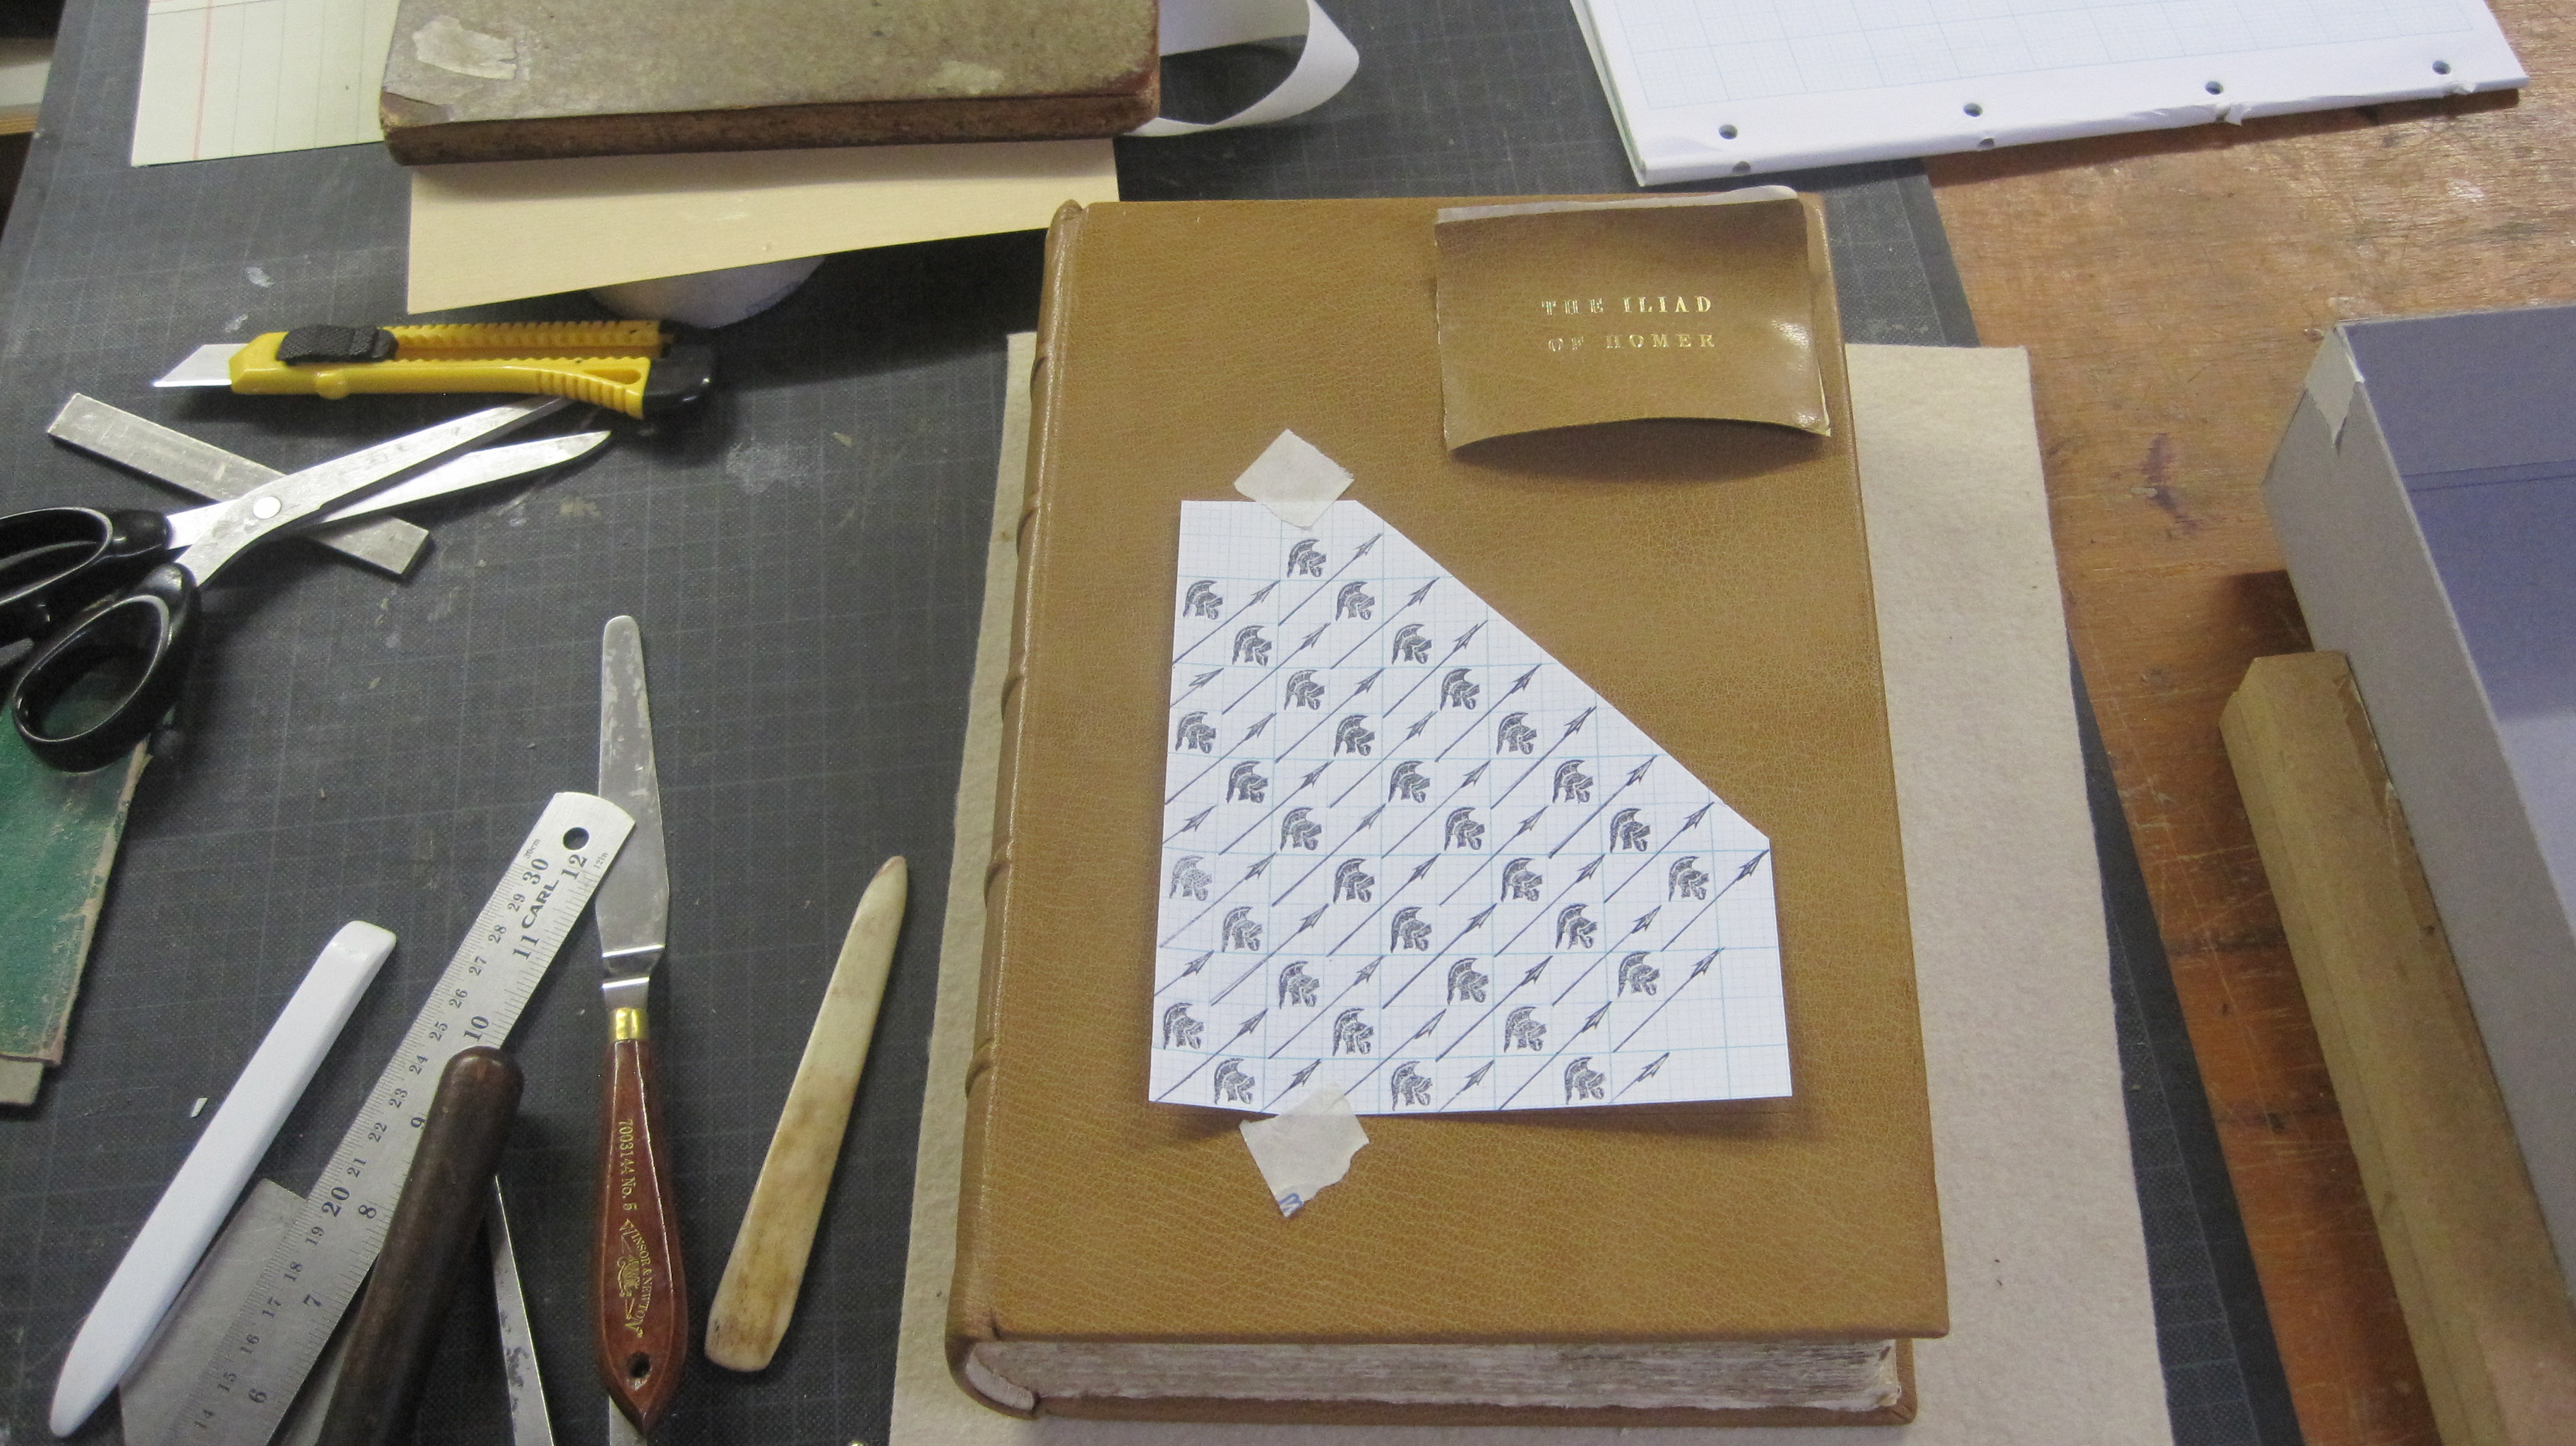
The final design for the front cover was settled:
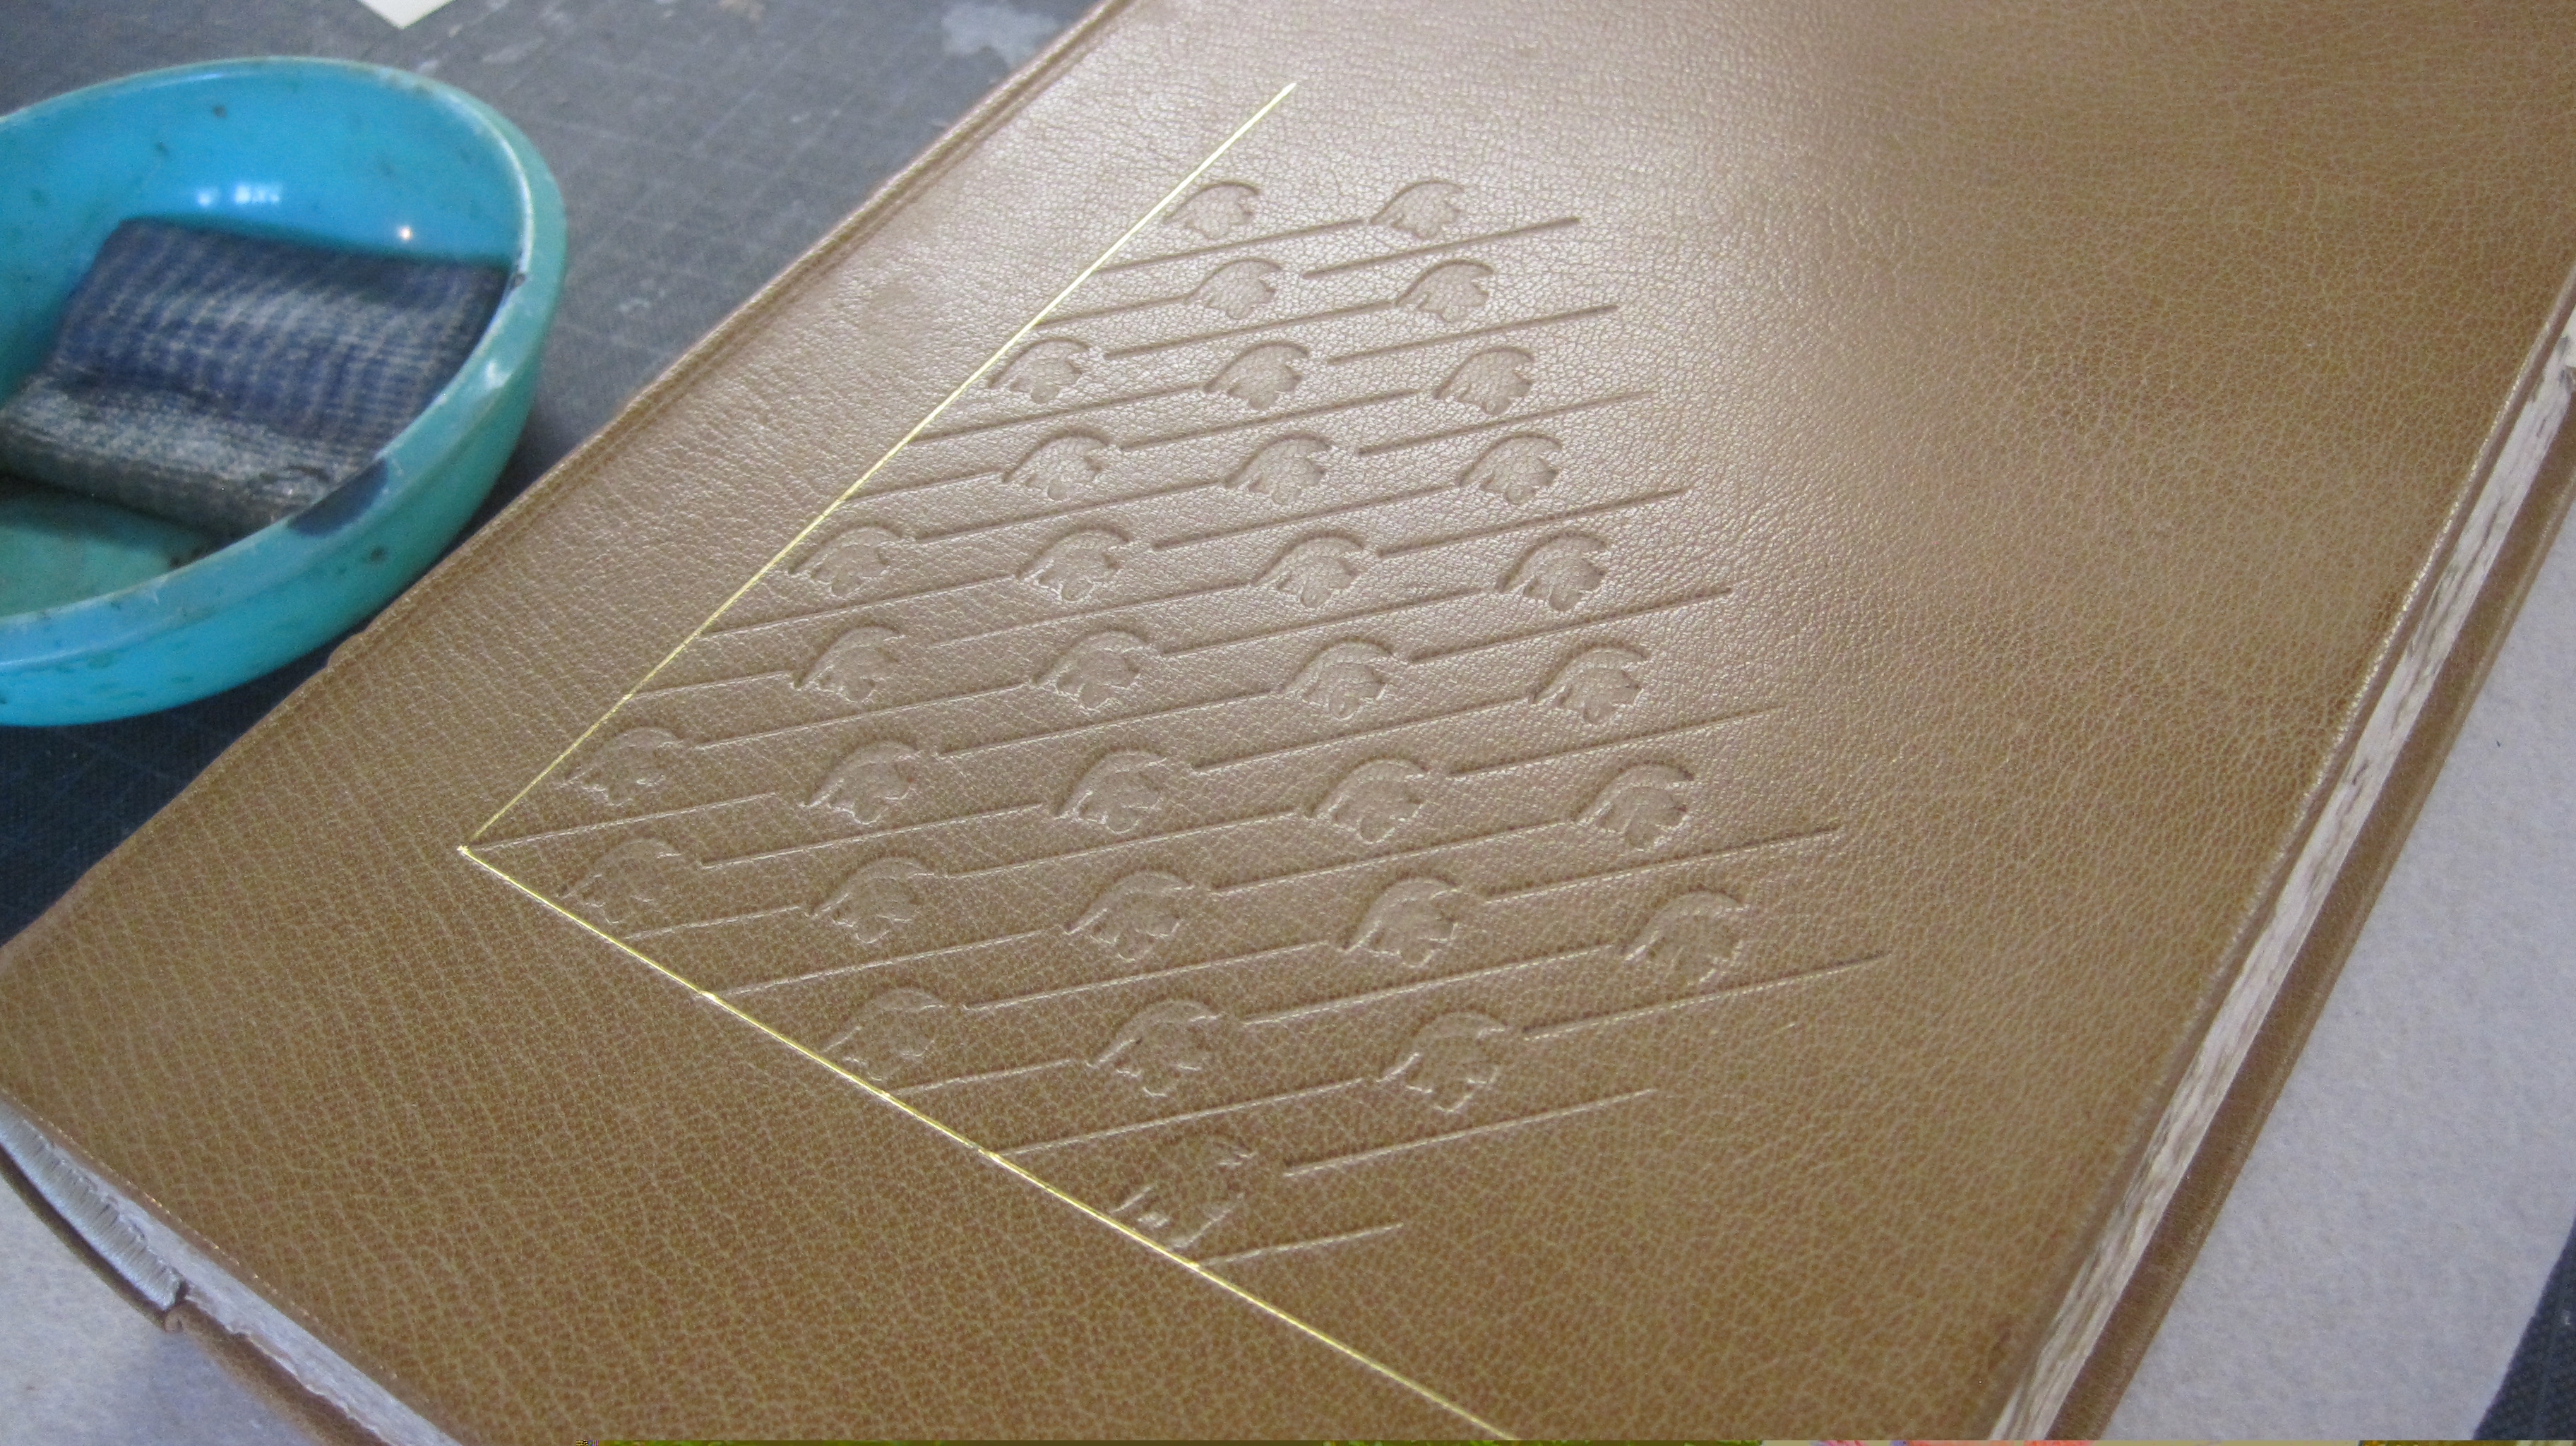
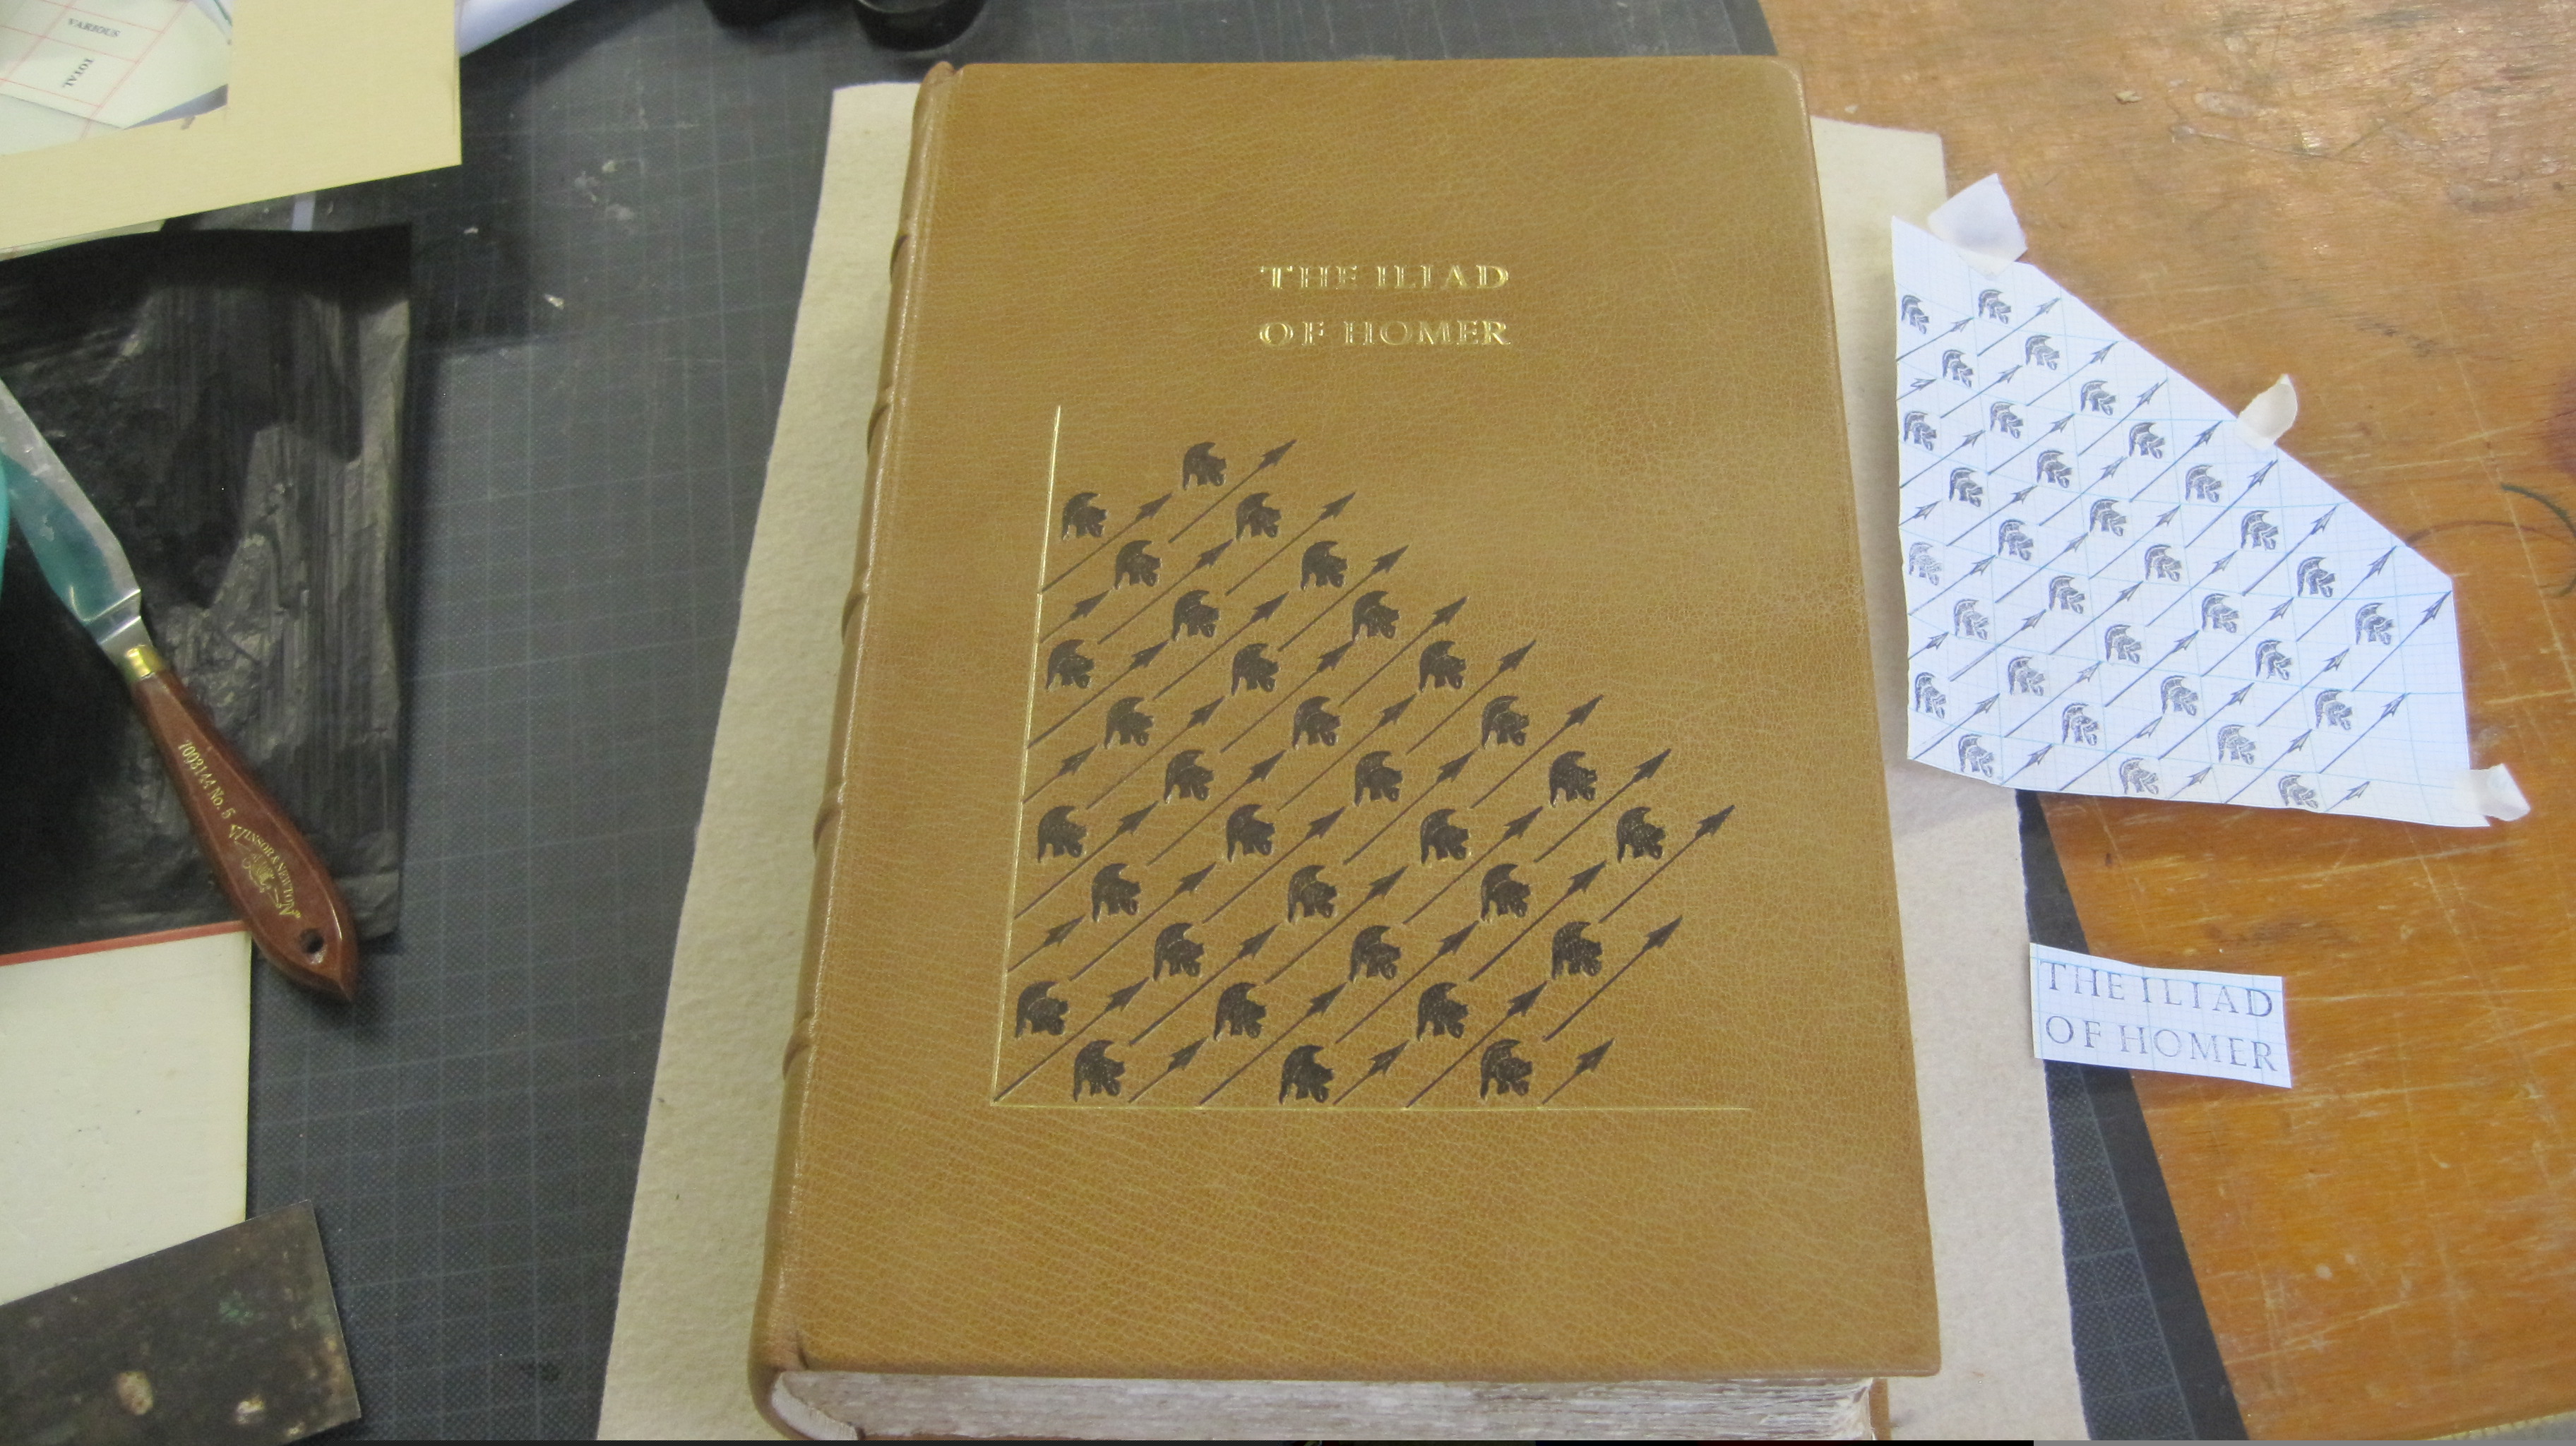
The loose piece of leather is the title label for the spine. I first thought that putting the same title on the spine in the position shown would work, but changed my mind later – larger lettering in the middle would be better. The tooling for the warriors was worked in blind through the paper pattern.A single gilt line provides a frame for the party of warriors to emerge from.Black is a suitably menacing colour. The title is in larger letters in the centre, at the same level as the title panel on the spine.The wrinkles in the top and bottom panels are pretty visible. As I’ve said before – we live and learn!
Comments or questions welcome. And please look back through previous posts, and share those you like with others.
Many ‘paperbacks’ are not only cherished but heavily used. And so they begin to fall apart. A recent client is a professional botanist who uses a specialist work on mosses and lichens virtually every day. It was published 20 years ago by a university and issued in ‘soft bound’ form – i.e. as a single sheet binding with the spine held together with some form of heat-set adhesive. It was literally falling apart, so I did a thesis binding job on it – pages sewn together by means of holes drilled along the spine including a strip of jaconette as a hinge for the covers. He happily paid my standard £25 thesis binding bill and said “Perhaps I should have had this done years ago”.
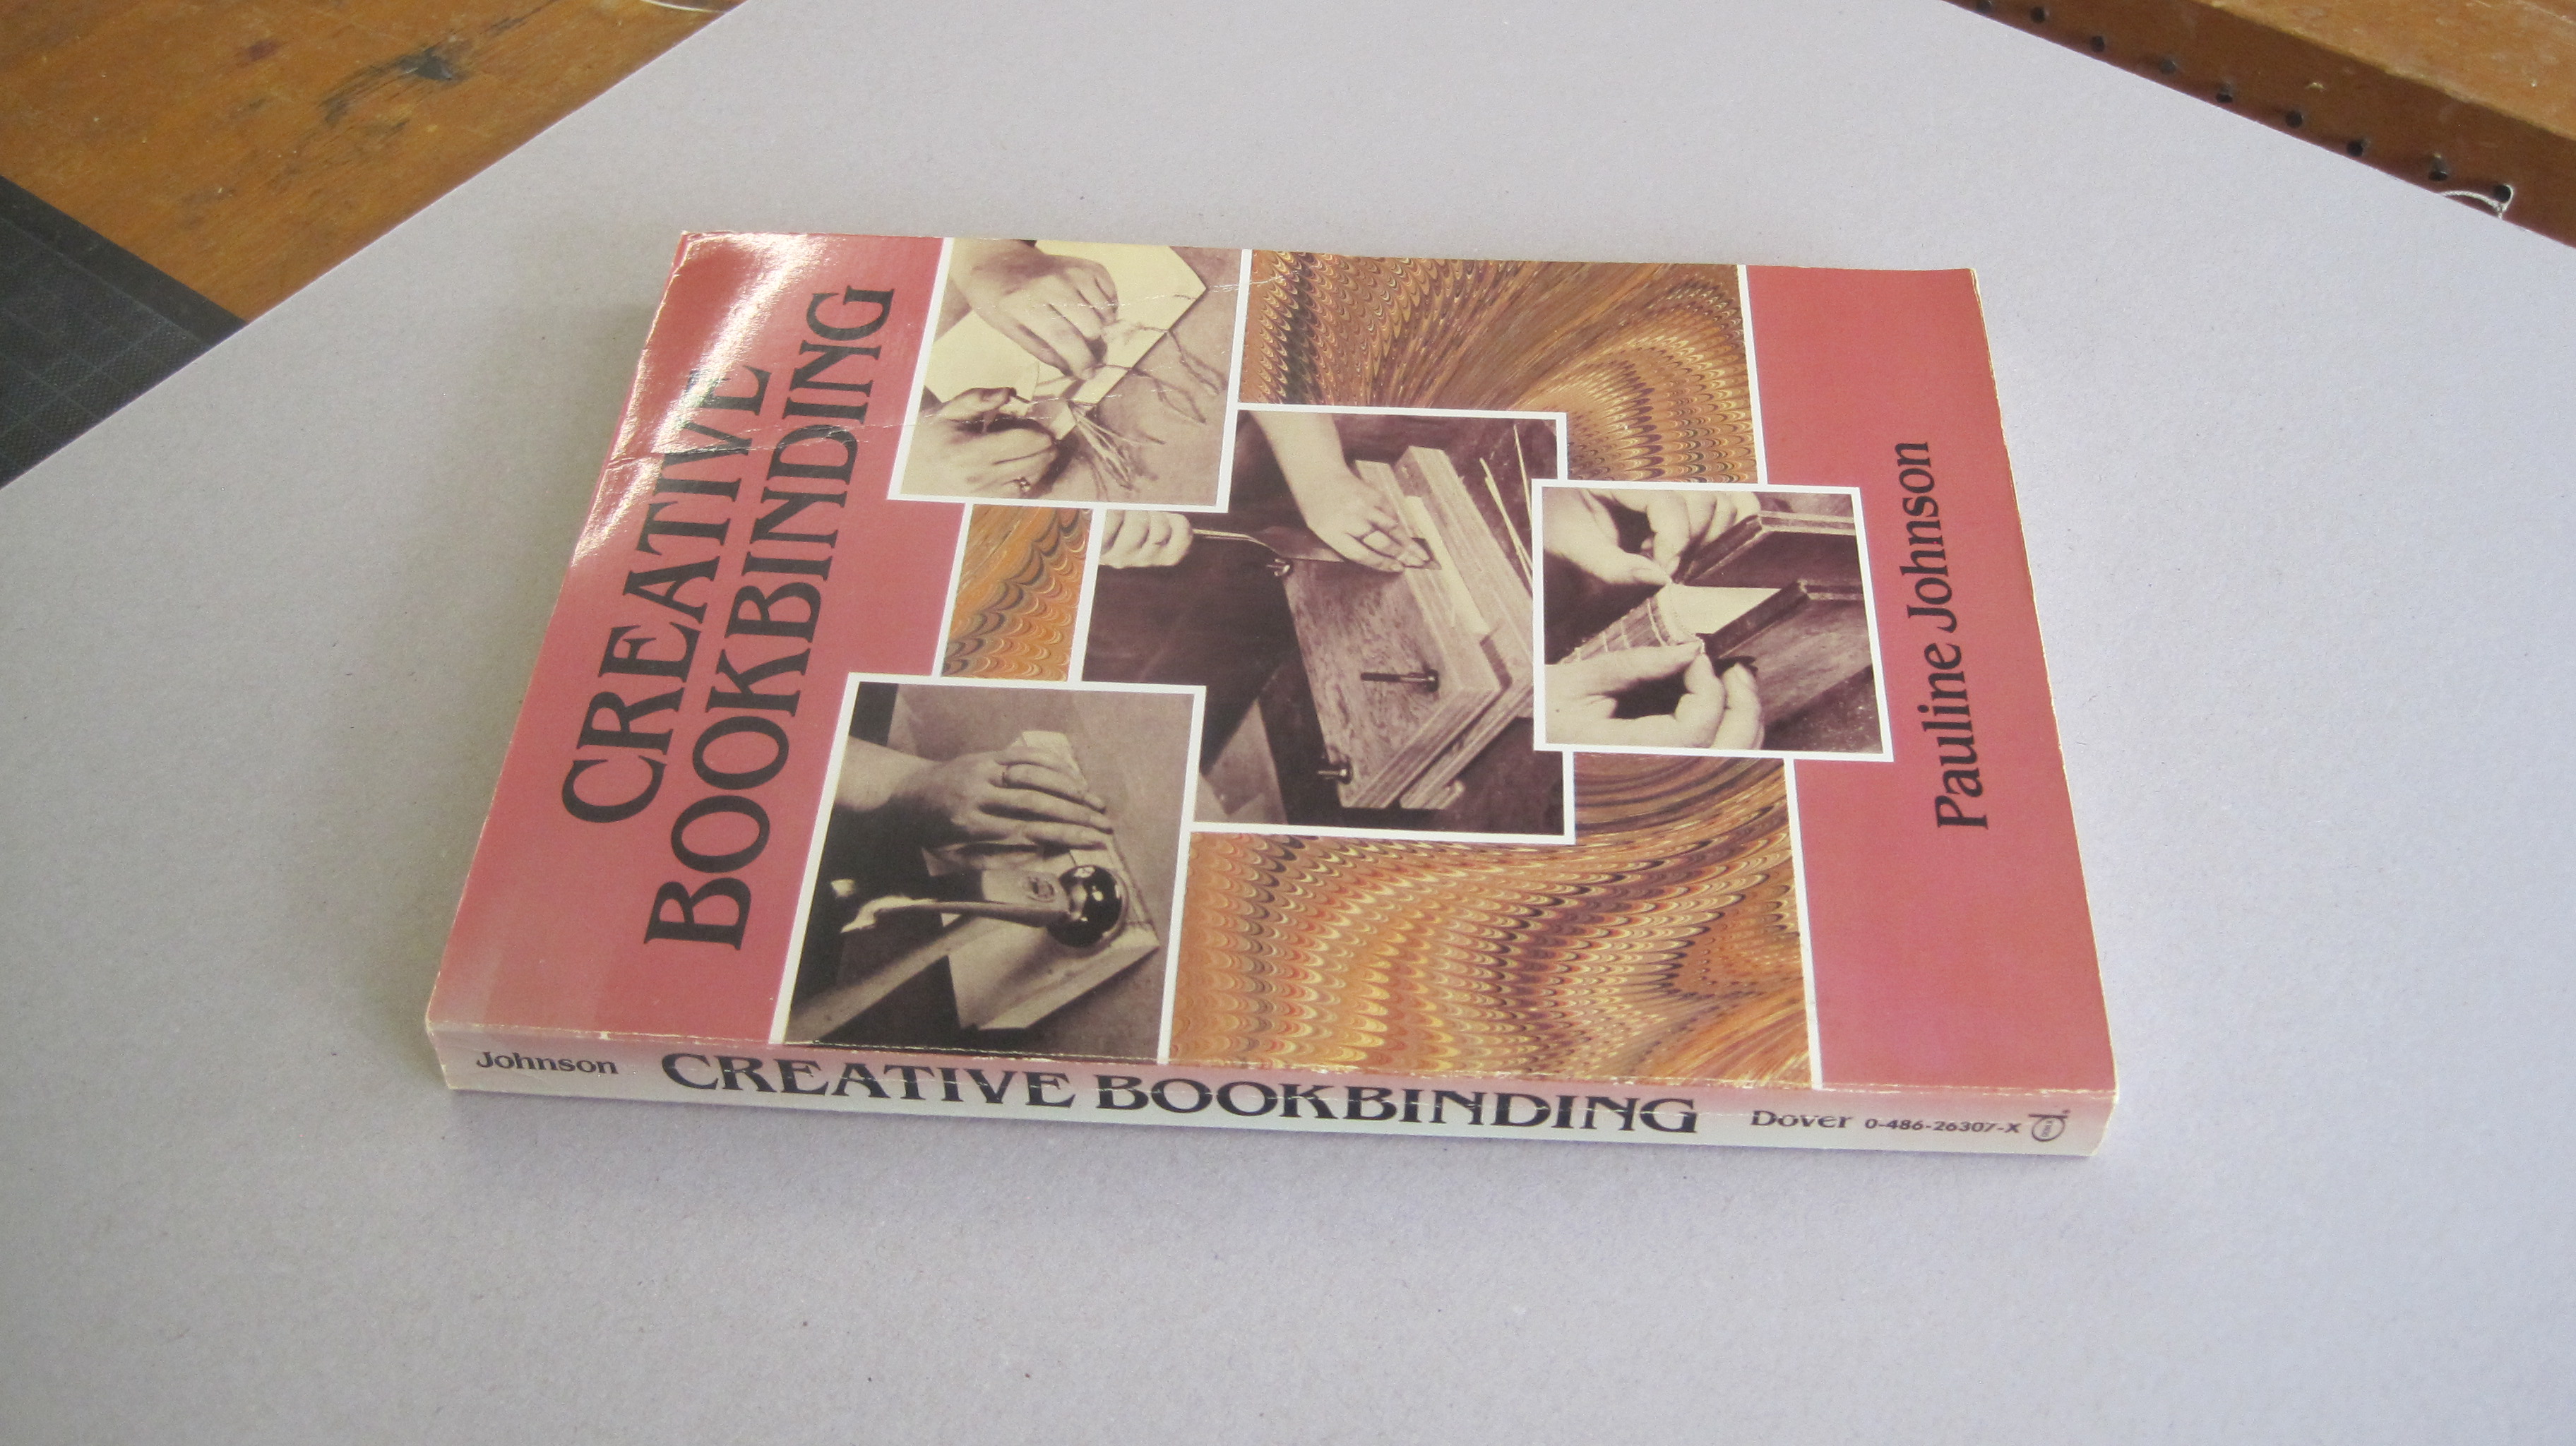
That set me thinking about my own books – I have a Dover Publications edition (1990) of Pauline Johnson’s ‘Creative Bookbinding’ which is well printed on good paper but in ‘softback’ form, unsewn.
Still intact, but covers beginning to curl and spine just going concave. So let’s prevent its inevitable deterioration and re-bind it now.
First, drill 2mm holes along the spine, 3mm (one eighth of an inch) in.
I have used these same ‘template’ boards for several years
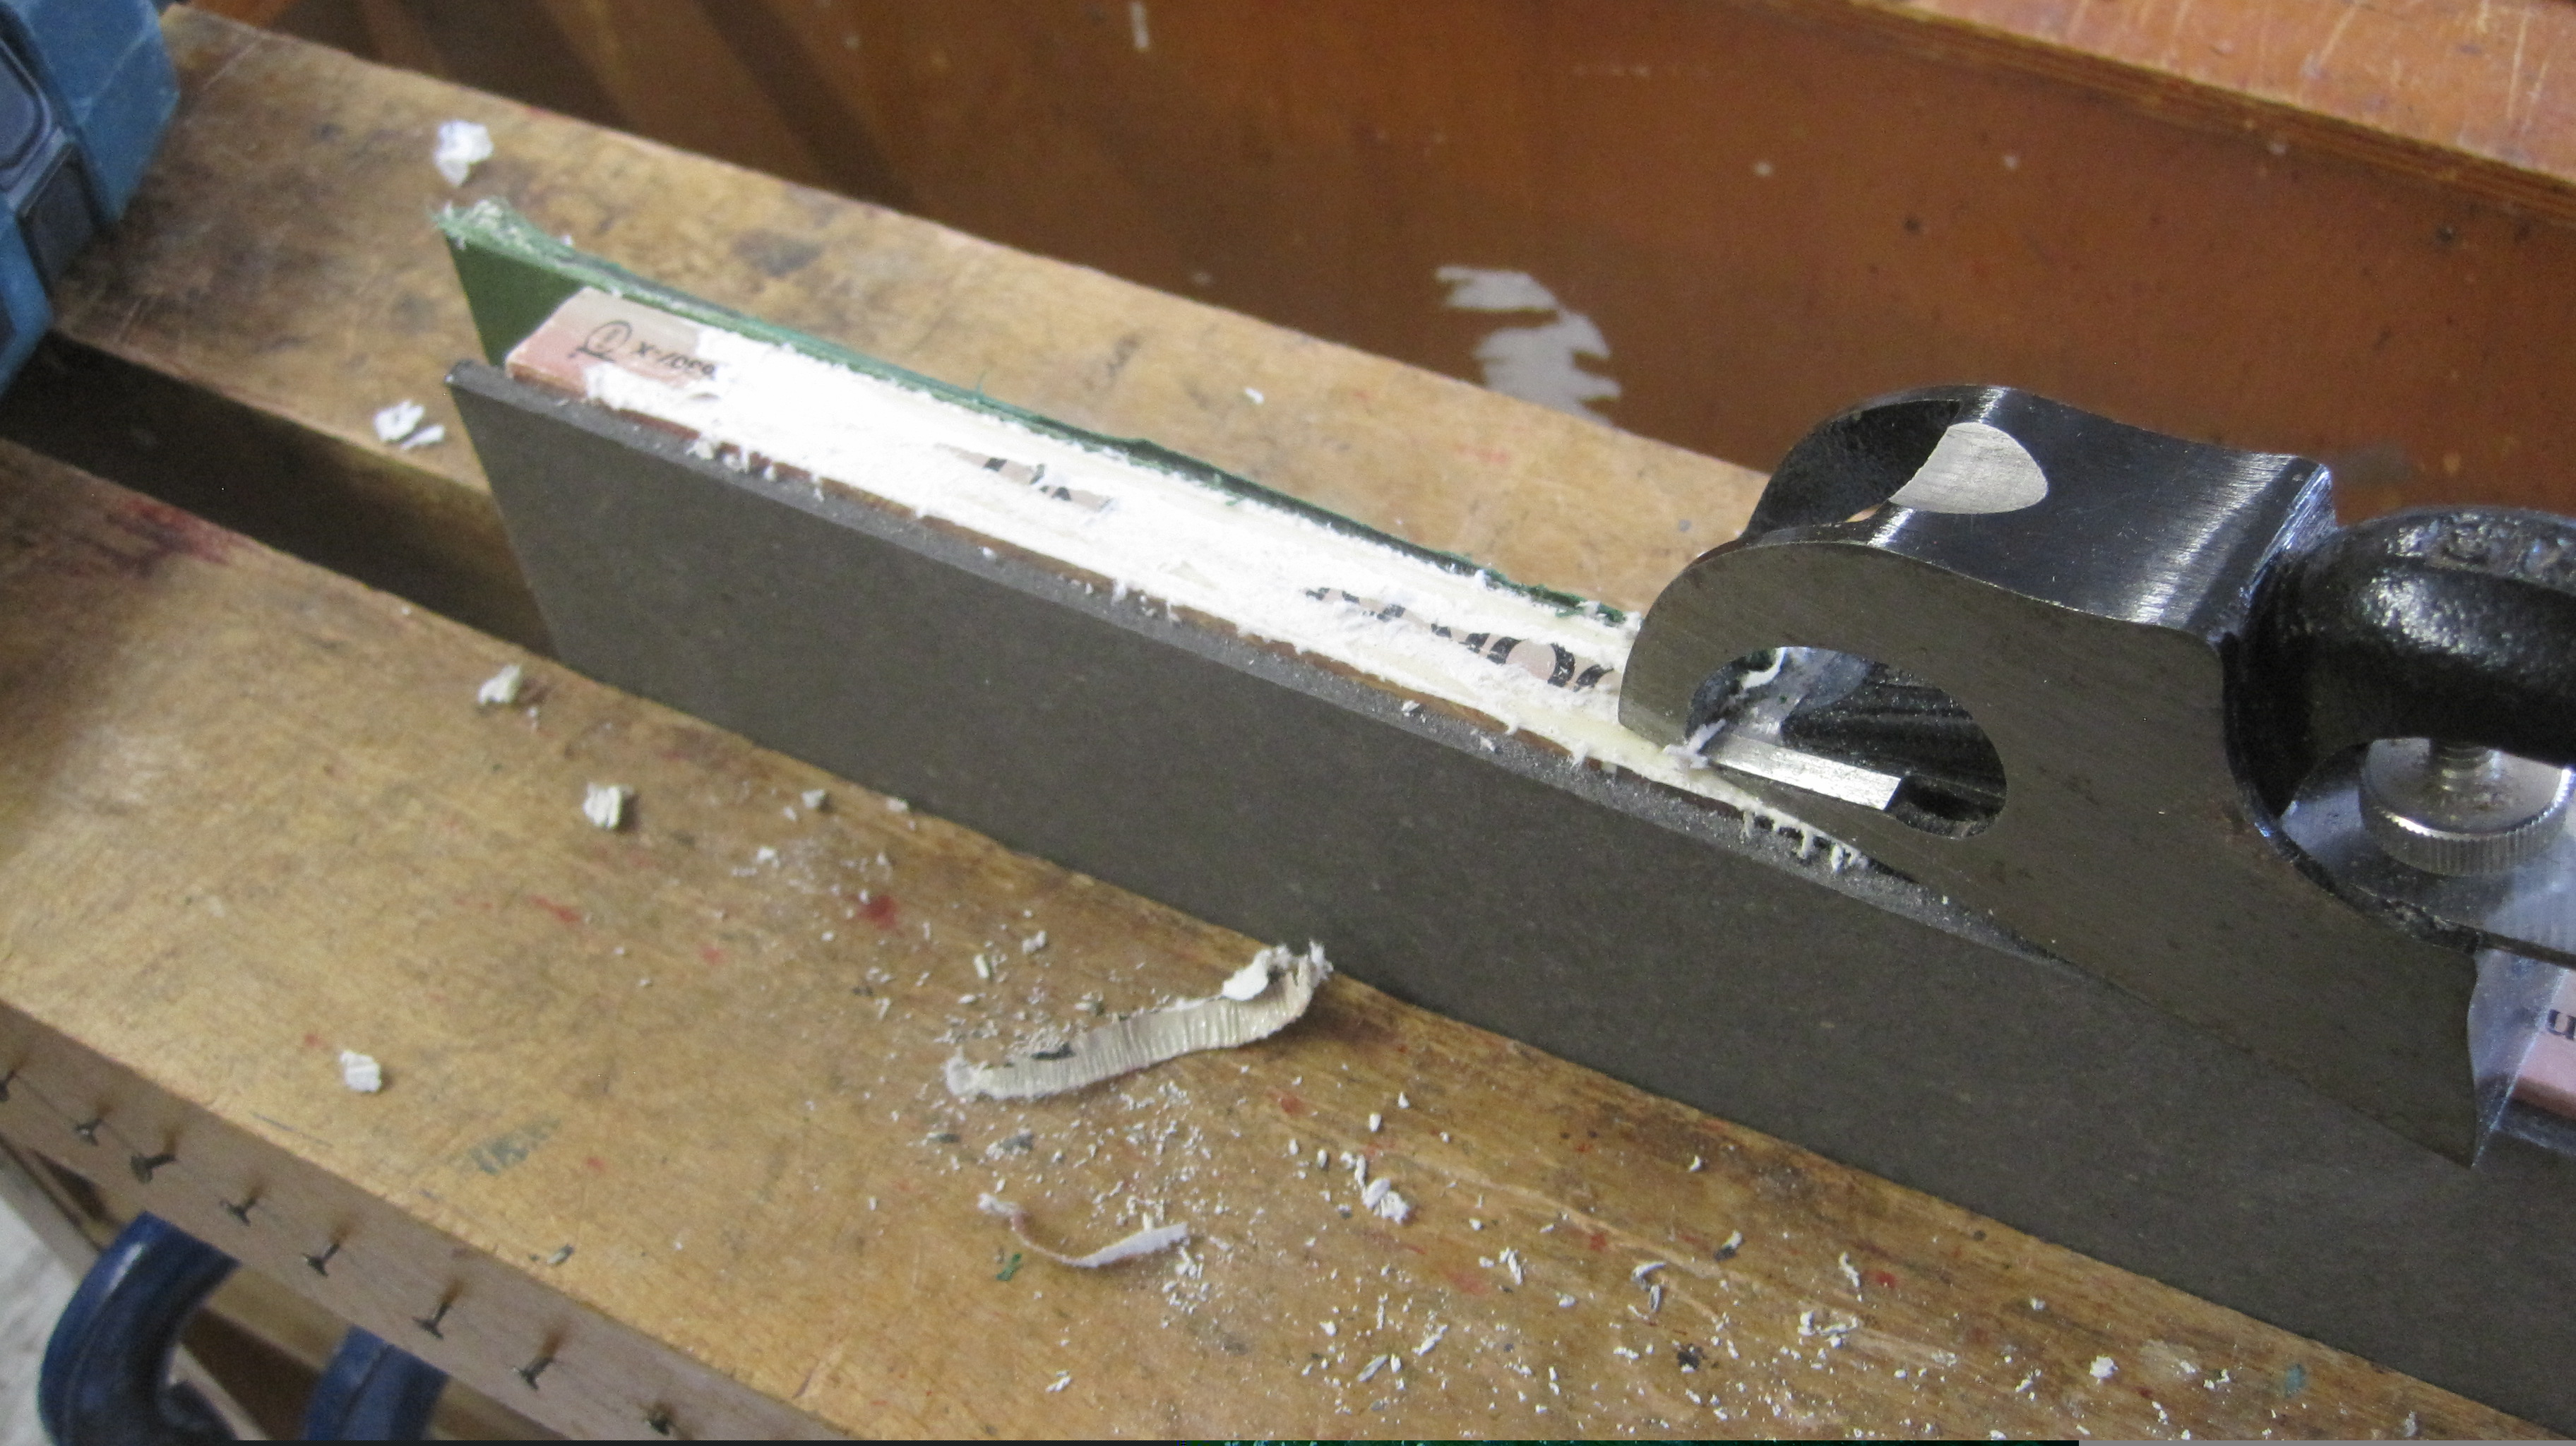
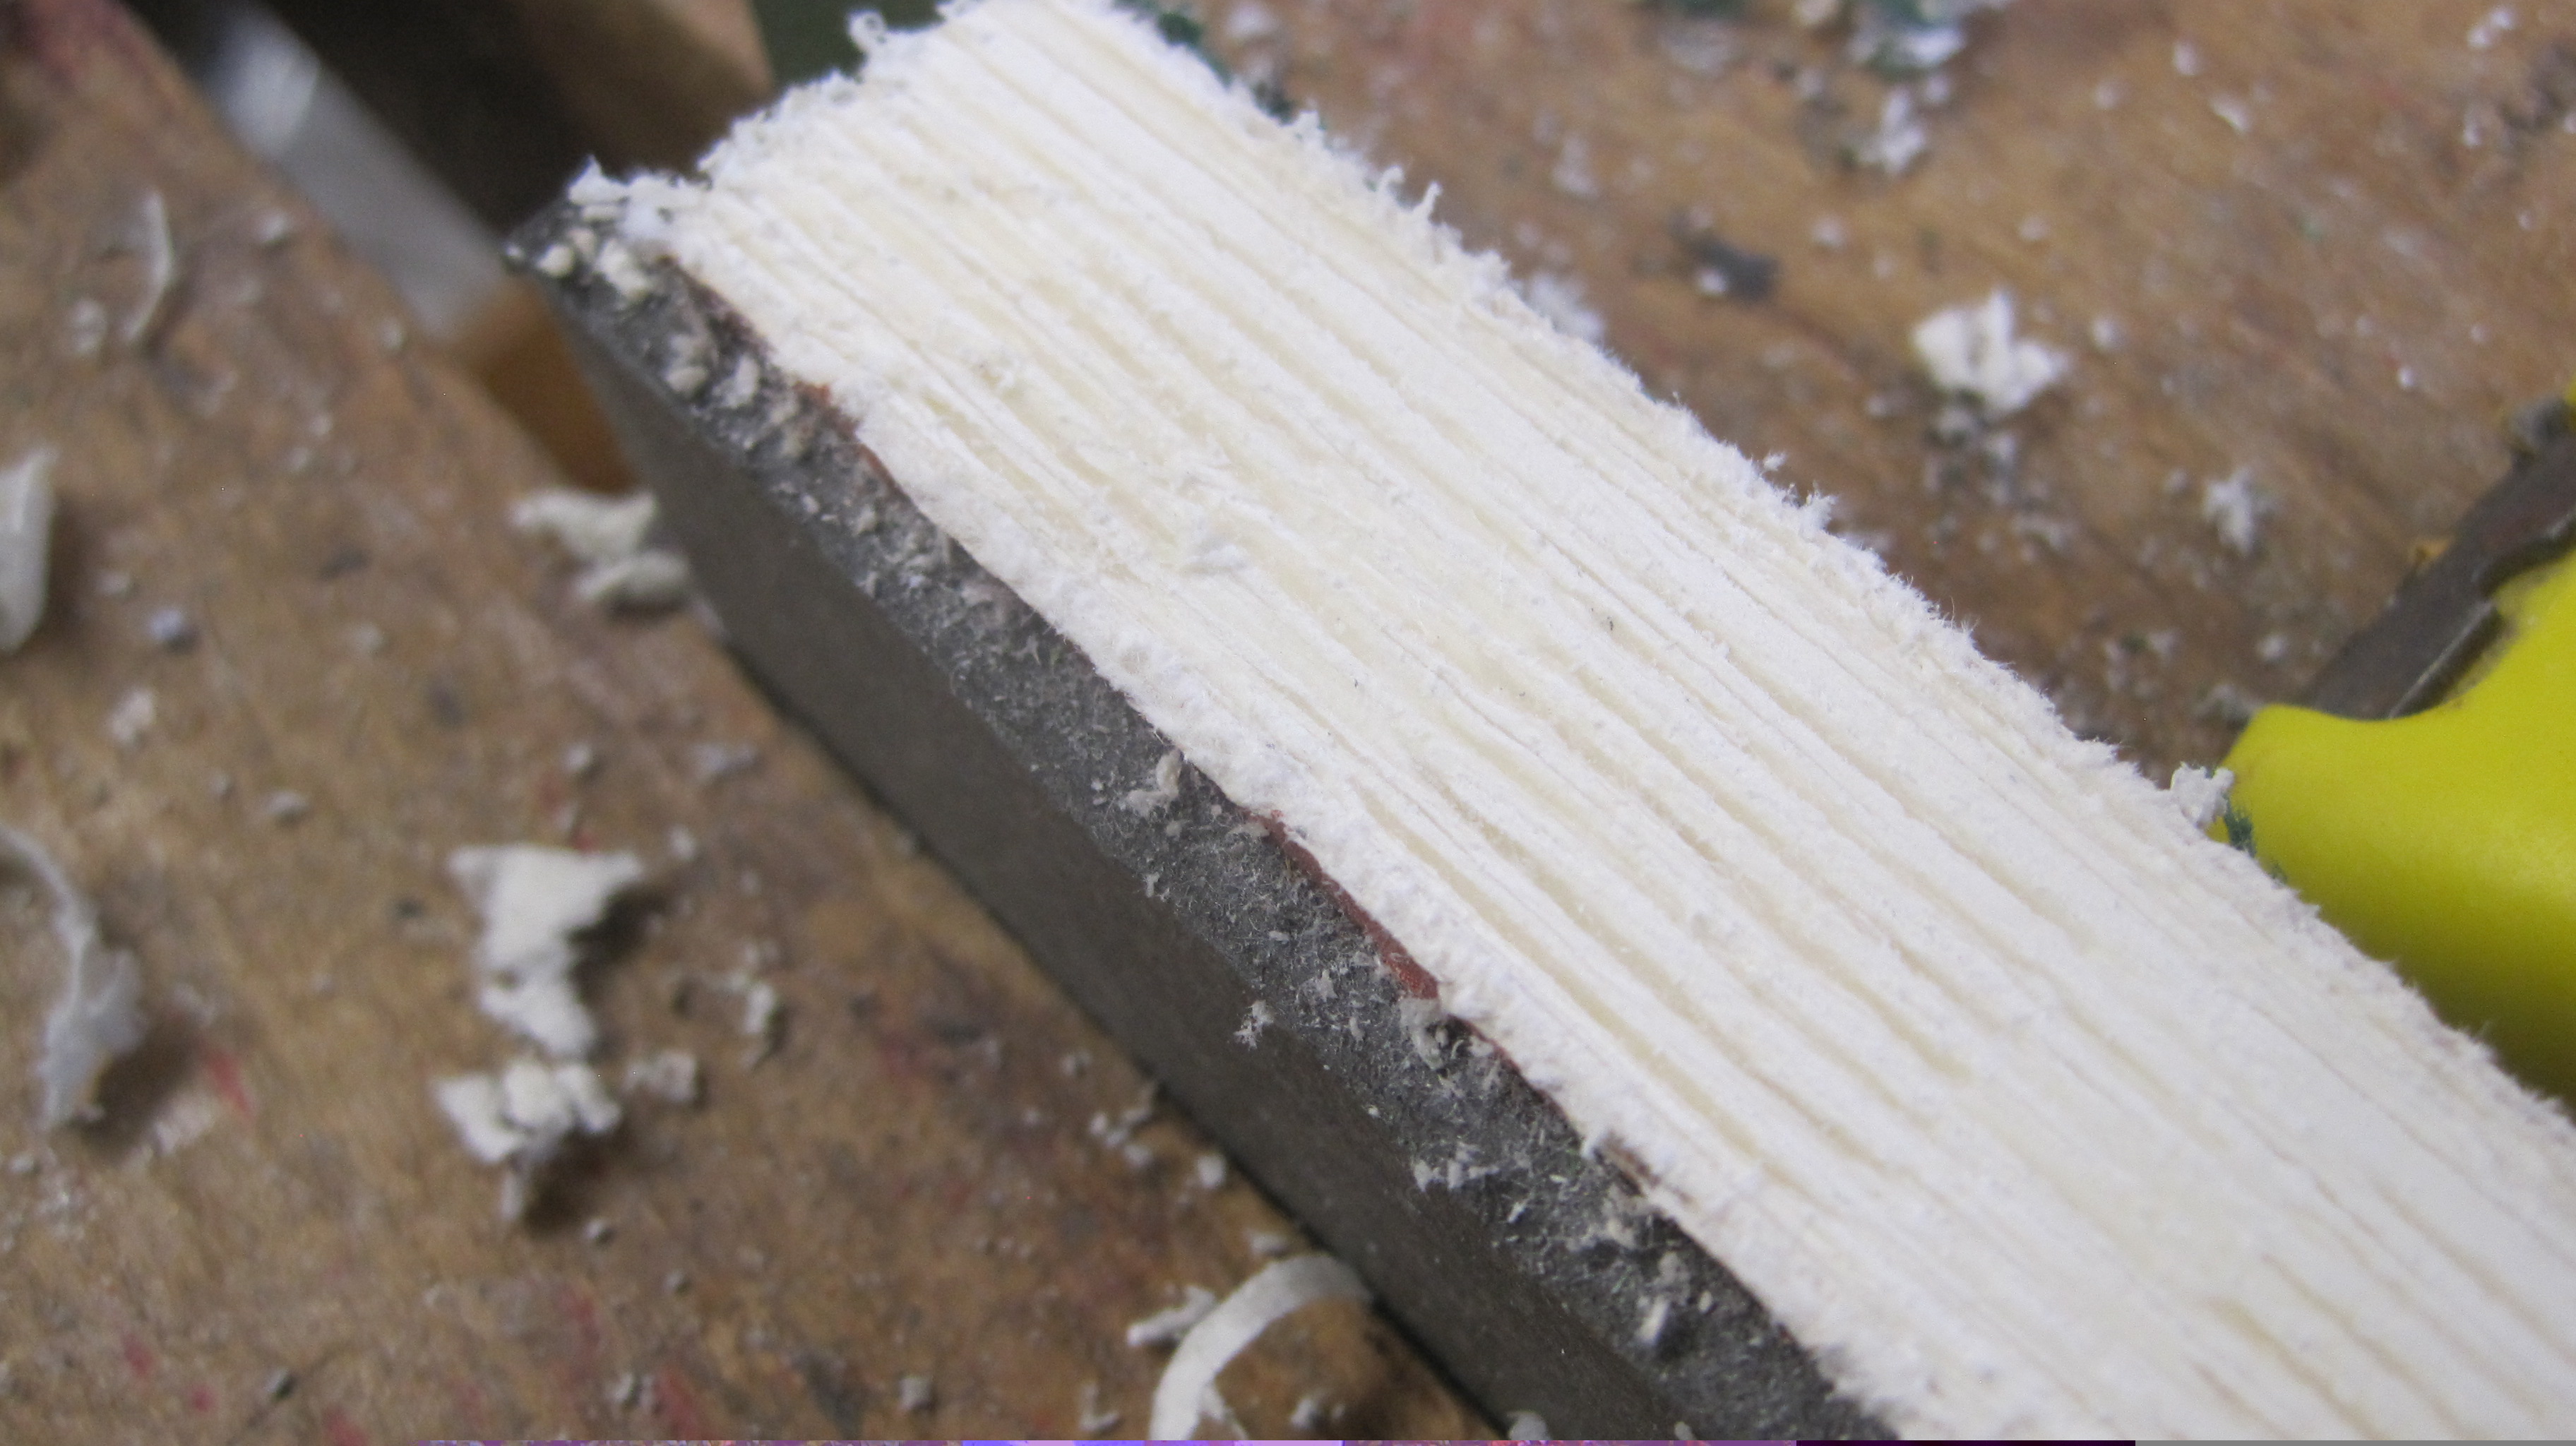
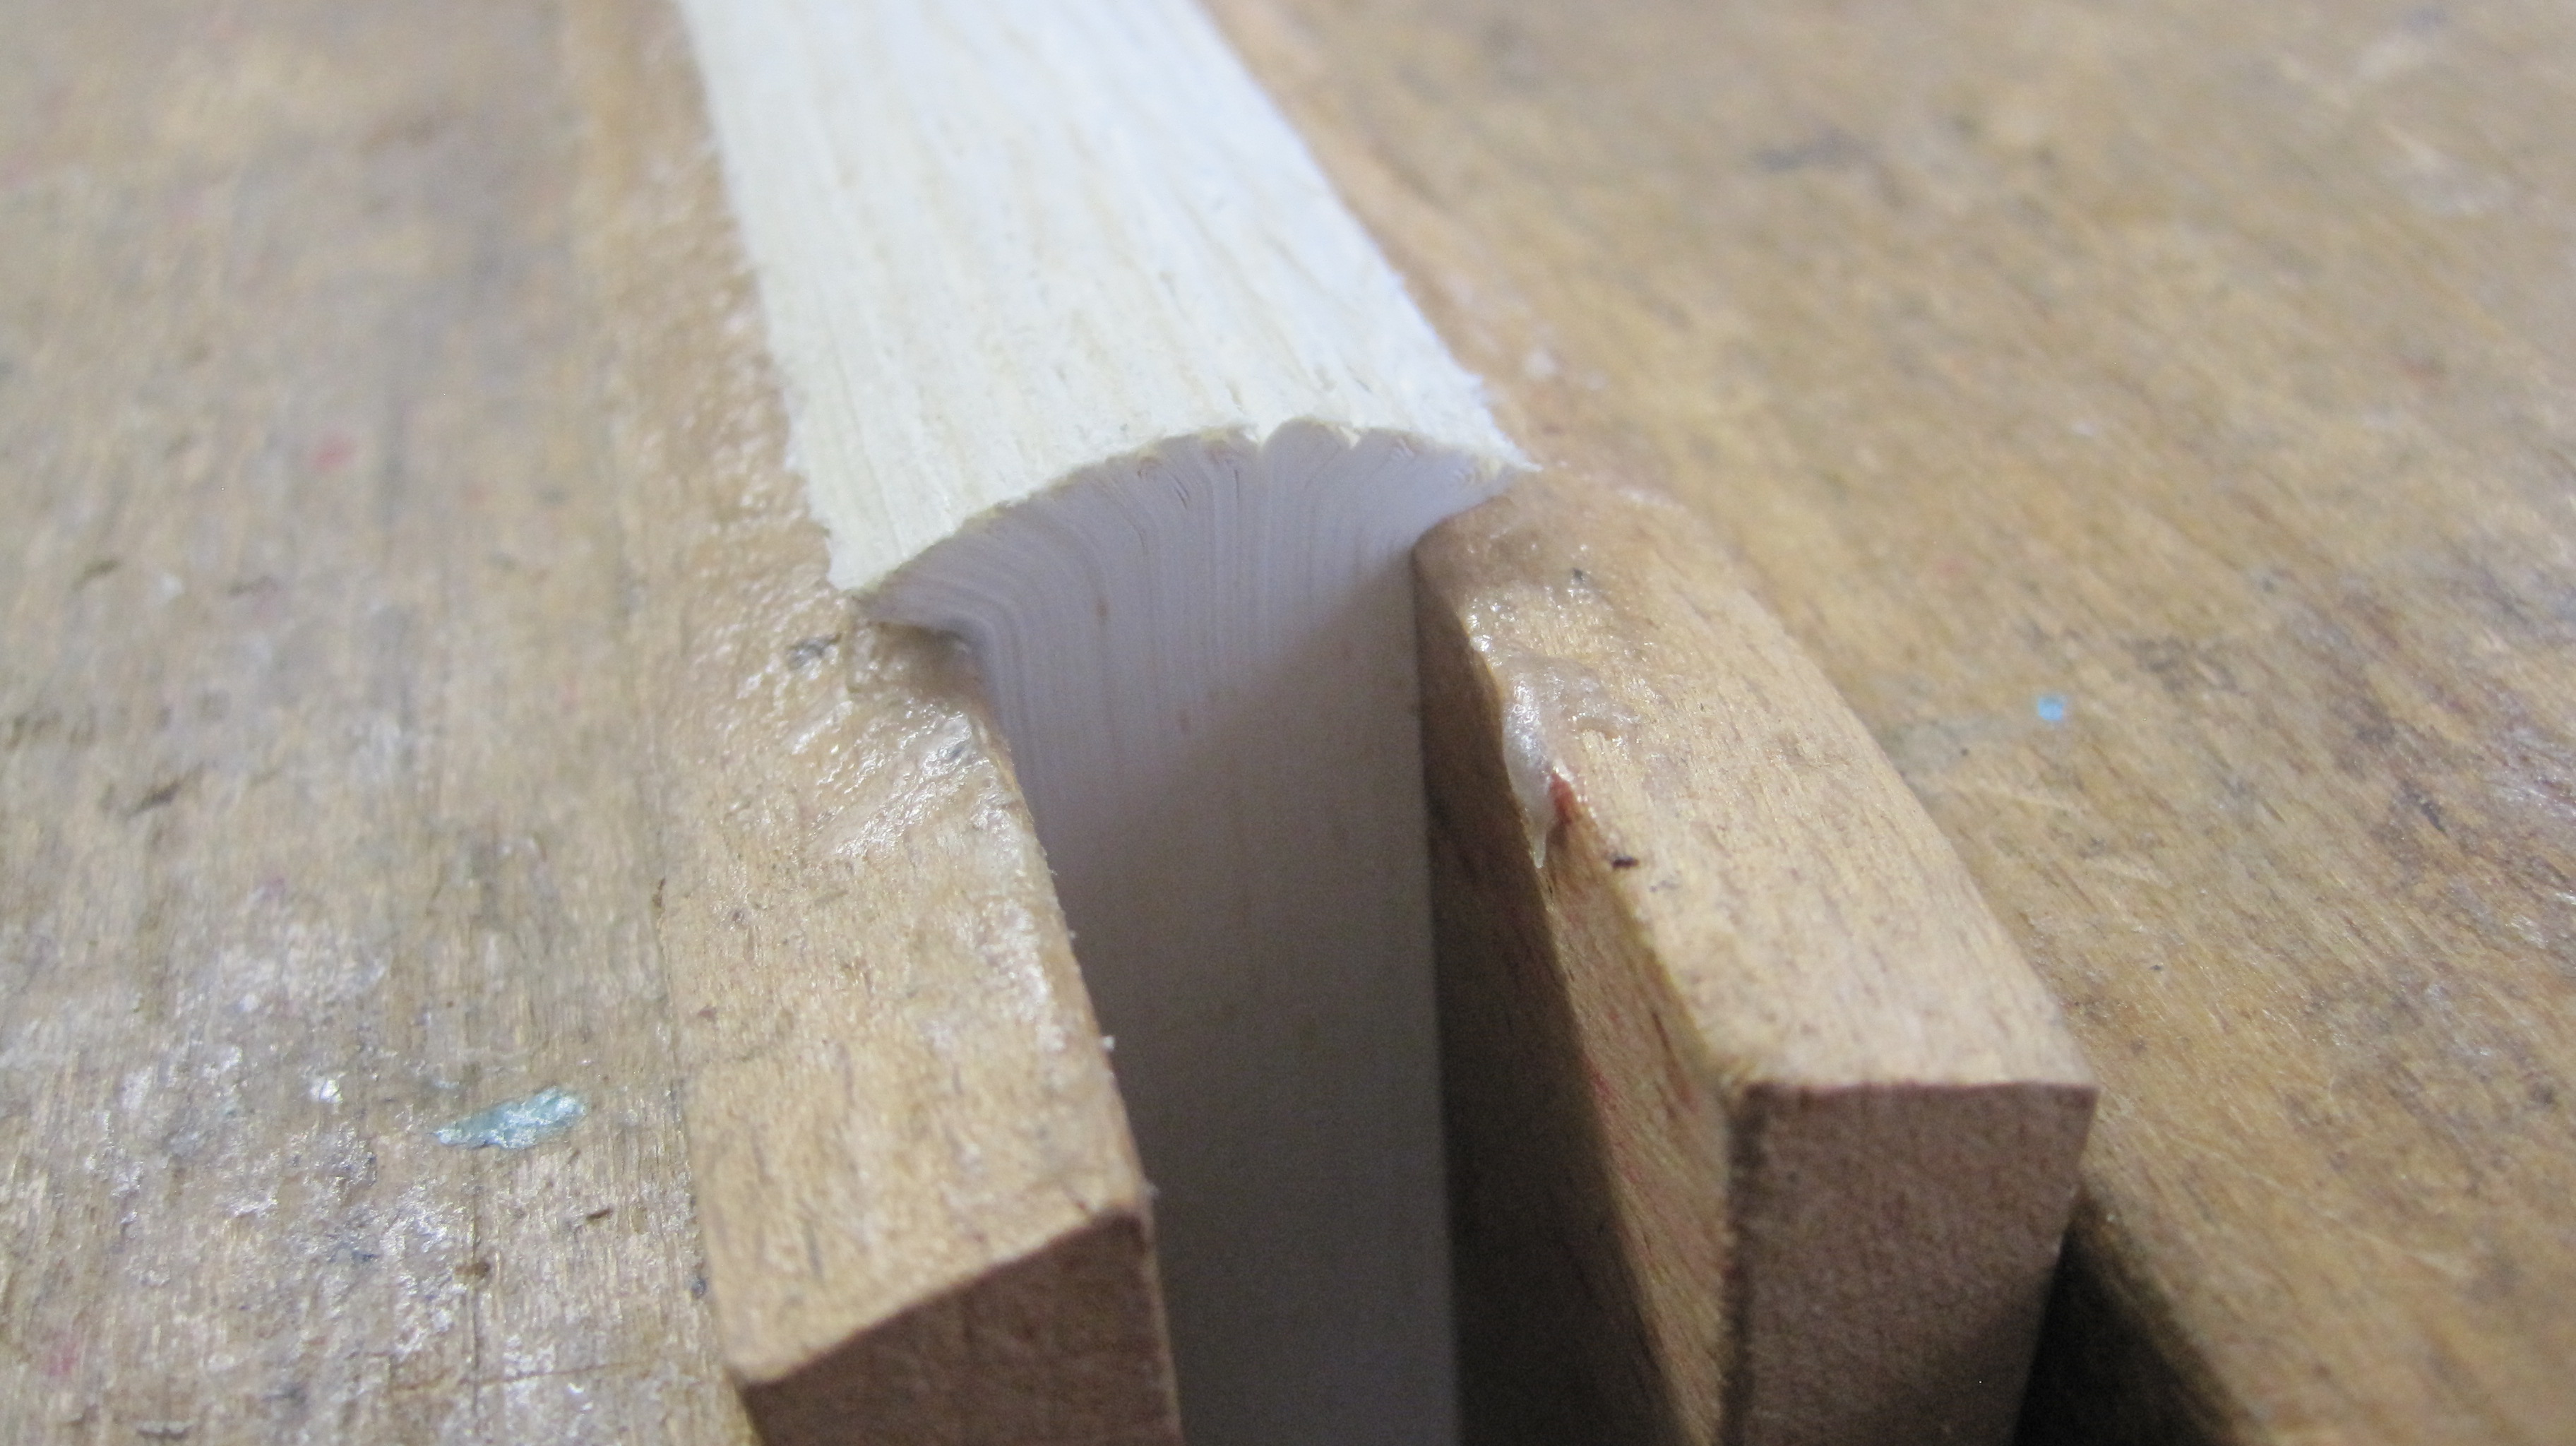
Now remove the flat spine and adhesive, right back to the page edges. I use a small plane and a ‘Surform’ rasp..
Now sew through the holes with a strip of jaconette or ‘fraynot’ cotton fabric on each side.
When sewing complete, gently hammer the back into a round and then place between backing boards, screwed down tight. The backing begins with sharp strokes with the claw of the backing hammer about one third into the spine, and again on the other side, one third in.
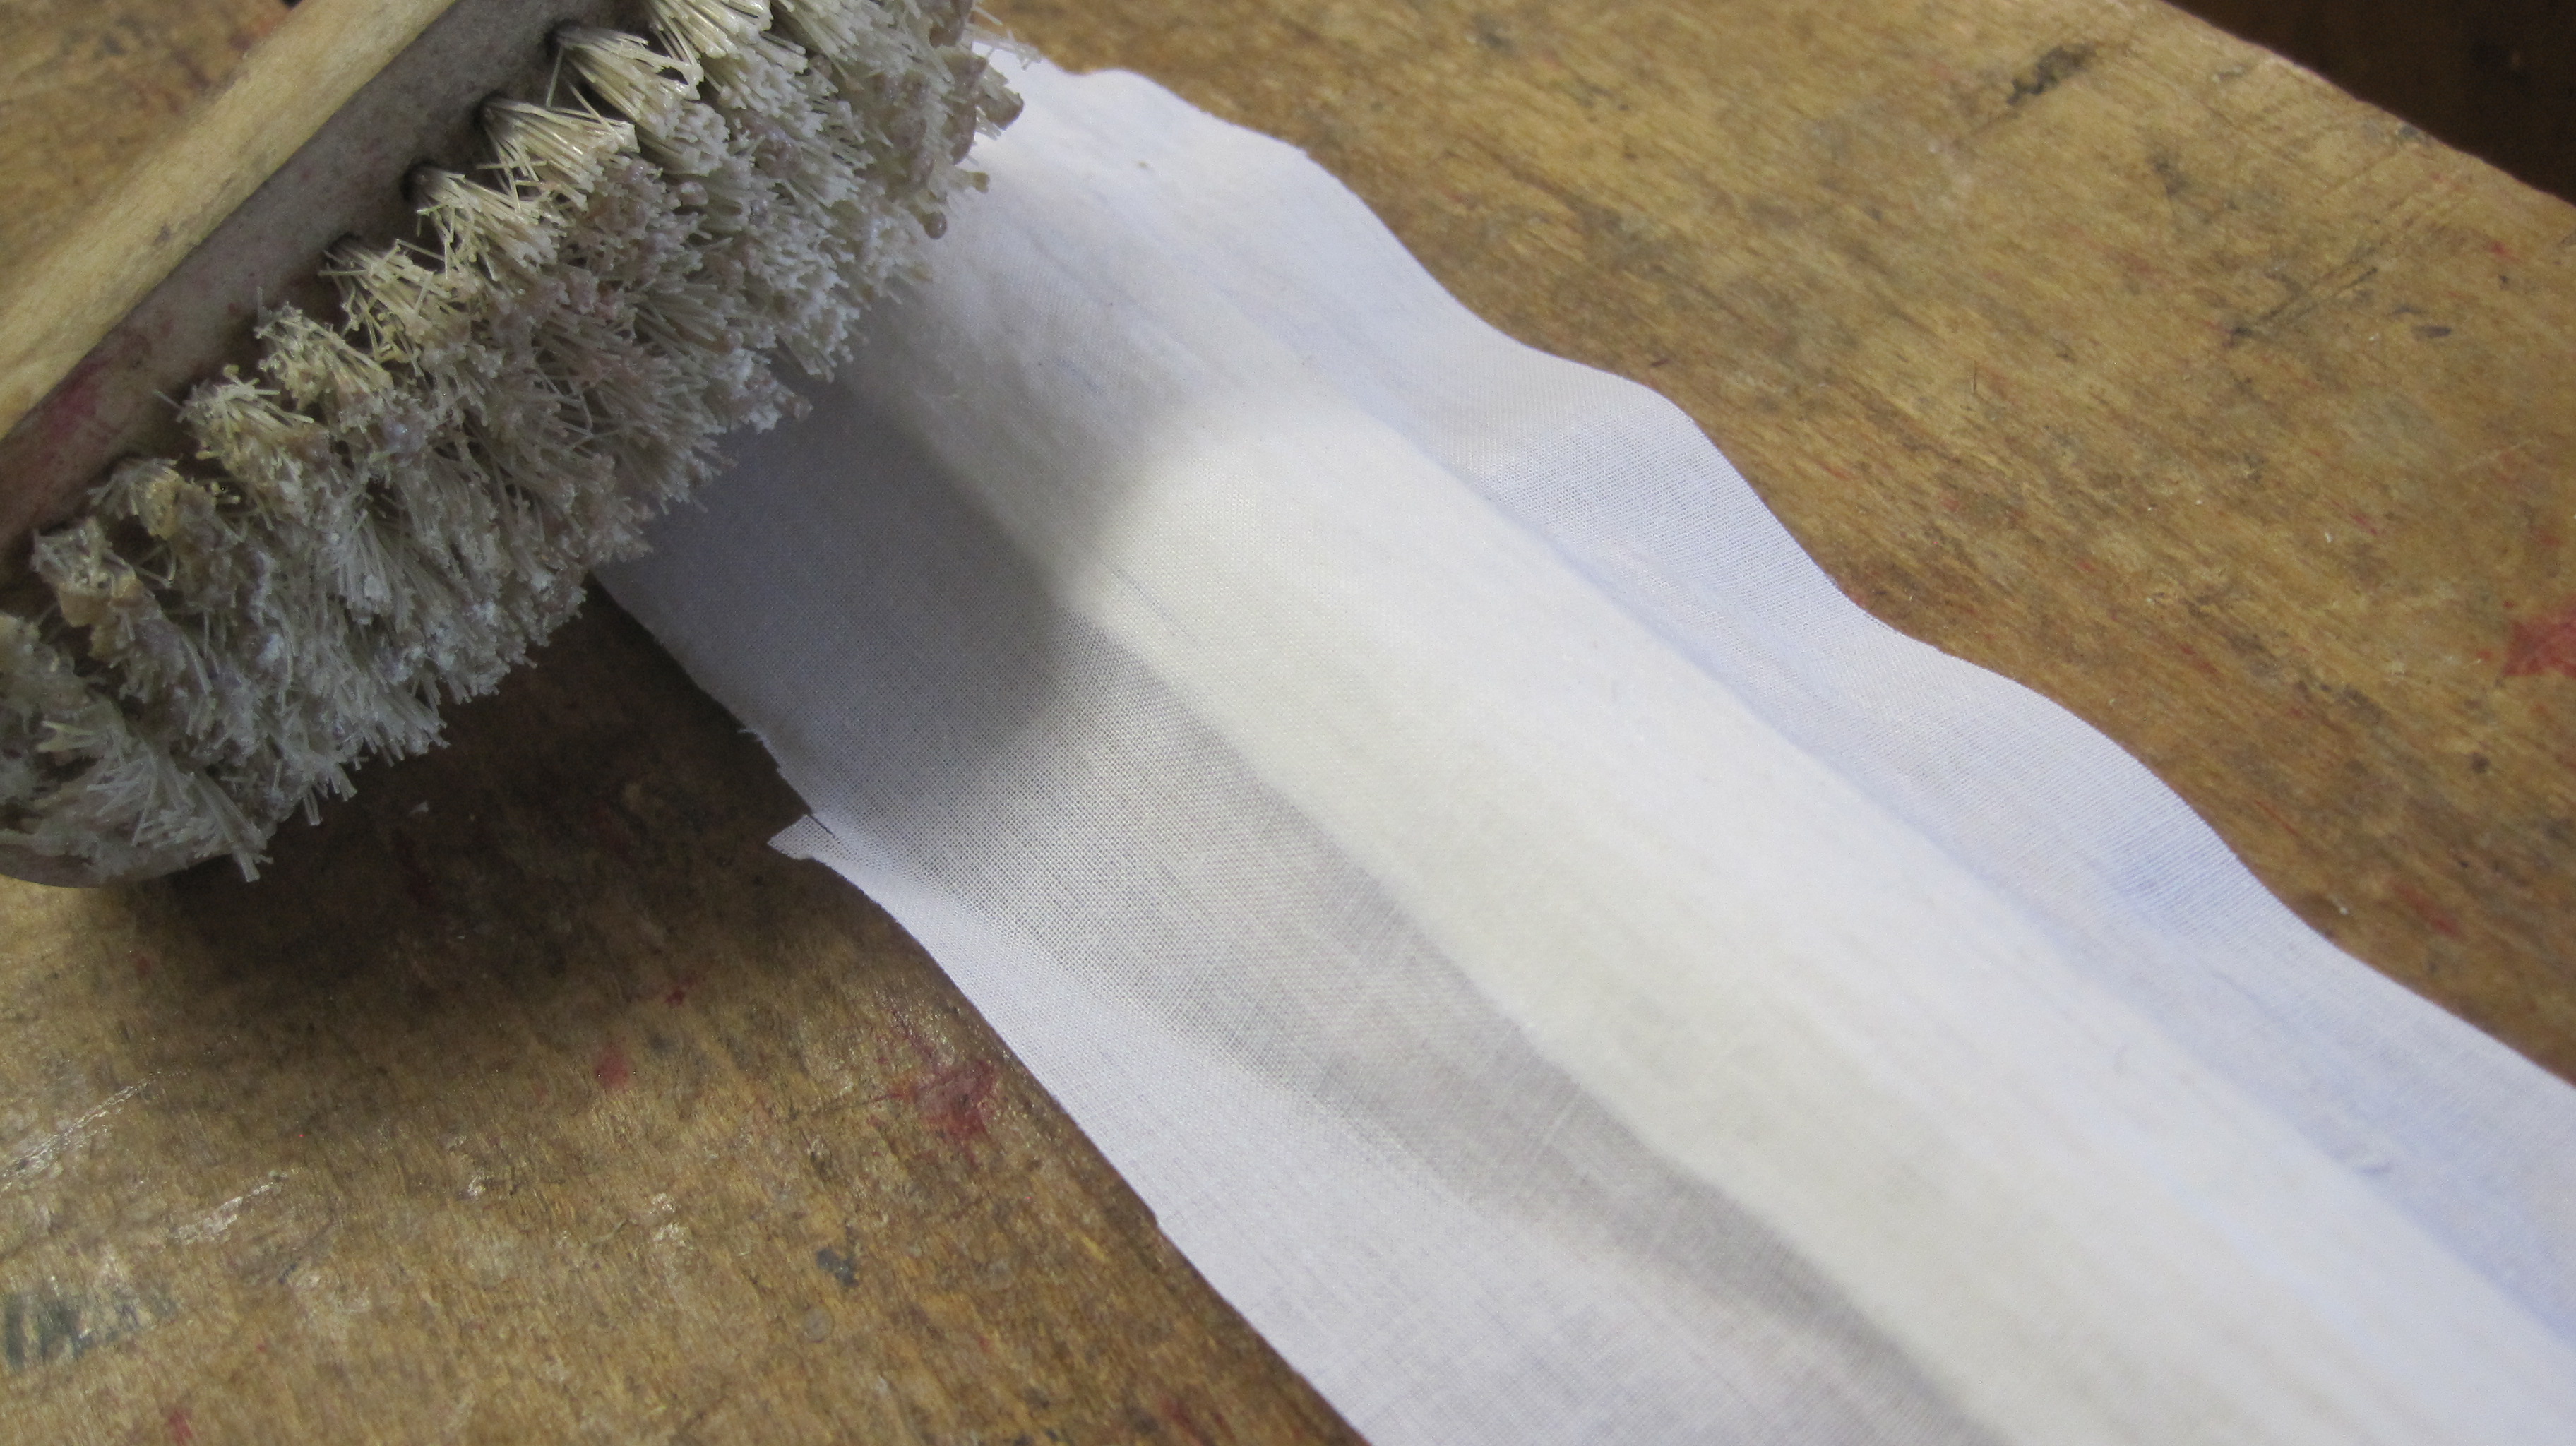
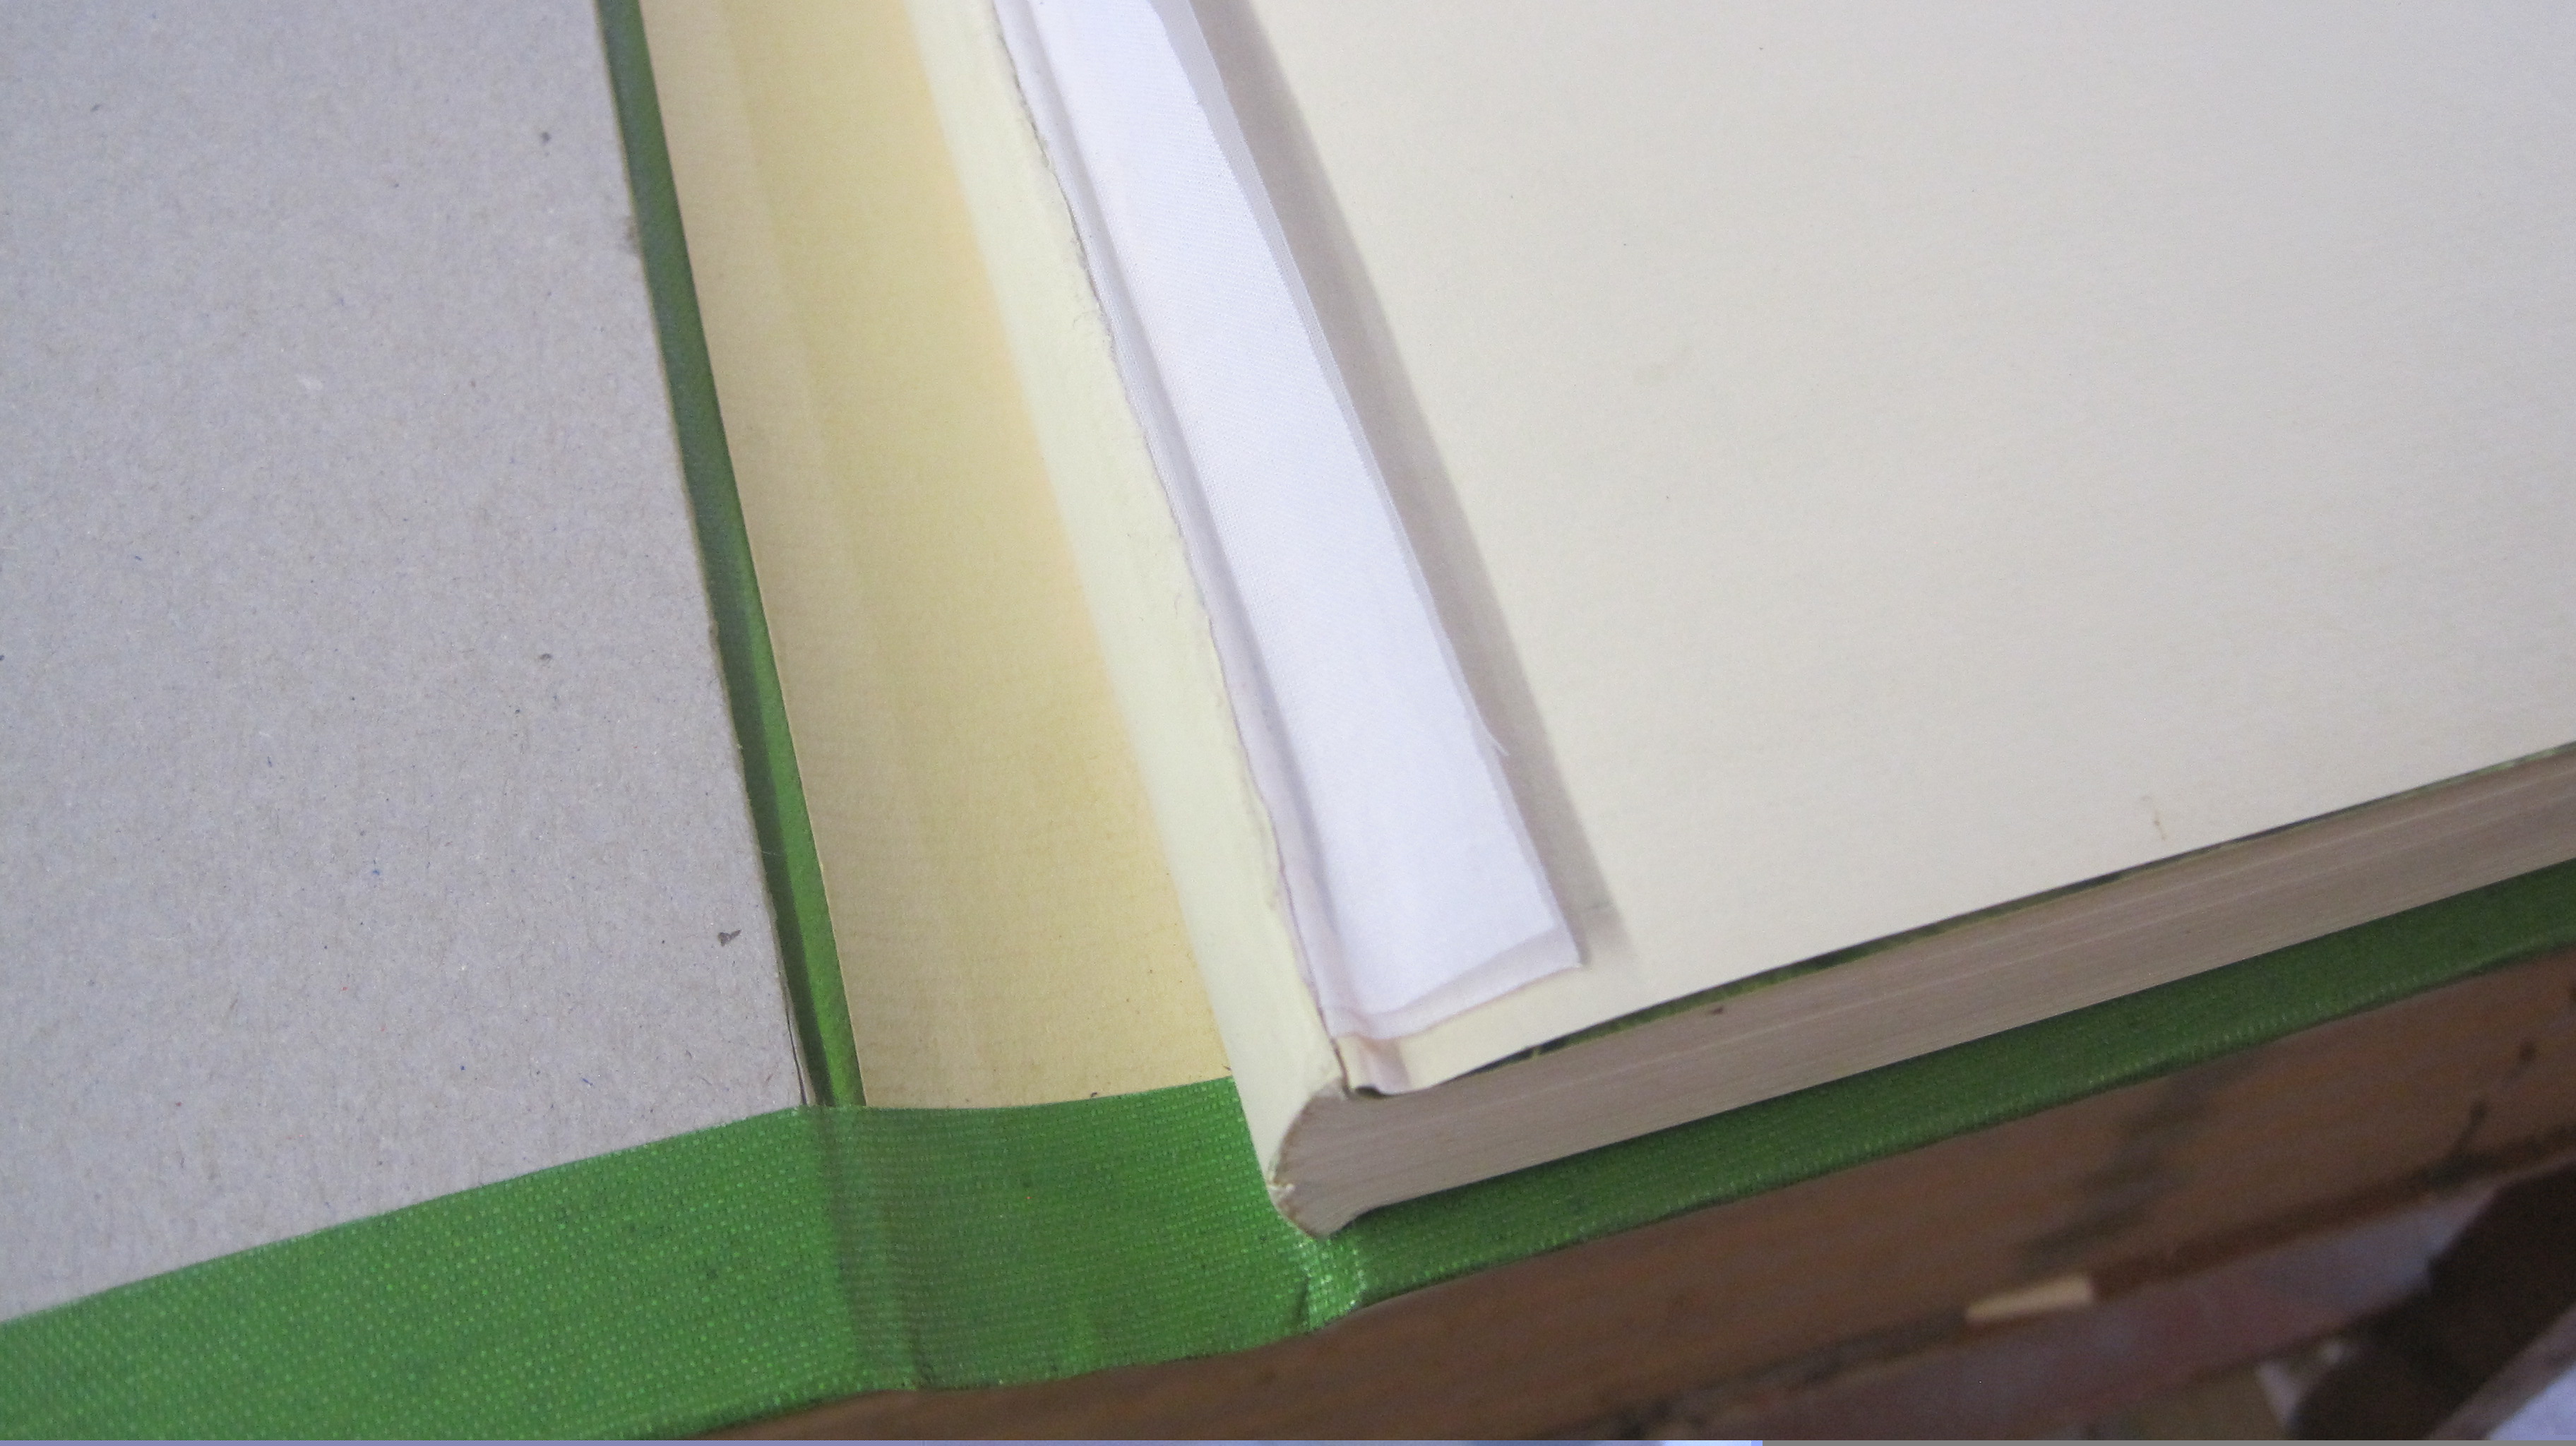
The first strokes with the claw – repeated on the other side before turning the hammer to the flat side and with glancing strokes working the back into an even curve. The depth of shoulder is the same as the position of the drilled holes. Leave the book where it is and glue a strip of fraynot along the spine with a 15mm overhang on each side. Tap it down with a bristle brush to ensure perfect adhesion – much better than rubbing with a bone folder.The overhang combines with the previously sewn strips (after they have been glued up the shoulder and turned down again) to prevent that ‘returned cloth joint’ (see previous post about Help for the Unhinged) pulling away after the case is put on.
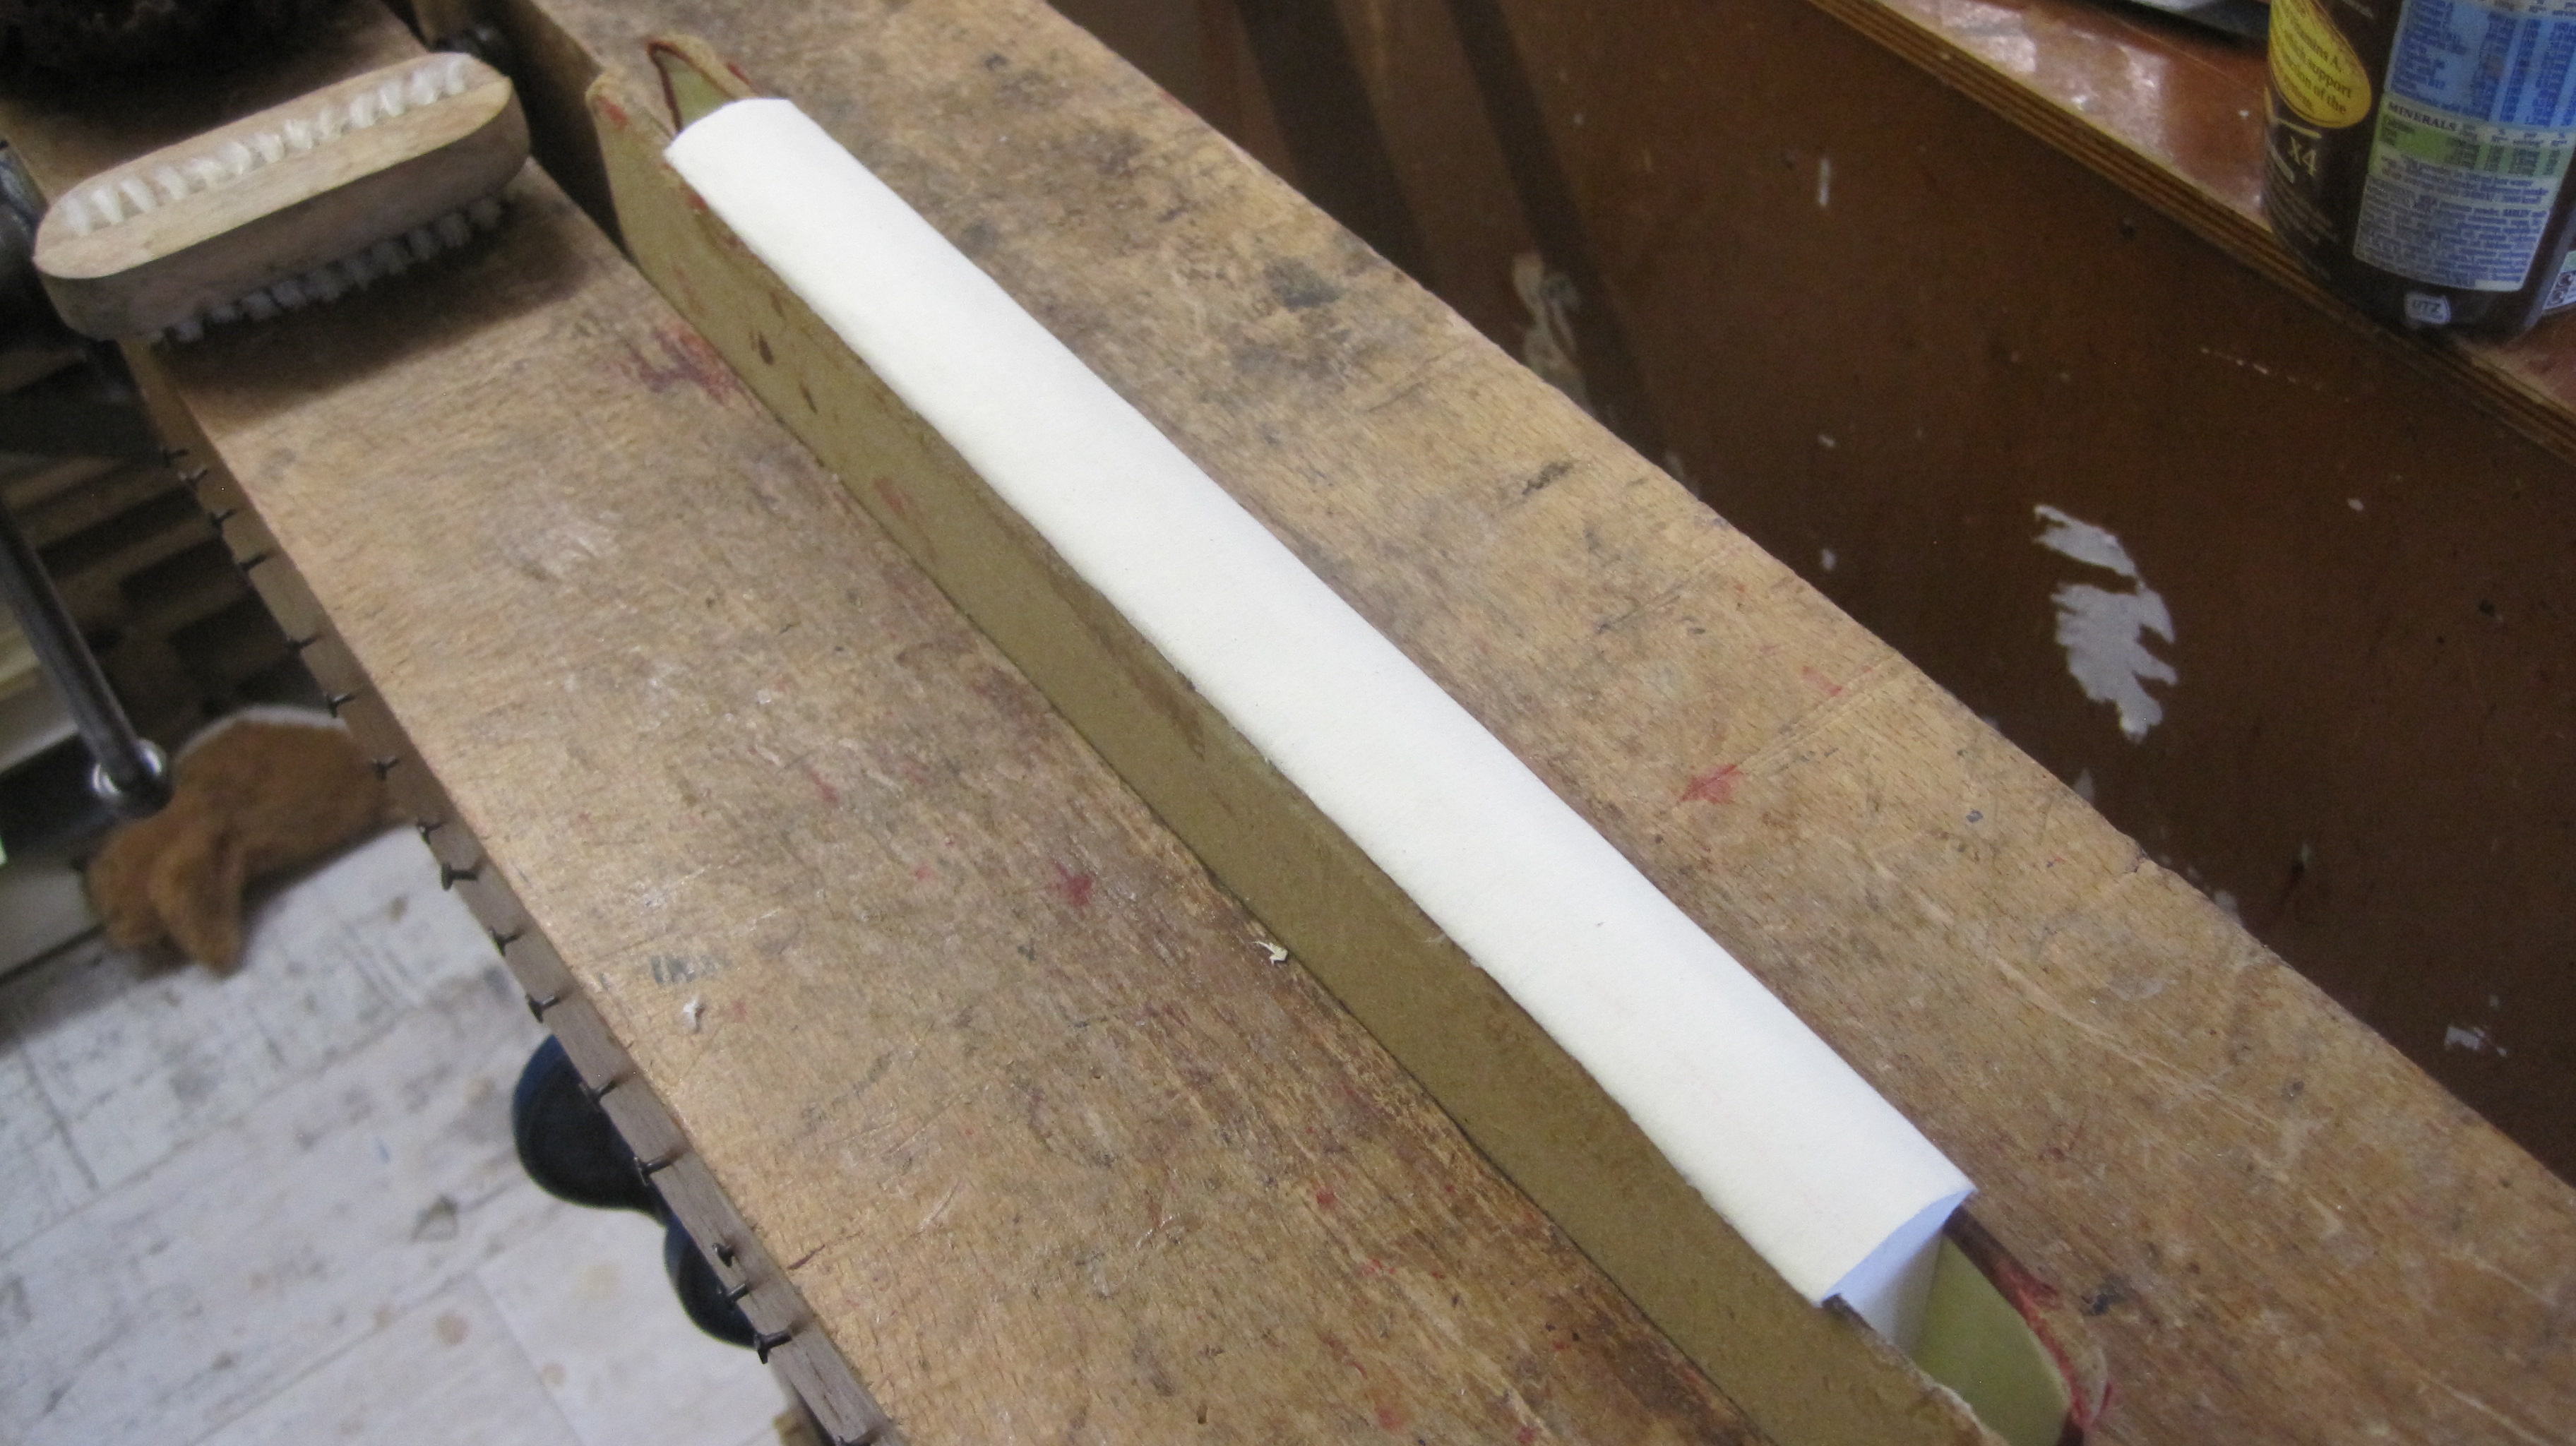
Now glue two separate strips of strong cartridge paper (at least 120gsm) along the spine, letting the first dry thoroughly. Again, tap down with a bristle brush. Now you can release the book from the backing boards as the spine is now set in the curve achieved by backing.
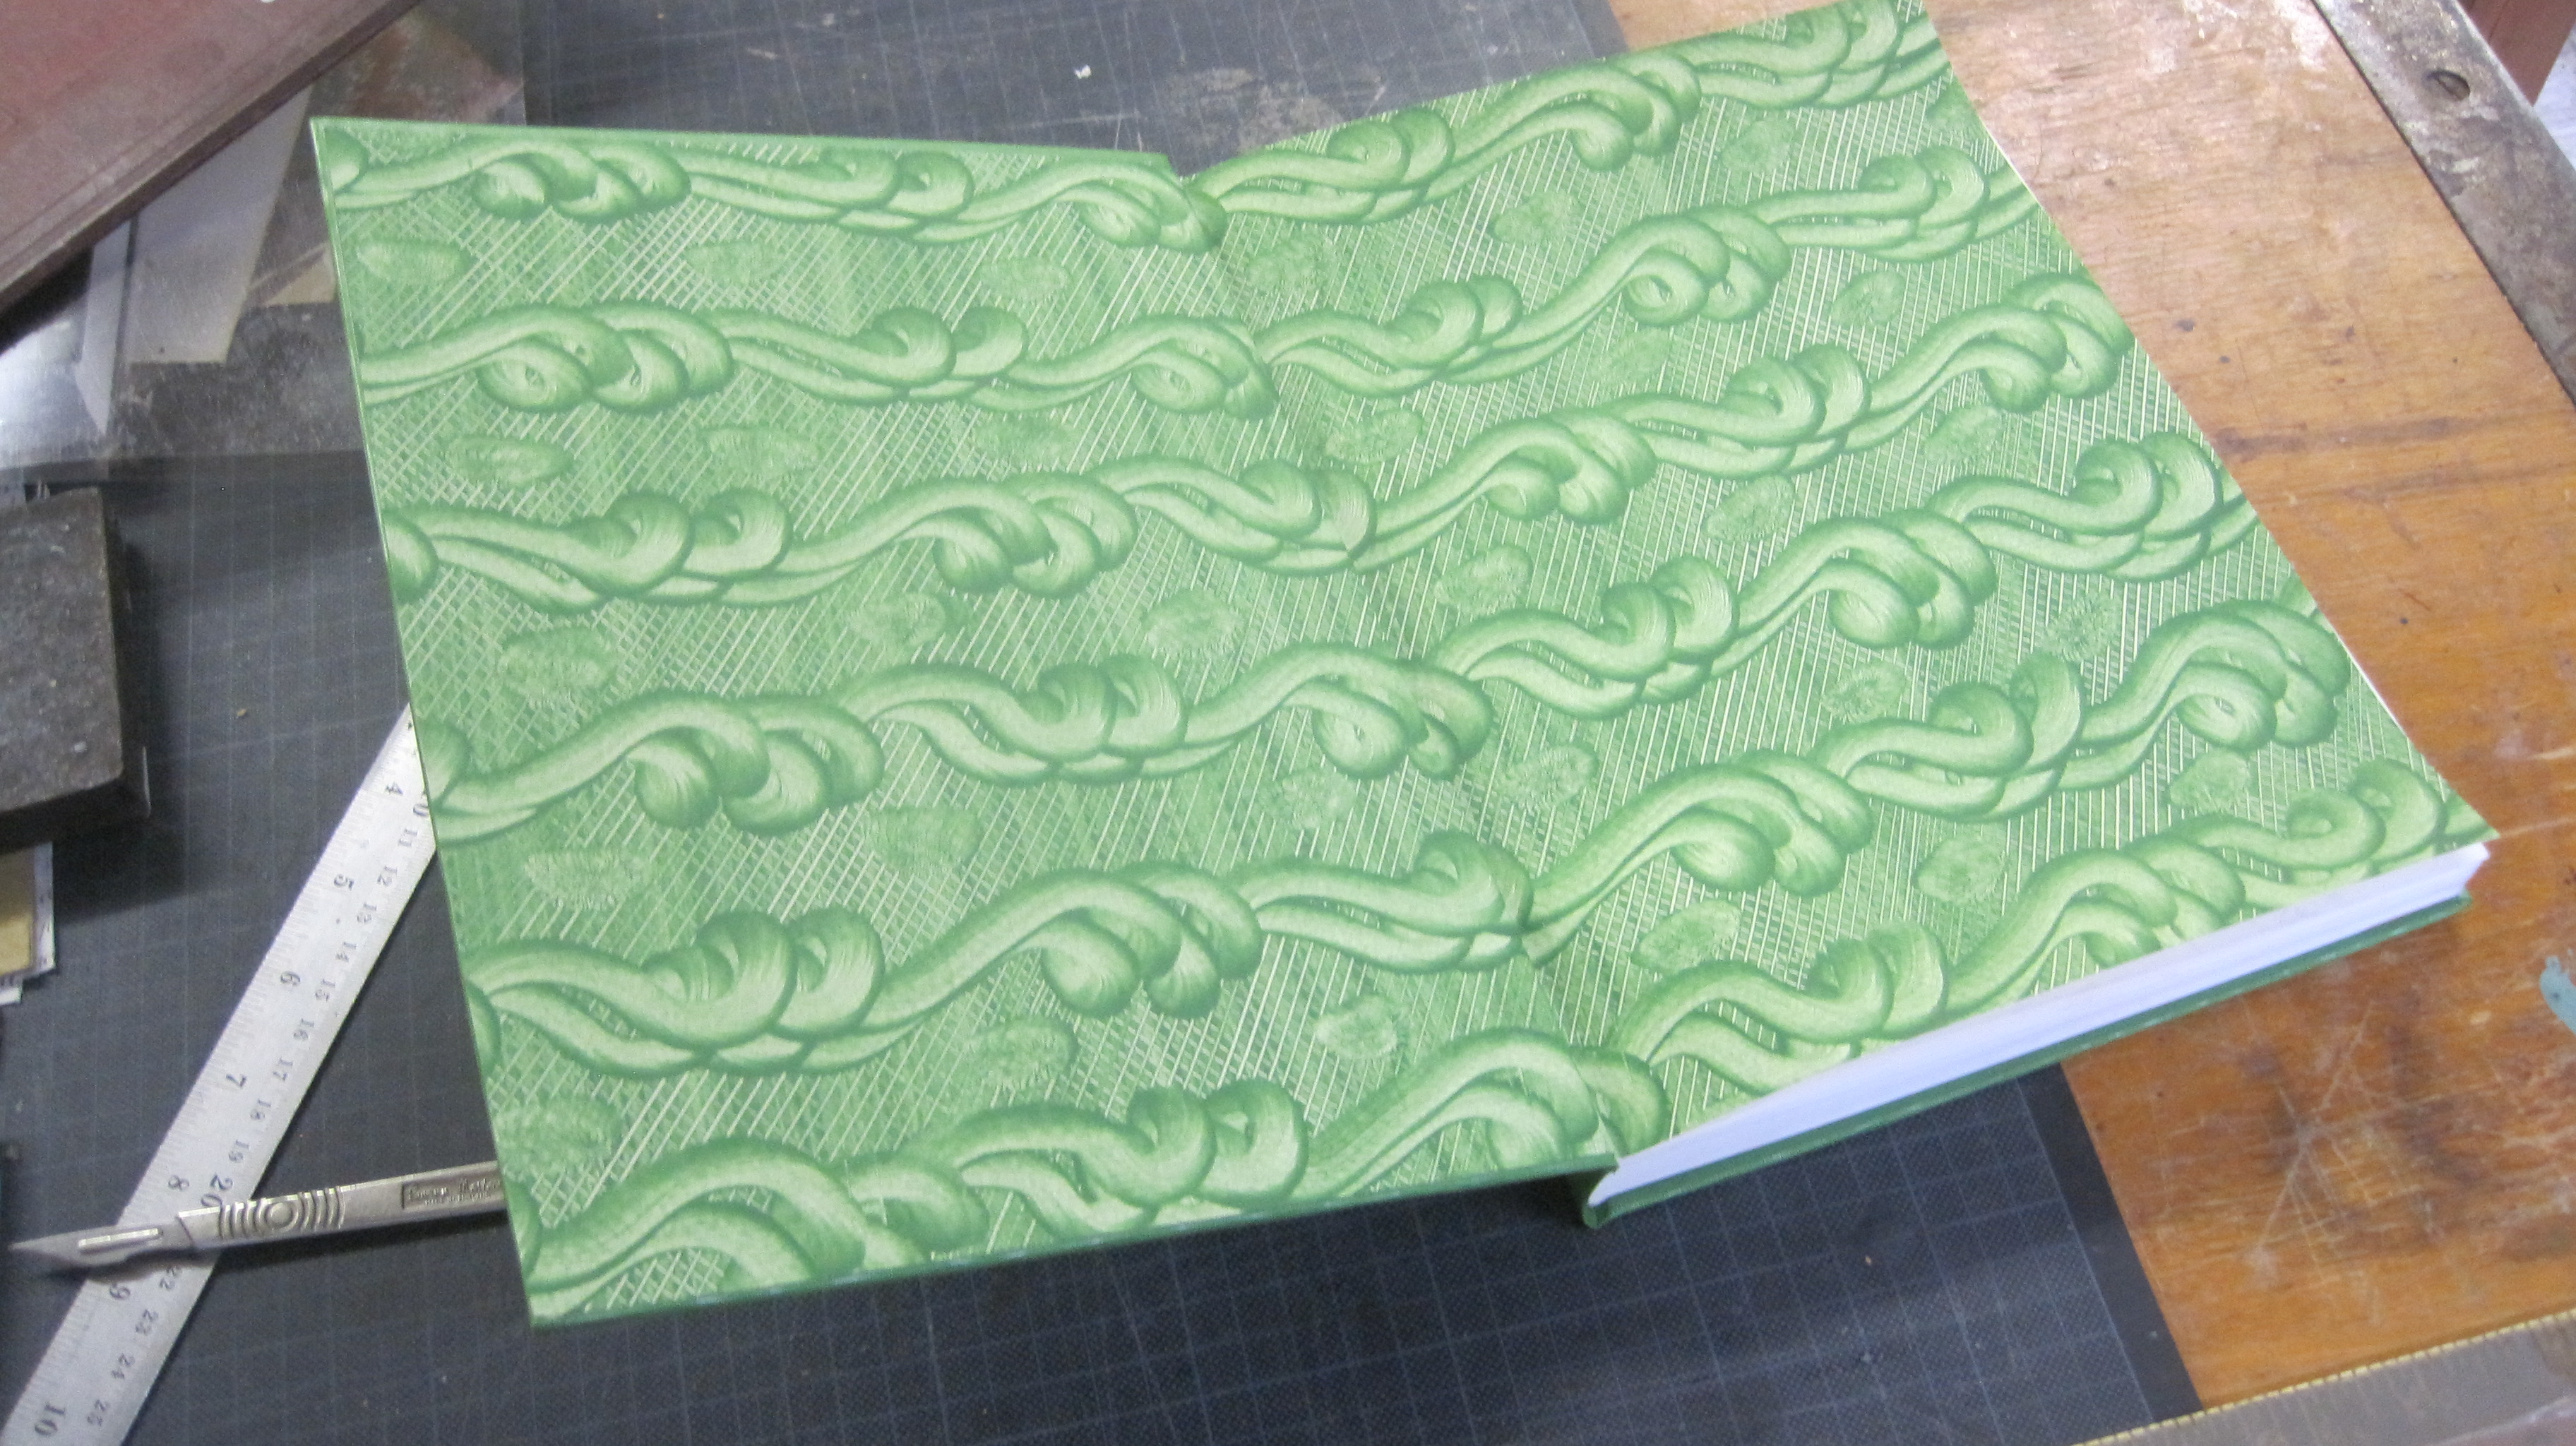
Now make a case. Buckram is an appropriate cloth in view of the long anticipated life of the finished book. Also, tip endpapers on to the shoulder each side. In this case I used a sheet of paste-paper that I have had for some years – it seemed appropriate to the ‘Creative’ title of the book.
Note the two thicknesses of cotton fabric – the top one ‘locks’ the turned-up fold of the lower one that was sewn on to the book so it can’t pull away.The paste-down is a little too wide and is trimmed off with a scalpel before the paste has set.
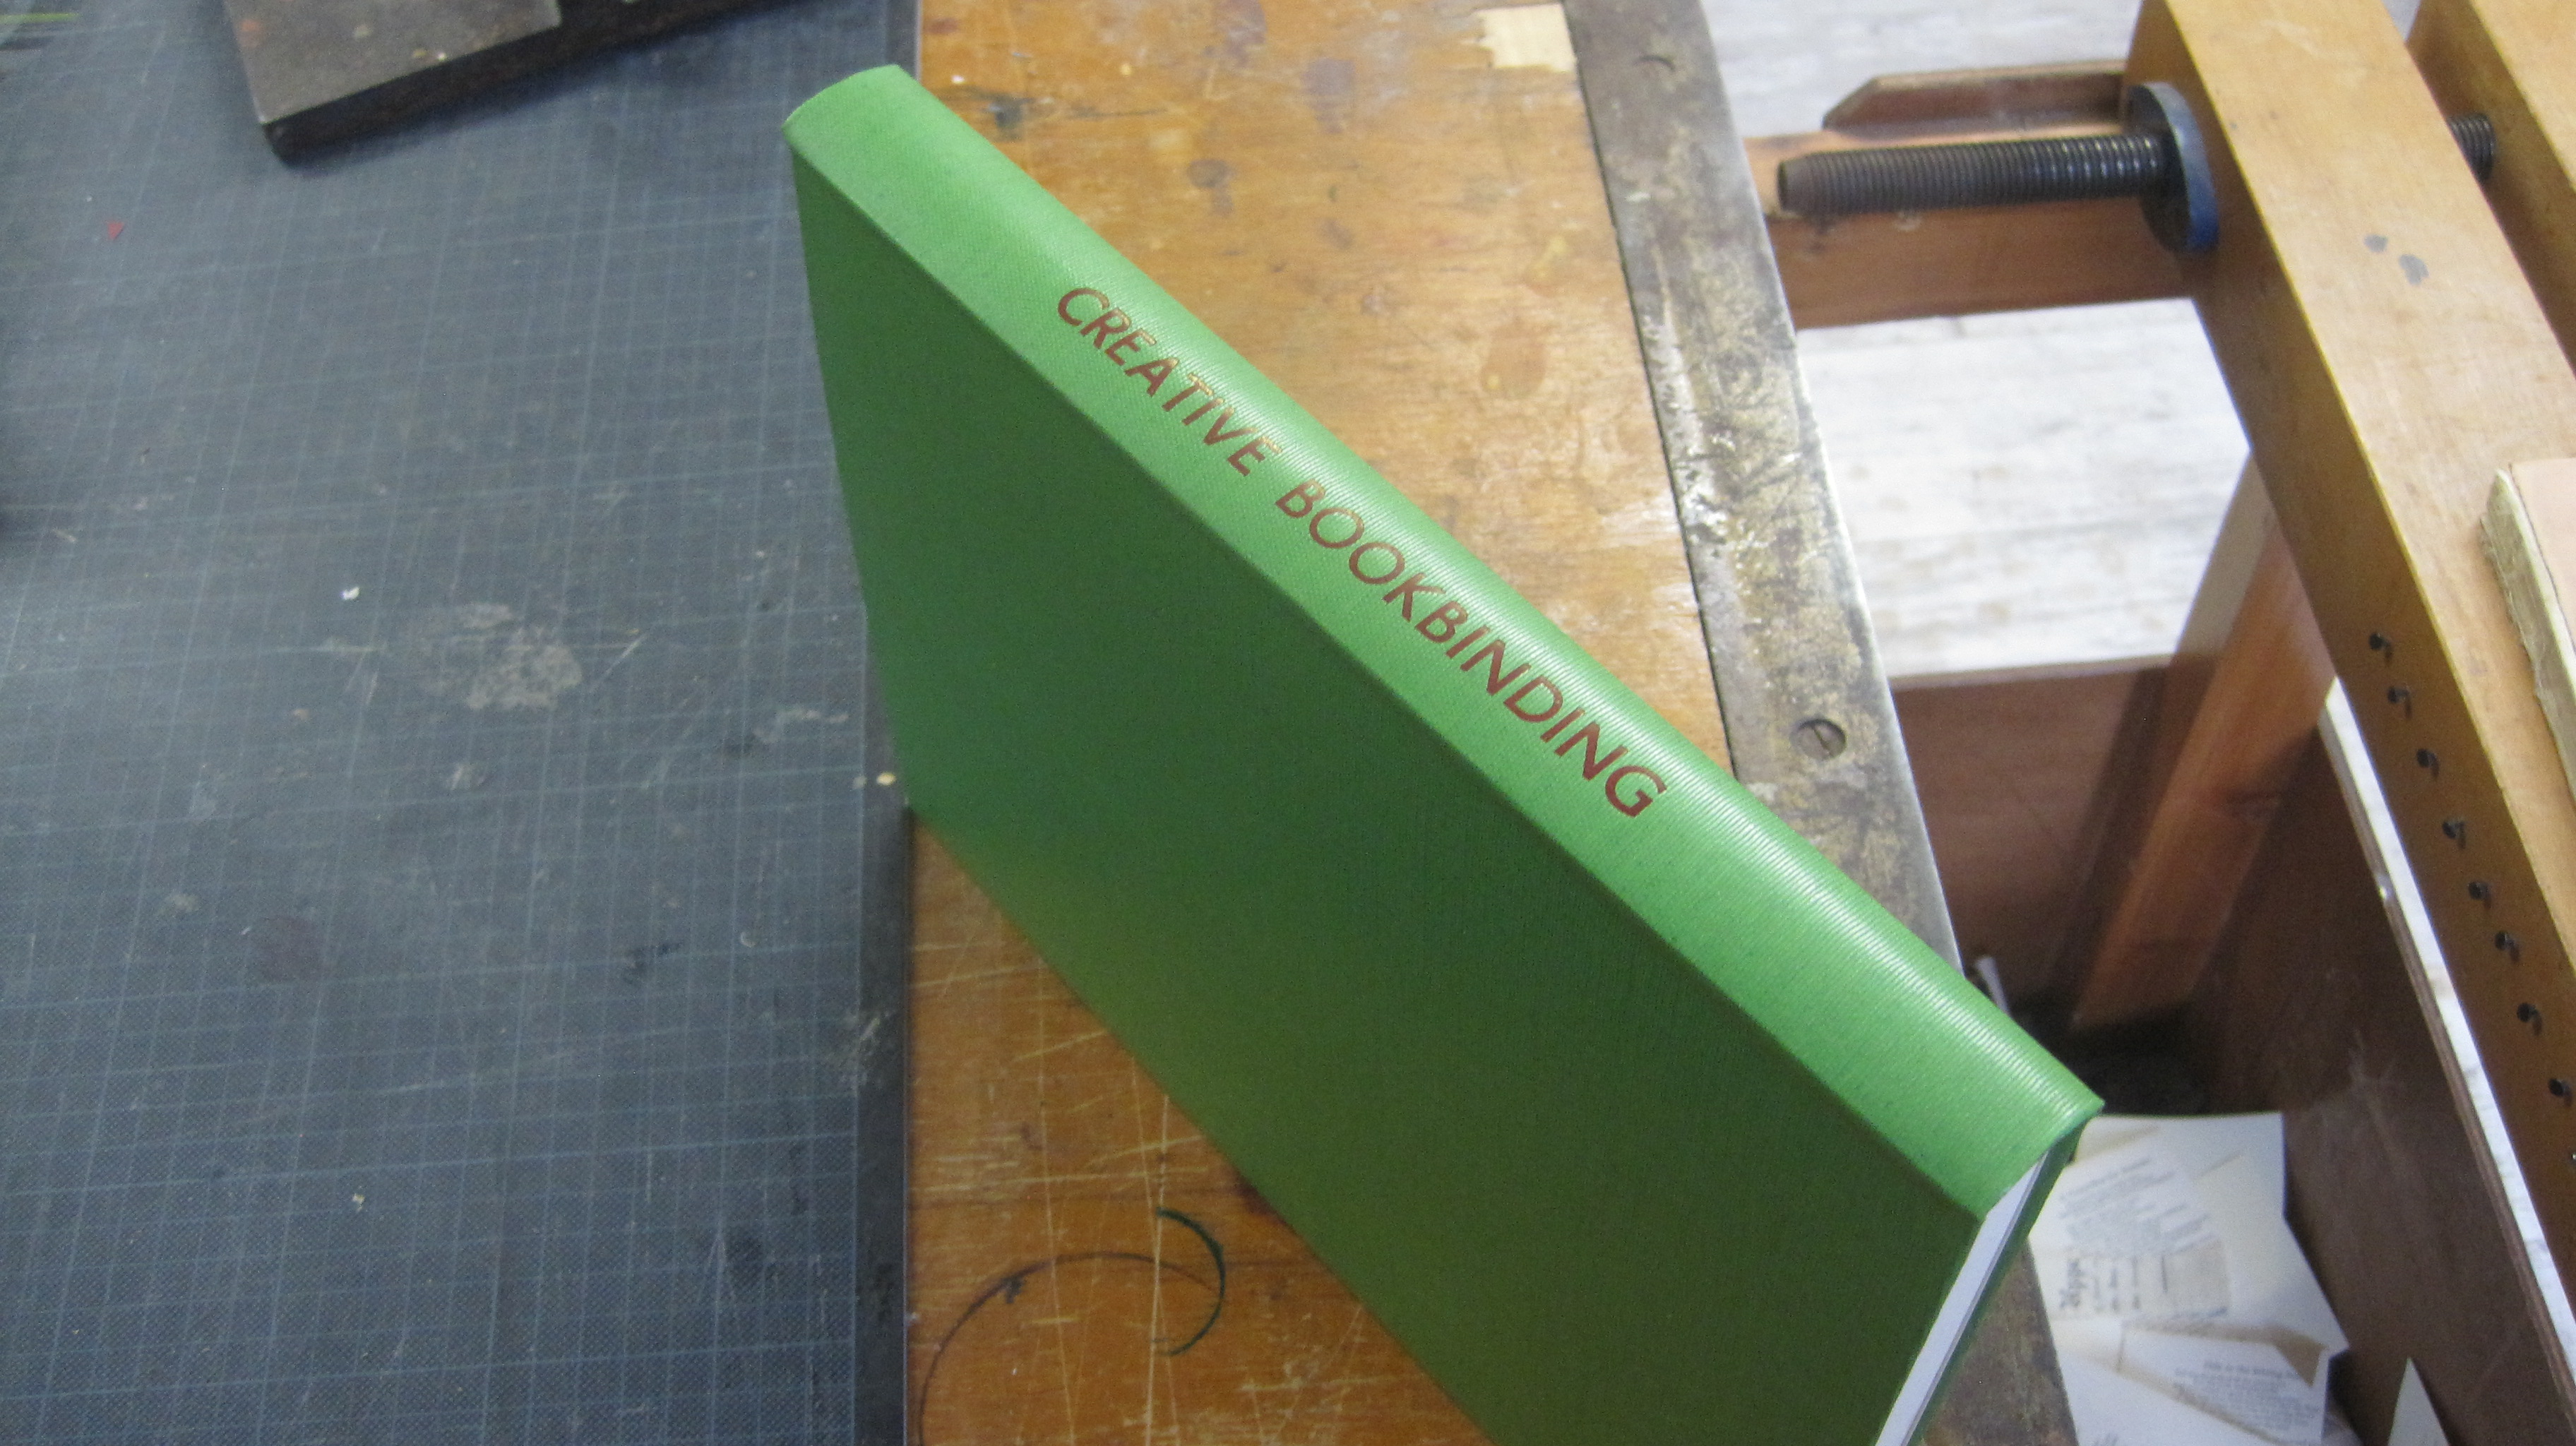
Title blocked with red foil using a 30-point sans serif font that I have hardly ever used in 20 years. It seemed right to give it an airing.
Job done. Will stand up to whatever use it is put to for many years.
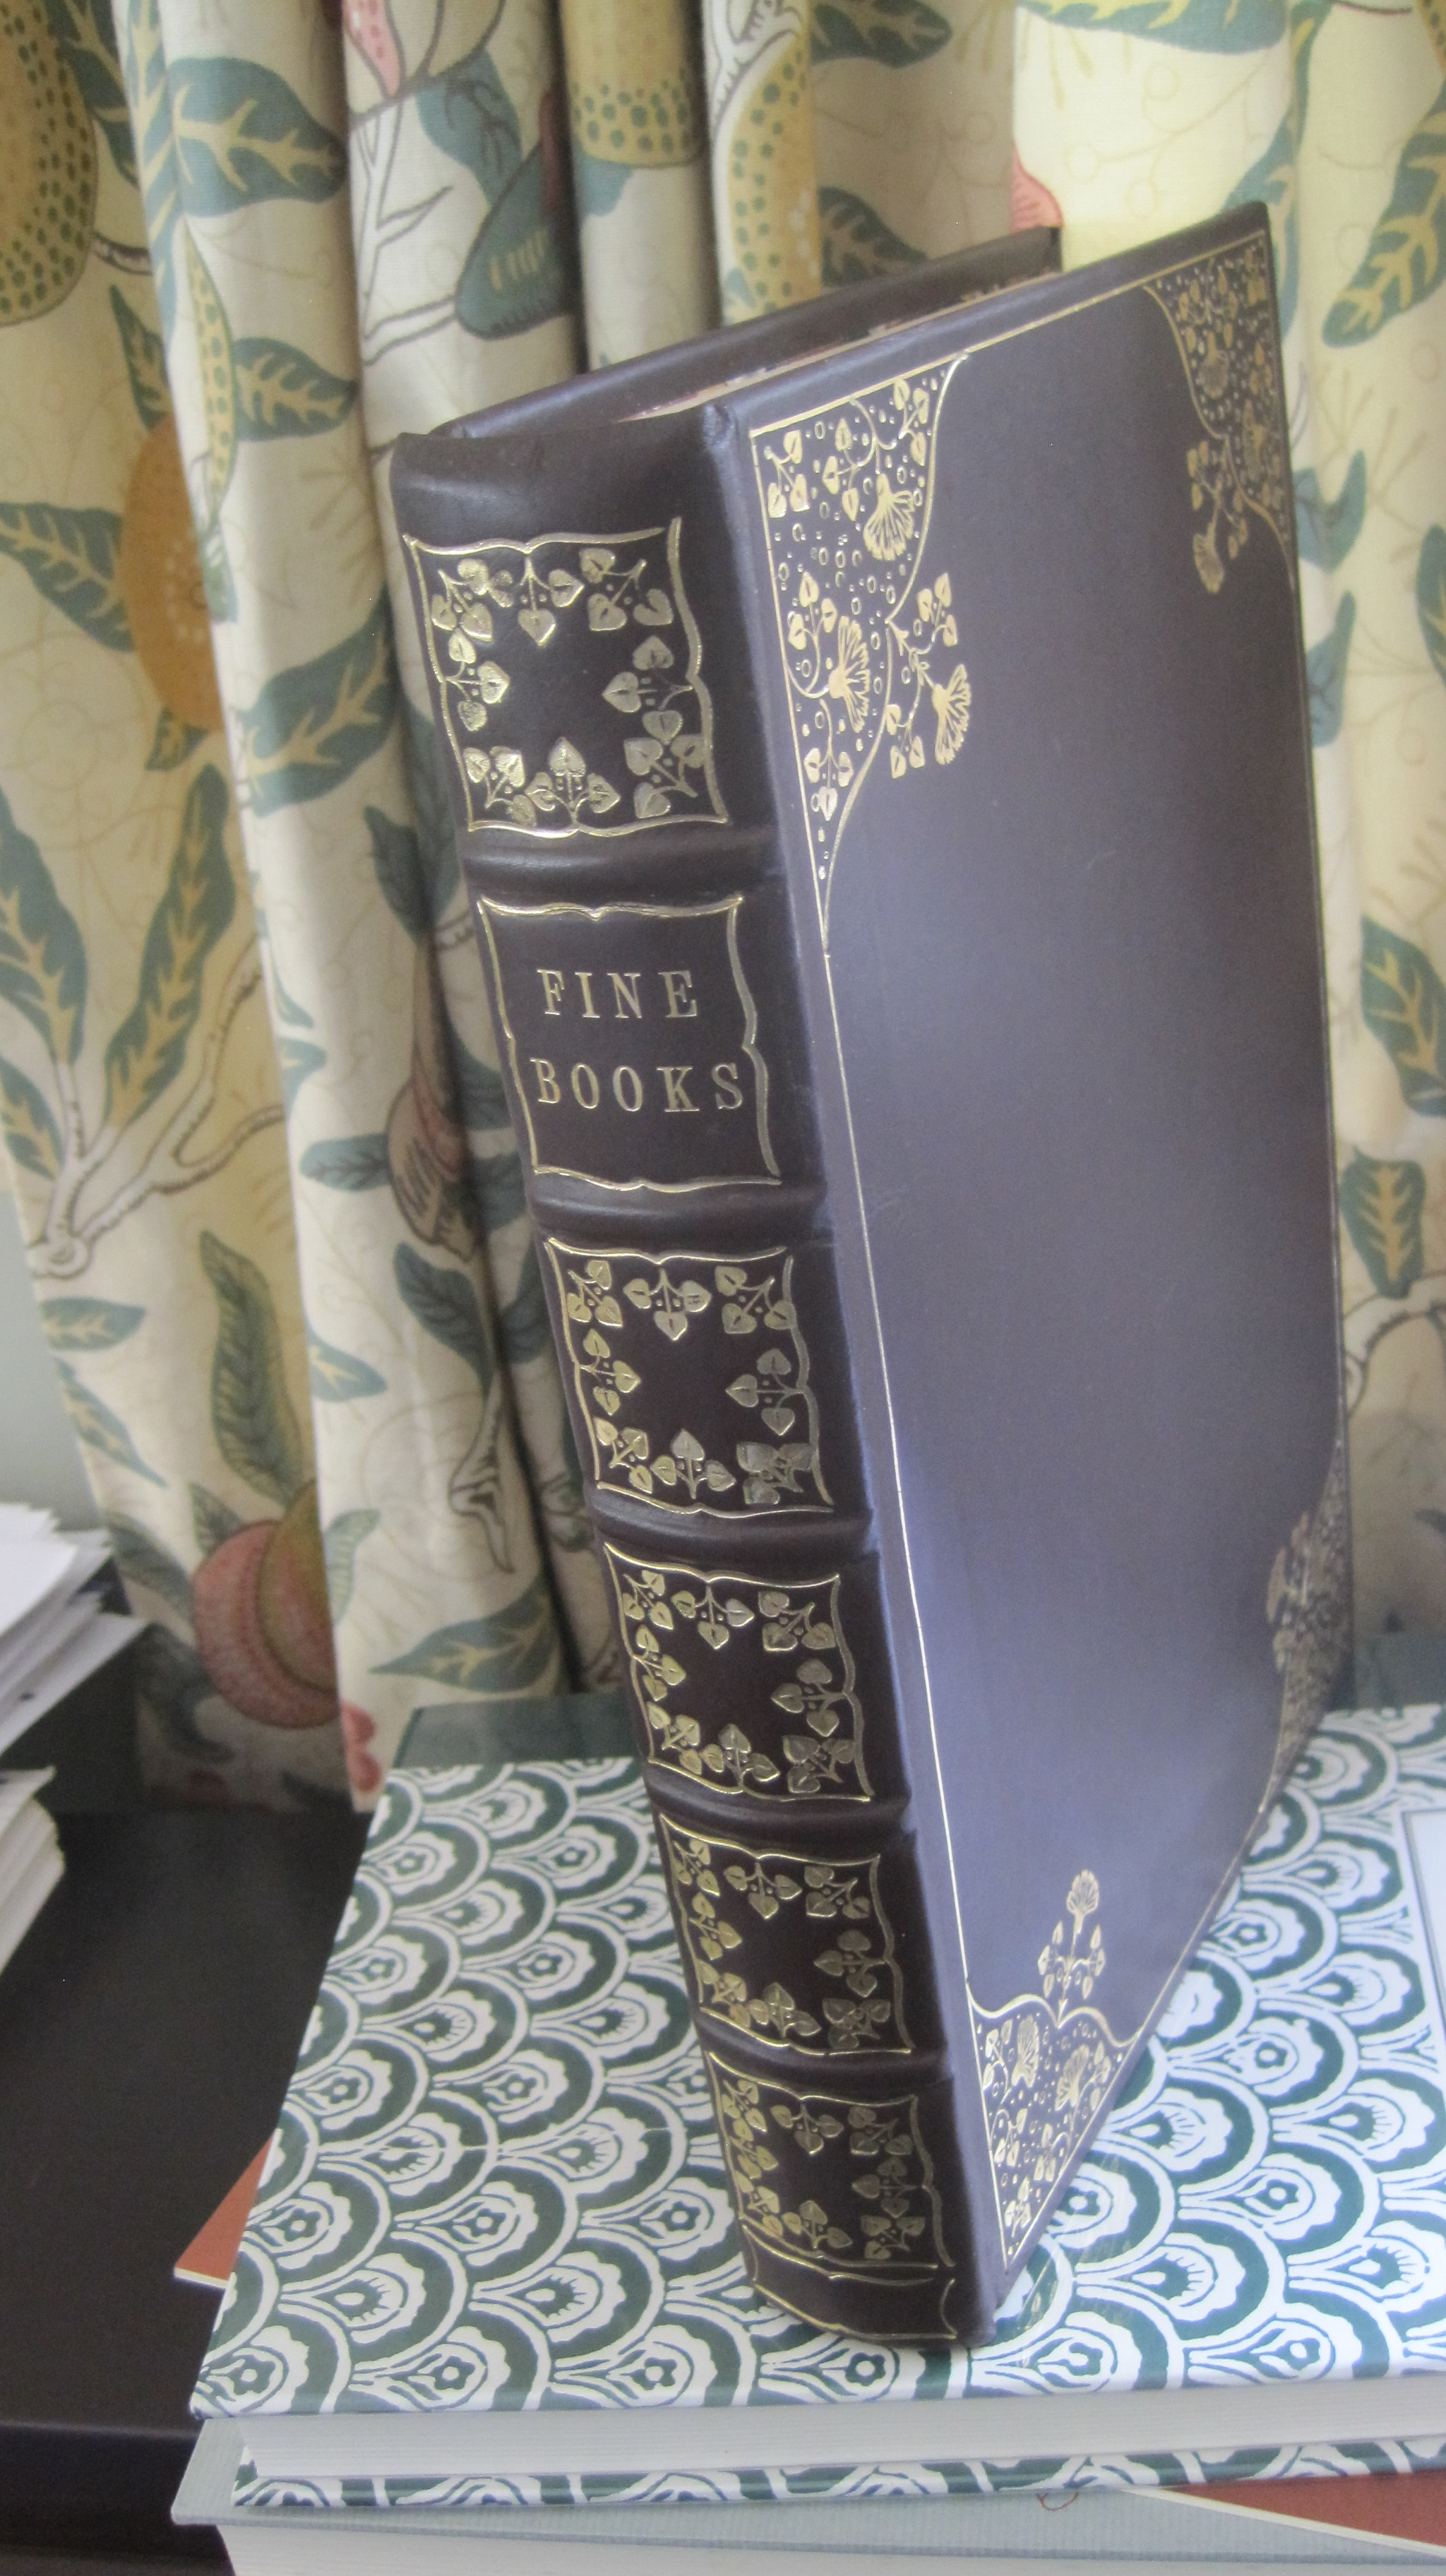
Alfred W Pollard was a distinguished bibliographer, Assistant Keeper of Books at the British Museum and Honorary Professor of Bibliography at Kings College, London. In 1912 Methuen published his study of early fine printing, ‘Fine Books’, in their Connoisseur’s Library series. Copies of the first edition sell for around £100 at present.
In 1973 a specialist re-print publisher, EP Publishing, issued a re-print, with a new introduction. The printing is fine, the paper quite acceptable and the binding (as far as sewing the sections together is concerned) perfectly sound. But the covers are a great disappointment – bright red cloth with unsuitable title lettering and then a cheap poorly designed dust-jacket. EP seems to have gone out of business.
Wrong lettering!
Now, this near-travesty was offered on a local booksellers bargain shelf for £1. So I bought it, took the covers off, sewed proper endbands at head and tail, put five false bands on a hollow spine and covered the book in dark brown calf. For a book published in 1912 originally a suitable decorative treatment could be along Doves Bindery, or Douglas Cockerell lines.
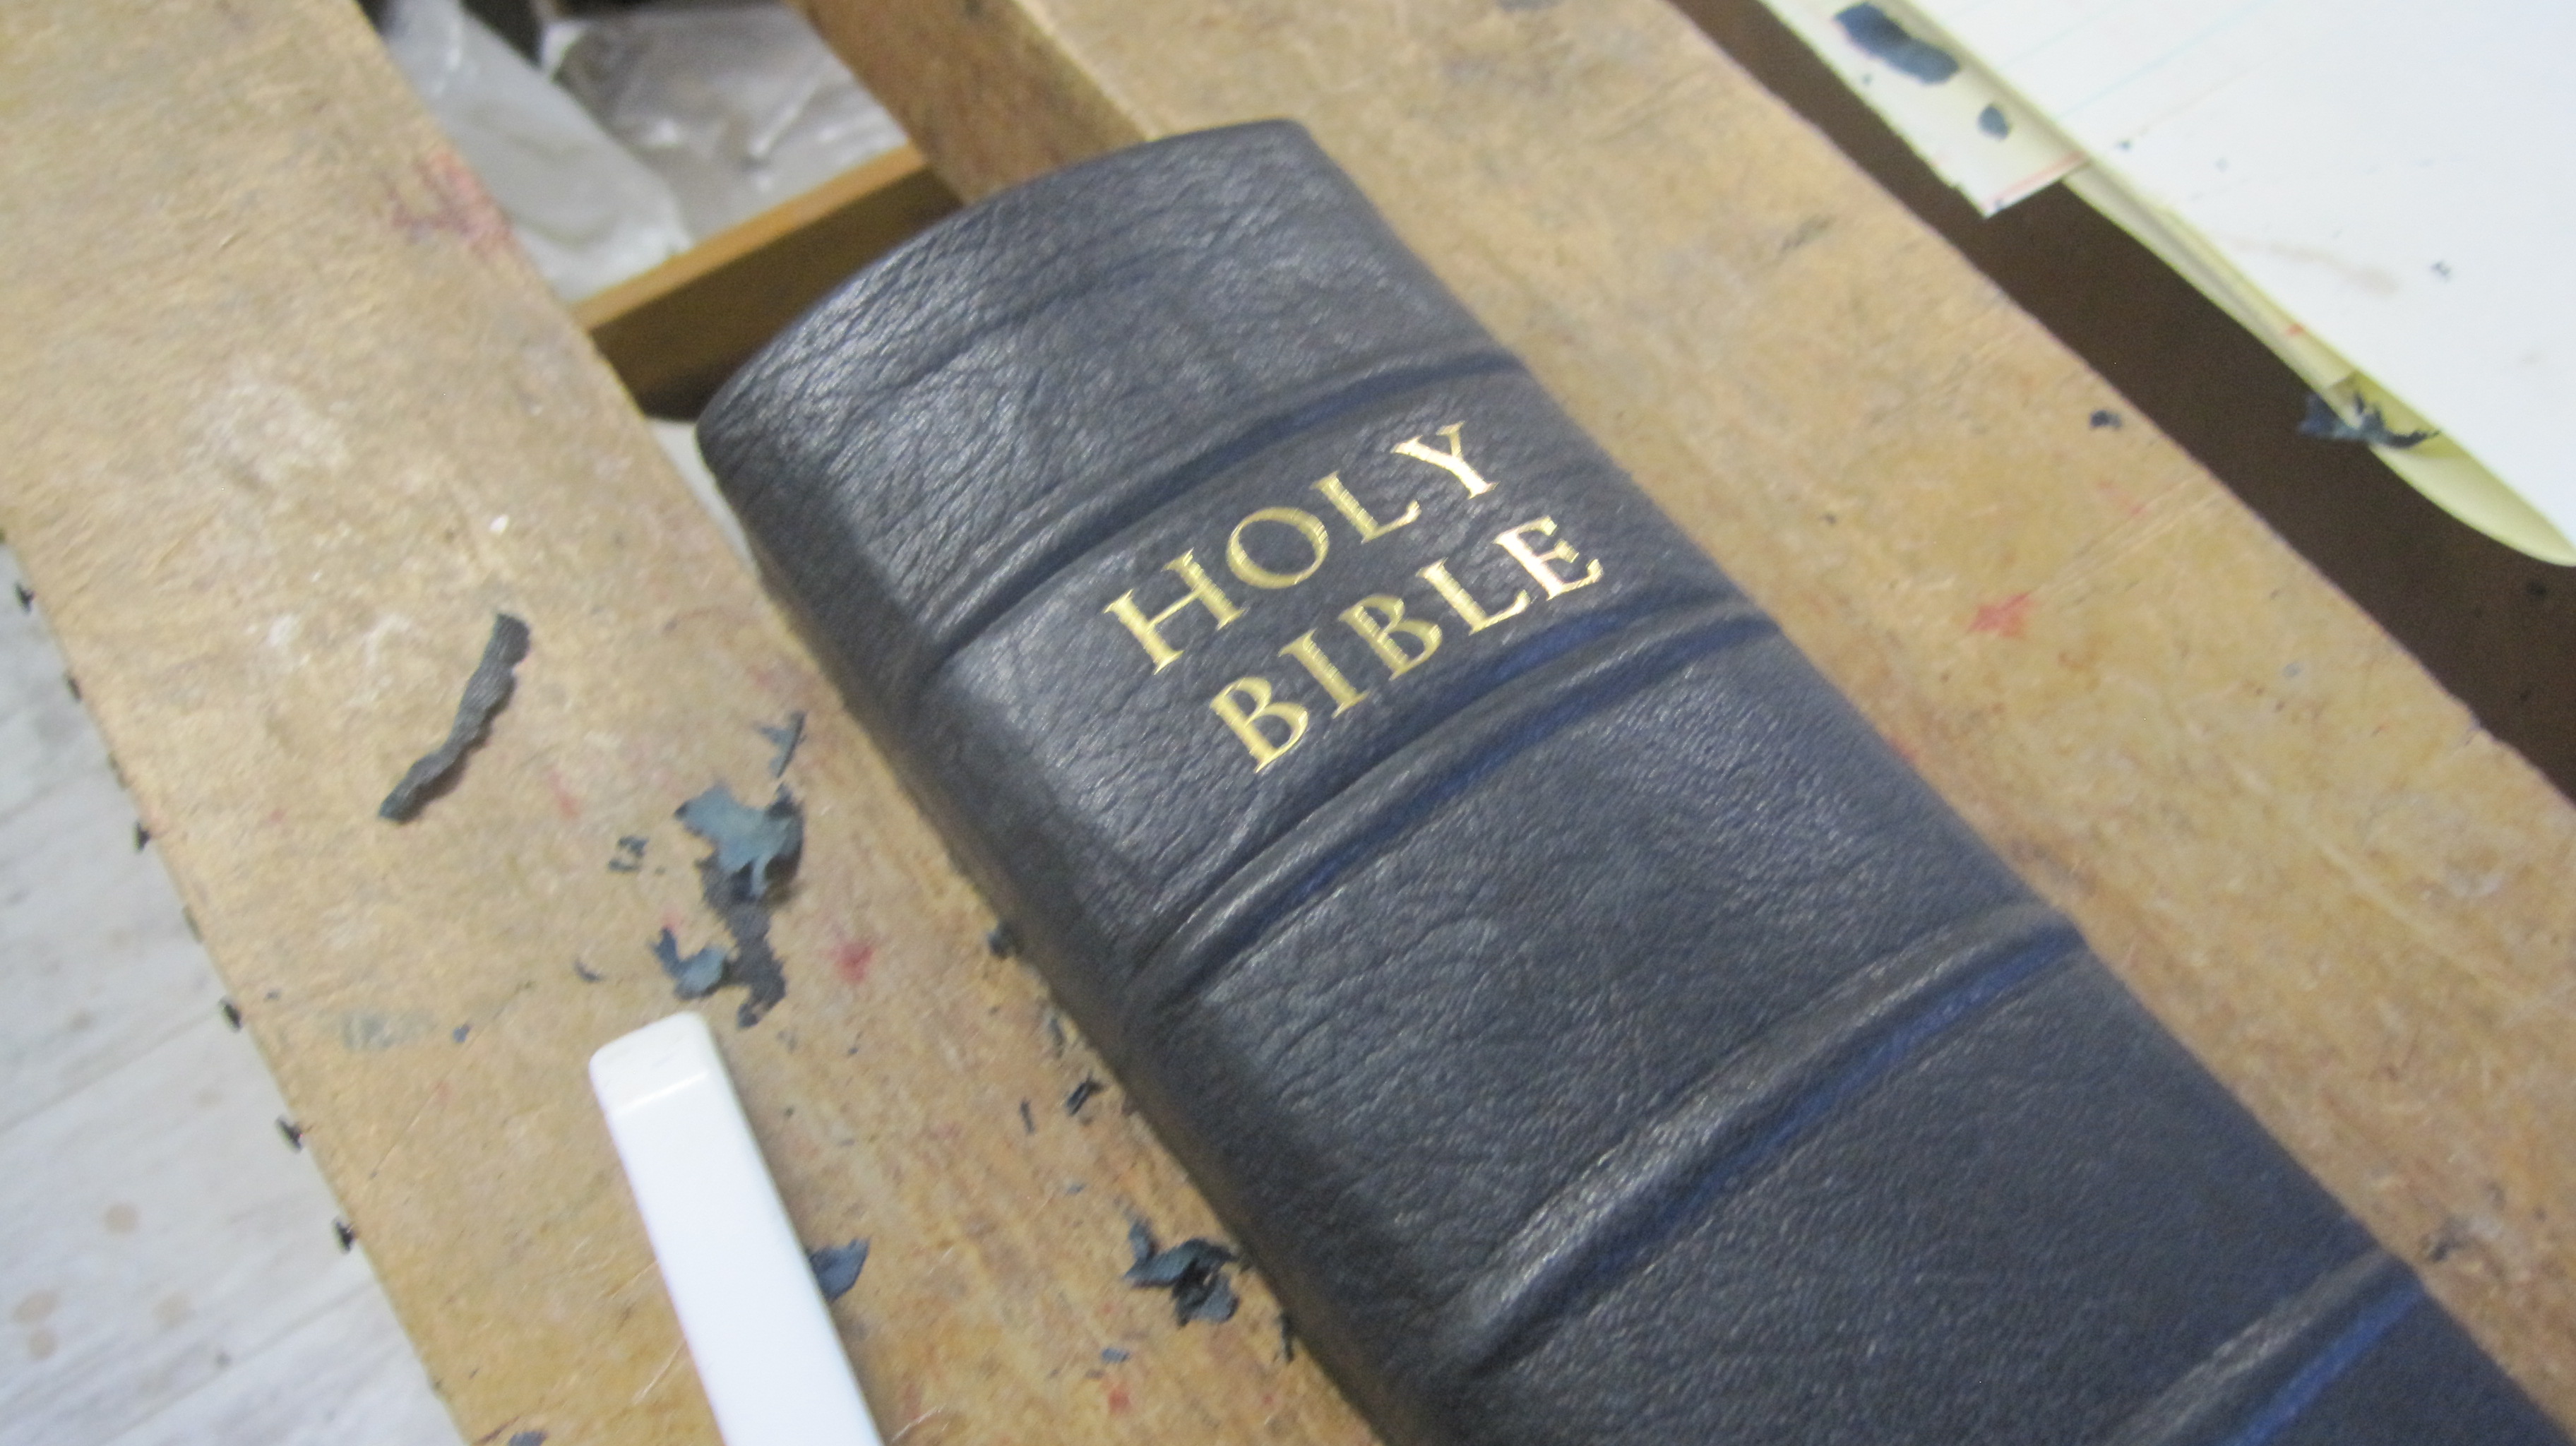
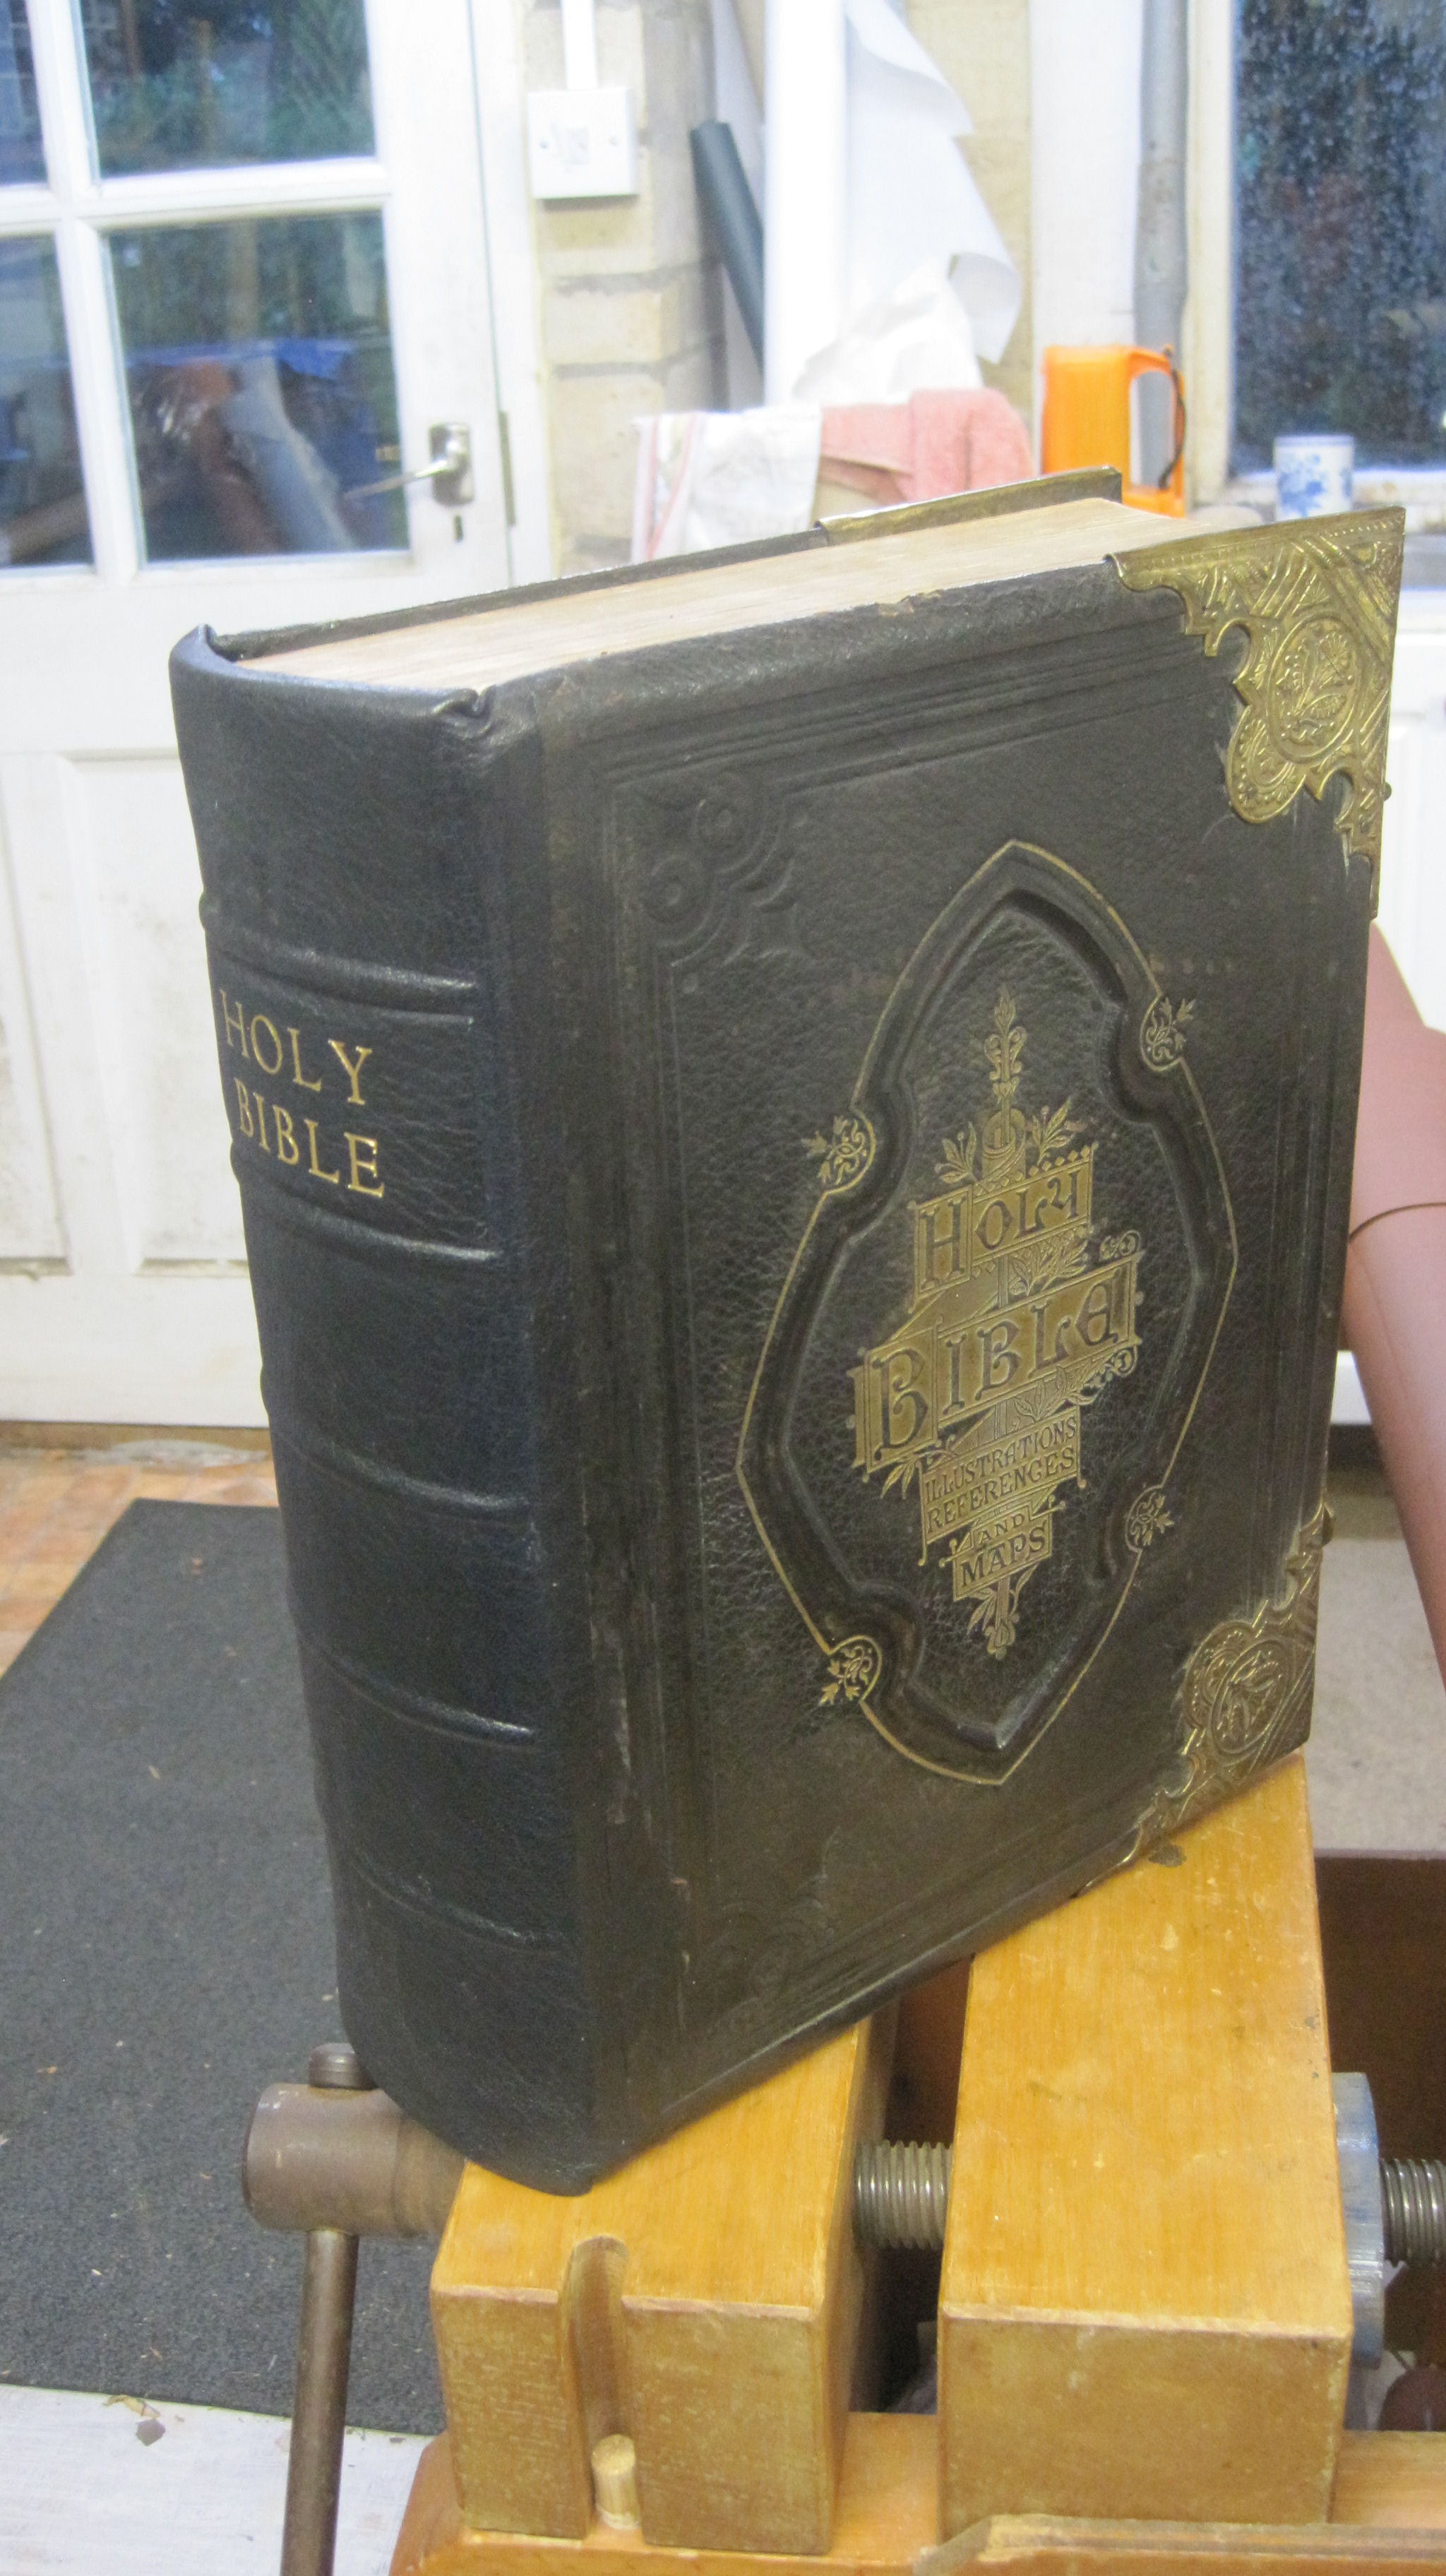
The last Family Bible I repaired, about a year ago, cost the owner £50. A bargain, but I just about covered my costs. A month ago another proud owner brought his Family Bible in to my workshop. It looked much the same as the previous one – boards detached, spine leather perished, old patch repair to one hinge – so I quoted £50, approximately.
How wrong I was! When I started work on it a fortnight ago two big differences emerged: first, the front board was badly warped and would have to be flattened, and, second, the spine was very heavily glued and lined with the hardest animal glue I have ever come across.
Flattening the front board is simple but takes time and ties up a nipping press for several days. You have to support the perimeter of the board with something solid (I use pieces of aluminium furniture from my blocking press) and then depress the outward bow in a nipping press with other solid pieces in the middle. Wet the surface of the outward bow first, screw the press down so as to reverse the distortion and leave it for a couple of days at least to dry completely in its new shape. It will recover a bit of its previous shape when released from the press so should end up quite flat. This time it came out right first time, but on other occasions a second or even third treatment has been required.
While the board was setting I could begin on the spine.
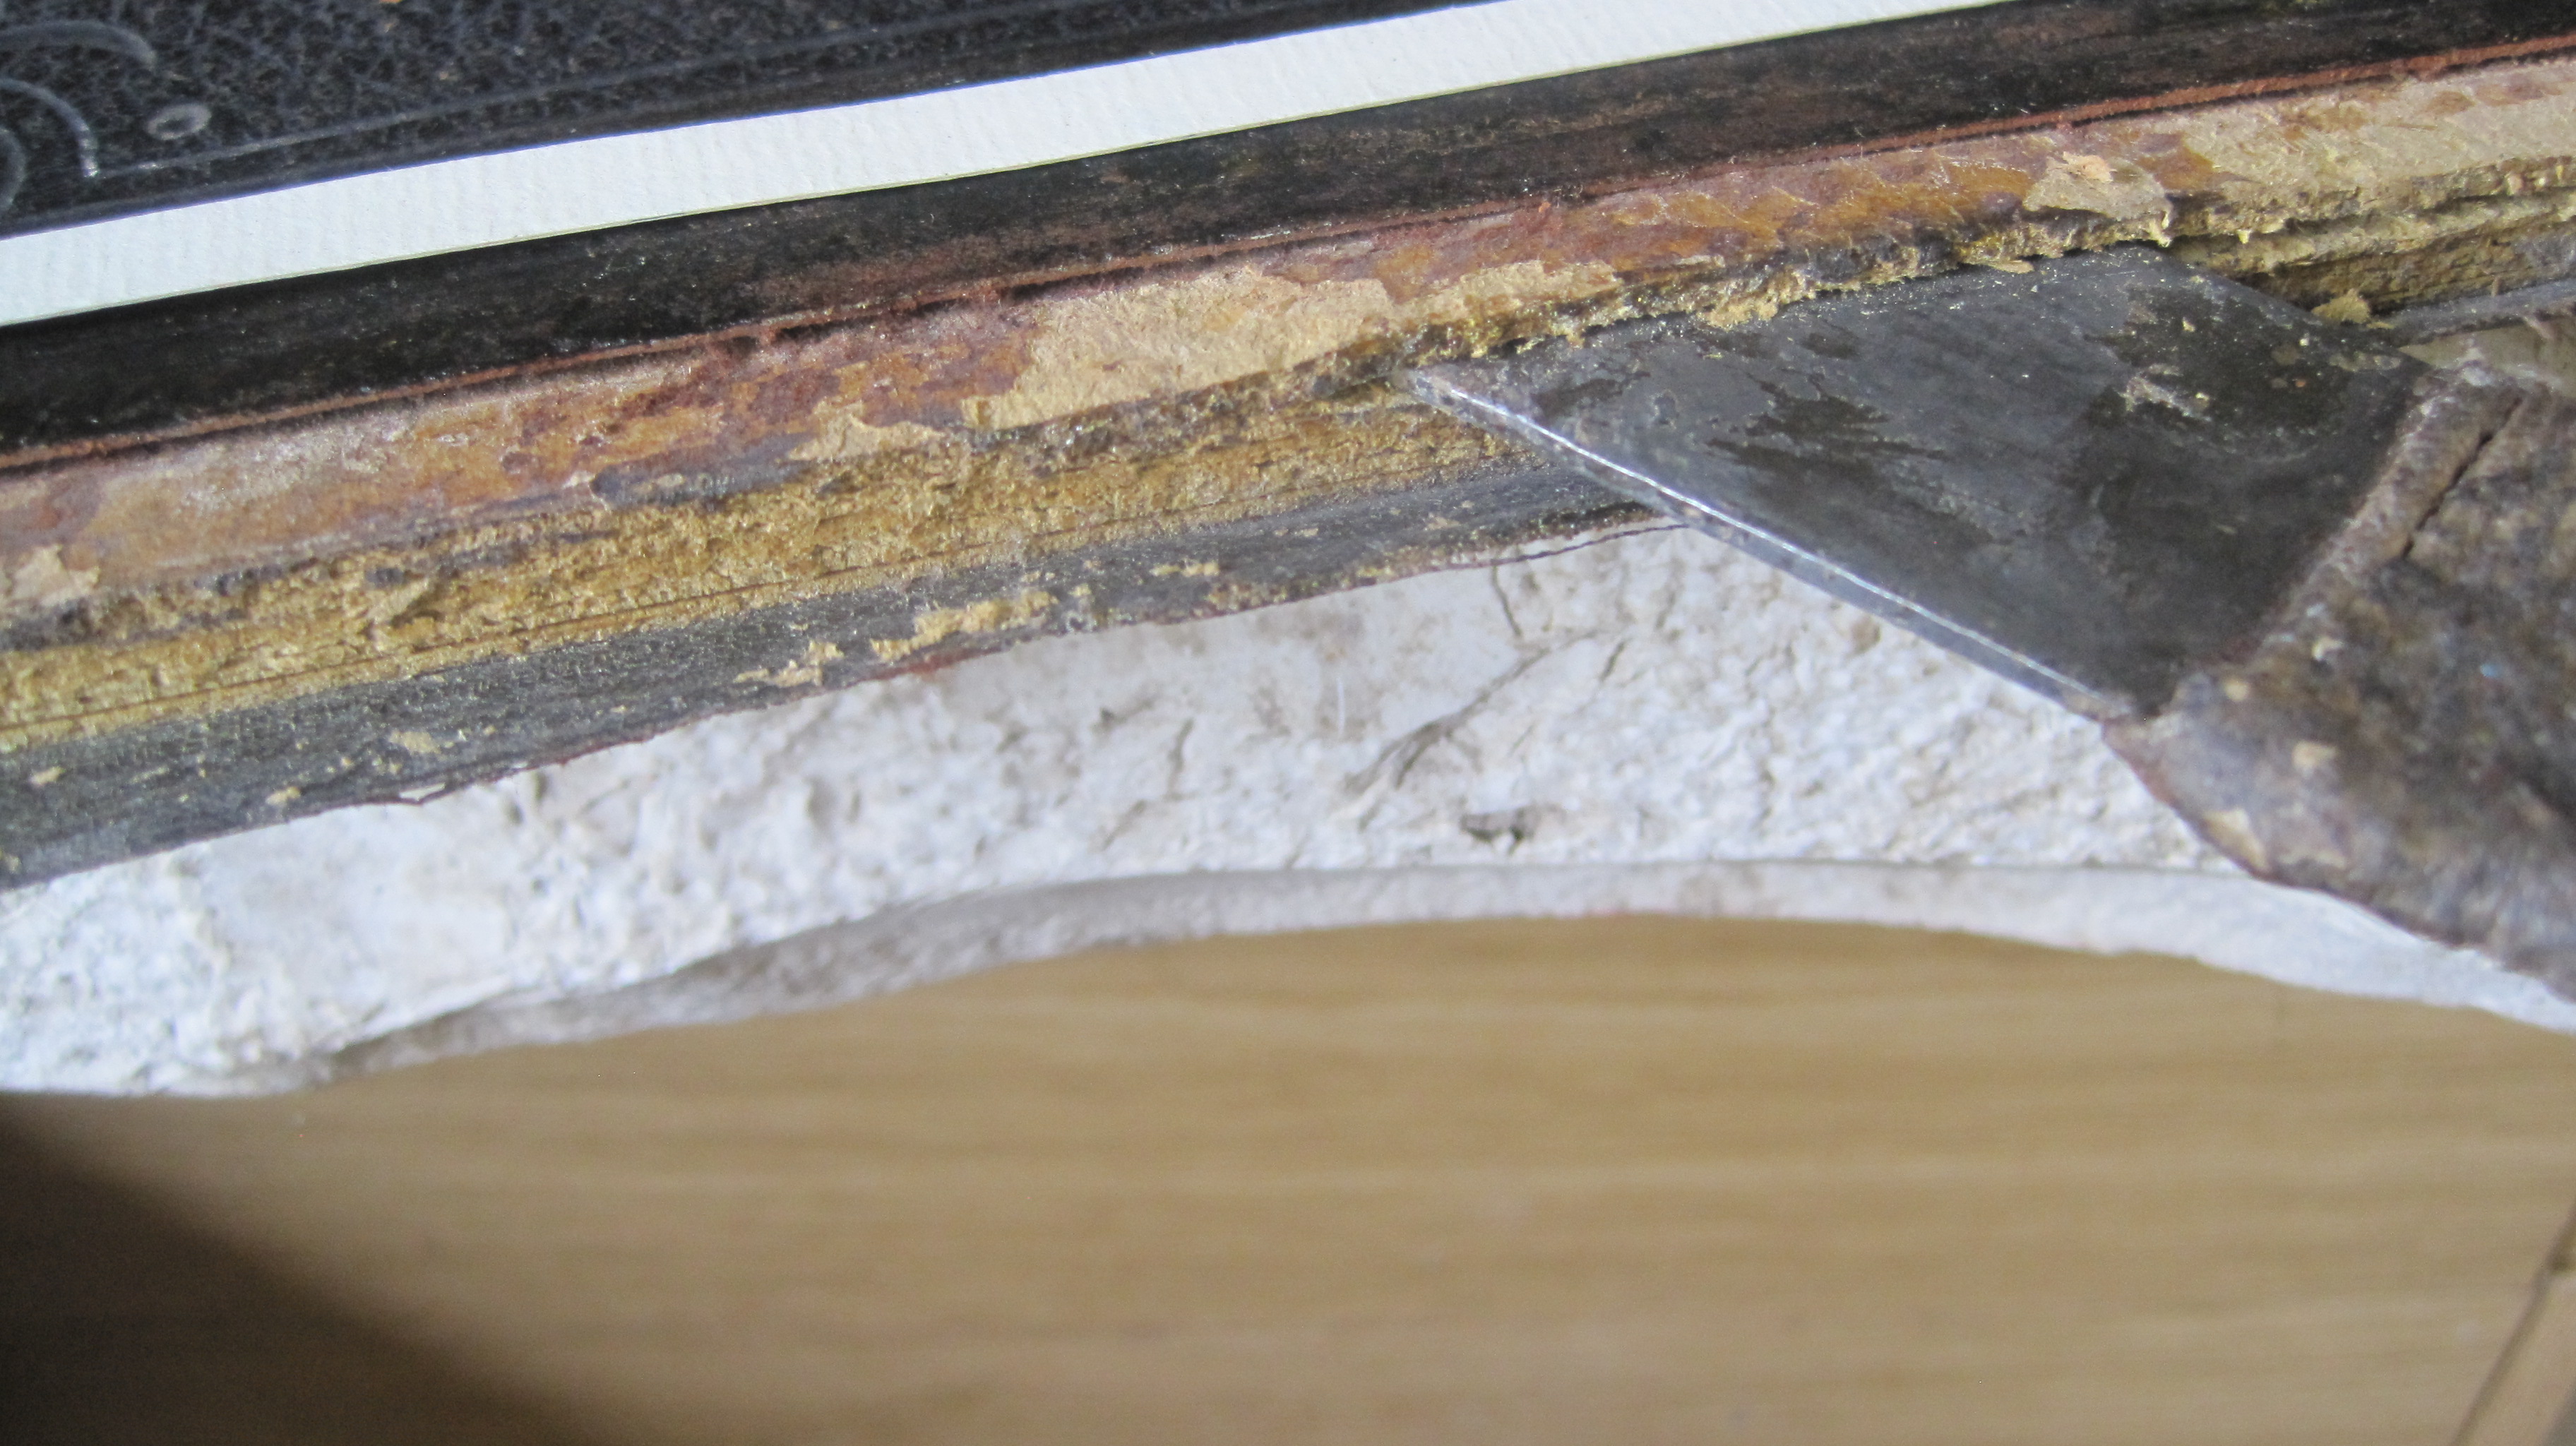
Slice and scrape the perished leather back to the mull liningsCover the spine with thick paste and cover that with a sheet of melinex to slow down drying out Remove the melinex and scrape off the softened glue. Repeat until all glue removed – in this case, twice more as the glue was very strongActually, not all the glue needs to be removed: only enough to expose the folds of the sections – the residue in the creases between the sections will form part of the new lining. This picture also shows that the book had been sewn on only four very thin cords. The endbands had been stuck on, not sewn, so new cloth endbands were made.Cloth endbands, shown with the first fraynot lining on the spine, sewn along the joint as described in an earlier post.
After gluing the made endbands at top and tail the back is lined with three layers of strong cartridge paper (120gsm). The original binding had a tight back with four false cords across it. I prefer five cords myself, so these were glued on and then a piece of black goatskin with a fairly heavy grain so as to match the original binding was pared down and partly glued over the back.
Most of the top and bottom panels are left unglued so that the head and tail can be turned in later. It is much easier to cover a tight back in this way, in two stages, than to try to do it all at once. The sides are glued in place before the head and tail are turned in.
But first the old boards must be attached. The first 10 mm of the old leather along the hinge will certainly be decayed so should be trimmed off.
The old leather can be lifted back a further 25mm for the new spine leather to go under after a ‘Bernie strip’ is glued on . But first the board has to be split for the hinge cloth to be securely embedded into the board – to glue the hinge cloth down on to the top surface of the cover board is not strong enough
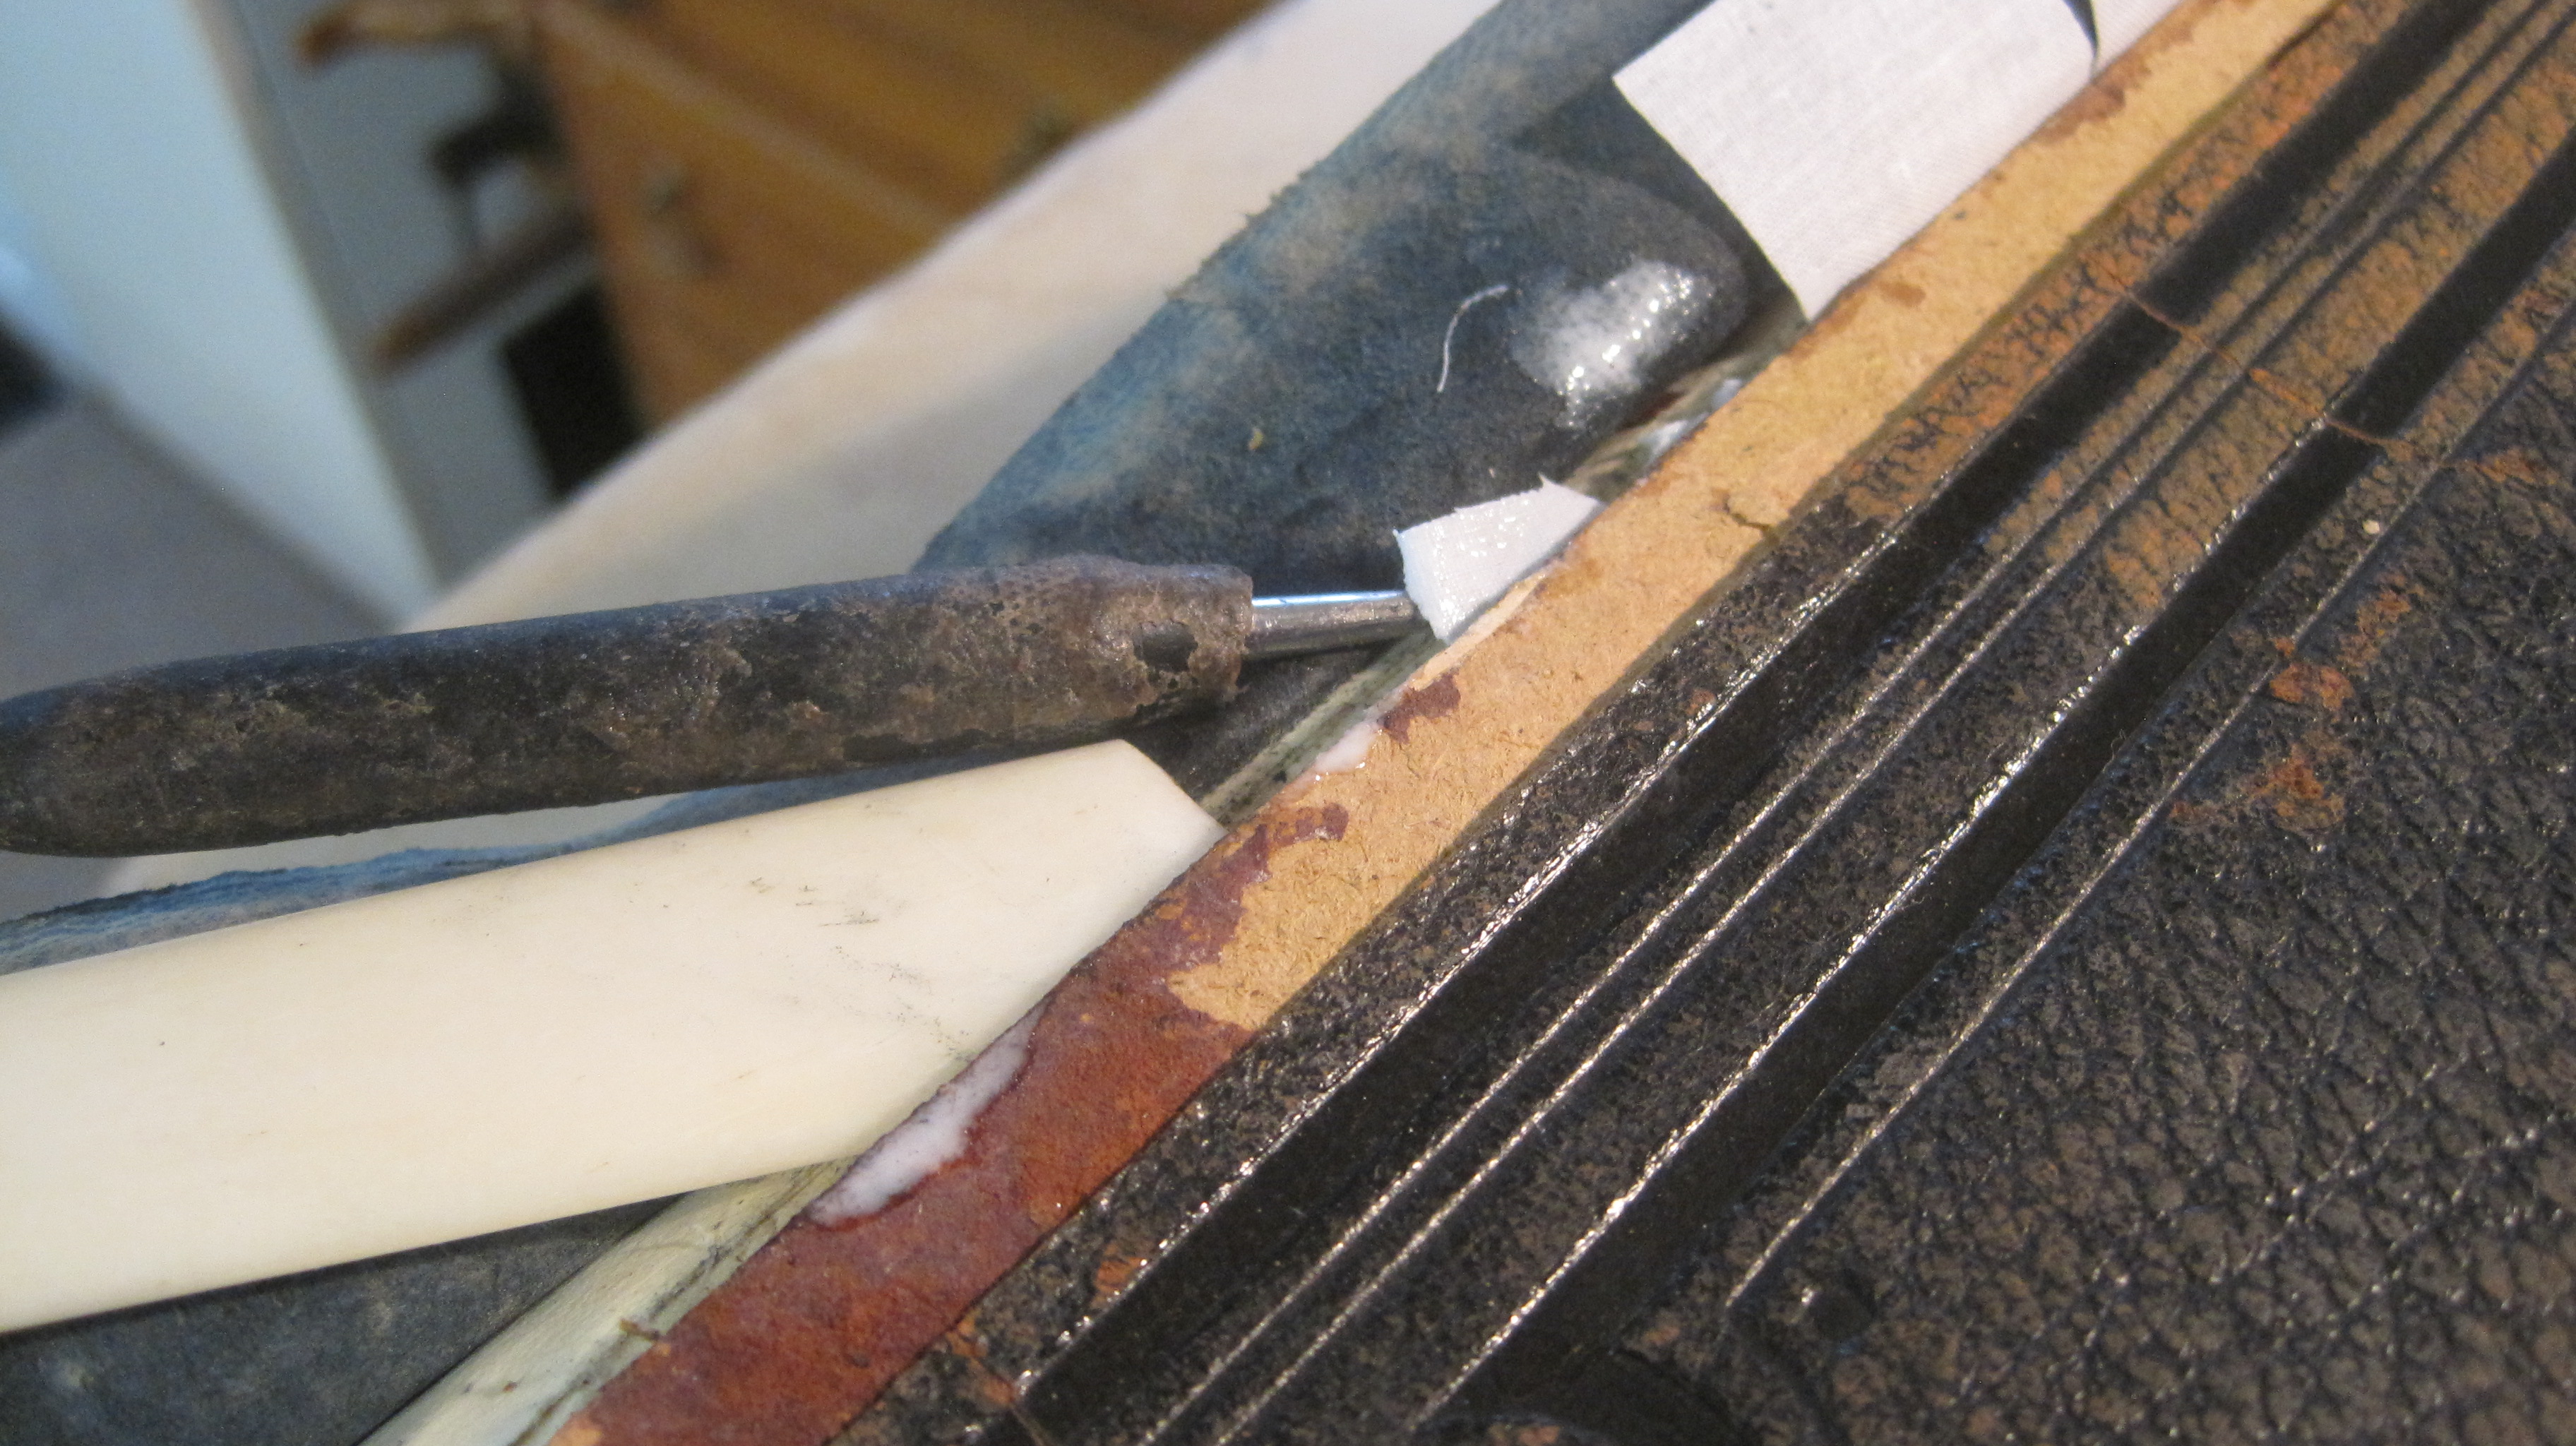
It is better to cut the hinge cloth into tabs and glue each one at a time and work it into the split – don’t try to put the glue into the split.
The split is held open with the end of a bone folder and each glued ‘tab’ worked in successively. The book is then pressed to consolidate the join.
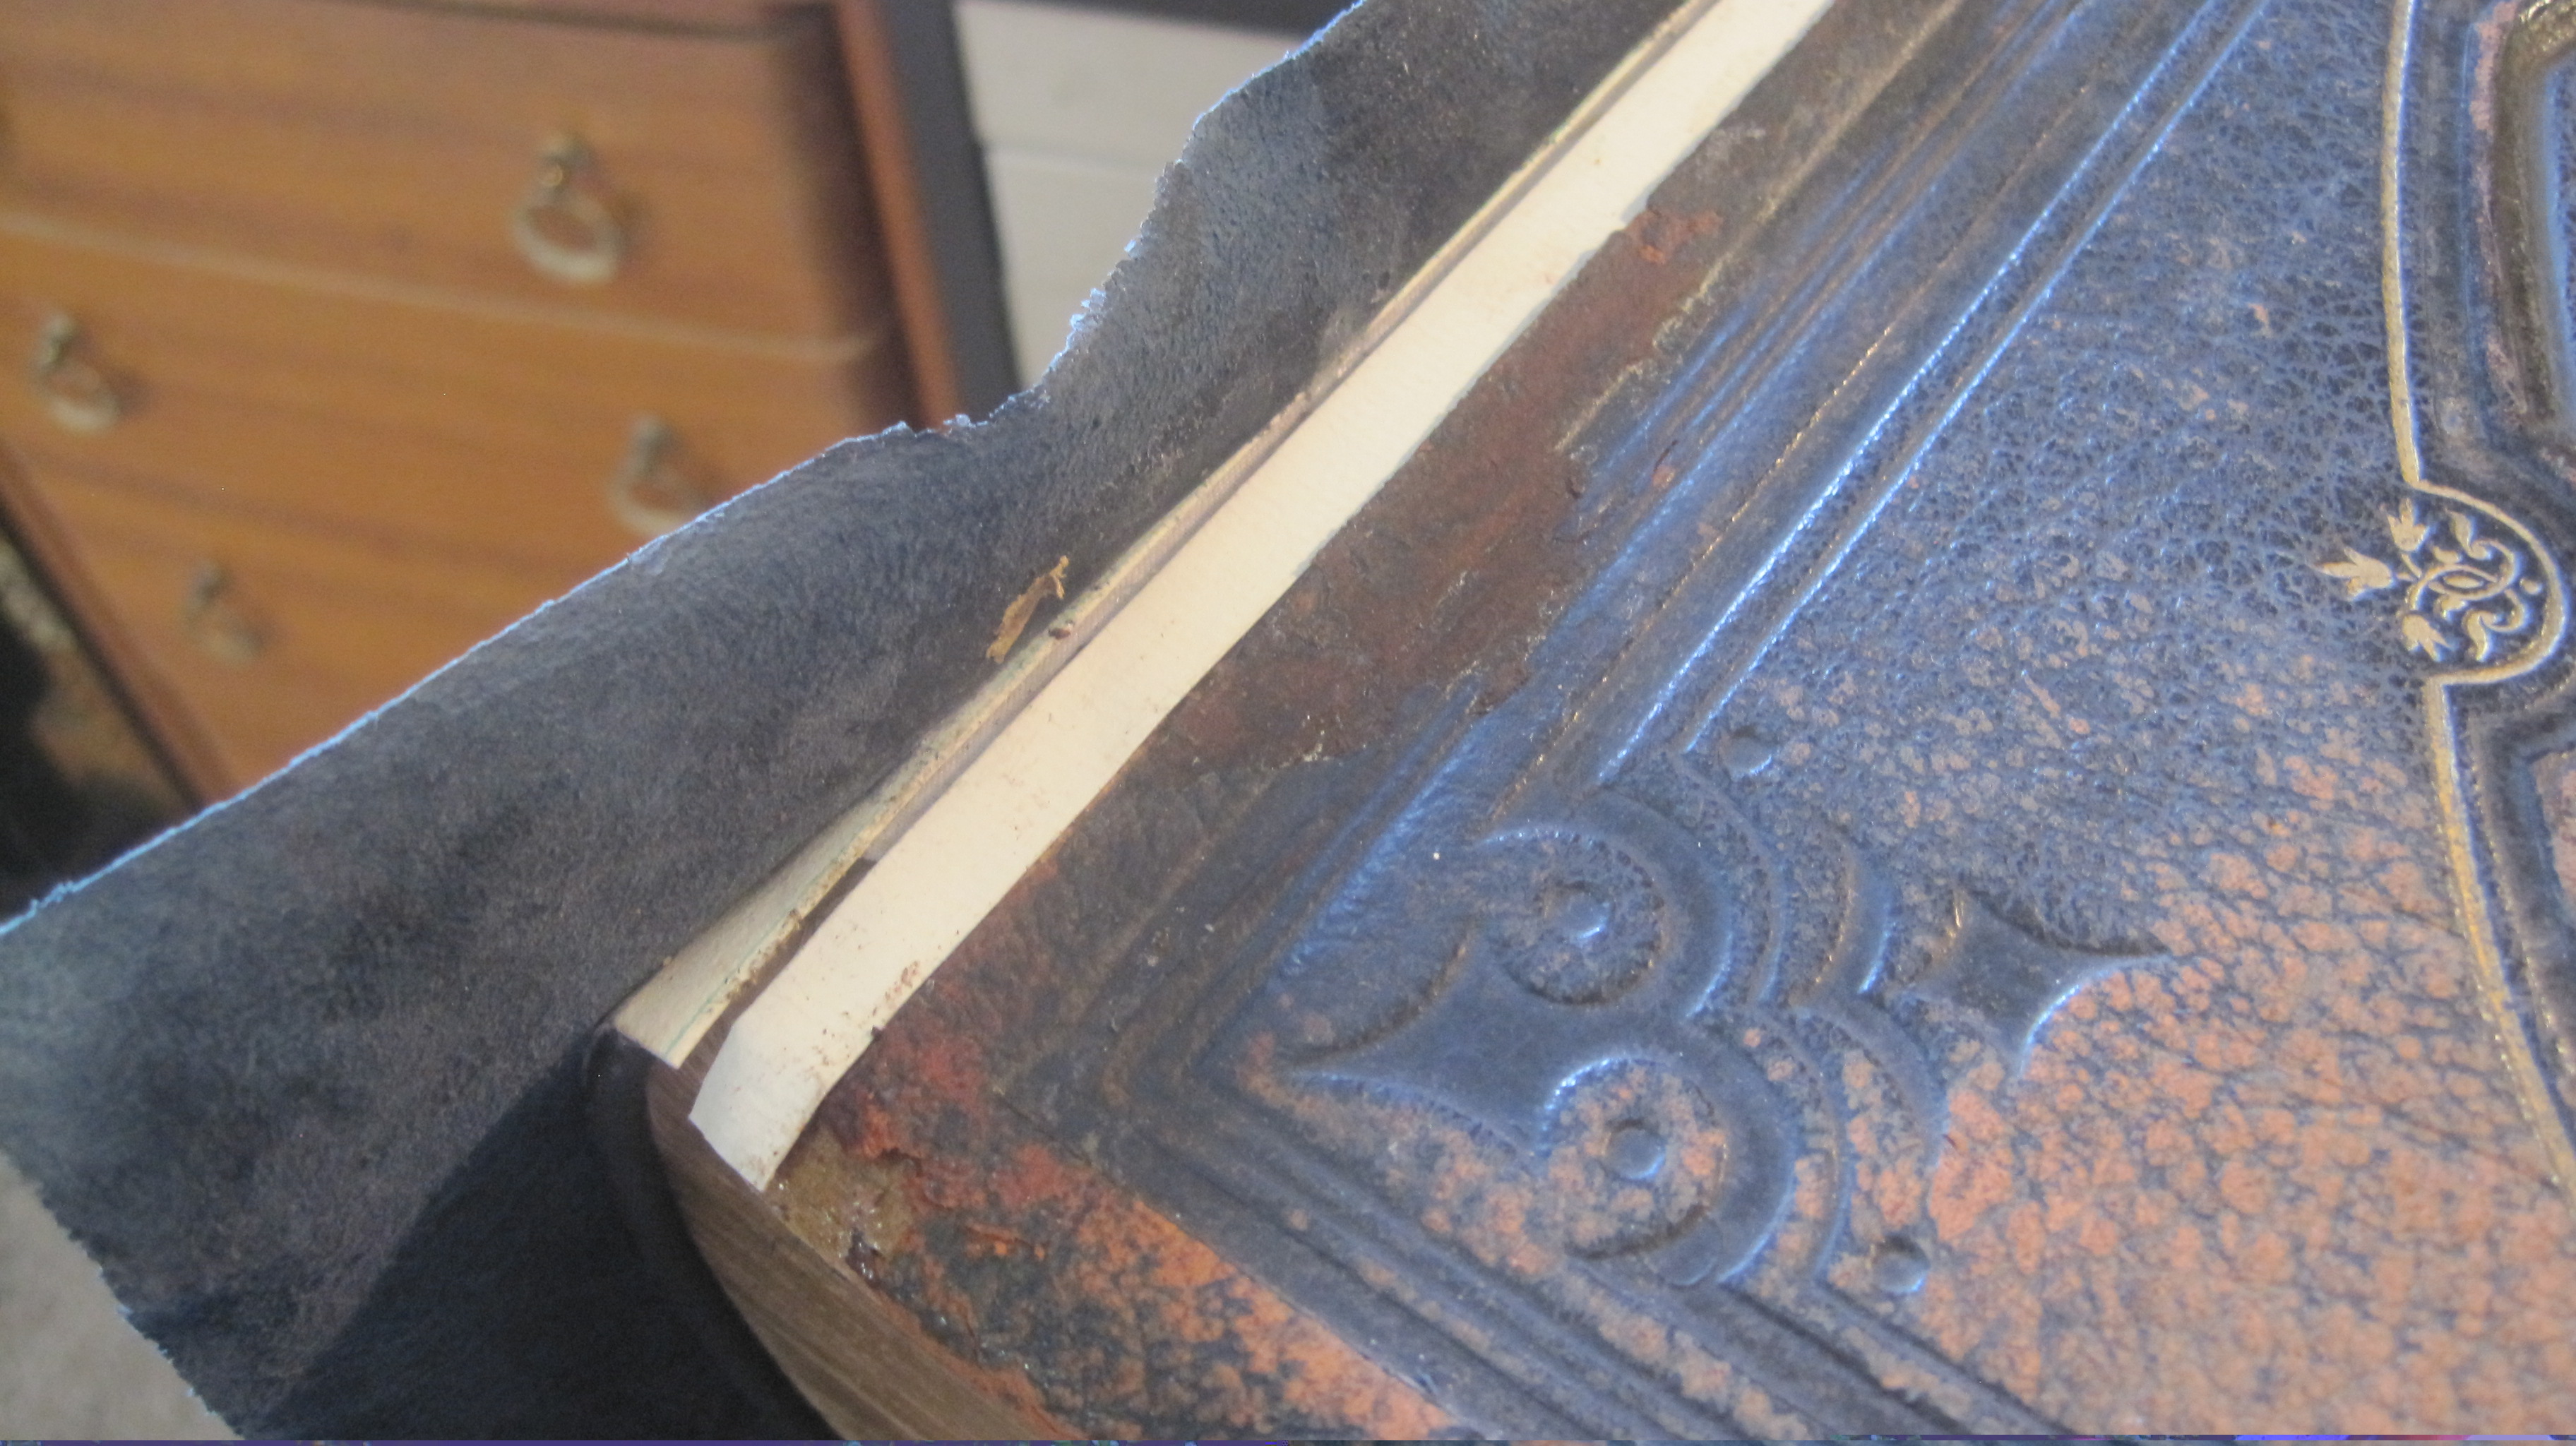
Then the ‘Bernie strip is glued in place.
Ready for the new spine leather to be glued over the strip and under the lifted cover leather.The worn and faded sides will be stained to match the new back later.
Now the head and tail can be turned in and the headcaps formed.
I use a paste/glue mix for this stage – the paste extends the ‘working time’ and also softens the leather. To ensure the turn-in adheres firmly the the spine linings a crepe bandage can be tied tightly round the whole book.
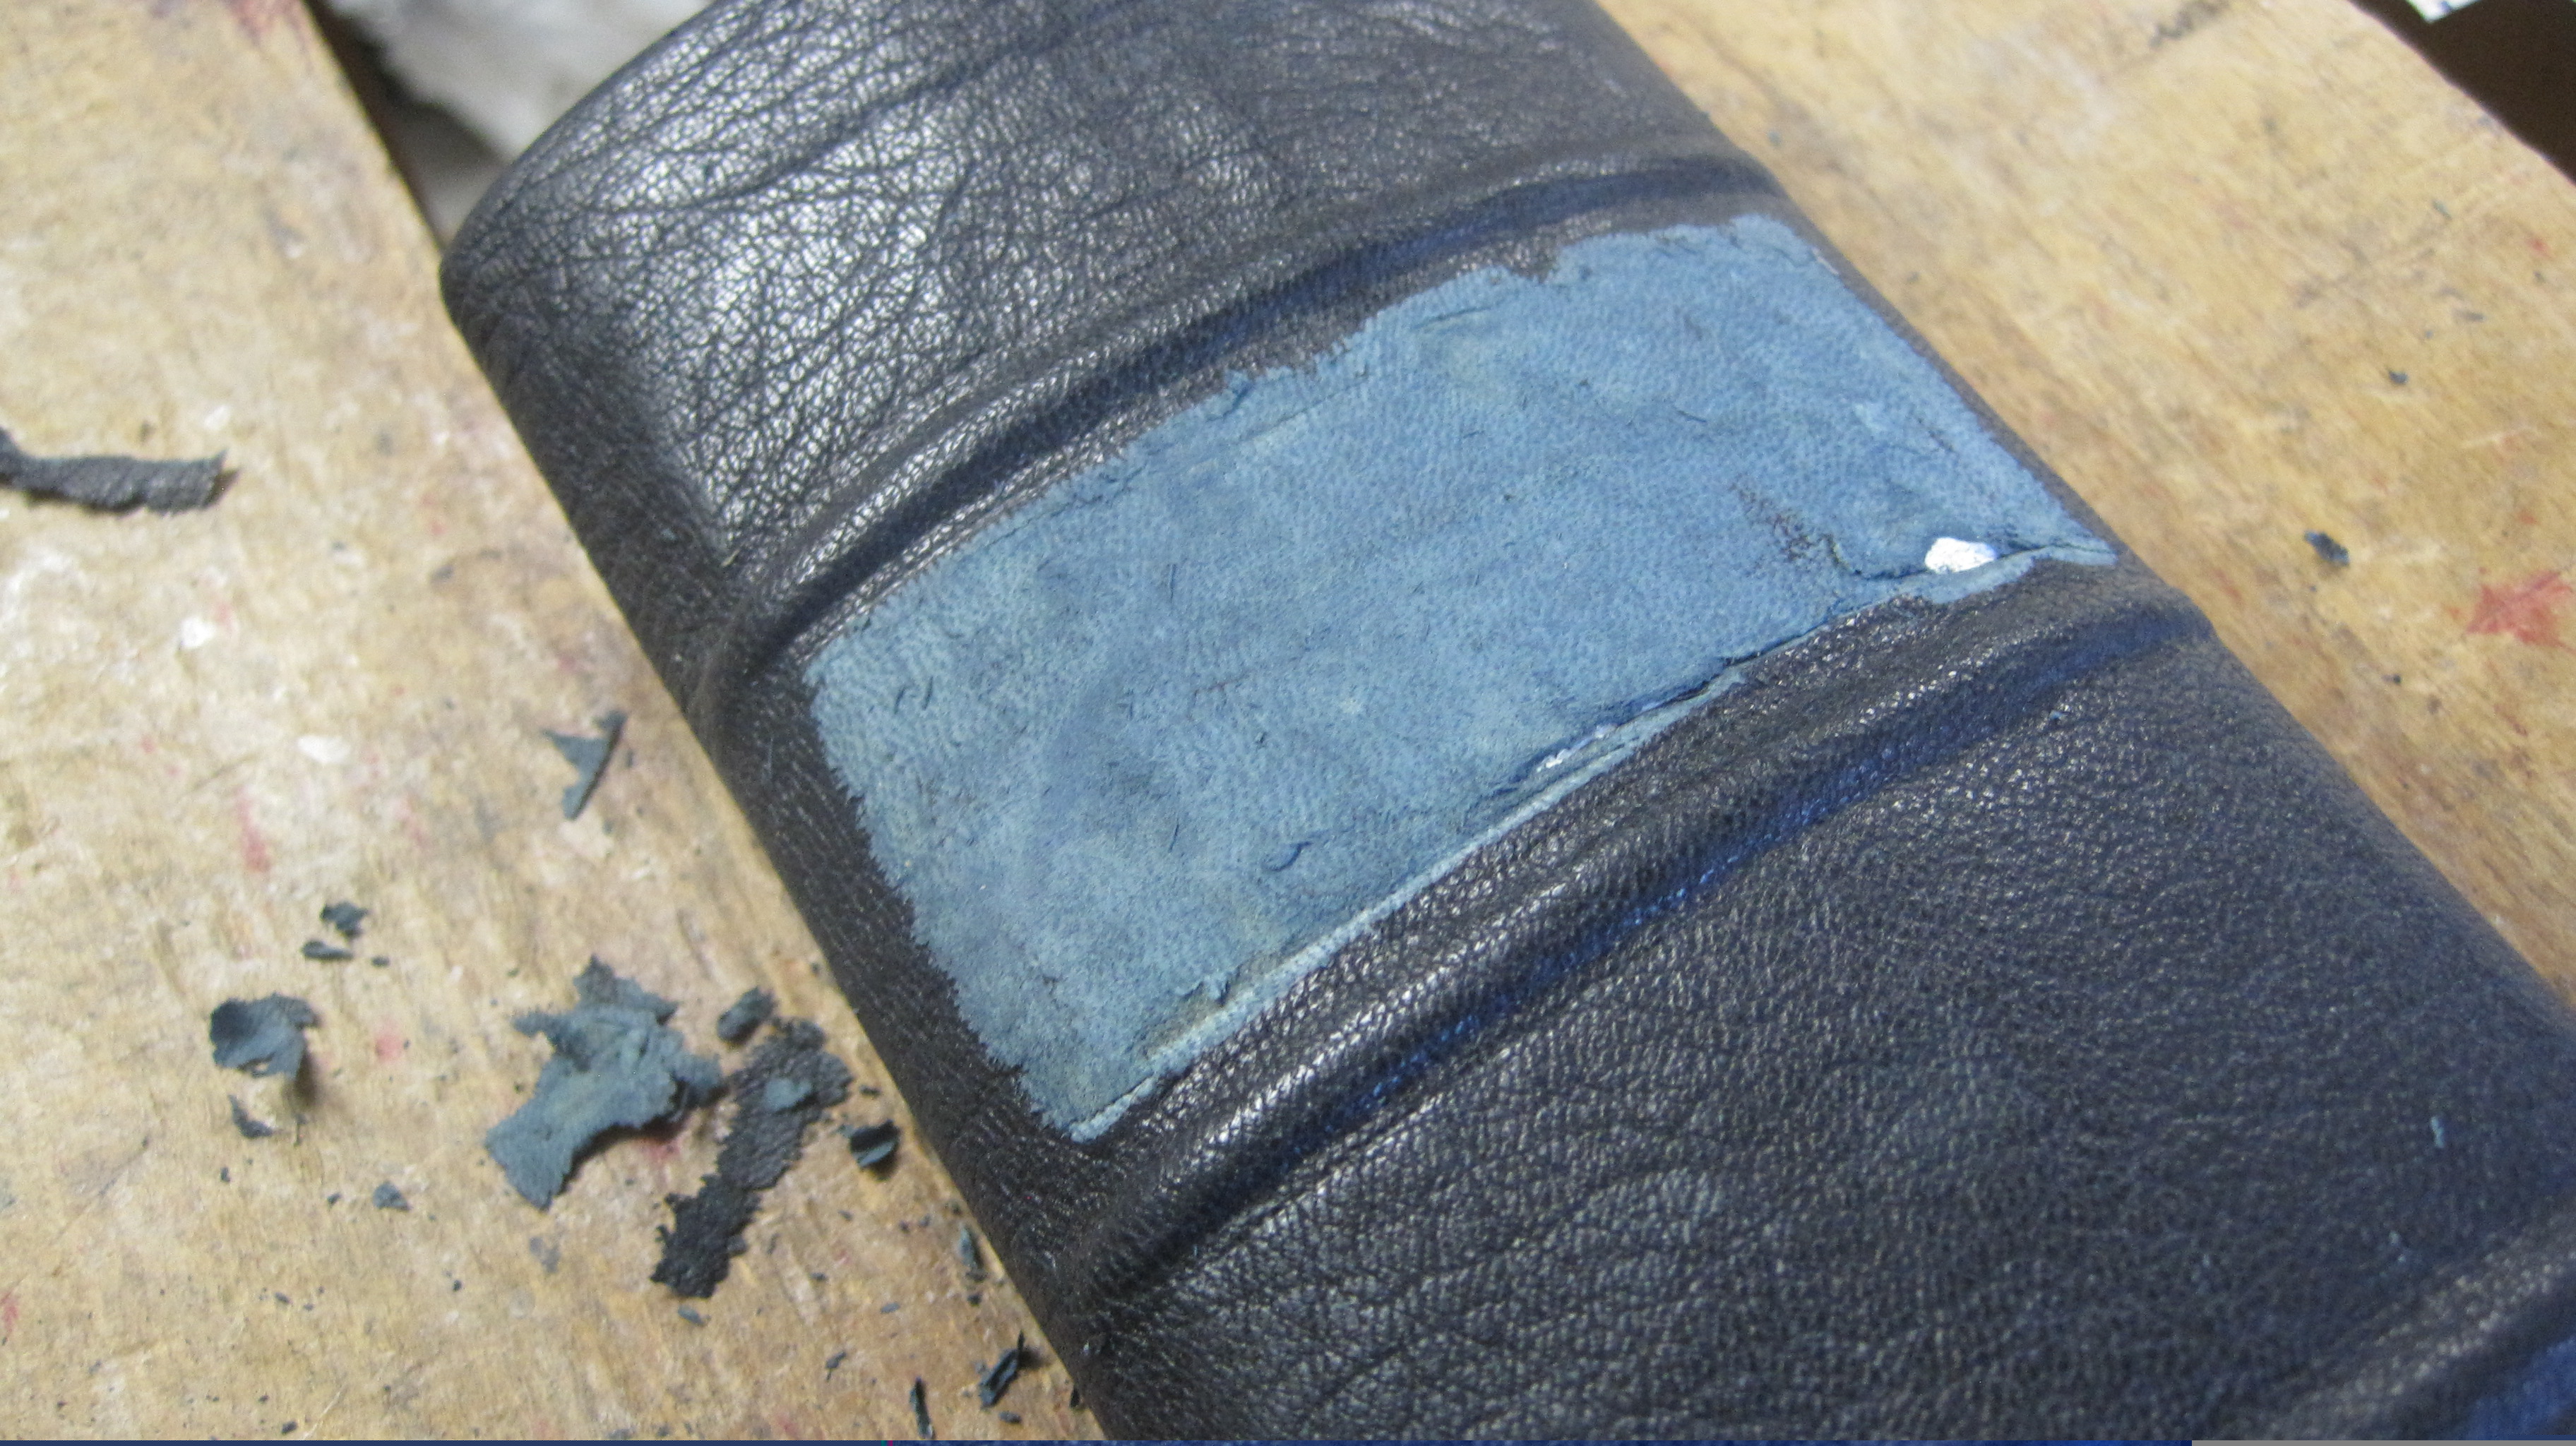
Now for the title on the spine. I do not have handle letters large enough to look right on a book this size but I do have 48 point type – only the nine letters needed for ‘HOLY BIBLE’ which I acquired tied together with string in a mixed lot at an auction a dozen years ago. So the title is blocked on a piece of the same leather from which the spine was cut pared down and backed with tissue paper. The panel on the book is also pared down so the label does not sit too proud.
The label glued in place:
And the finished product:
Just a little more staining required on the old sides.
Total working time was four hours, spread over several days, and requiring the use of nipping press, lay press, blocking press, paring equipment etc. etc. Next time my quote will be about £150.
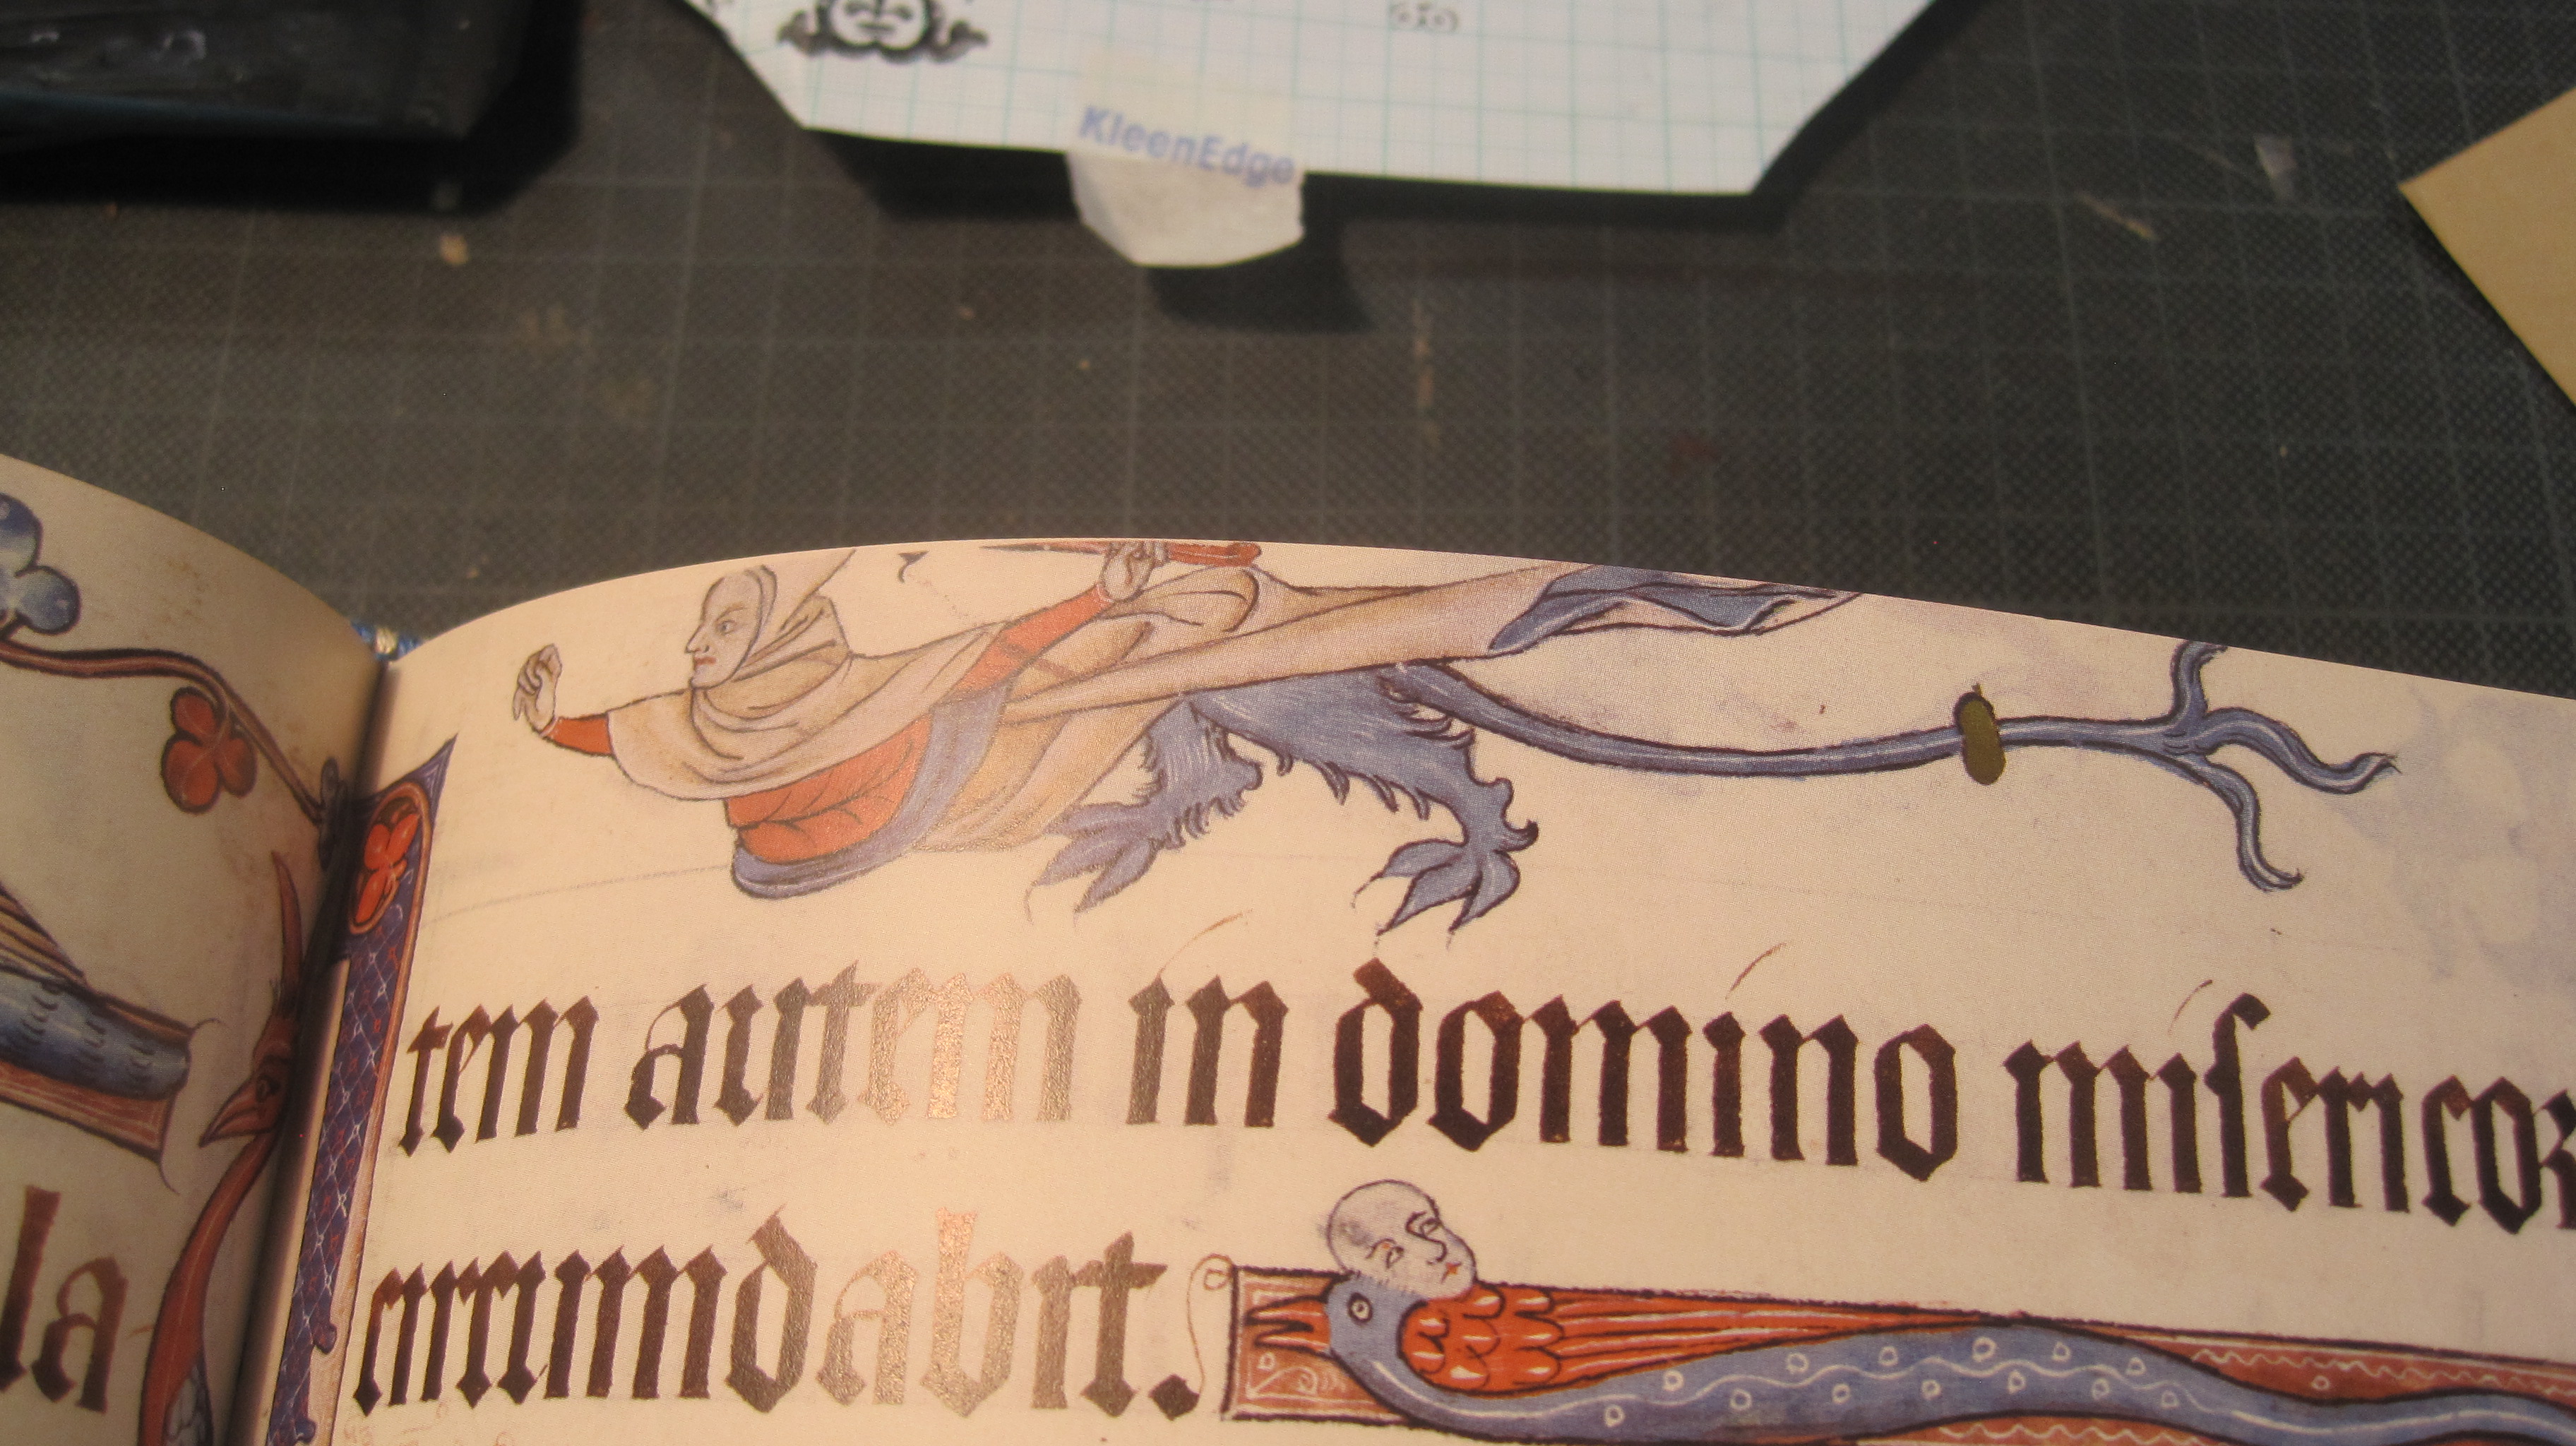
Back in January I wrote about my rebound version of the excellent Folio Society facsimile of this extraordinary book – excellent except for the publisher’s binding, that is. Well, I have another copy, without the drop-back box and accompanying commentary, so I have had another go.
In the meantime, since January, I have found out a lot more about the original, partly from a copy of the Sotheby’s auction brochure of 1929 and also from the British Library website which has an image of the previous rebinding, done in 1630. That was 300 years after the book was made and, presumably, first bound. A book designed for regular devotional use, such as a psalter might well have needed rebinding well before 1630, perhaps after 150 years – so around 1480. Also, if you look closely at the facsimile pages you can see that the margins were trimmed either when it was re-bound in 1630, or perhaps earlier.
So, a variation on my previous design would be appropriate, still aimed at a late 15th century effect.
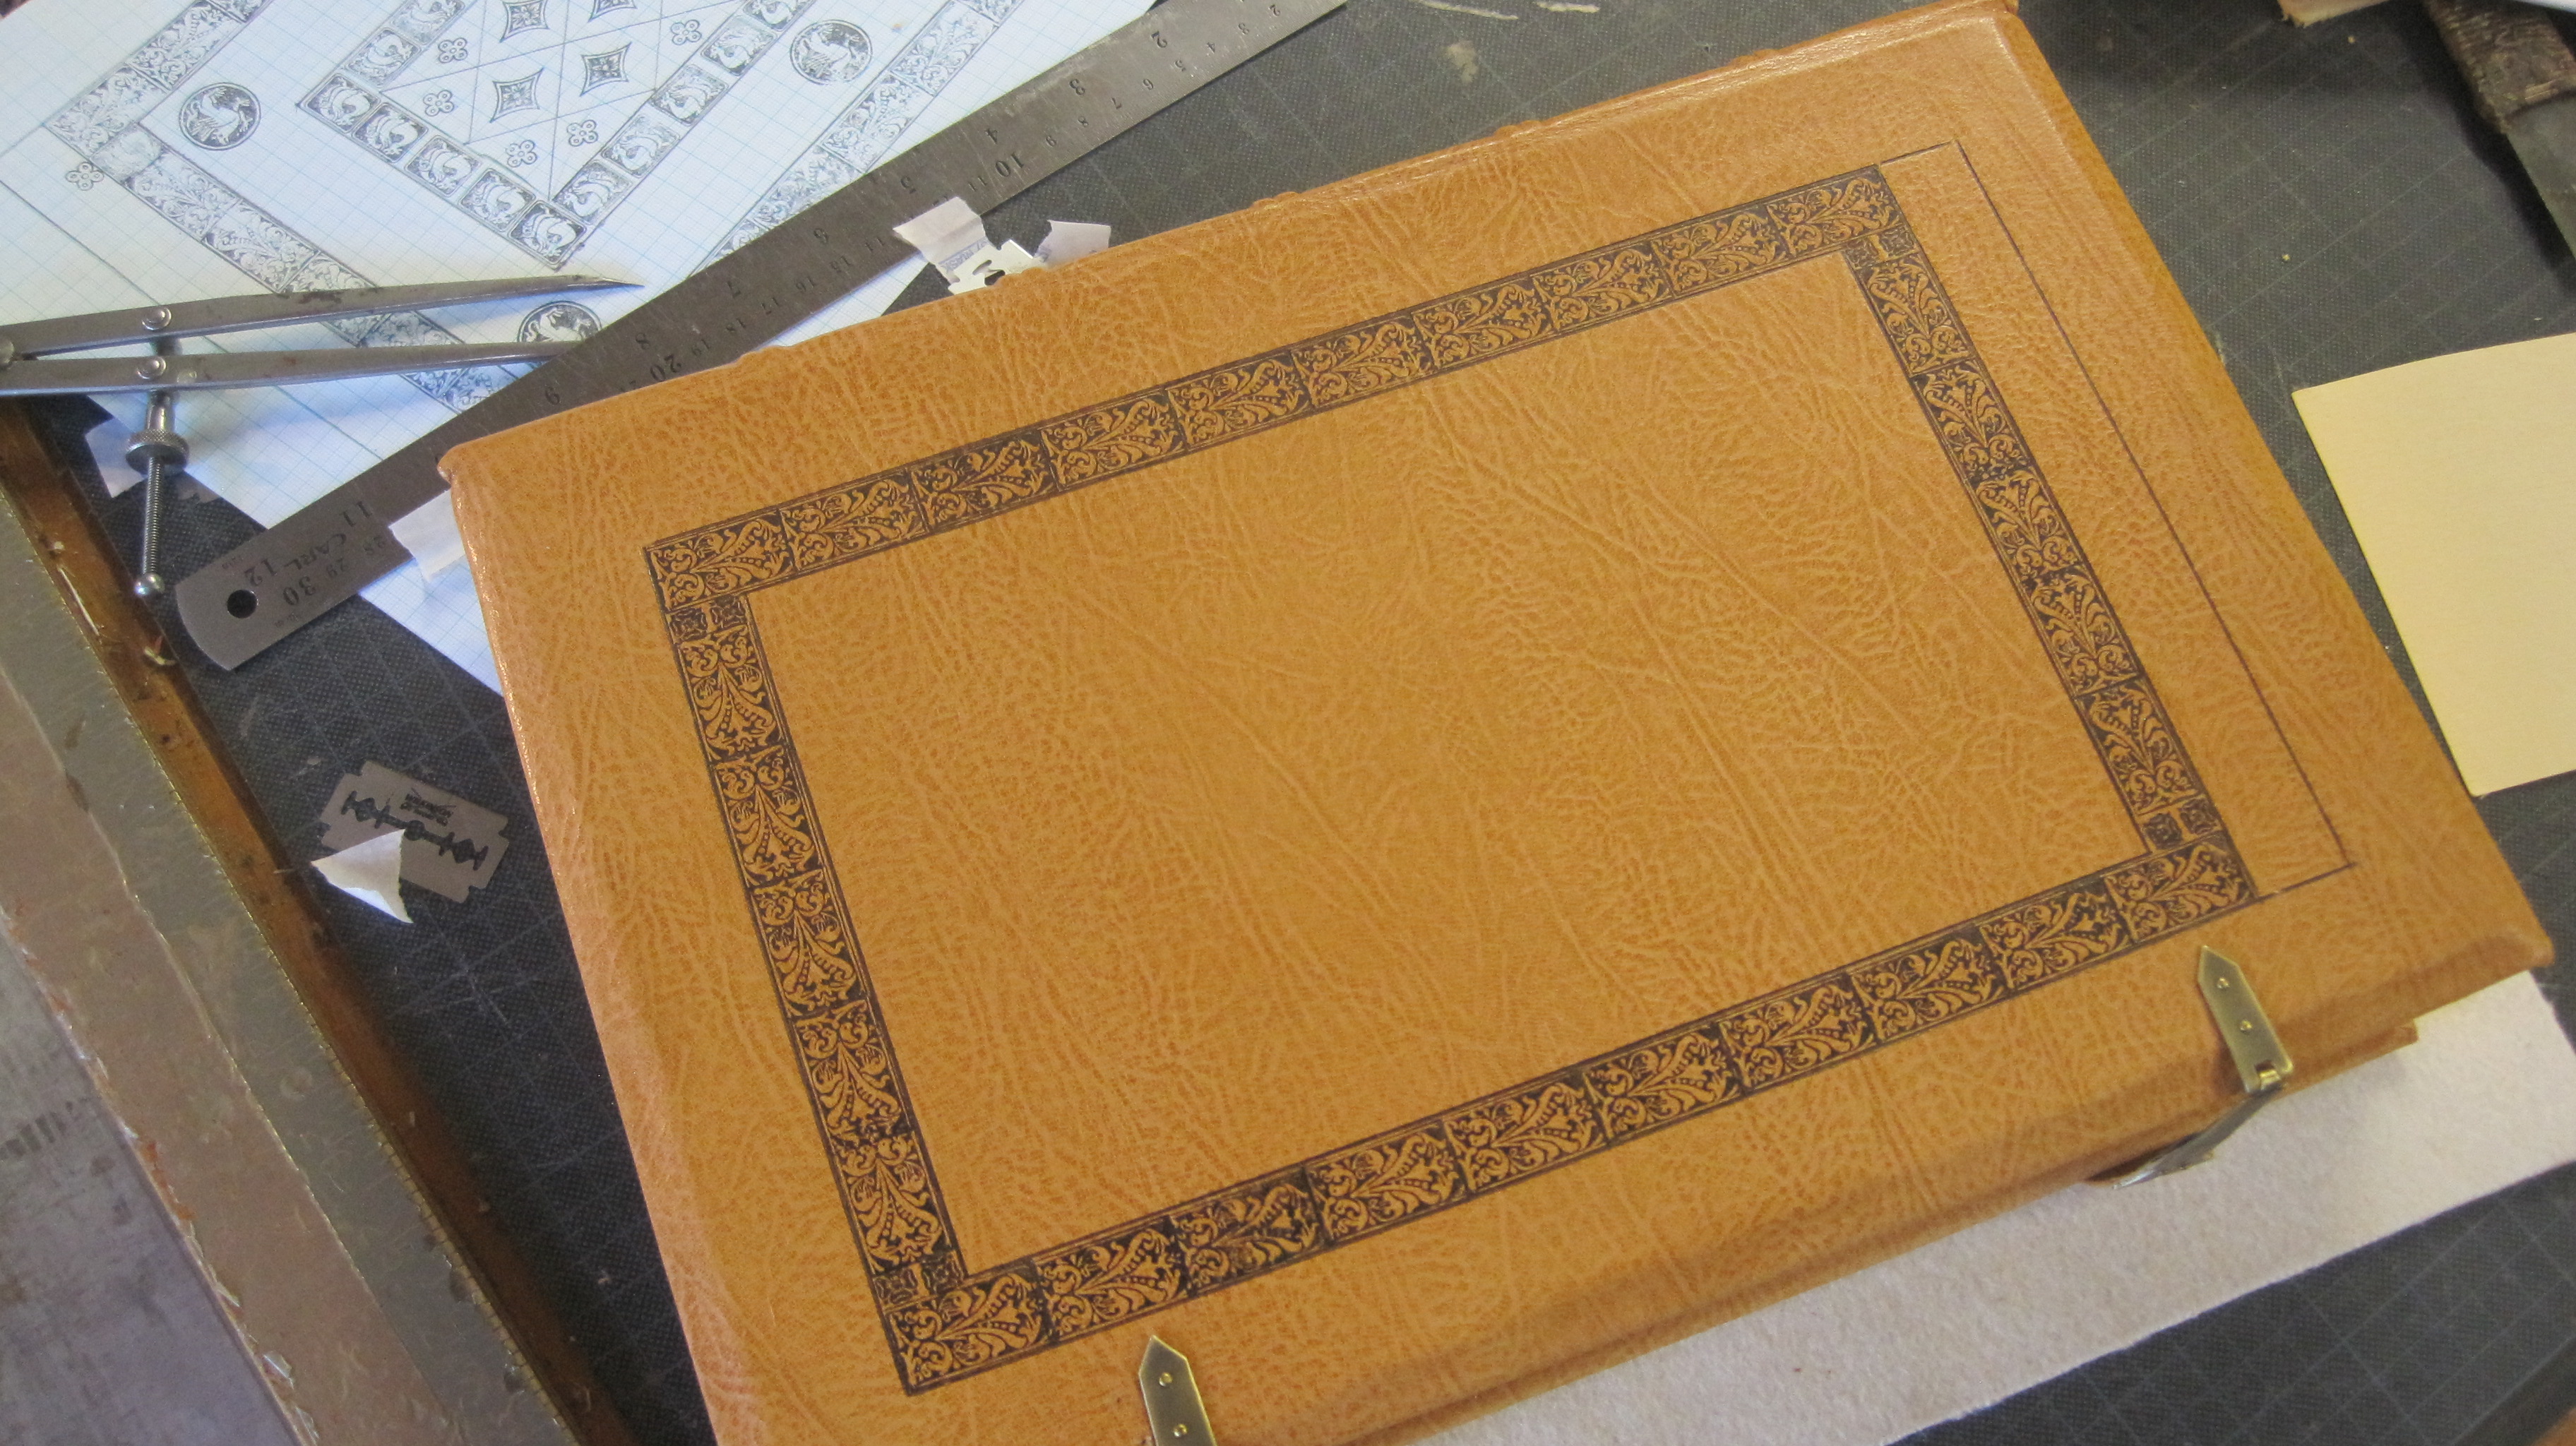
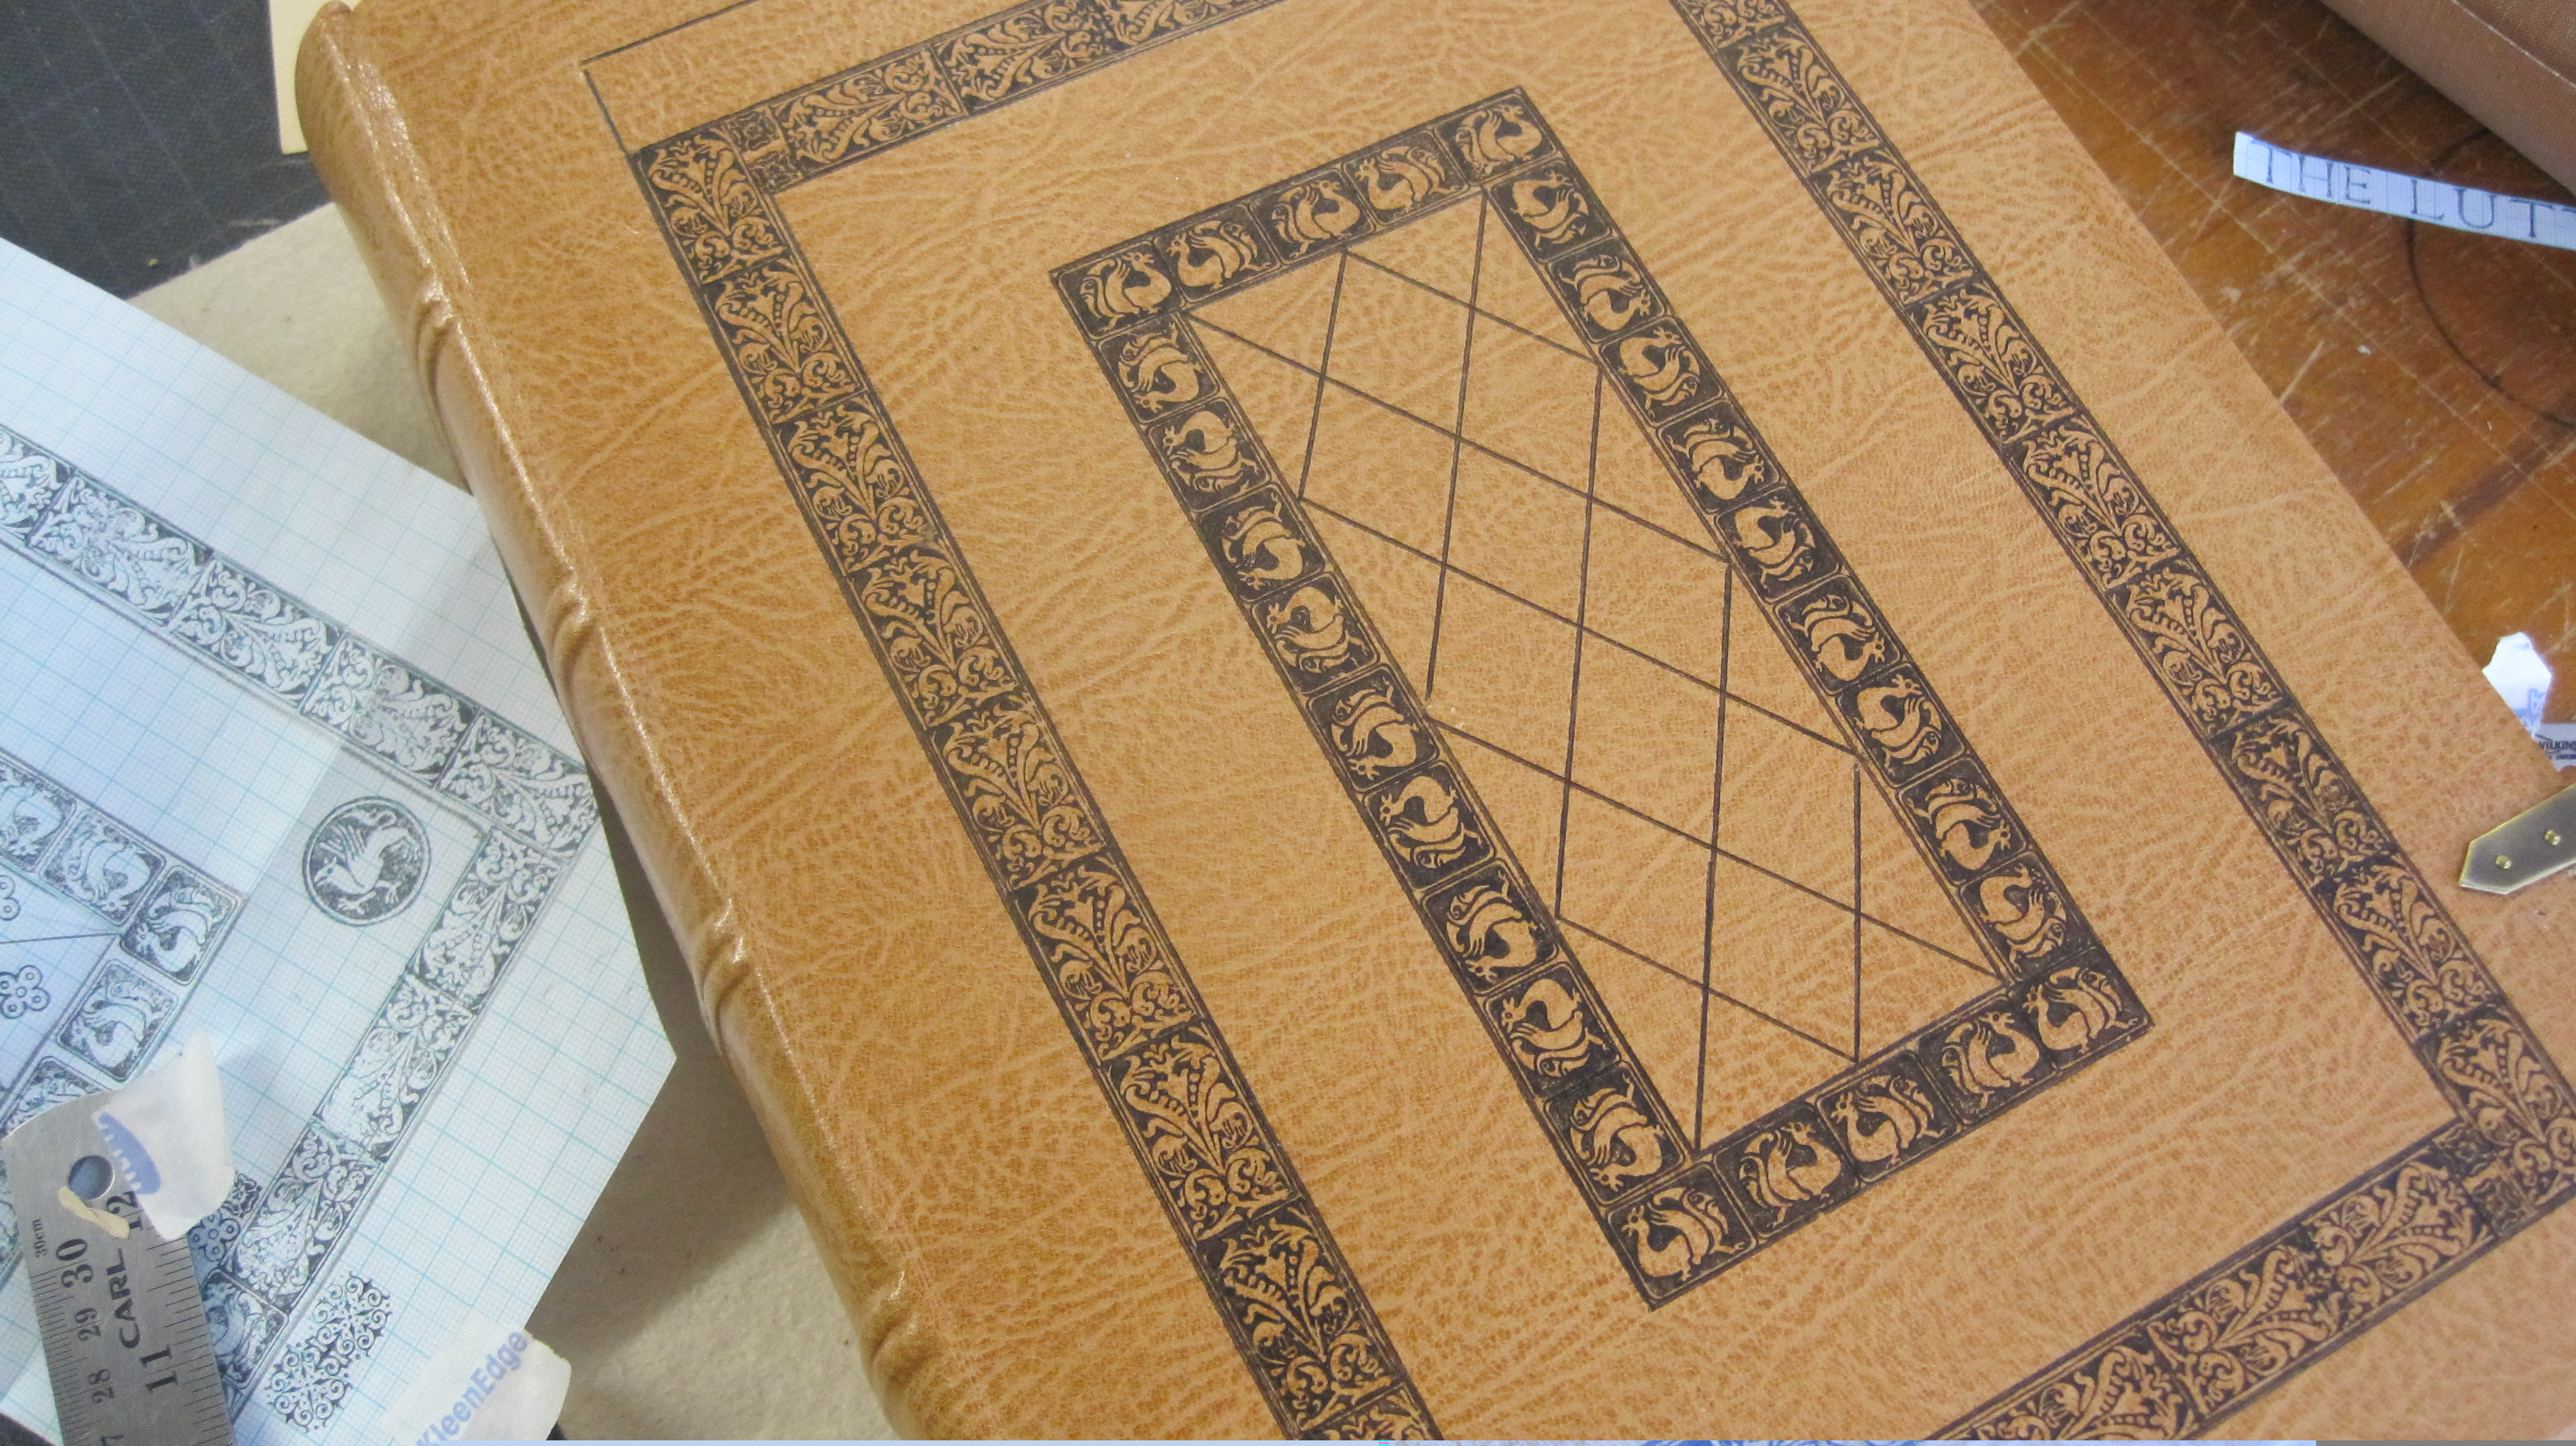
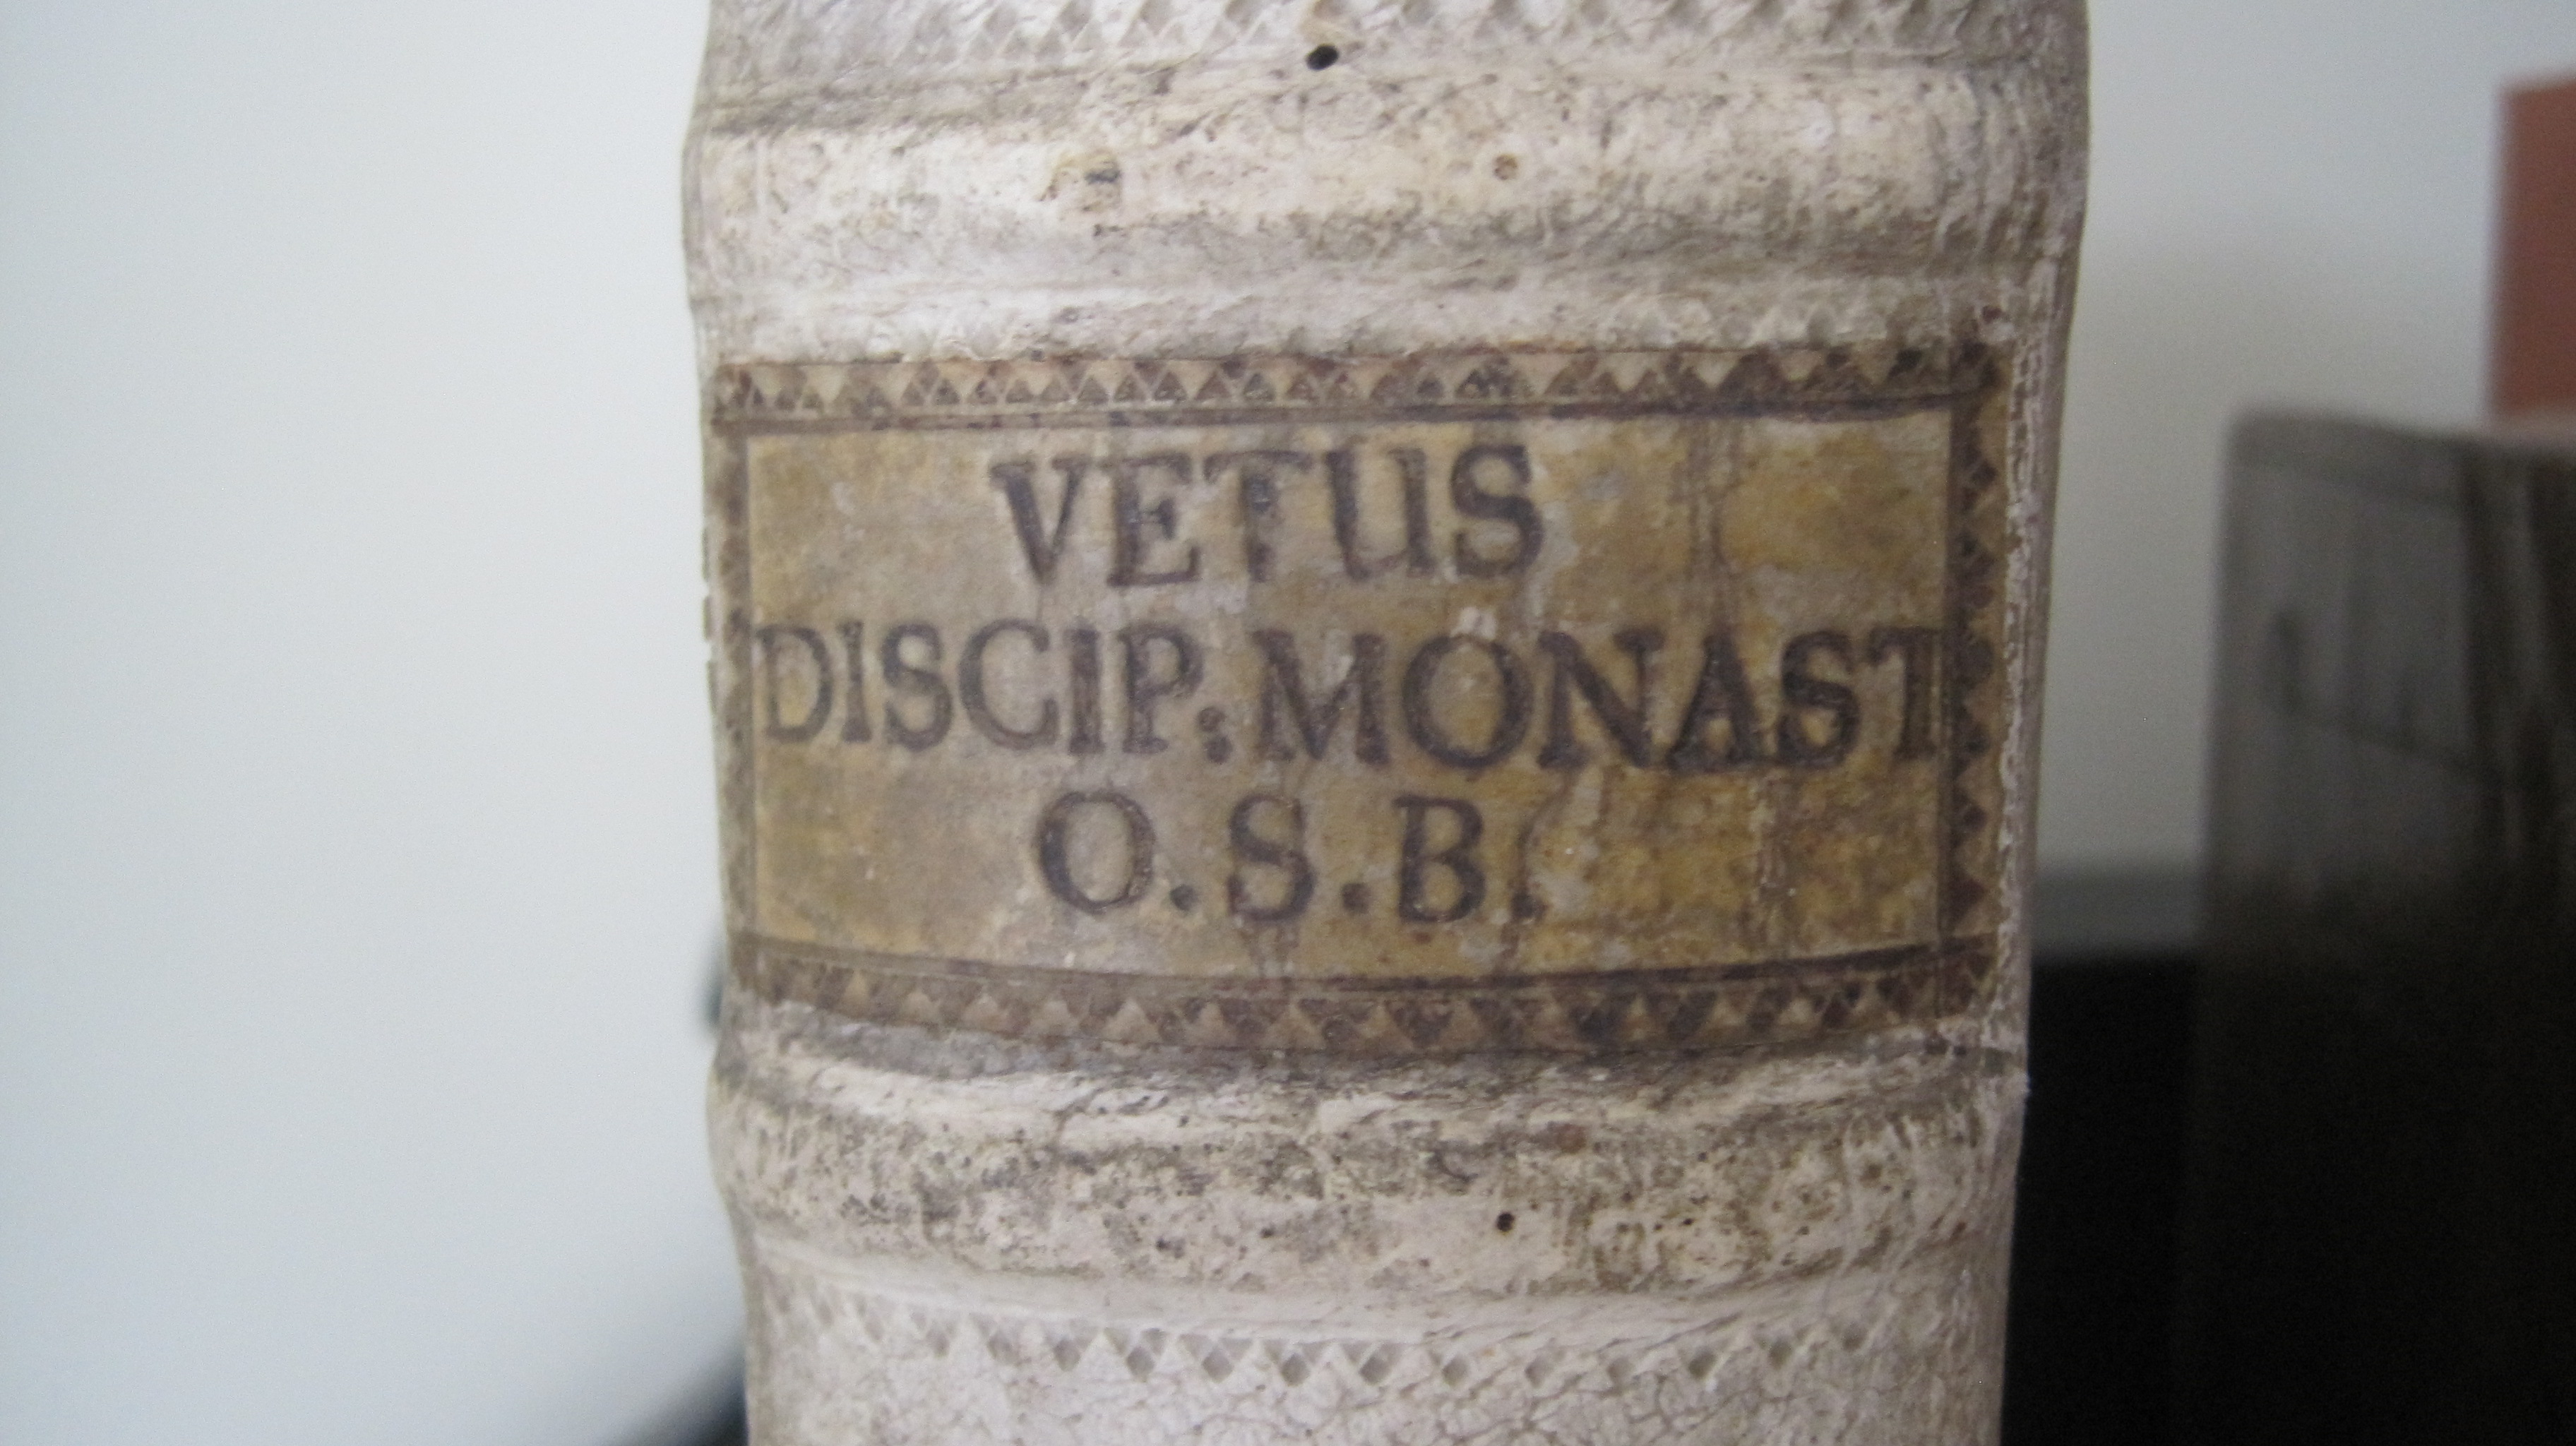
I had a skin of goat, pale tan in colour, exactly as it would have been if freshly tanned in 1480. Five double bands on the spine, and blue-and-white sewn headbands would be appropriate, and ‘blind’ decoration on the covers. I like the strong black effect of using carbon paper which produces a much more even result than just using a hot tool on damp leather so I settled on that. Here is the first part of creating the outer panel:
The position of the outer edge of the first panel is determined by the size of the clasp fittings (again bought from Muller). The razor blades are positioned to prevent over-run on the fillet lines. The strip at the top will be for the title lettering.
Outer panel complete – 30 impressions of a rectangular tool actually dating from about 1520, but close enough – you have to work with what you’ve got!
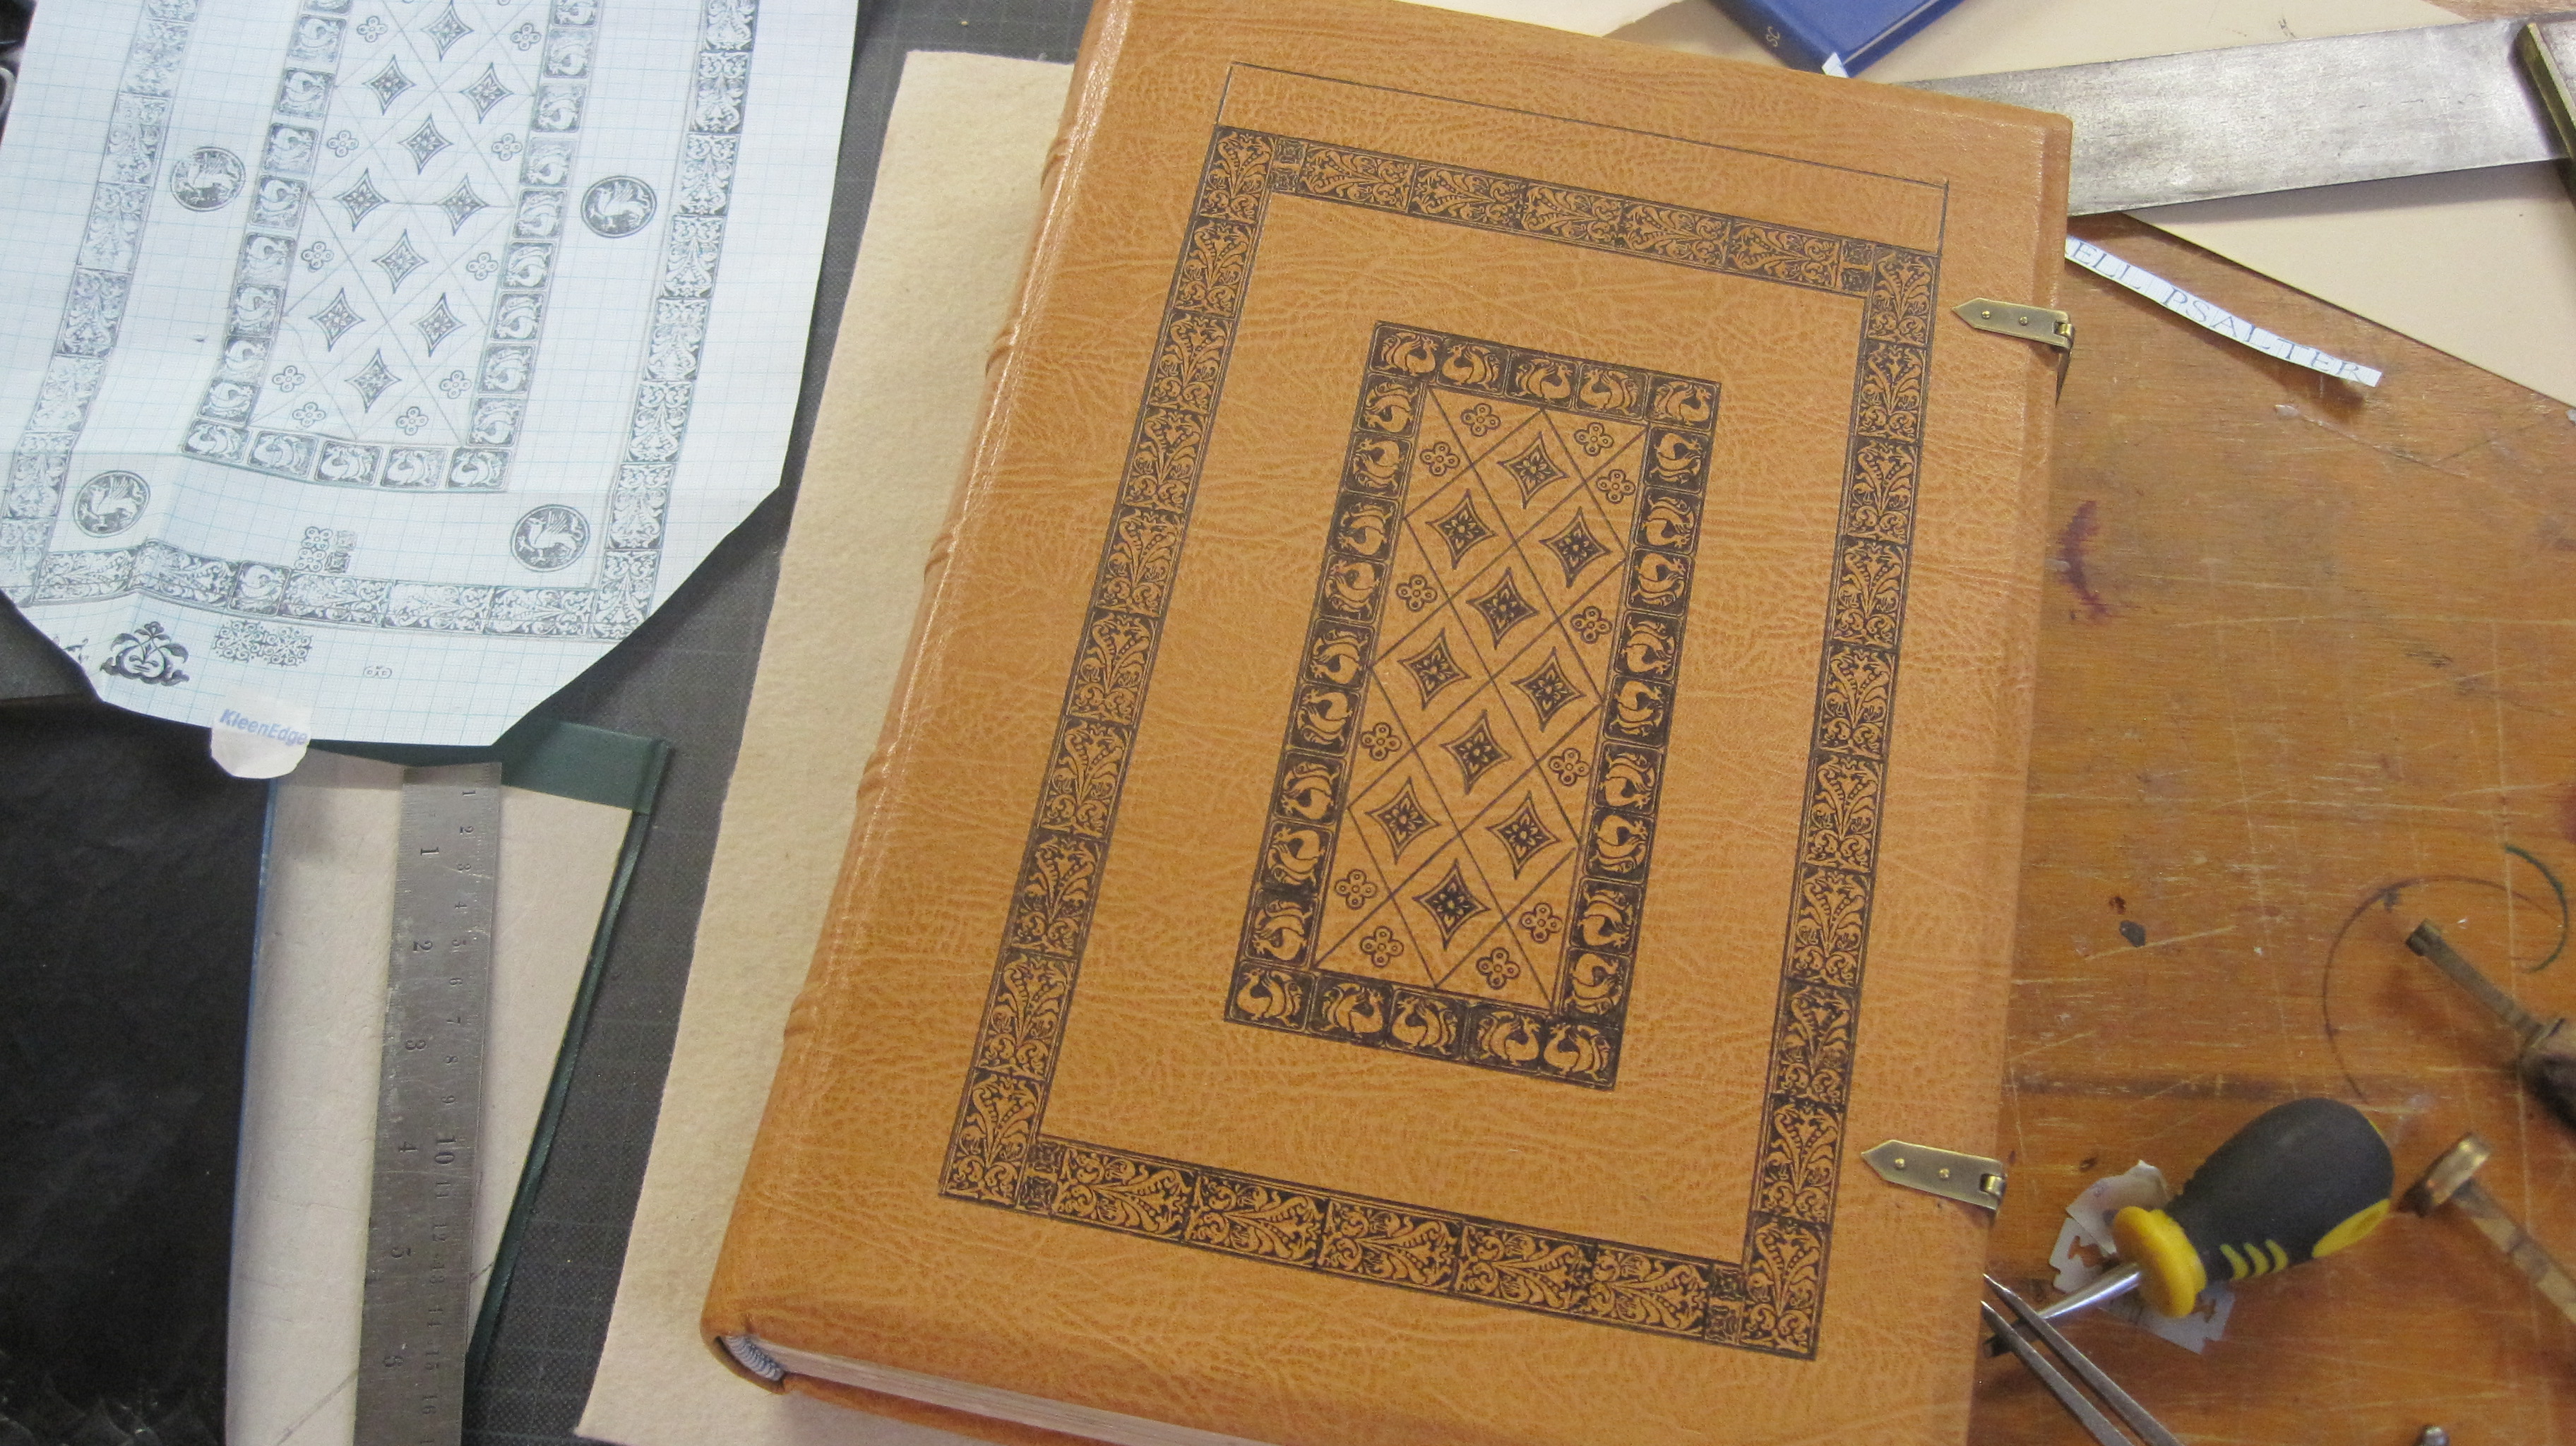
Inner panel completed. Here the tools are perfectly correct: modern copies of English tools from around 1460. The pattern on the left shows where we are going with the design.Diaper/lozenge framework– Finished.
I have not yet decided what to do on the back cover or the spine: any suggestions?
Looking back through my work book I see that about half the repairs I have done include the request ‘leather title label, gilt’. So, over the years, hundreds.
Douglas Cockerell said…’books have to be recognised by their titles and it is of the utmost importance that the lettering should be as clear as possible and should fully identify the volume’ (Bookbinding and the Care of Books, p 221). Pretty obvious really, so it’s surprising that there is very little guidance in manuals of bookbinding technique on how to make ‘lettering pieces’ (i.e. labels) or how best to word them.
But Cockerell does have a good deal to say about lettering and letter spacing, as does Arthur Johnson – all good stuff, of course.
Looking at recent manuals, neither Jen Lindsey (‘Fine Bookbinding, a technical guide’, 2009), nor Kathy Abbott (‘Bookbinding, a step-by-step guide’, 2010) mention book titles at all. I guess that’s because both books are about forwarding only, not finishing, though neither actually says so. Arthur Johnson refers briefly to coloured lettering pieces but not how to make them. Eric Burdett has nearly a whole page (page 252) which is helpful as far as it goes, but that’s not far. Going back to Paul Hasluck (1902) you will find about half a page (pages 62/63) about ‘lettering pieces’ of ‘smooth morocco’ on calf bindings in a contrasting colour. But no word about how to prepare them, or letter them on the book. Harrison (Bookbinding Craft and Industry) has half a page on lettering but does not mention separate labels (‘pieces’) at all, in spite of the fact that when his book was written every trade bindery was putting lettering pieces on most of their half or quarter calf bindings.
Only Joseph Zaehnsdorf (‘The Art of Bookbinding’, 2nd. edn. 1890) gives guidance: “For lettering pieces, take morocco of any colour, according to fancy, and having wetted it to facilitate the work, pare it down as thin and as evenly as possible. Cut it to the size of the panel or space it is intended to fit. When cut truly, pare the edges all round, paste it well, put it on the place and rub well down” (page 136). He goes on, helpfully, “I must caution the workman not to allow the leather to come over on to the joint, as by the frequent opening or moving of the boards the edge of the leather will become loose”.
This is what I am talking about:
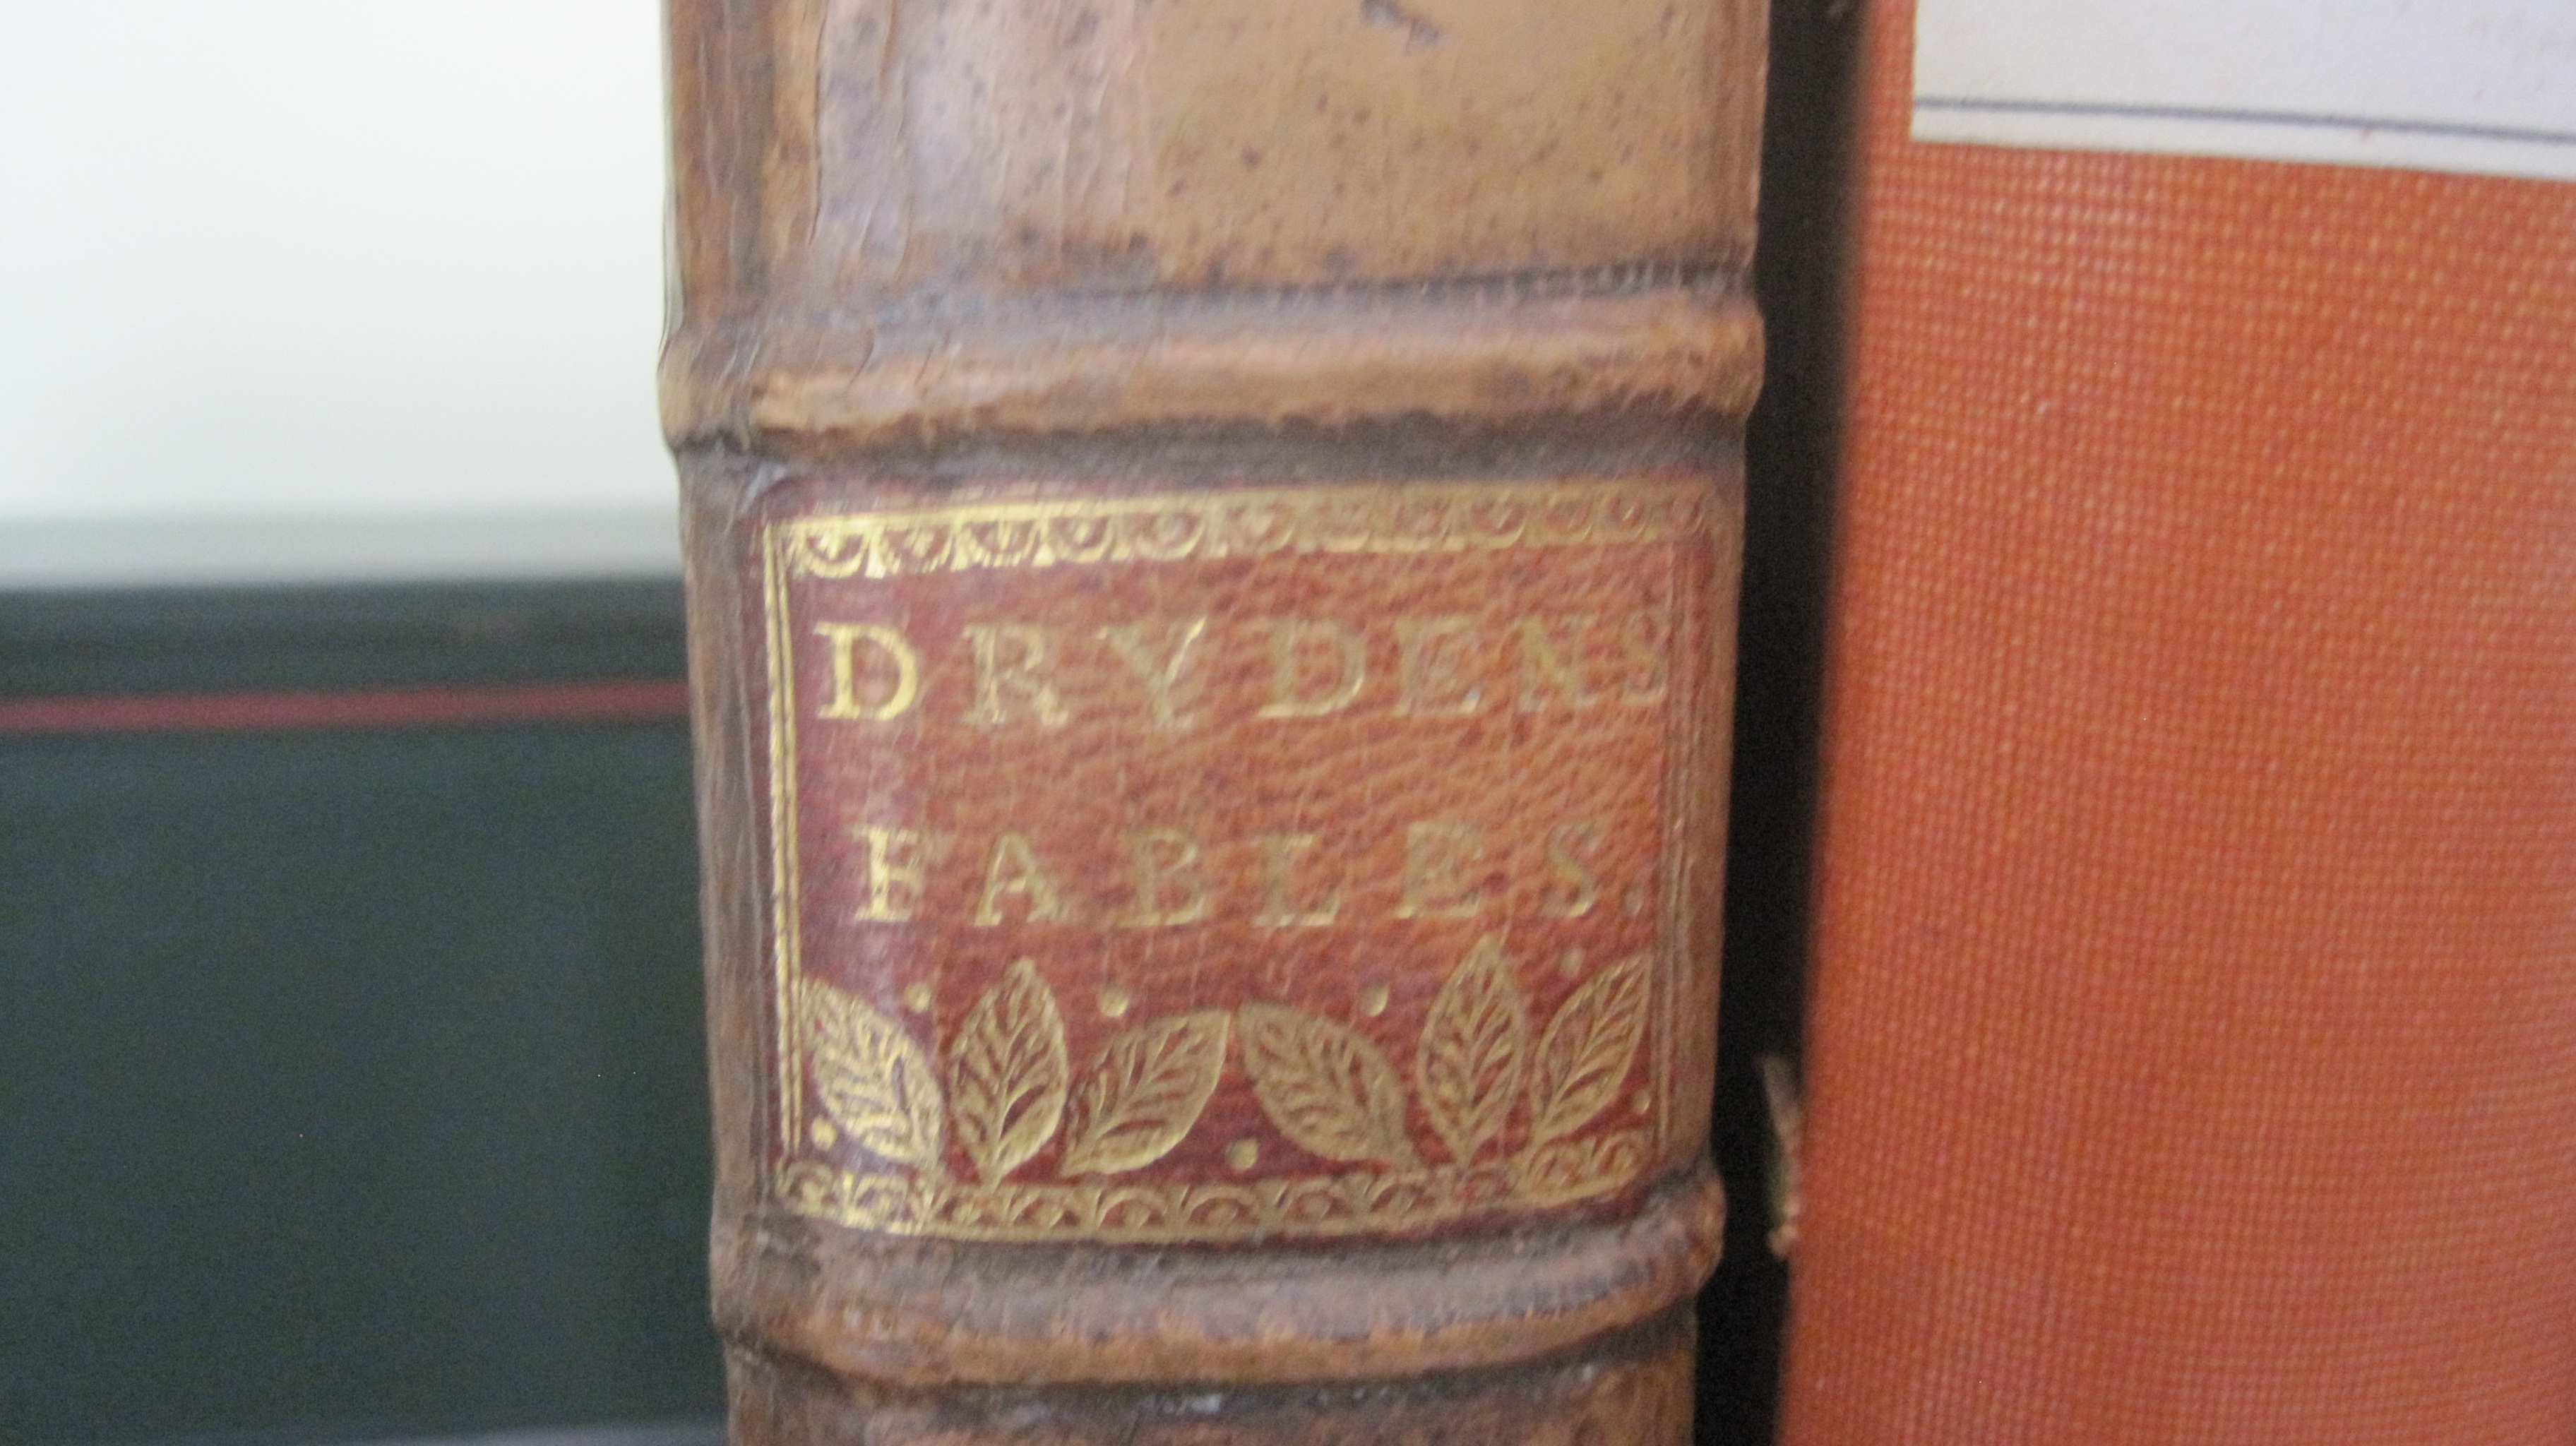
Label of thinly-pared morocco, blocked with gold foil. Note the side edges stop short of the hinge-jointAn early label (1713) . Side edges also stop short of actual hinge joint
Now, all labels were lettered with individual handle letters until the early 19th century when typeholders came in to use. And blocking presses were not used for labels I believe until relatively recently. But they do the job very well – and accurately and quickly – so I use mine all the time for labels which I prepare myself, using various sizes of brass or lead type.
I make my own labels and never use skiver. Take a piece of good smooth leather (goat or calf but not sheep (roan) and not the soft and spongy bits around the belly of the skin, or the tough bits at neck and tail) and big enough to clamp on the stone and work comfortably on.
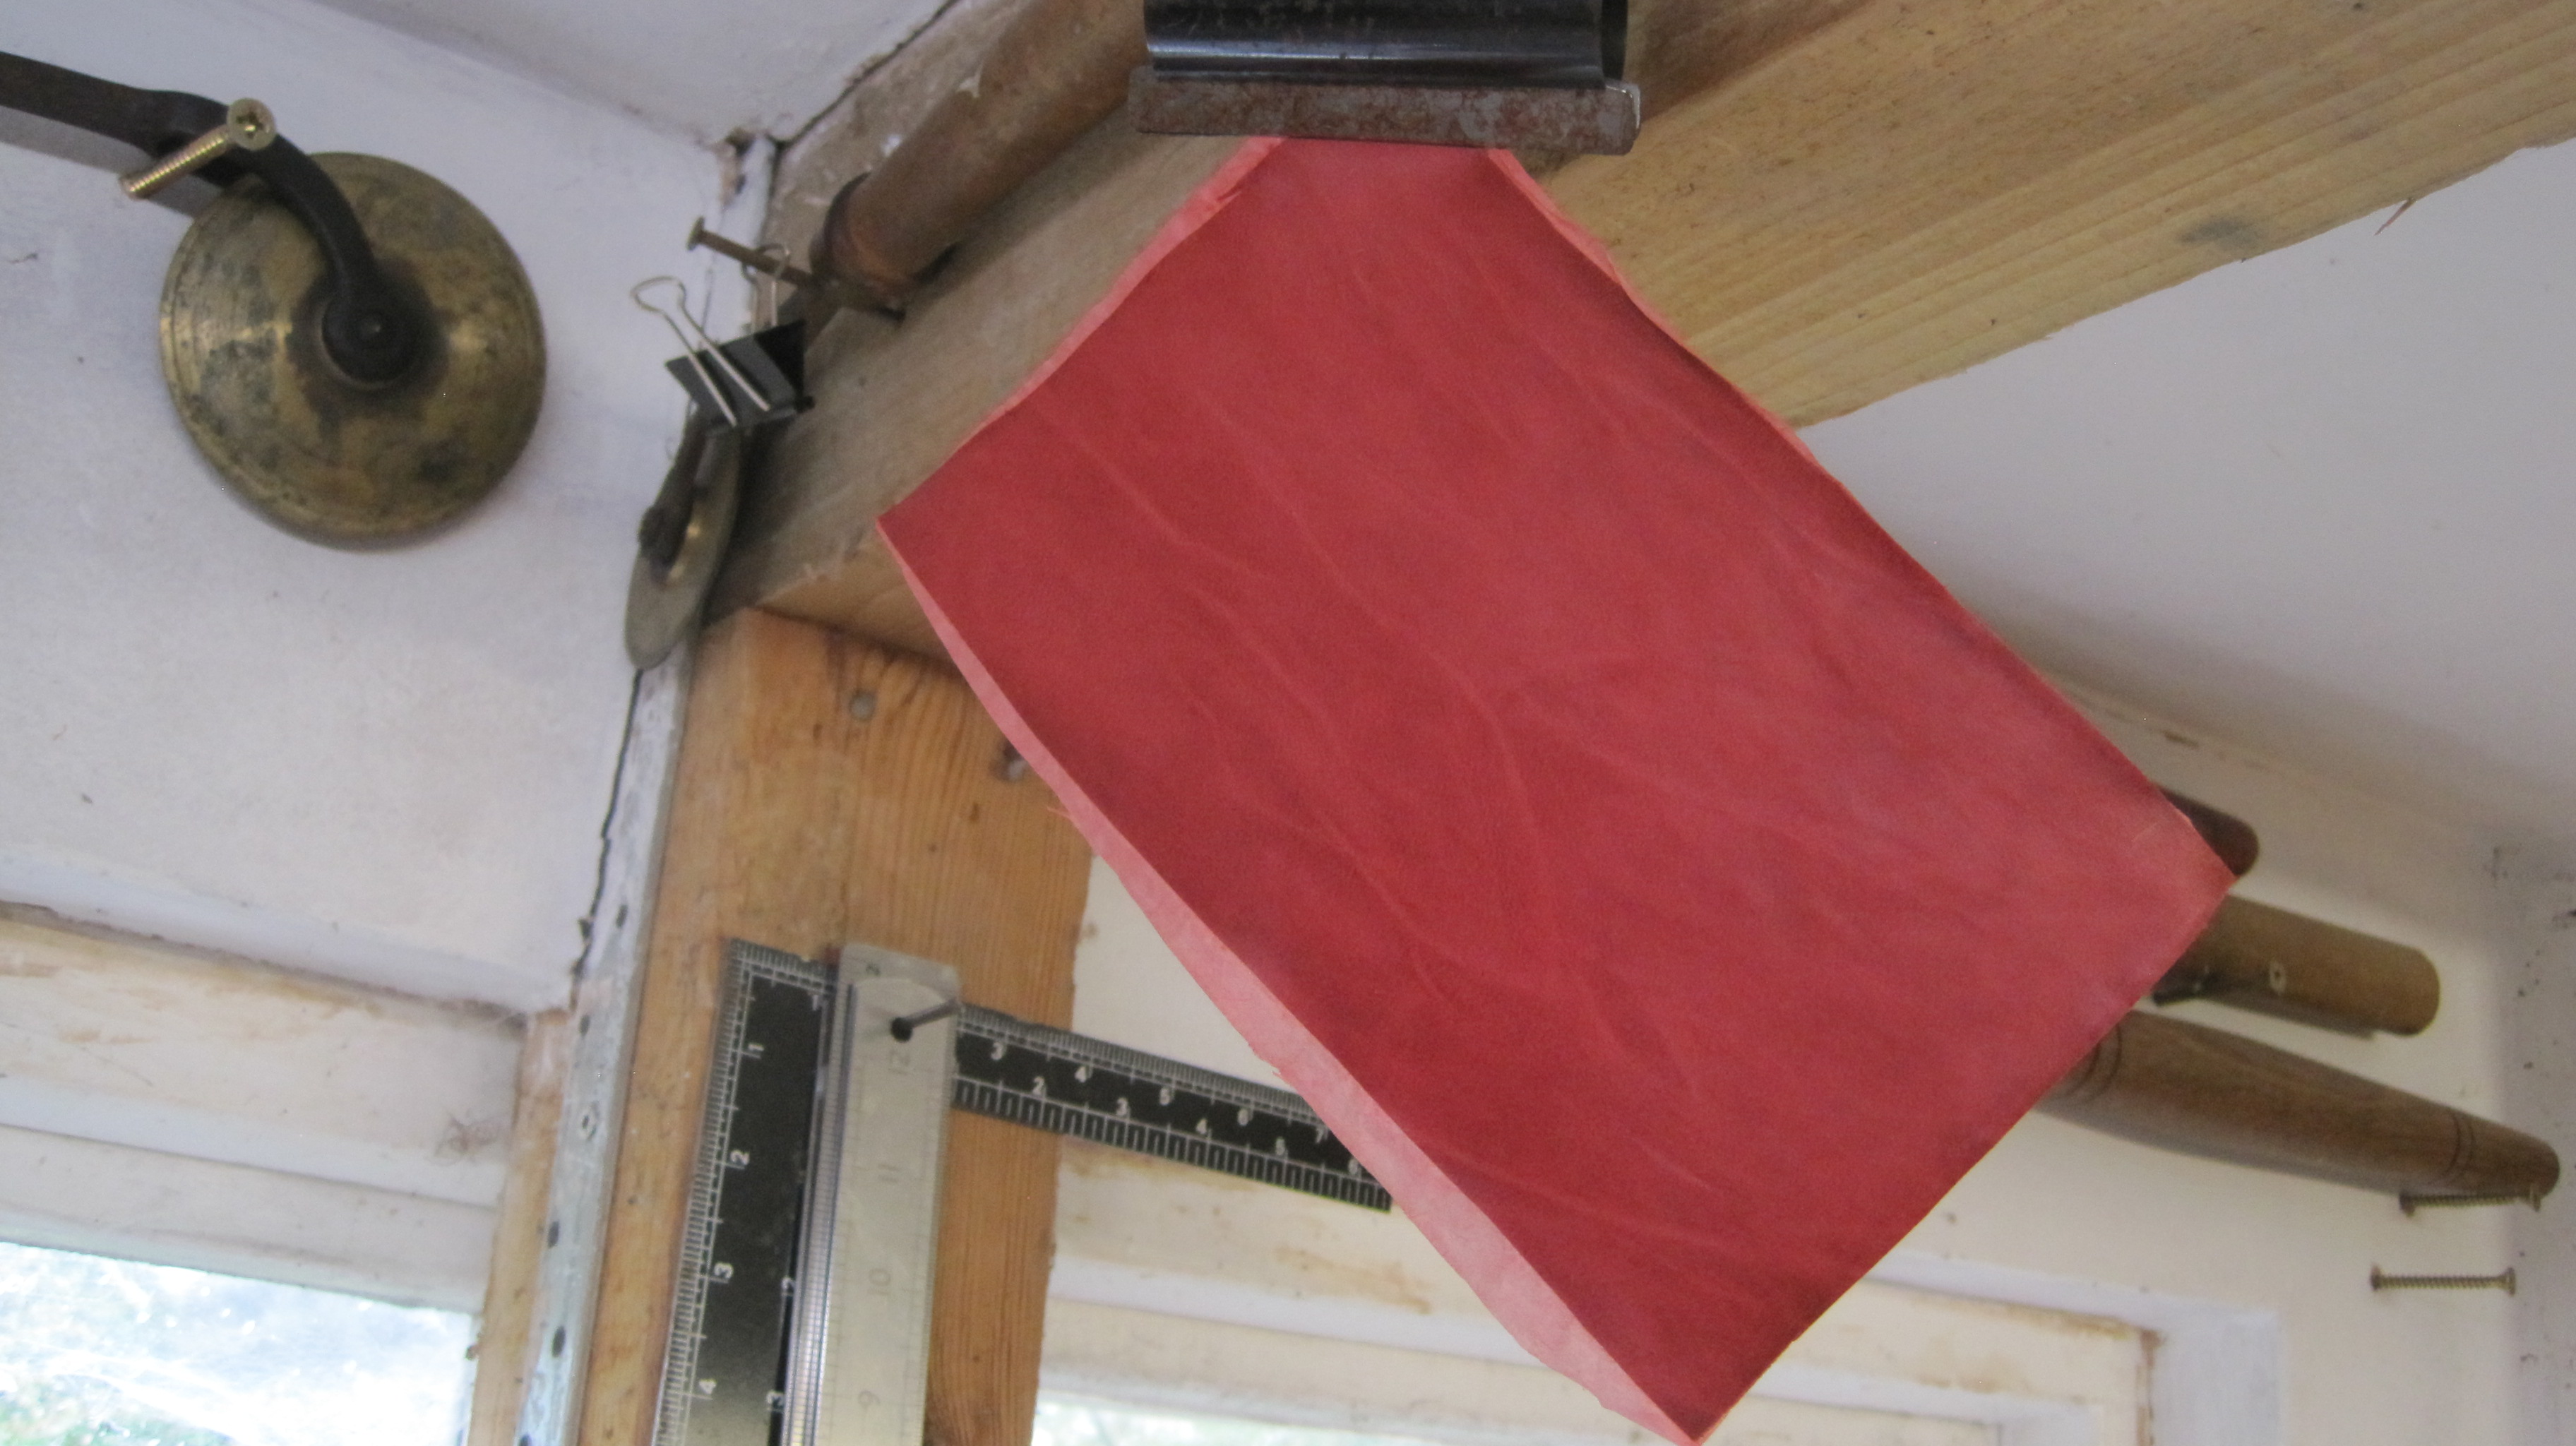
Pare as thin and evenly as you can, taking care to frequently remove crumbs from underneath. Paste both sides with smooth fresh paste and lay the flesh side on a sheet of tissue paper. Place between clean acetate or mylar/melinex sheets and press hard between smooth boards or tins in the nipping press for a few seconds. Tale out and hang up to dry.
Pieces from my stock. Uneven colour can be re-stained with spirit dye. The aim is to have a firm glossy surface which will take blocking through foil and result in a crisp sharp impression.
The examples below illustrate the importance of selecting the right size of type, and of good letter-spacing. The Diehl label type should have been one size larger and the word ‘Diehl’ spaced with 2mm board slips between each letter. Similarly the Markham label type is one size too small and the ‘Markham’ needs spacing. The Bradley label is fine, as is the Selected Poems, though the word ‘poems’ perhaps needs 1mm spaces between the type letters.
From left: 1713 original label (note the side edges are just short of the hinge); printed paper label; label made from same leather as the binding; contrasting label, pallet lines on all sides; new label on a re-back; label on a smooth back.
After blocking the label in the blocking press it is cut to size, edge pared all round and the place in which it is to fit is roughened with a nail board or sandpaper so the glue (not paste) takes well. Paste will soften the label and when rubbed down to fix it in place the impressions of the type will be lost whereas glue on the tissue backing does not soften the leather. Retaining the impression (or do I mean ‘illusion’?) of stamped letters is important, especially for older books.
When the label is to go on a smooth back the exact area it is to cover should be depressed with a small polishing iron so that it lies flat. It is normal practise to seal the top and bottom edges of the label with a line or decorative pallet.
A word about the paper label on the second book from the left: simple to print on a home laser printer, on to reclaimed paper from discarded old endpapers, and very effective on cloth or paper covers.
Finally, a couple of old examples of titles:
Parchment label on a tawed pigskin binding of 1723. The handle letters and pallet were blackened in the smoke of a candle before applyingThere’s nothing as evocative of real age as an ink inscription.I enjoyed doing these – a long time ago now!
Please comment, or disagree, or share with others.
“Binding very worn, front board detached…” Very common words in the book repair world. The textbooks all describe a method of creating a new attachment between the shoulder of the text and the cover/board: the ‘returned cloth joint’ (Burdett, The Craft of Bookbinding’, page 339, Johnson, The Practical Guide to Book Repair and Conservation’, pages 68/69, for example). I used this method myself for many years: no-one complained, so it clearly worked for the customer.
But it troubled me, though I am not an engineer, because it didn’t actually attach the new cloth at the hinge-point, i.e. at the top of the shoulder. The attachment is right in the groove and the top of the shoulder is held only by glue. Here is the method:
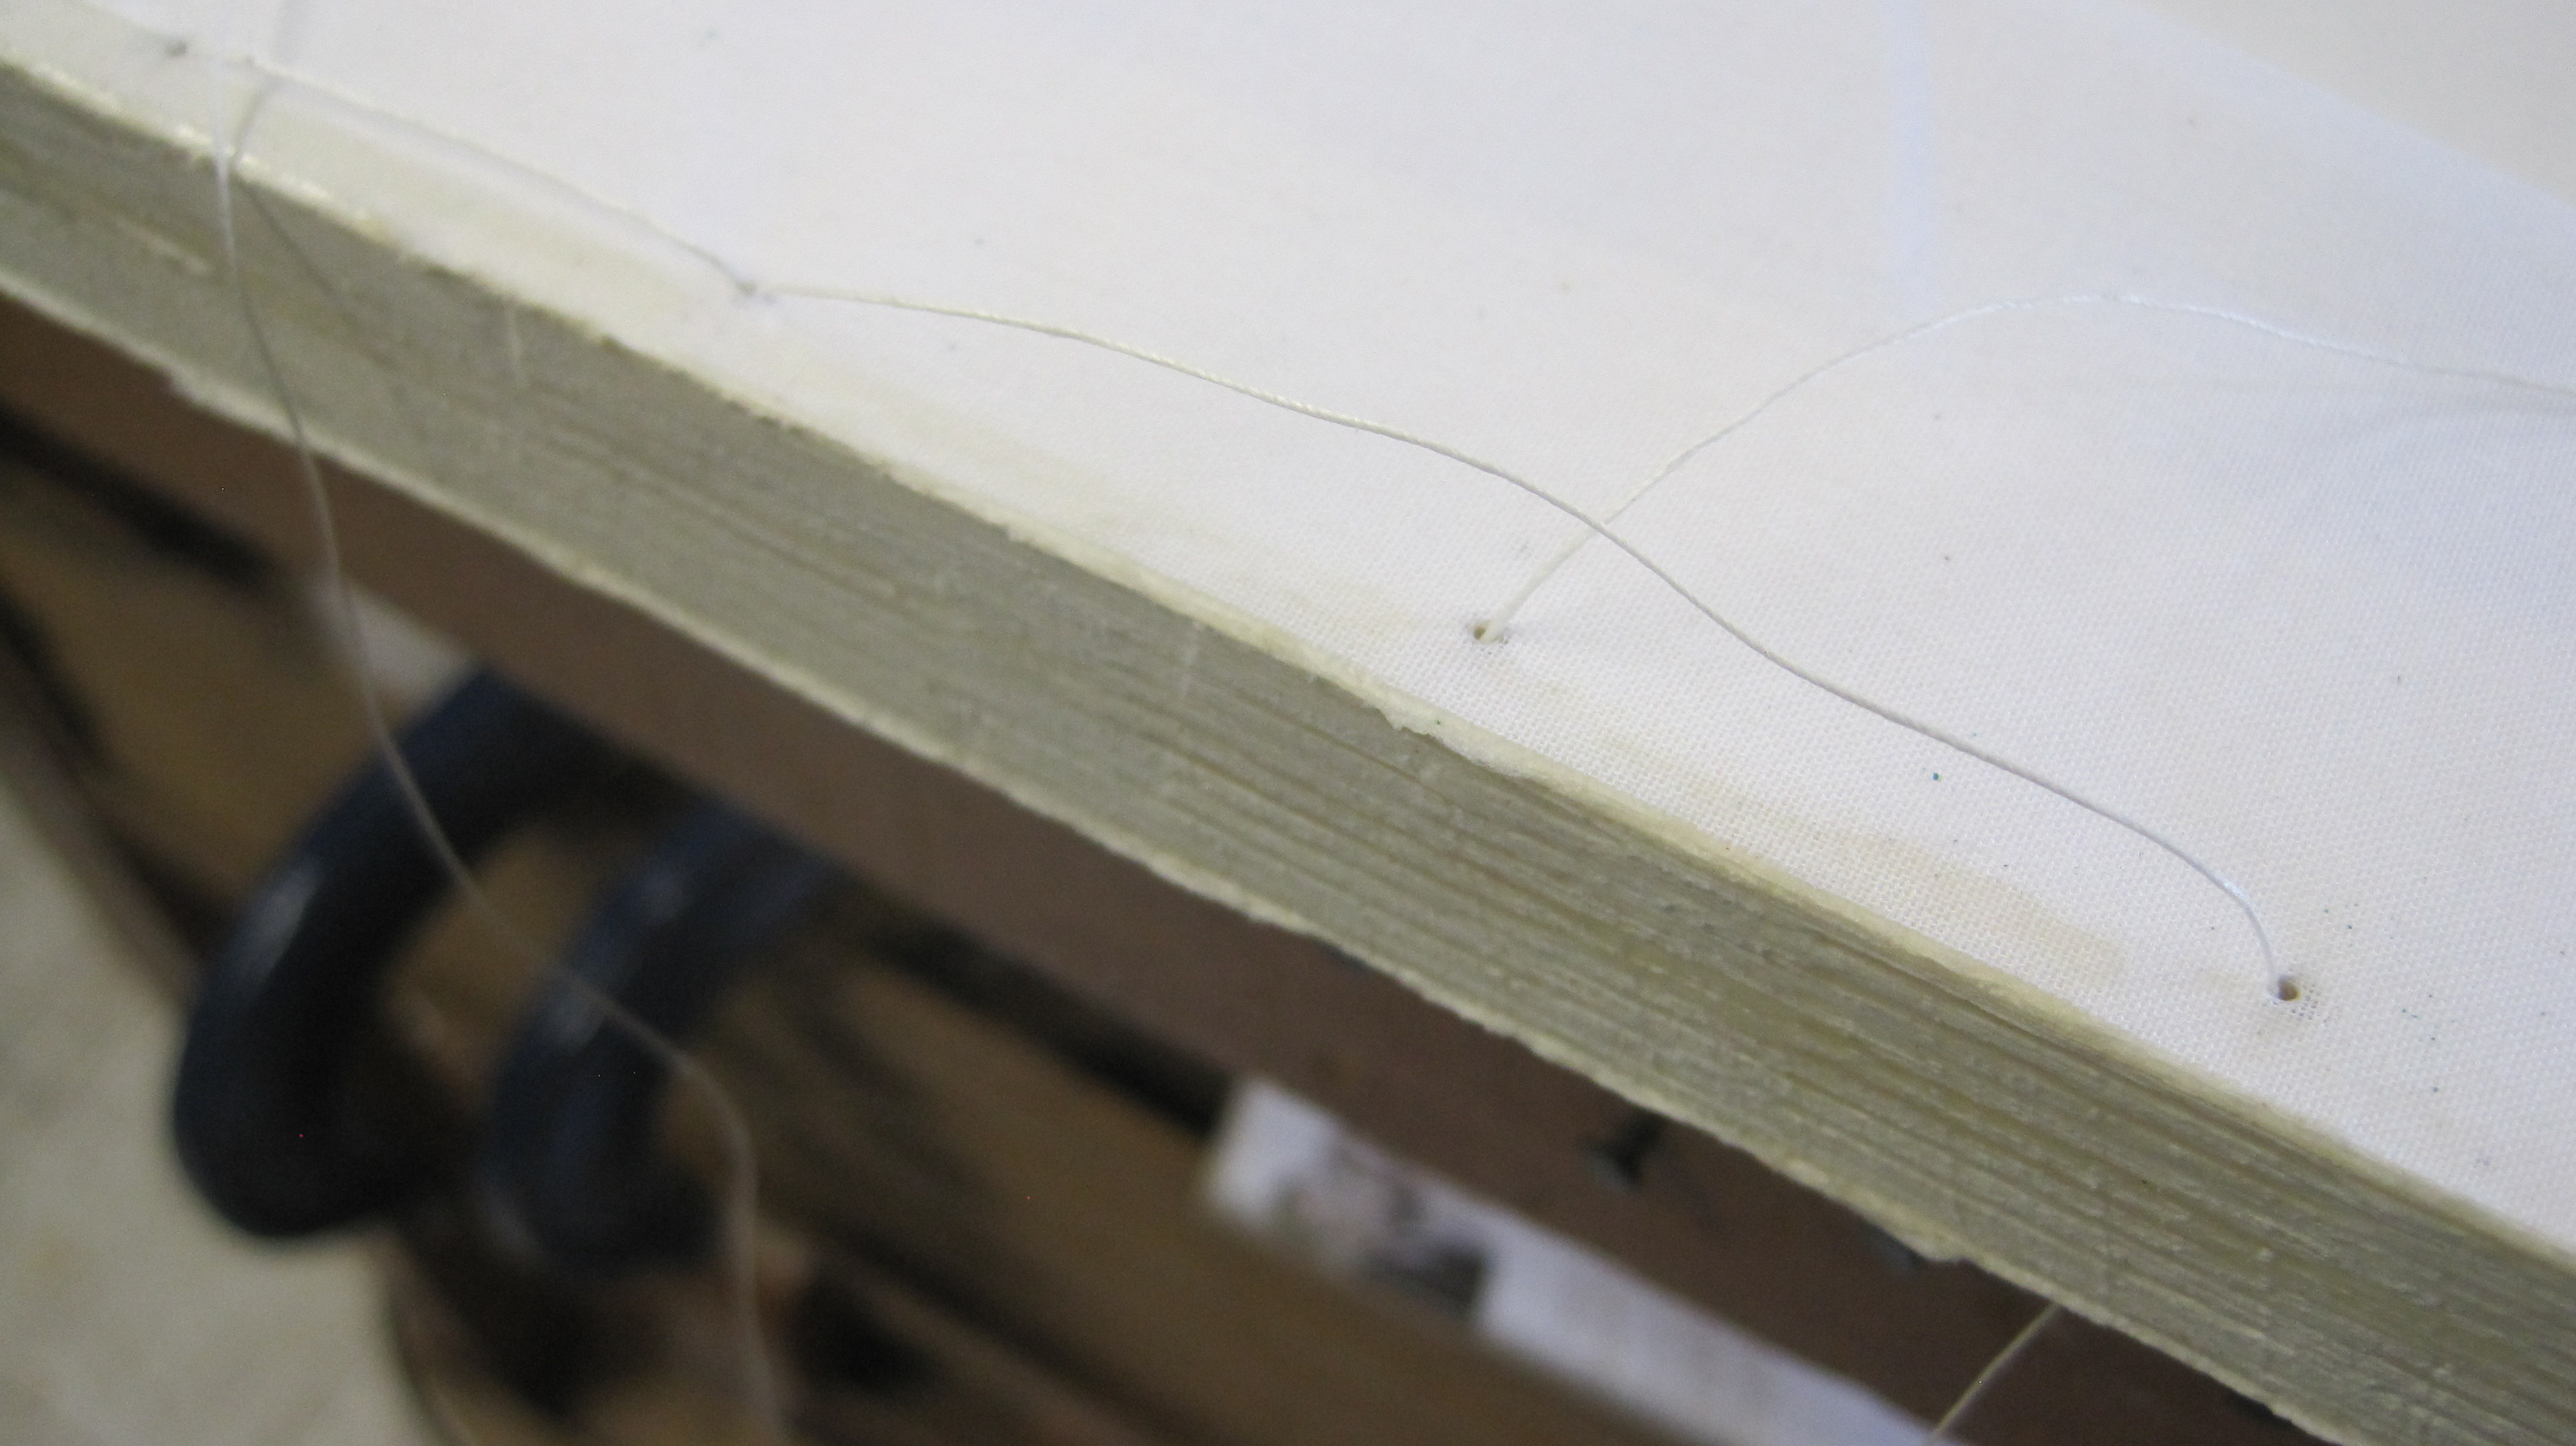
Glue a strip of jaconette, or similar starched cloth, against the shoulderPierce holes all along the base of the shoulder – Burdett says every half-inch (12mm) or so and Johnson’s diagram suggests the same spacing, which I think is unnecessarily closeSew through all along (the red thread is just to make the picture clear)
Turn the flap up and glue against the shoulderFold the flap down into the groove. The cover/board is then attached to it
The problems this method produces are two-fold: first, the glued ‘up’ fold can just pull away from the shoulder:
Second, the method puts three layers of cloth into the hinge where initially there was only one – the mull lining. If the repair uses the original board (as it very often does) this will push the board forward by enough to show the paste-down endpaper along the foredge:
I have highlighted the paste-down to show the effect
It took me years to realise there is a better way which avoids both those problems. Why not make the physical attachment point at the top of the shoulder, not at the base of the groove? You still need to pierce the shoulder to give the attaching thread something to hold on to, but you simply pass it through the new cloth at the top.
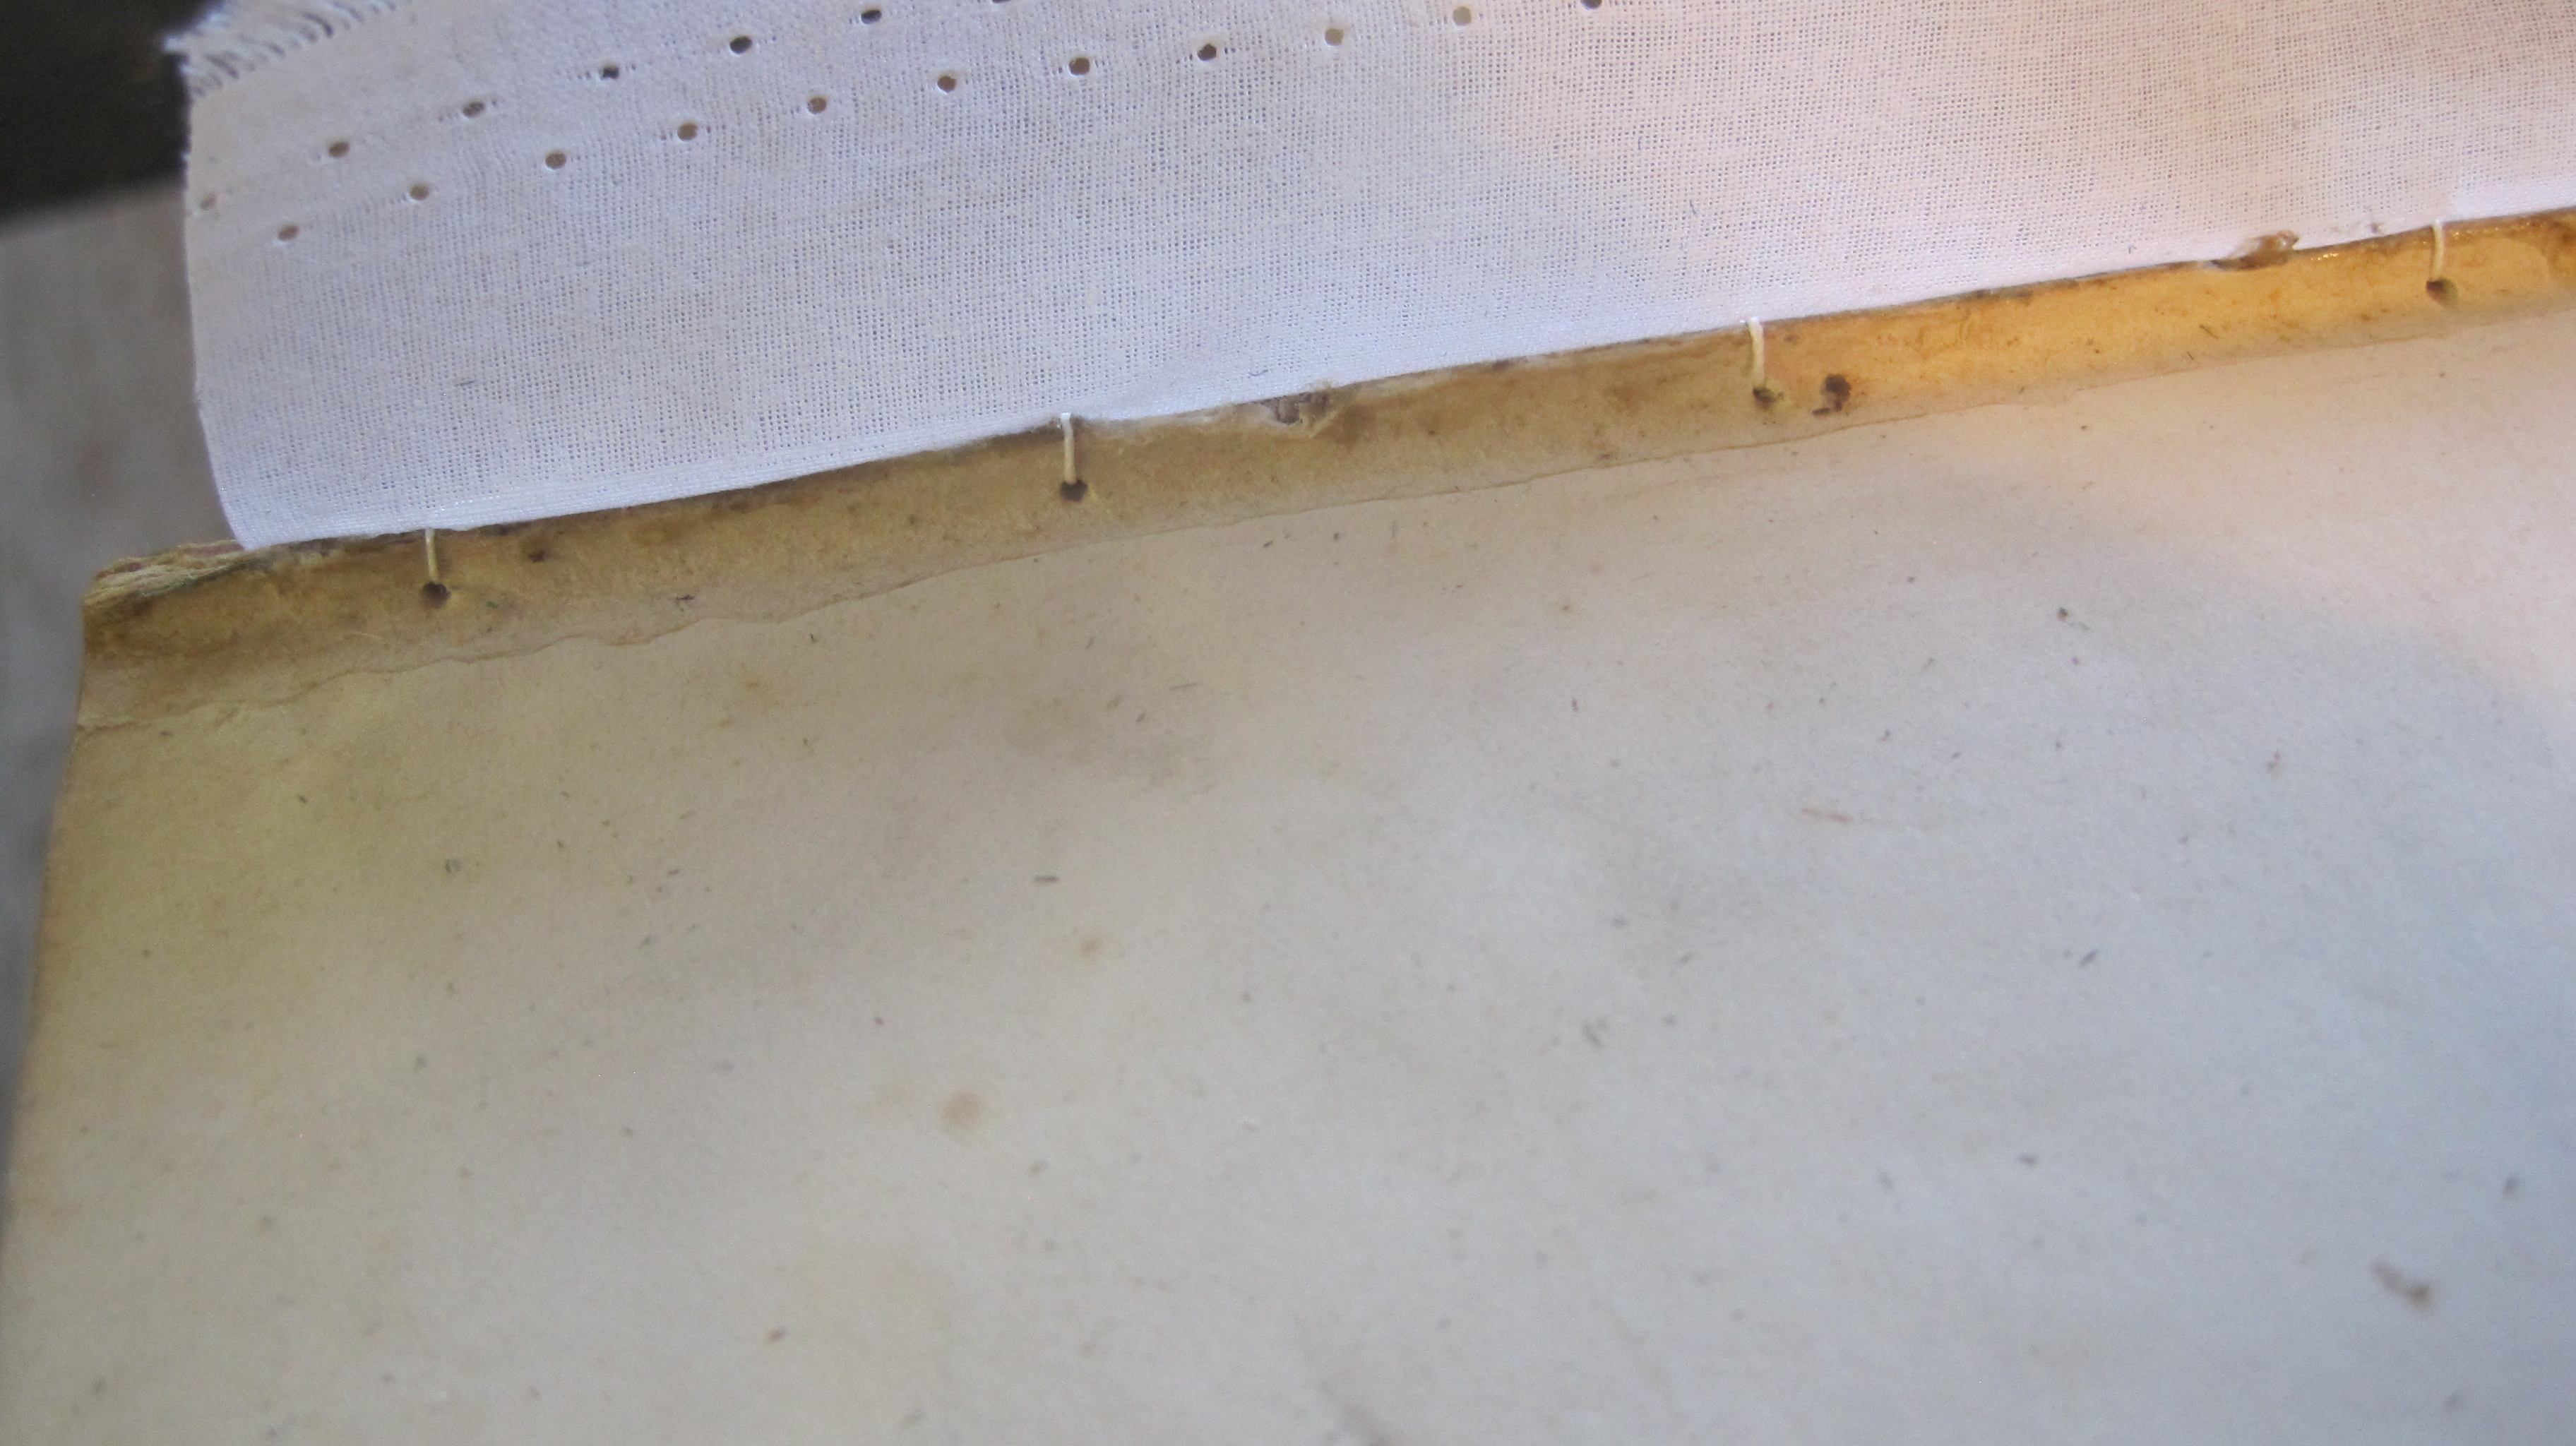
So, glue a strip of cloth across the spine, just as the original mull was, with an inch extra on each side as before. Pierce through from the base of the shoulder all along – 35 mm spacing is fine – and put a threaded needle through from the back and out again at the hinge point:
Tie a knot at the back
Repeat all along, using a simple blanket stitch:
The new hinge cloth is attached exactly at the top of the shoulder in nine places. That’s stronger than the original five laced-in cords
The back is then lined with kraft paper in the usual way, anchoring the sewn threads
Another layer of thicker paper will enable the little lumps to be sanded down and a kraft paper hollow produces a smooth back.
In the joint there is nothing extra so the old covers can go back exactly where they were:
Only the endpaper goes in the joint, just as originally.
I have used this method on all types of book – simple re-casing, leather hollow back, and tight back. It is quicker, but more important, it is simply better!
Of course, you may disagree – if so, please say so.
But first, welcome to our first viewer from Macedonia, where I spent happy times (working!) twenty years ago.
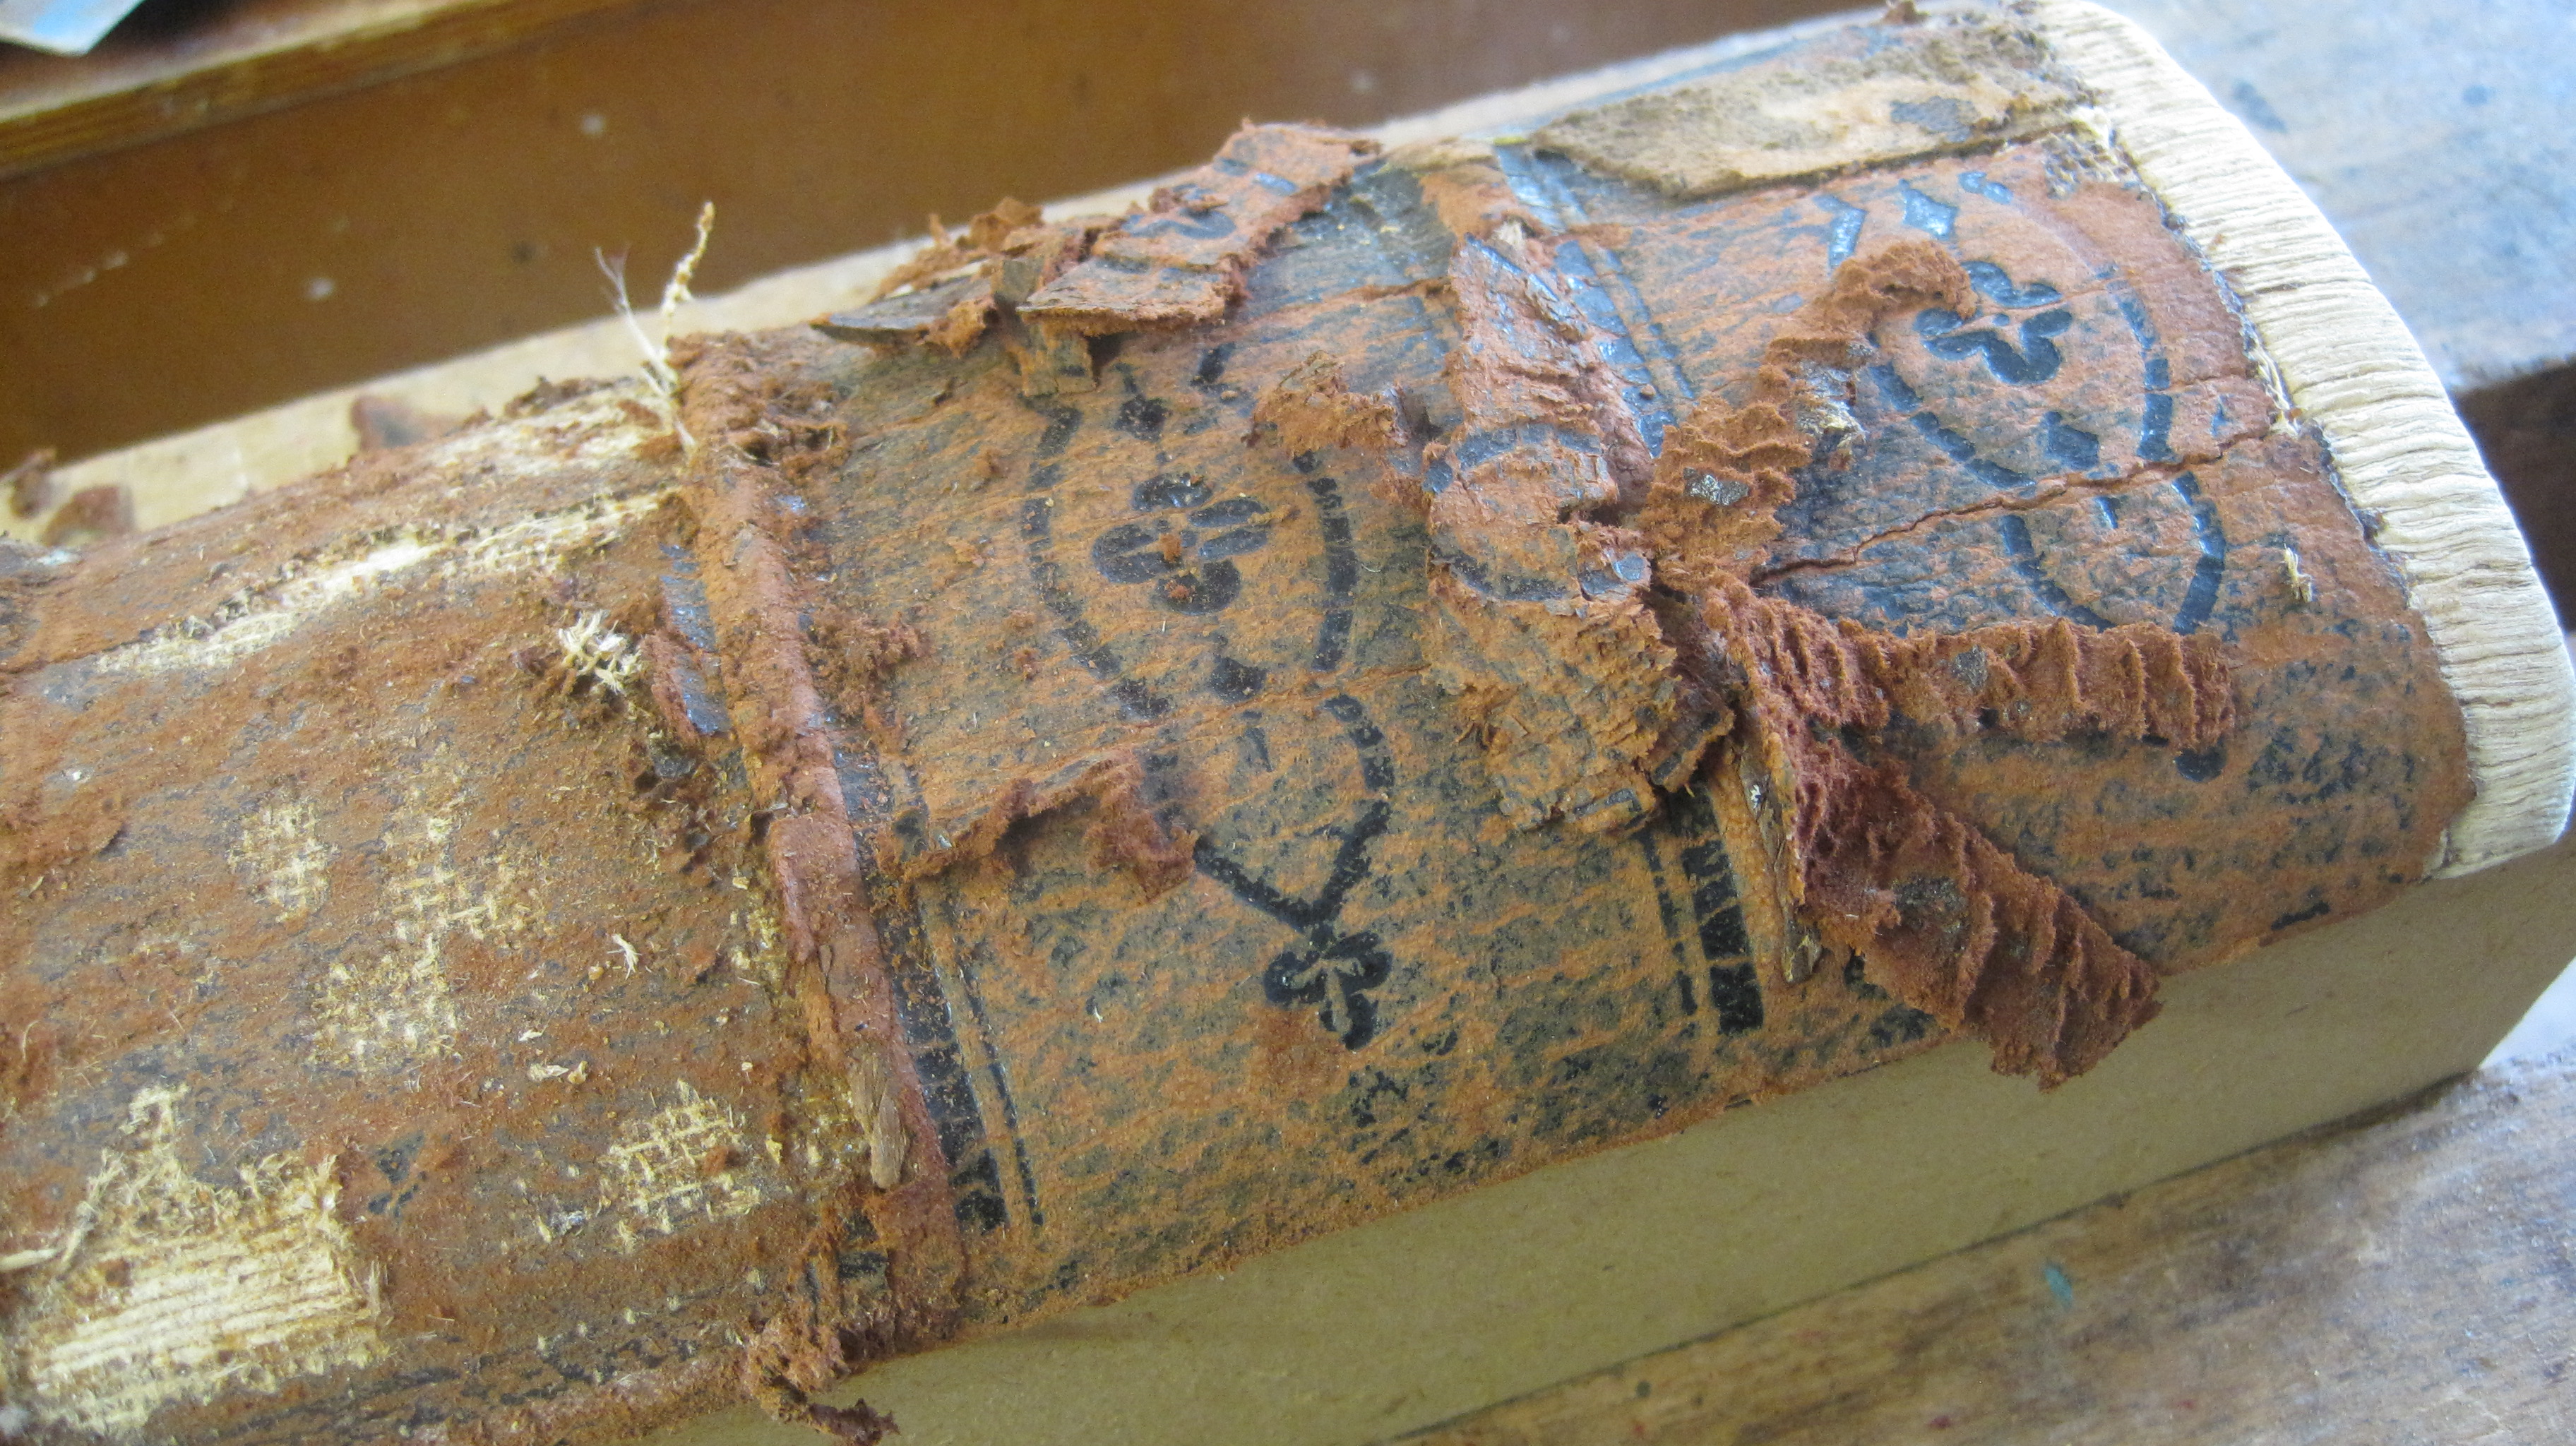
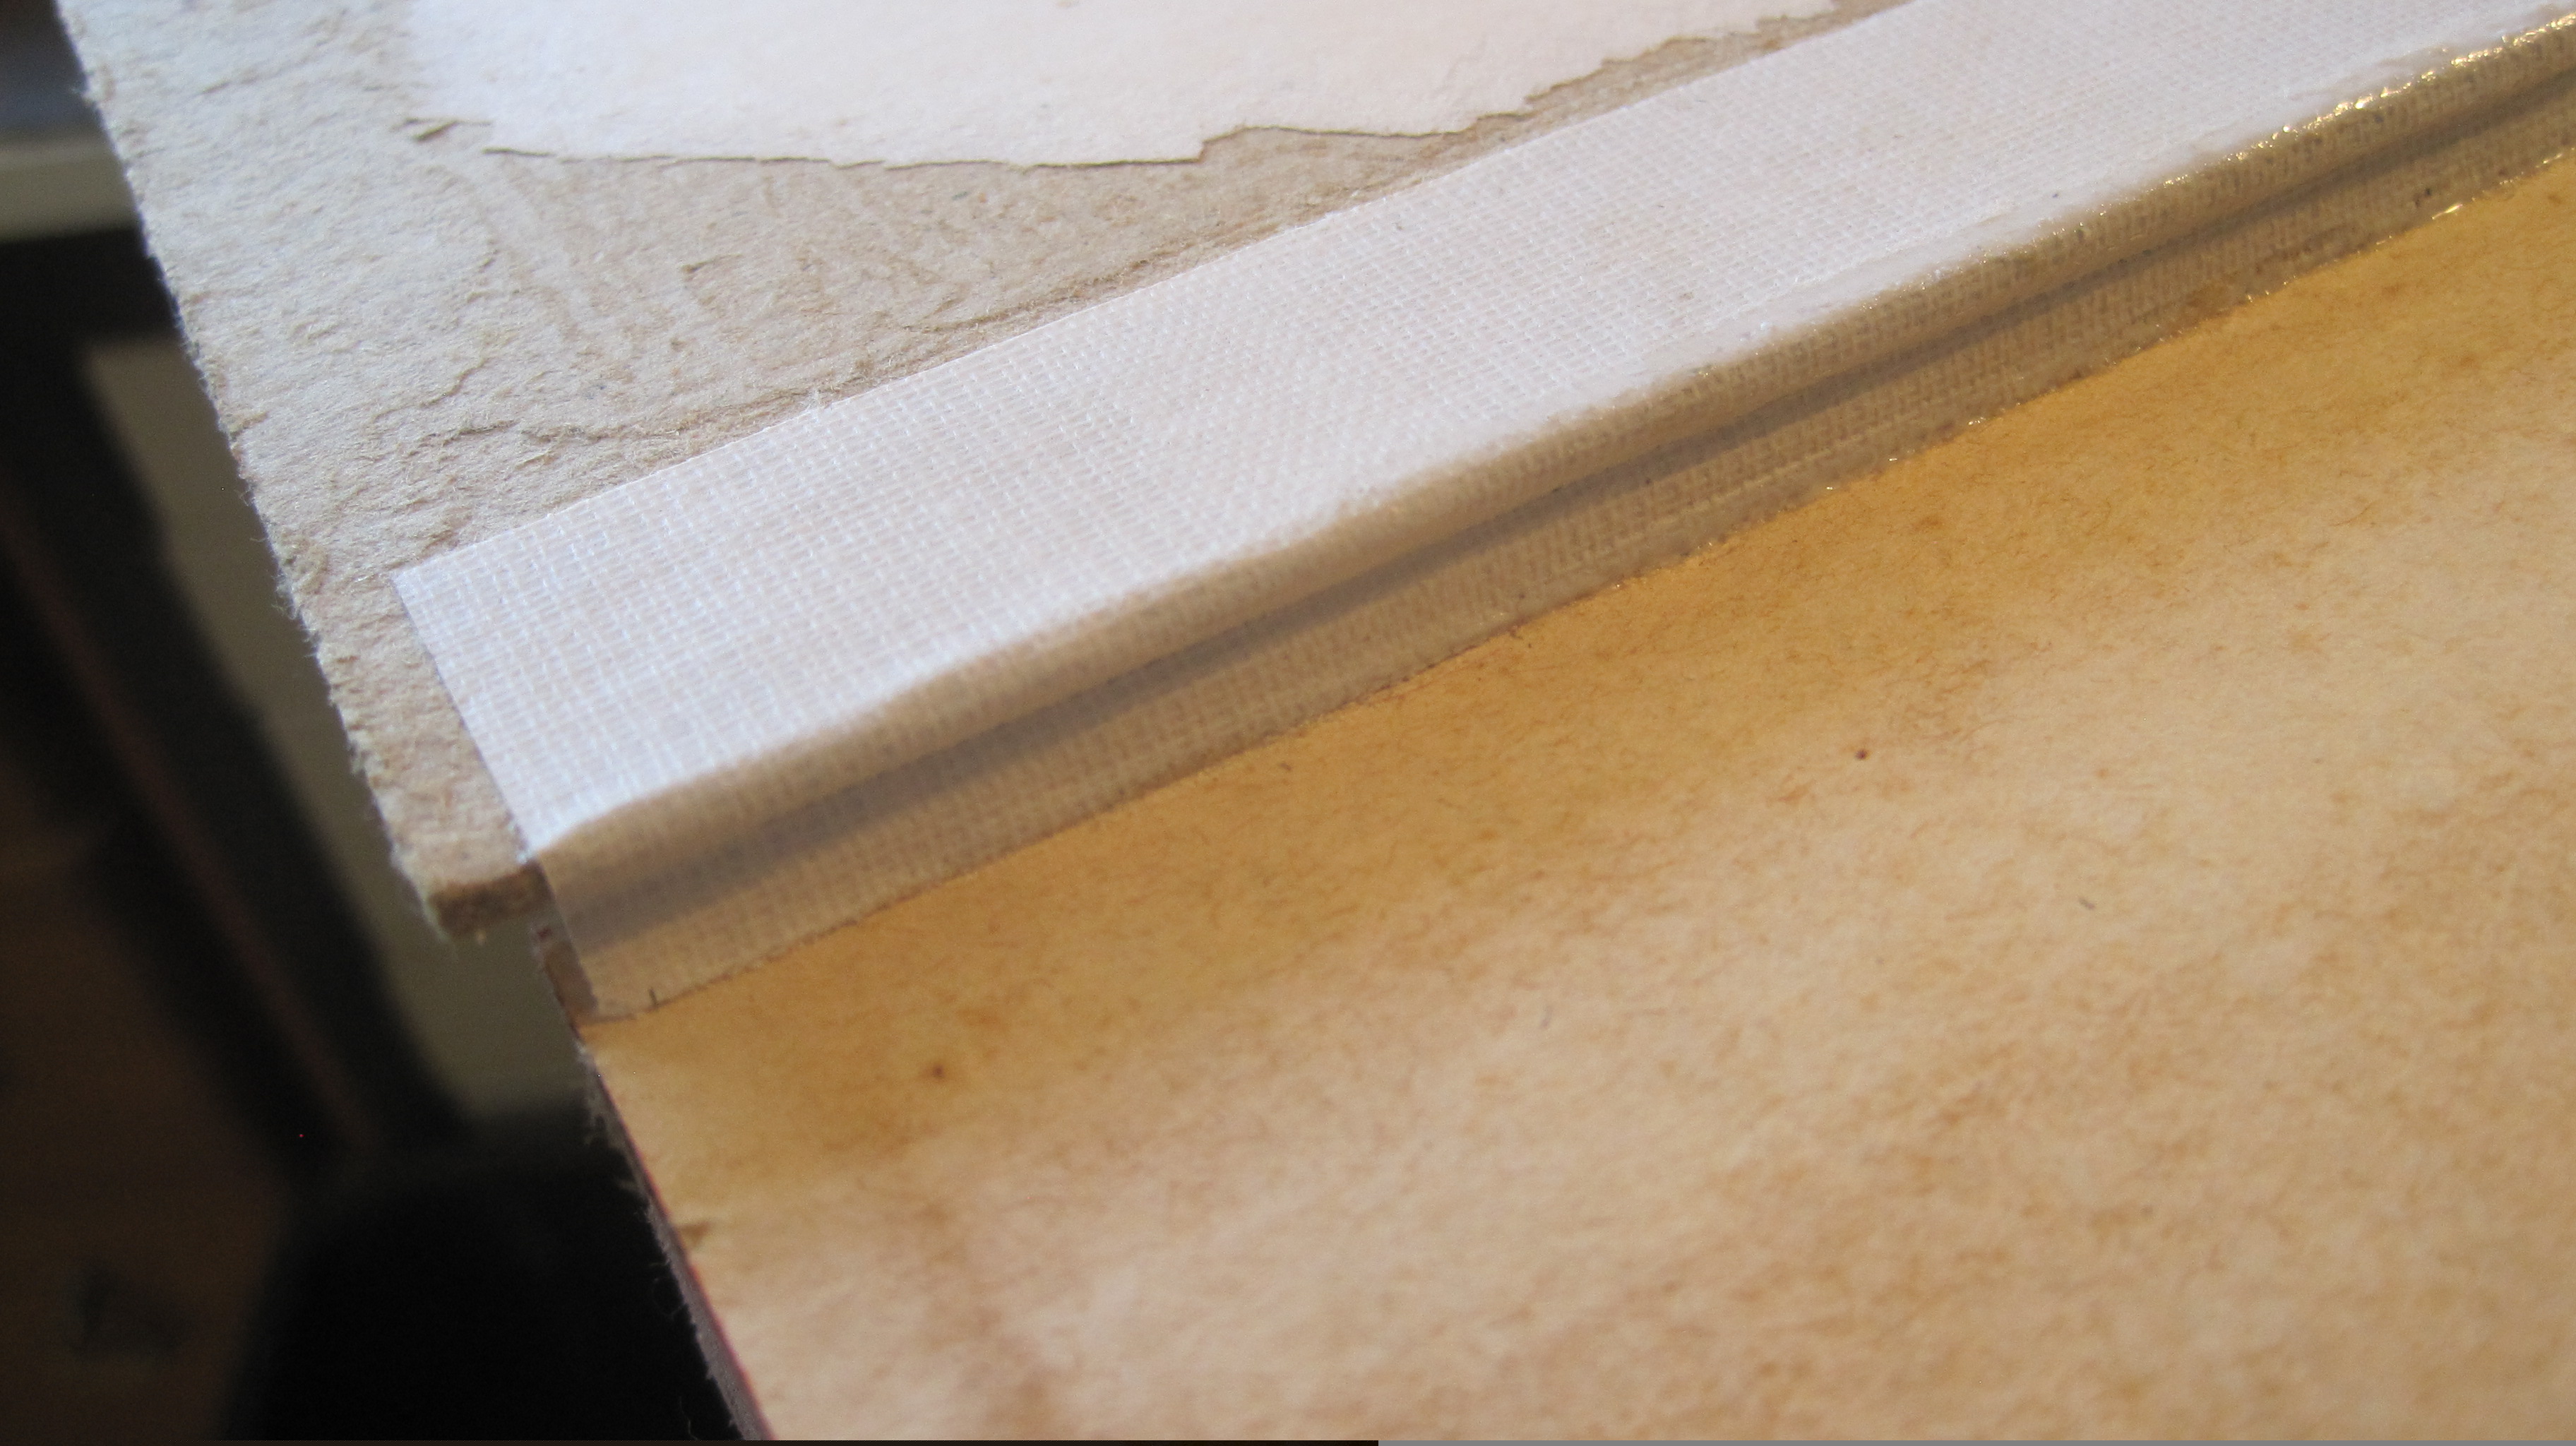
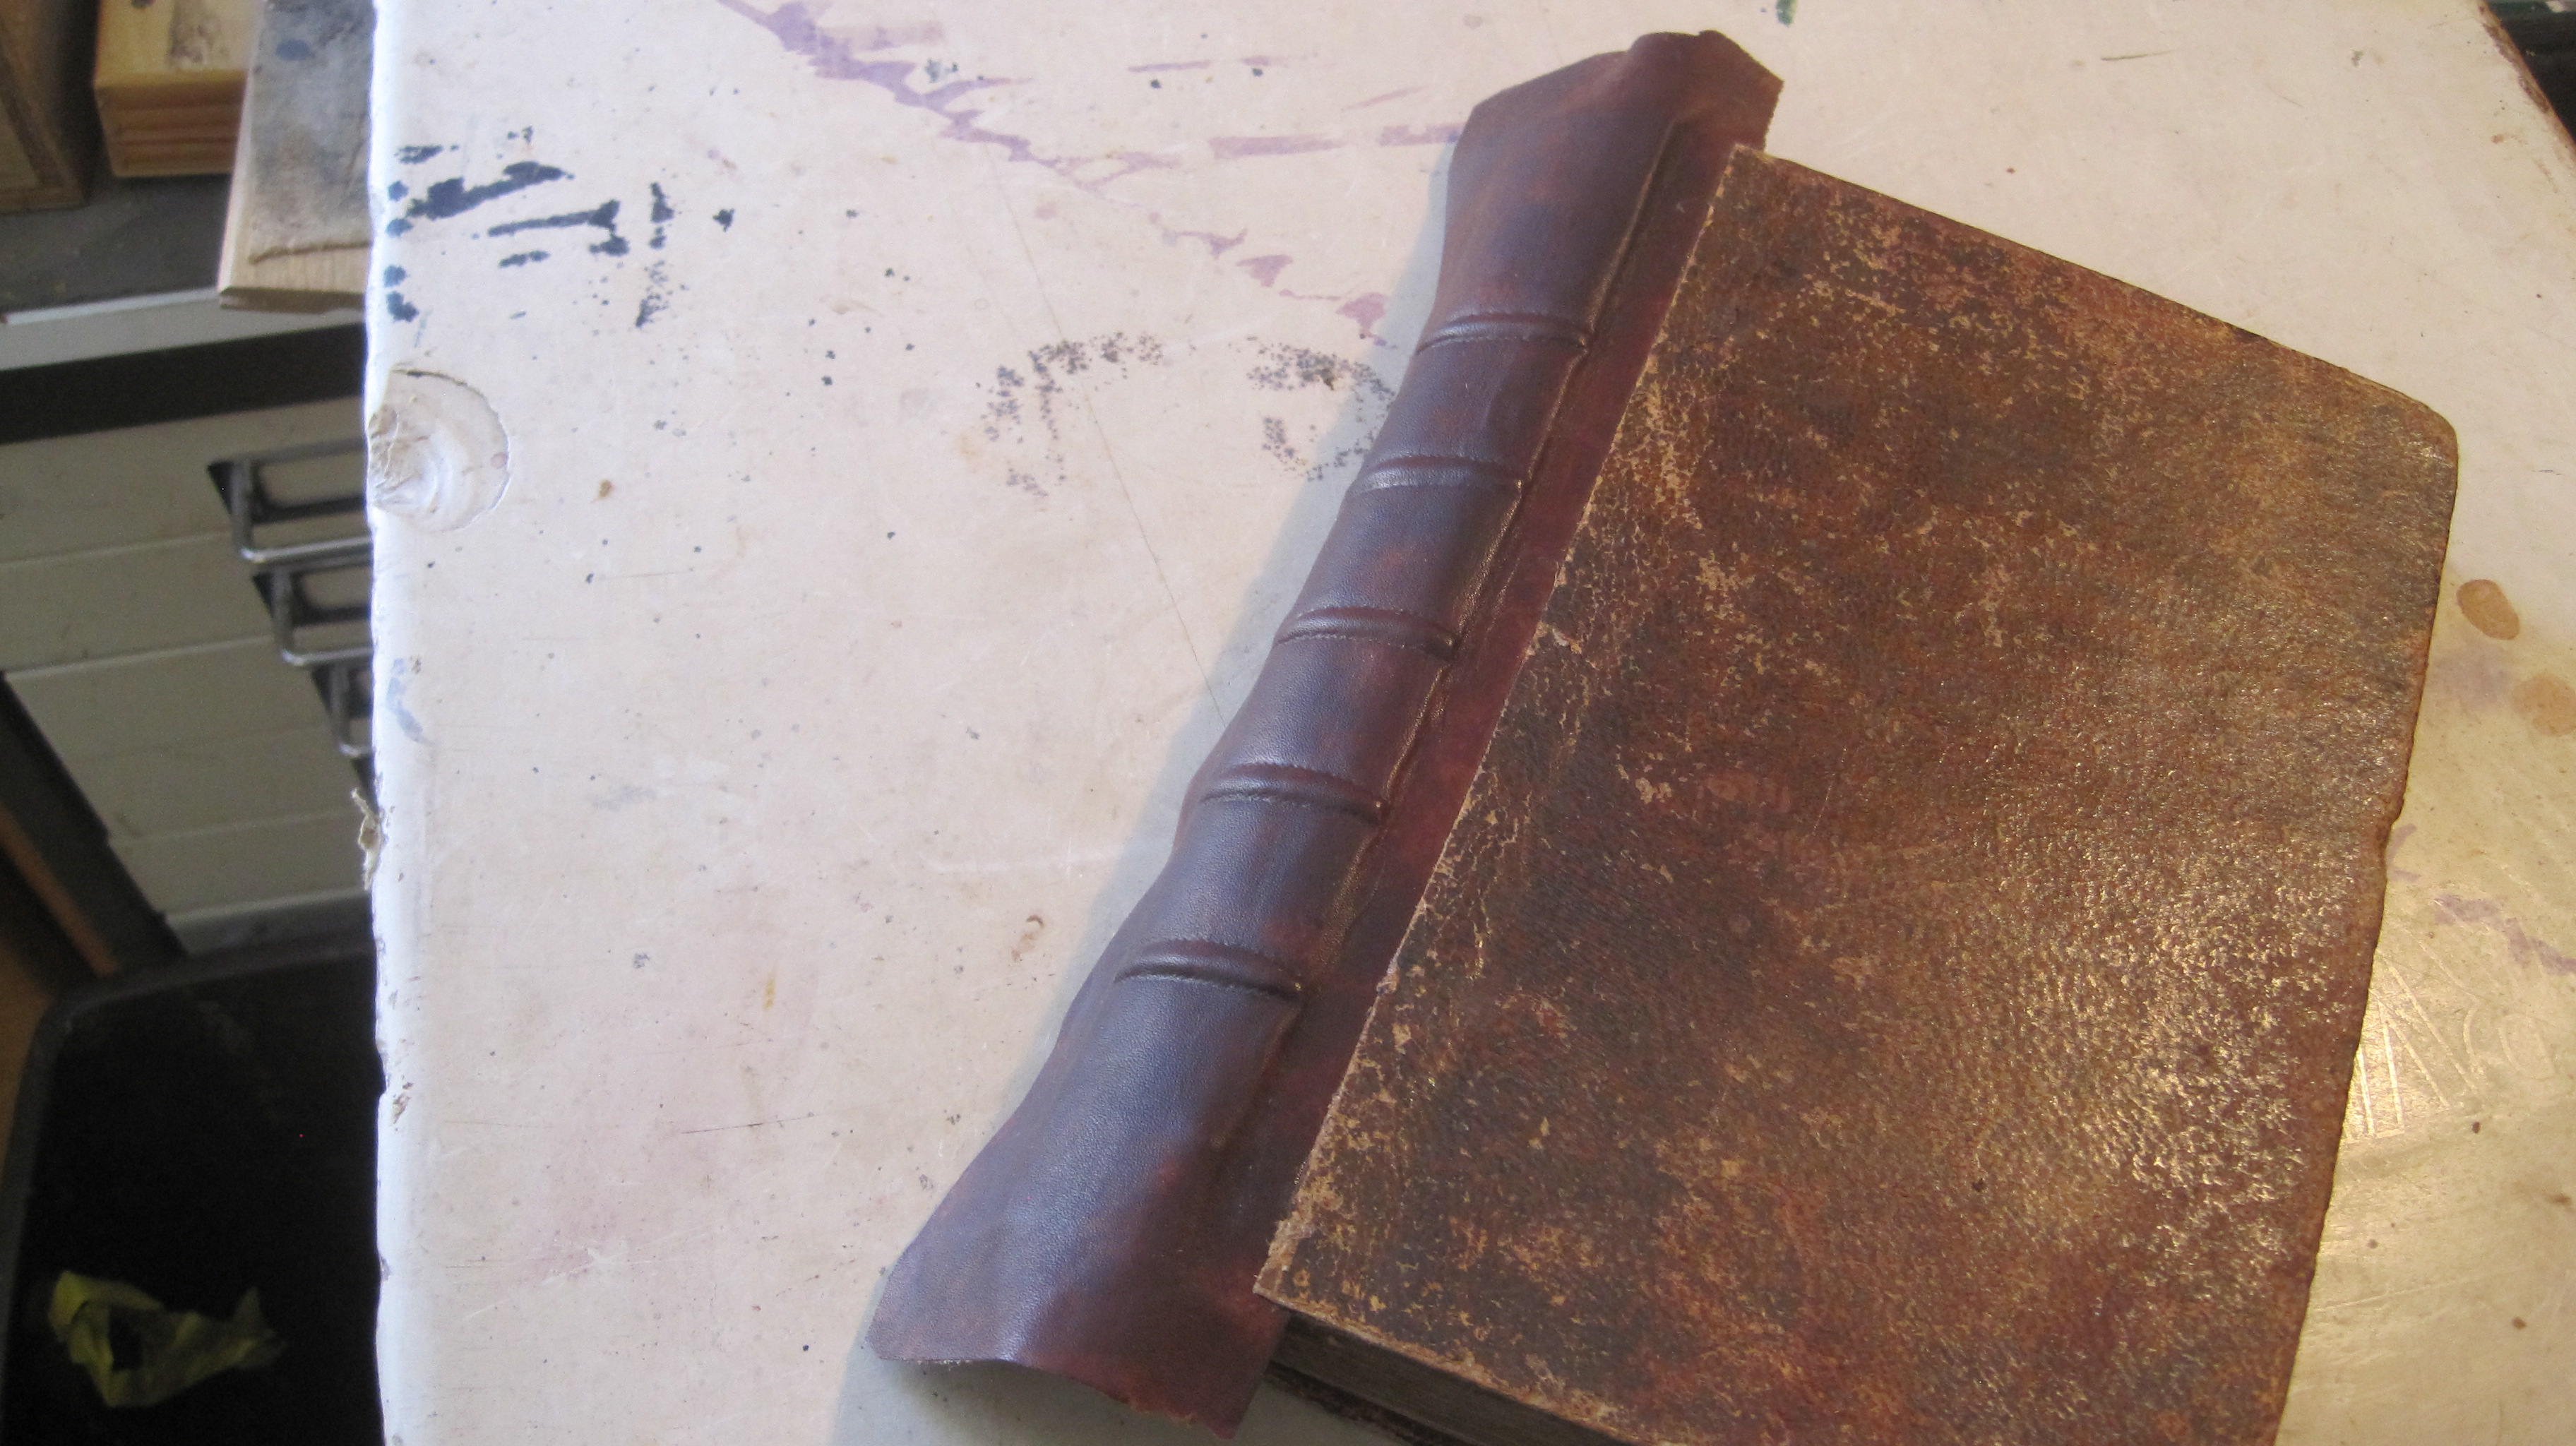
You could see in the previous ‘headbanding’ post that the book in question had raised bands on the spine. The original tight leather covering had completely decayed so it was cleaned off and the spine lined with strong thin cotton fabric (‘Fraynot’) which also acts as new hinges for the boards. Re-backing the book in leather as before, as a ‘tight back’ is fine, but I have found the book works better when finished if it has a hollow back – it opens better and the risk of future failure at the joints is reduced.
But the original raised cords on the spine preclude a traditional hollow. My solution is to shape a strip of thin card to fit over the old cords and then use it as the liner (stiffener) inside the new leather spine.
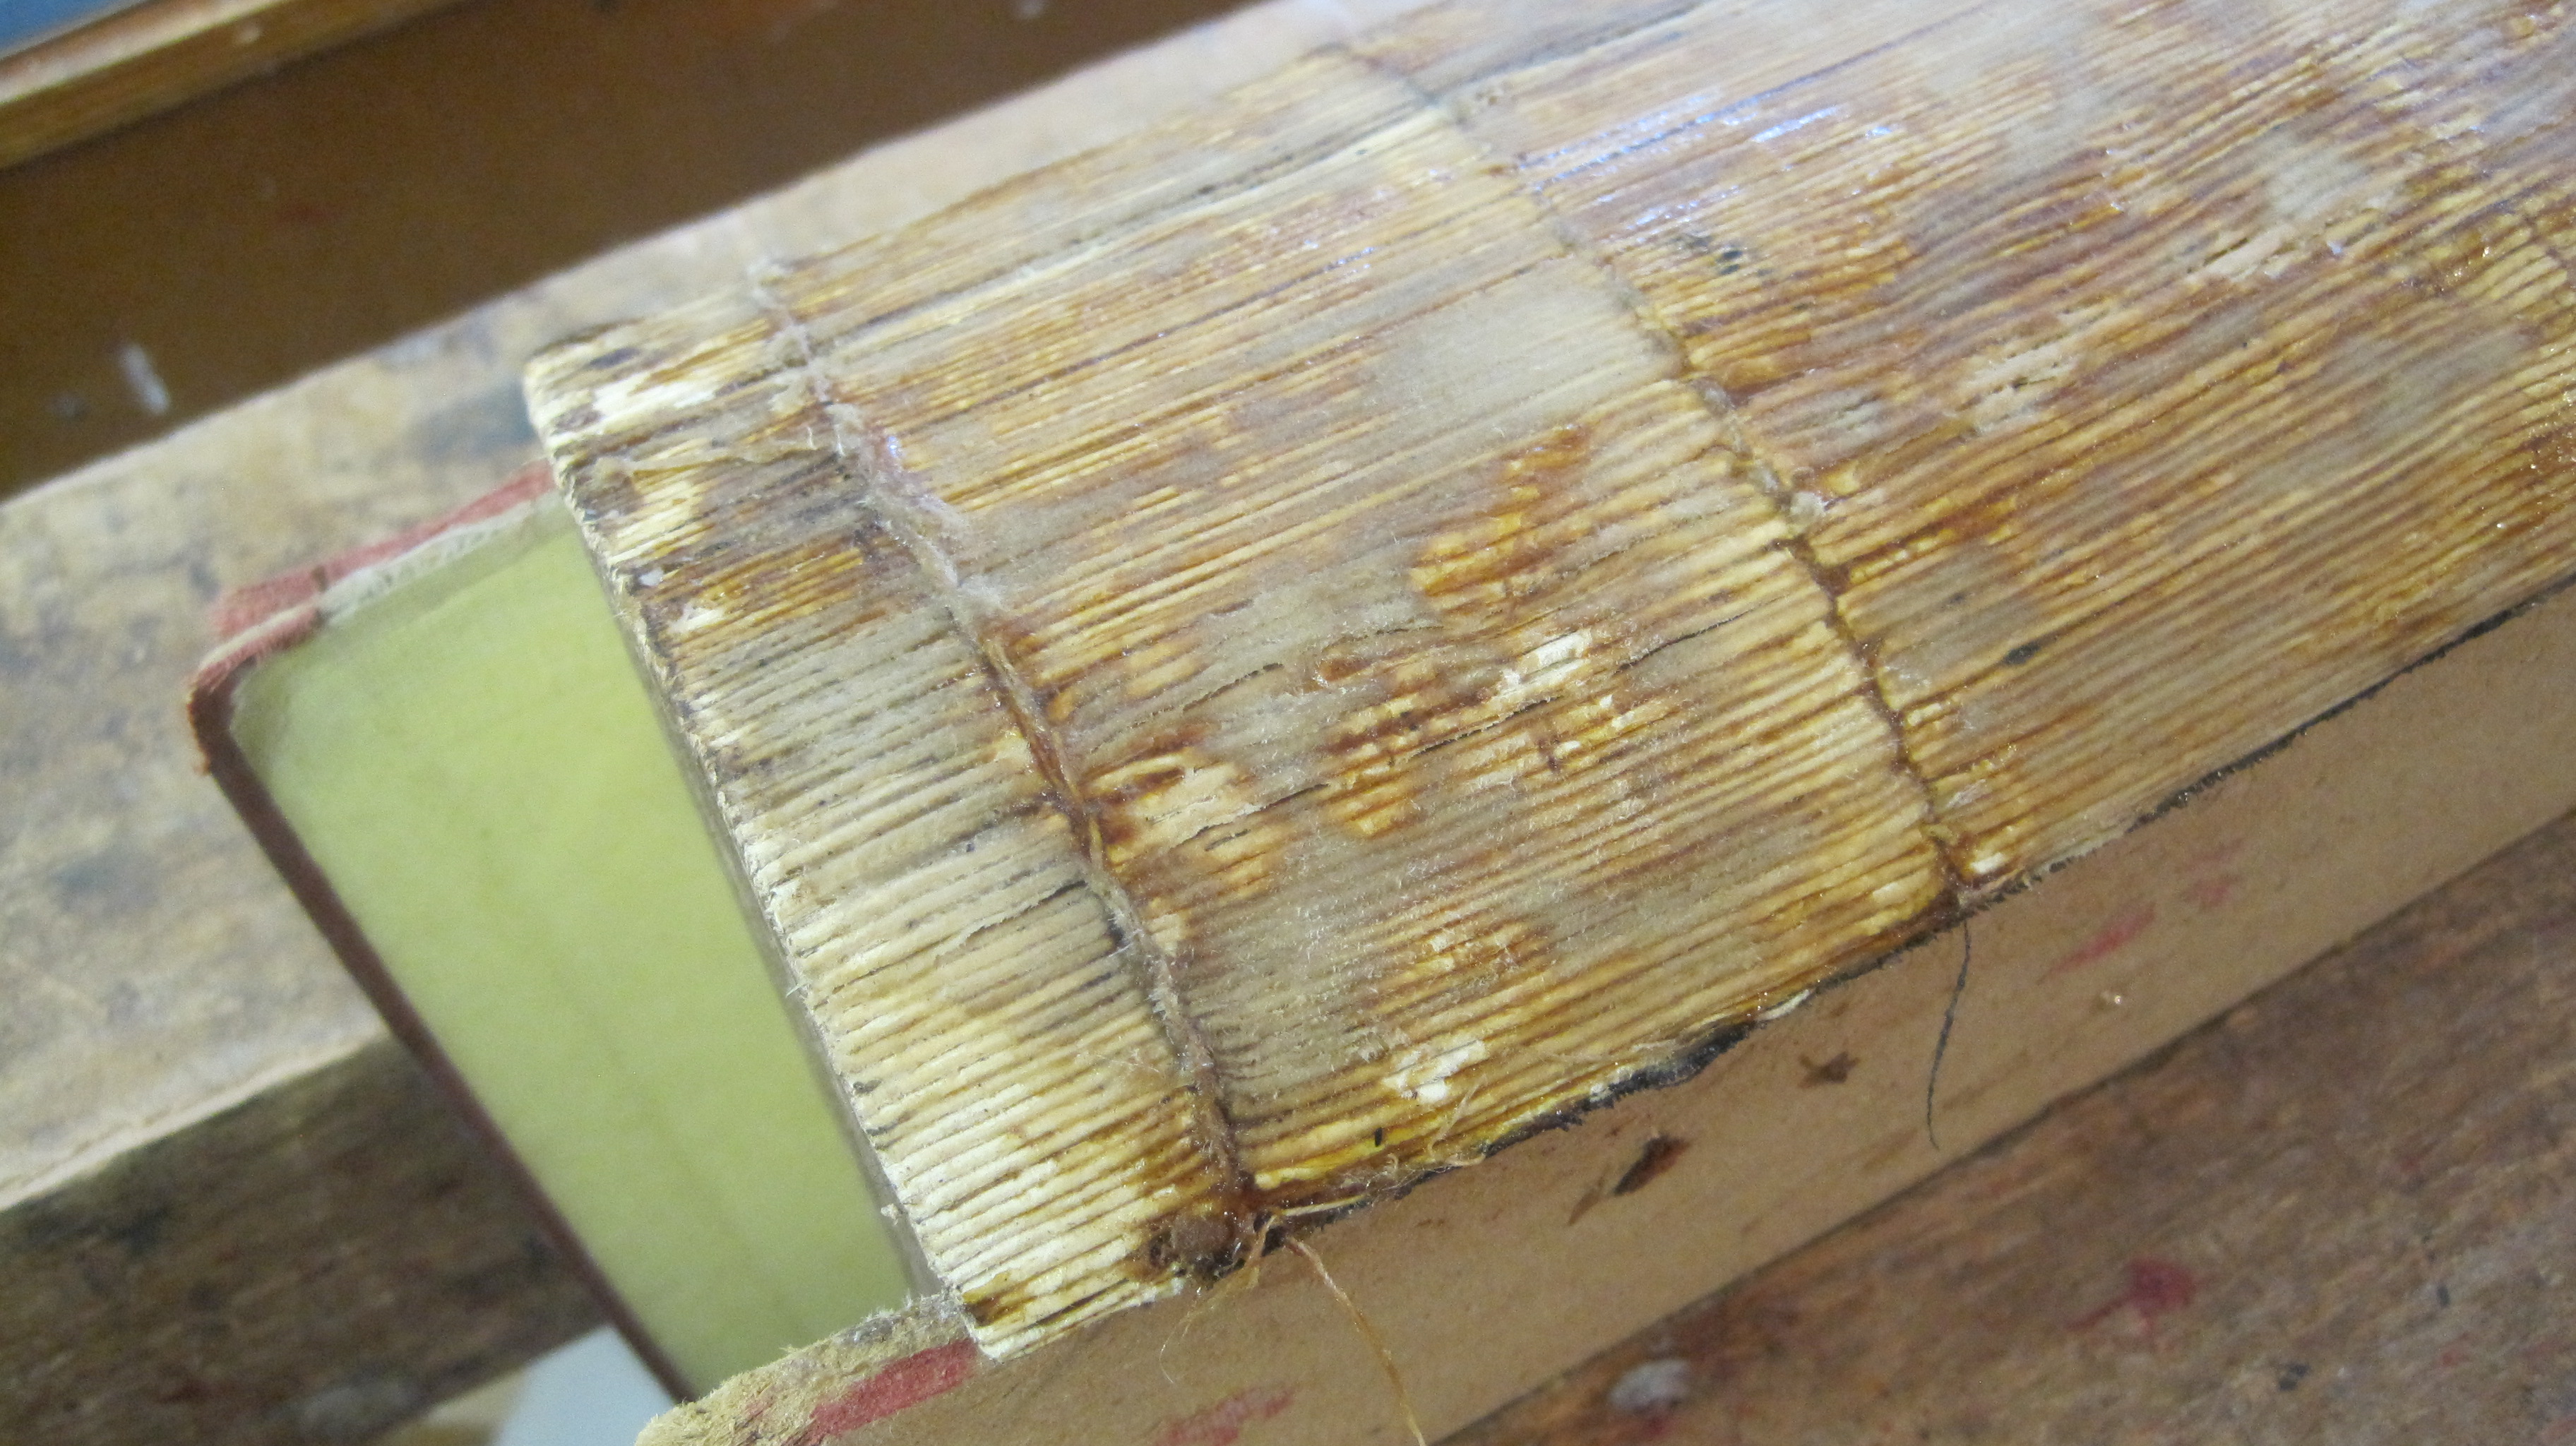
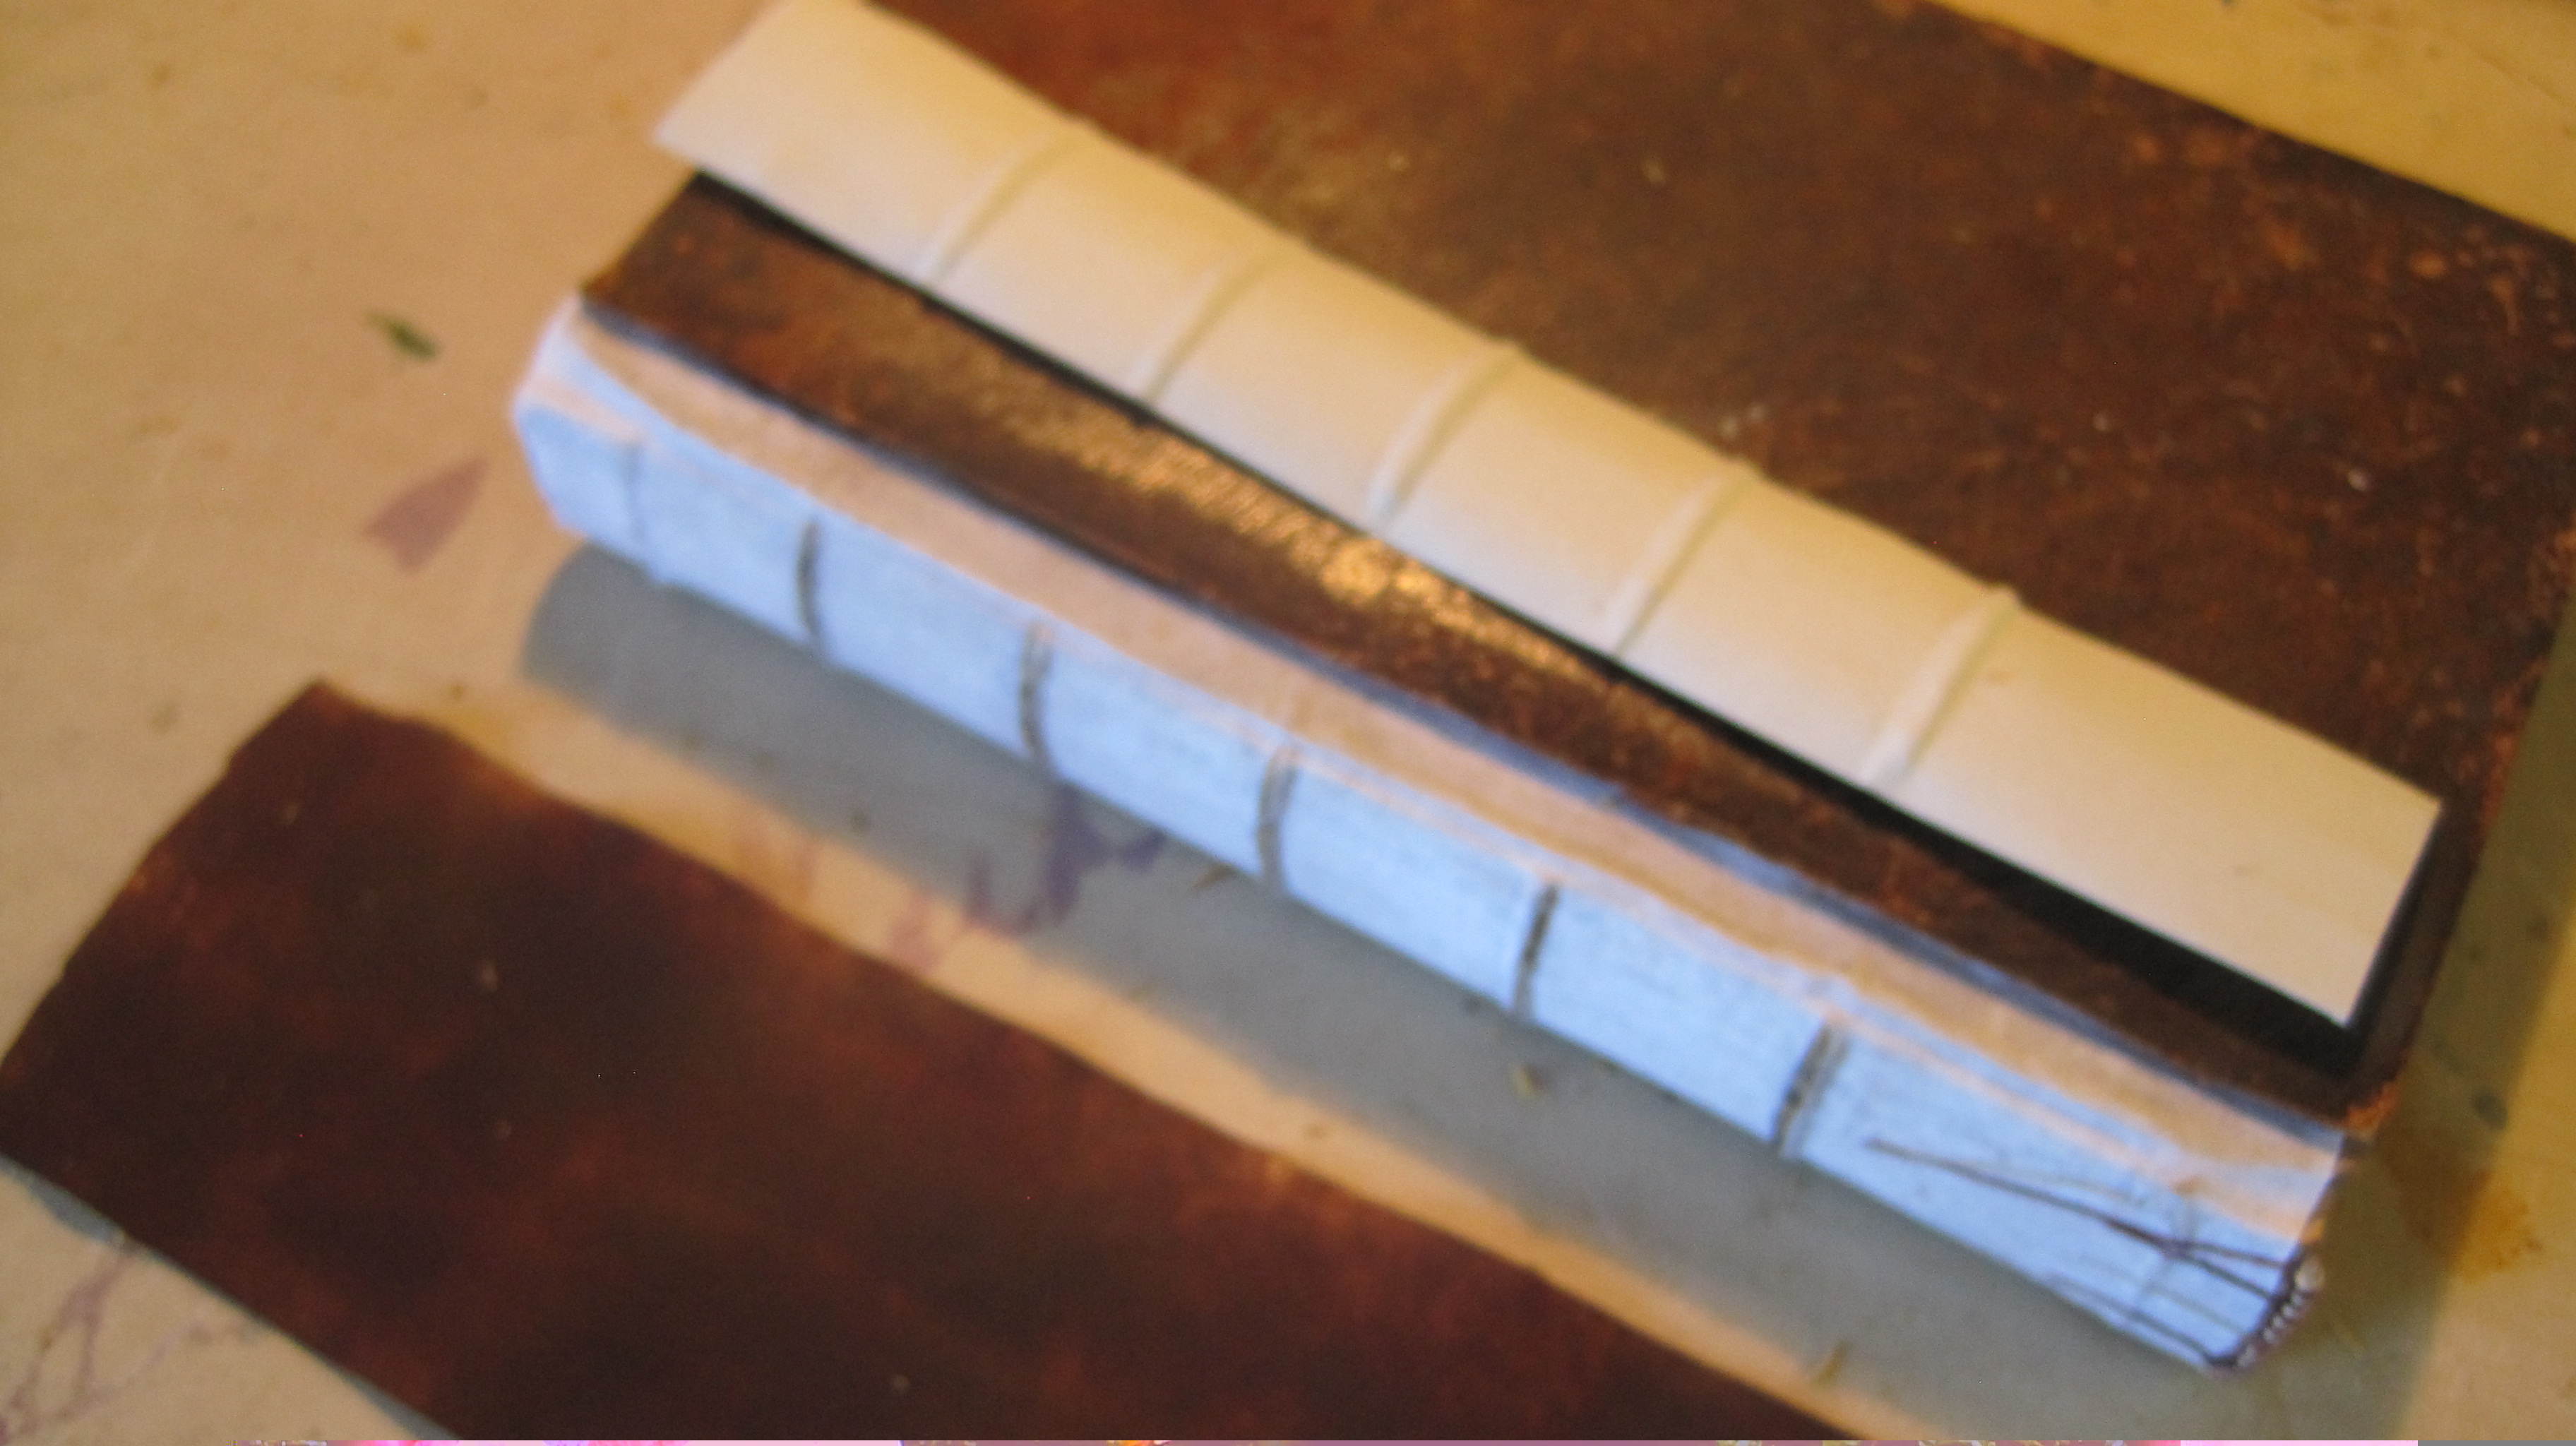
The picture below is out of focus, I’m afraid, but it shows the principal points
1. The strip of card was shaped by dampening the upper surface and tieing it over the bands in the same way as the leather will be later on (see picture 5). When it dries it has the contours of the old spine.
Now glue the Bernie Strips in place and cut back the corners and slit the fraynot to allow the eventual turn-in of the new leather spine. The old leather on the sides has been lifted for the new leather to go under. The lifting must be far enough back to allow a secure turn-in – 20 mm or so.
2. Note also the fraynot was slit across where it goes over each band making it easier to mould it tight to them
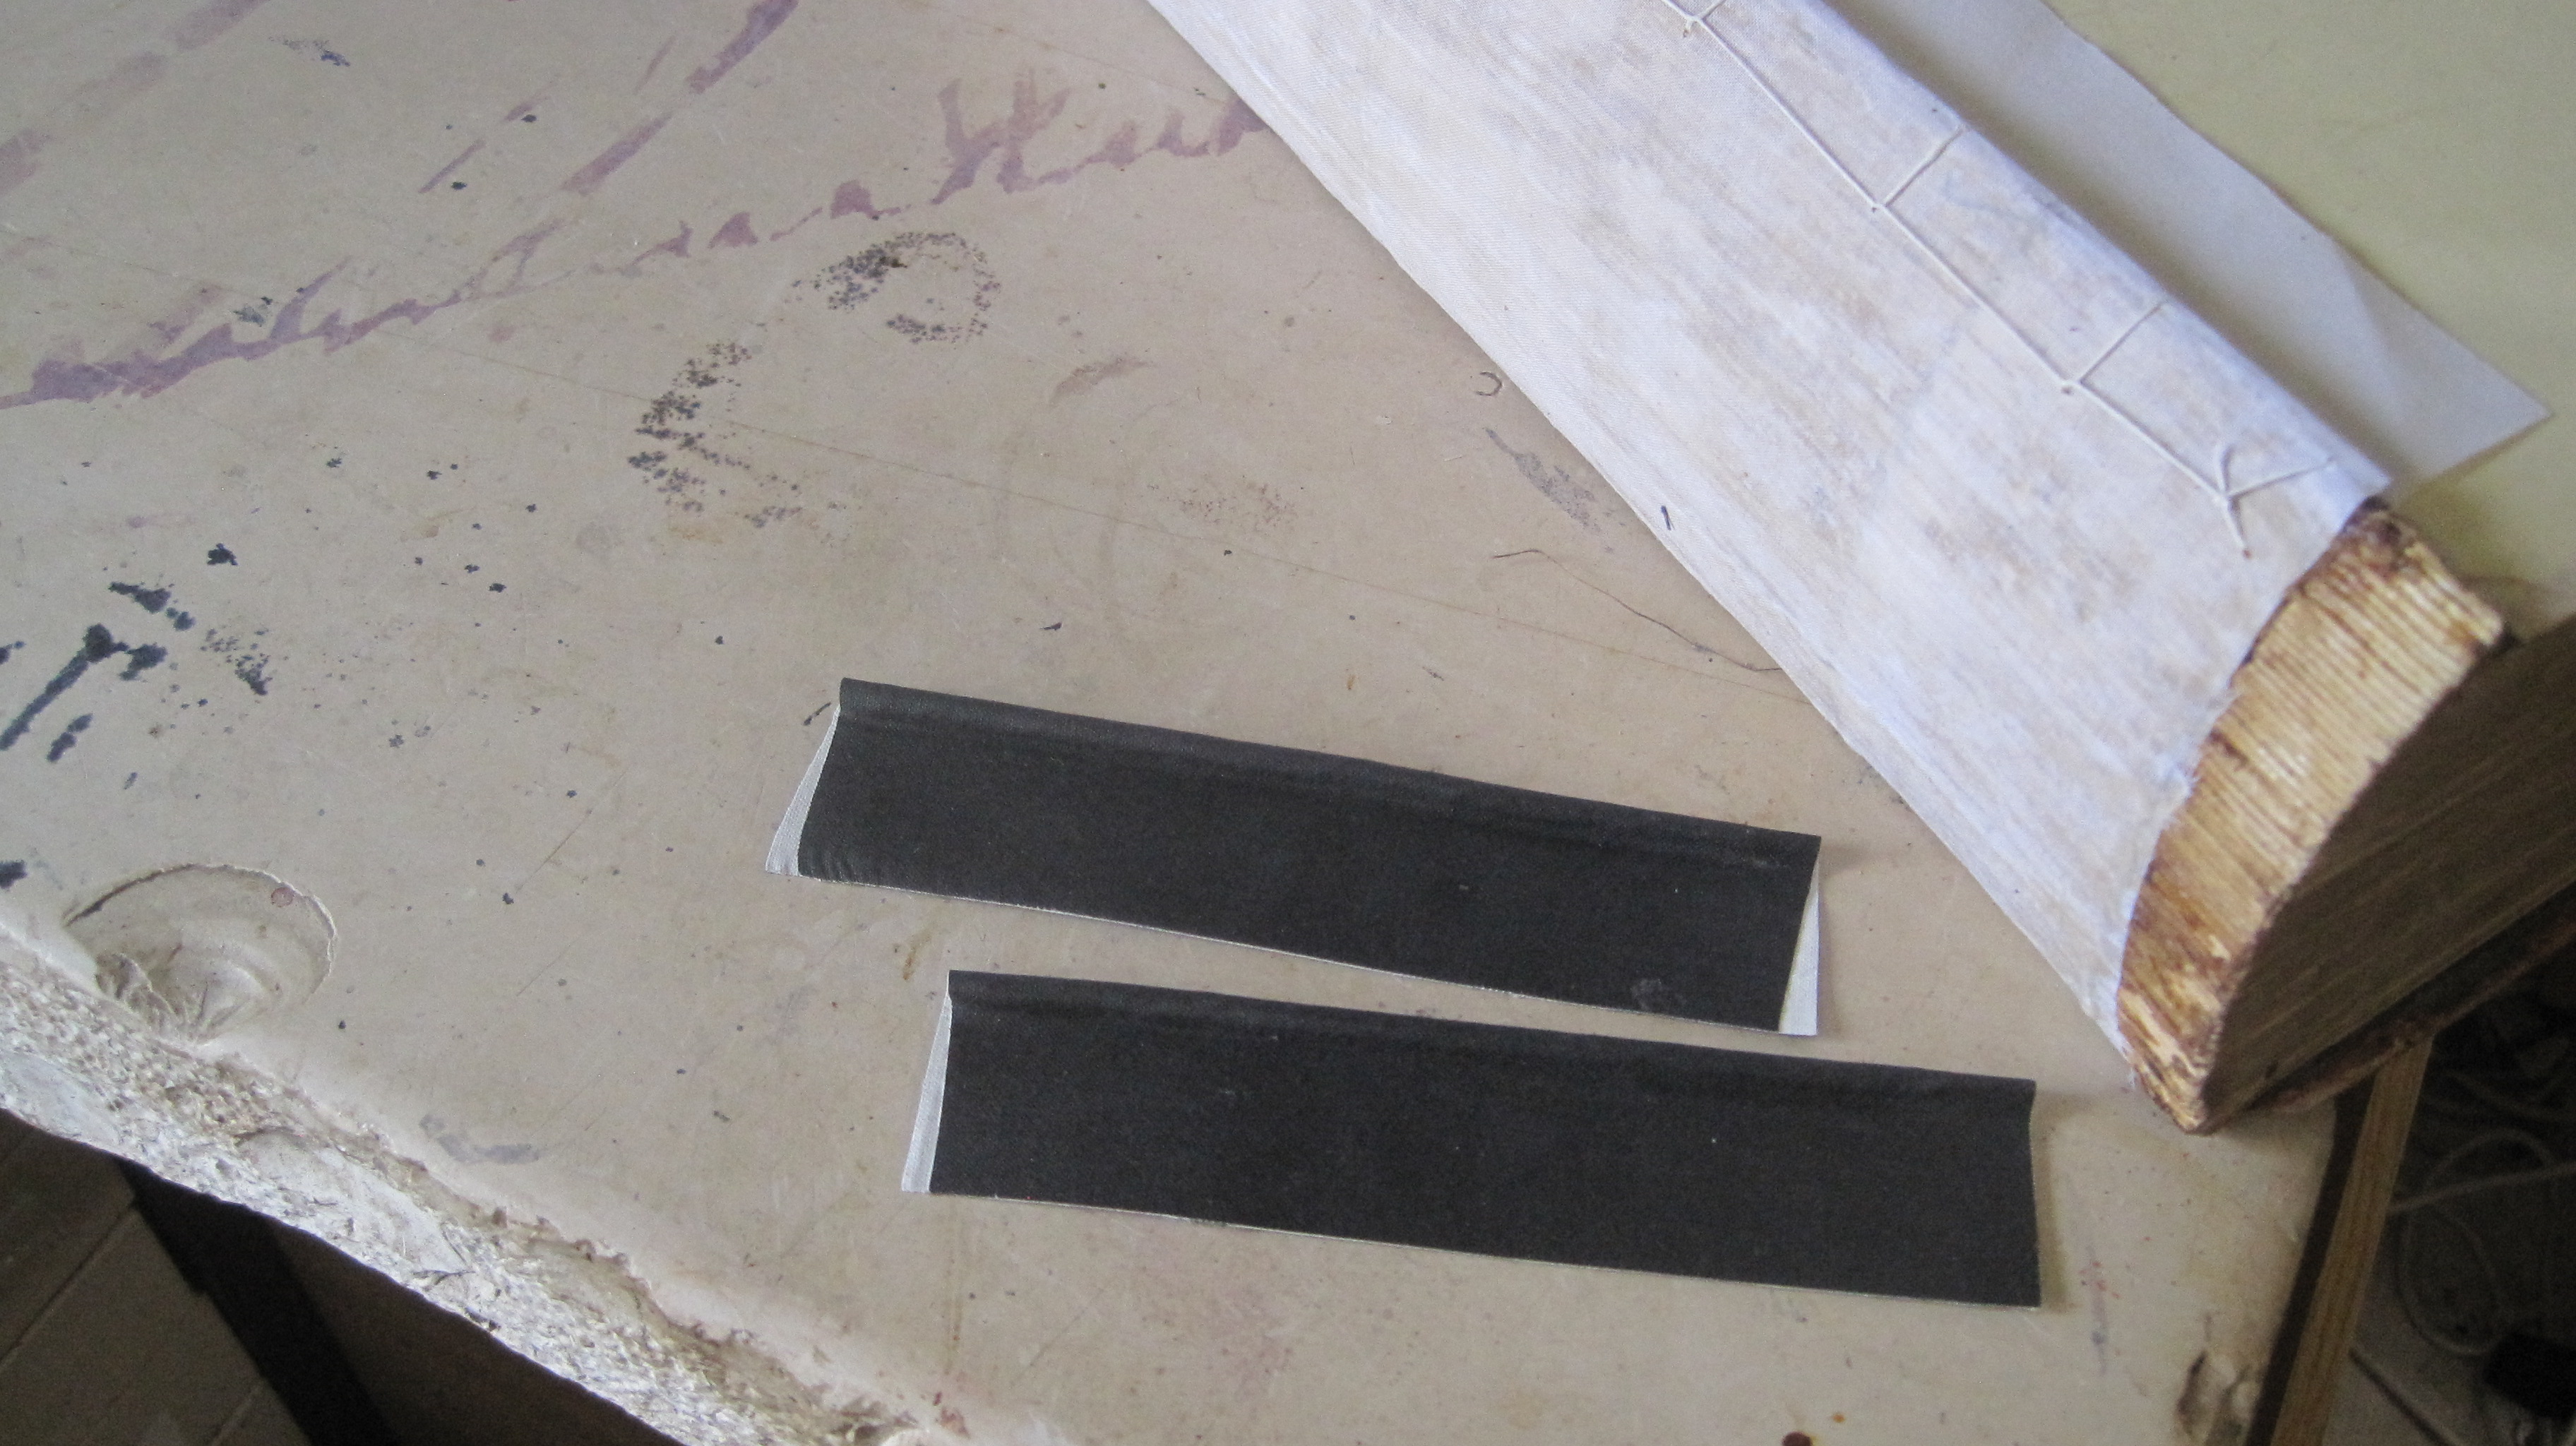
Lift the inside of each board at head and tail to take the turn-in
3. Lift under the old turn-in leather – that helps to avoid lumps on the inner surface after final turning-in
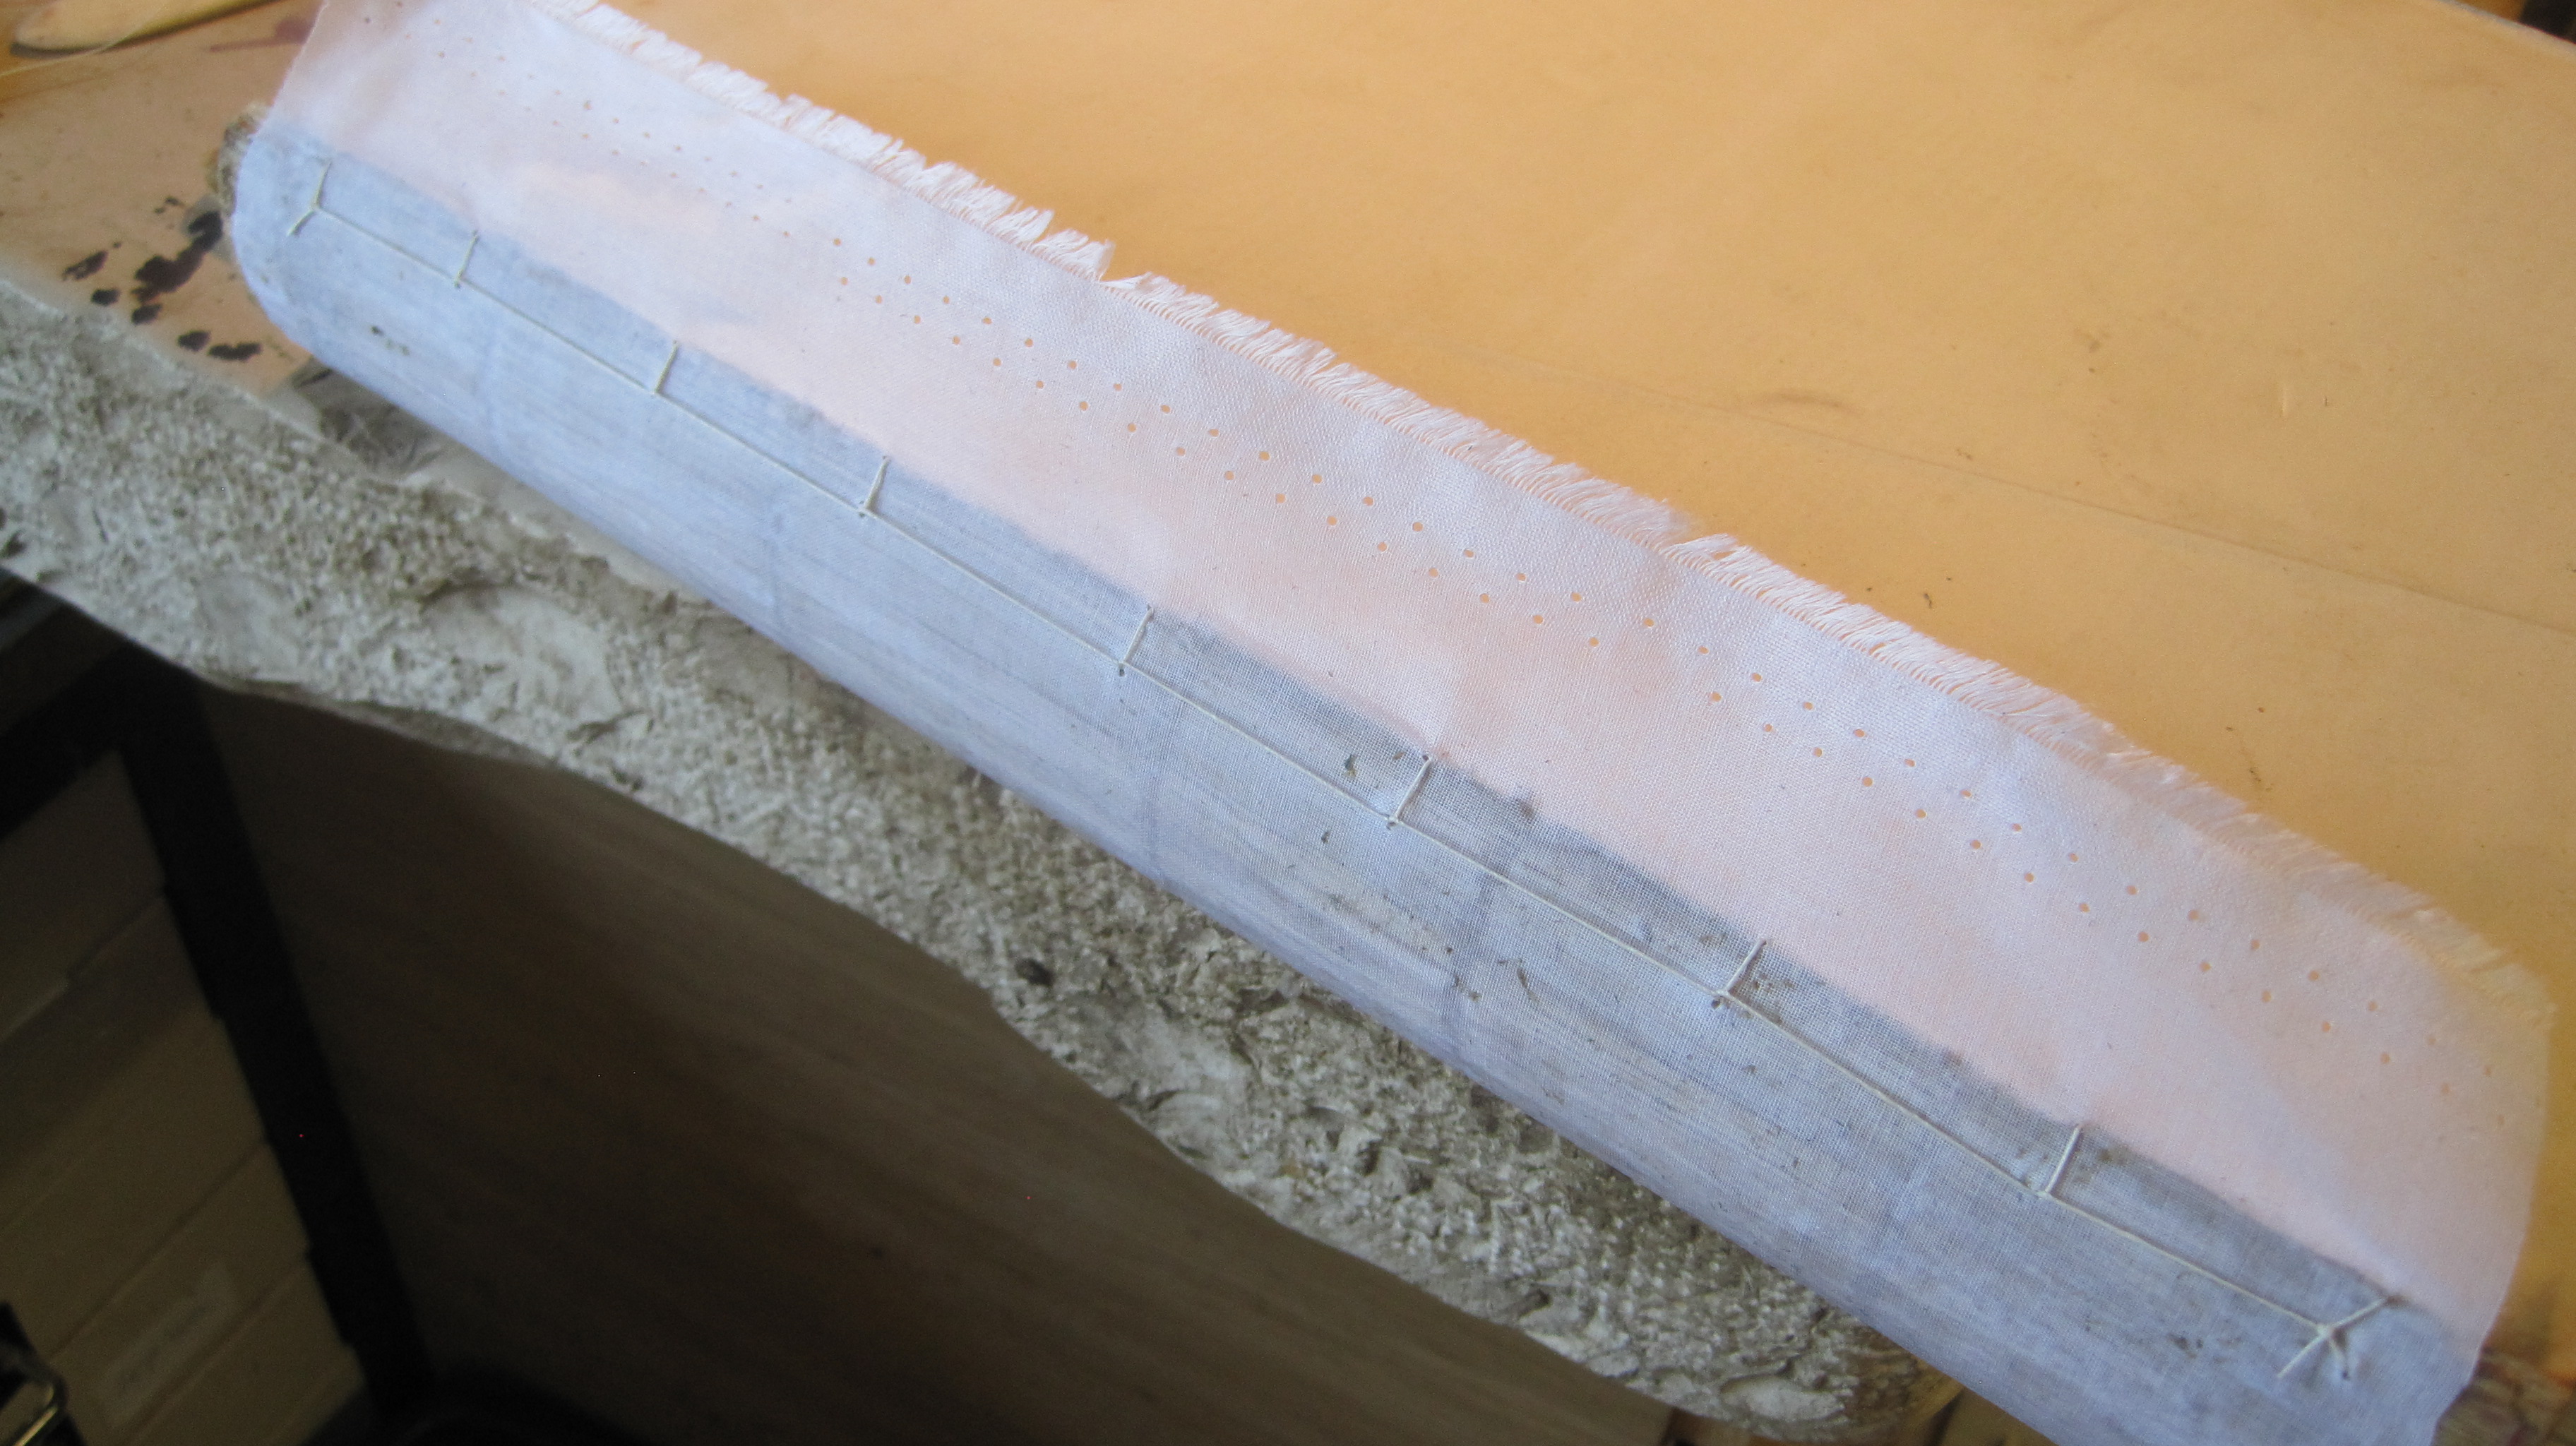
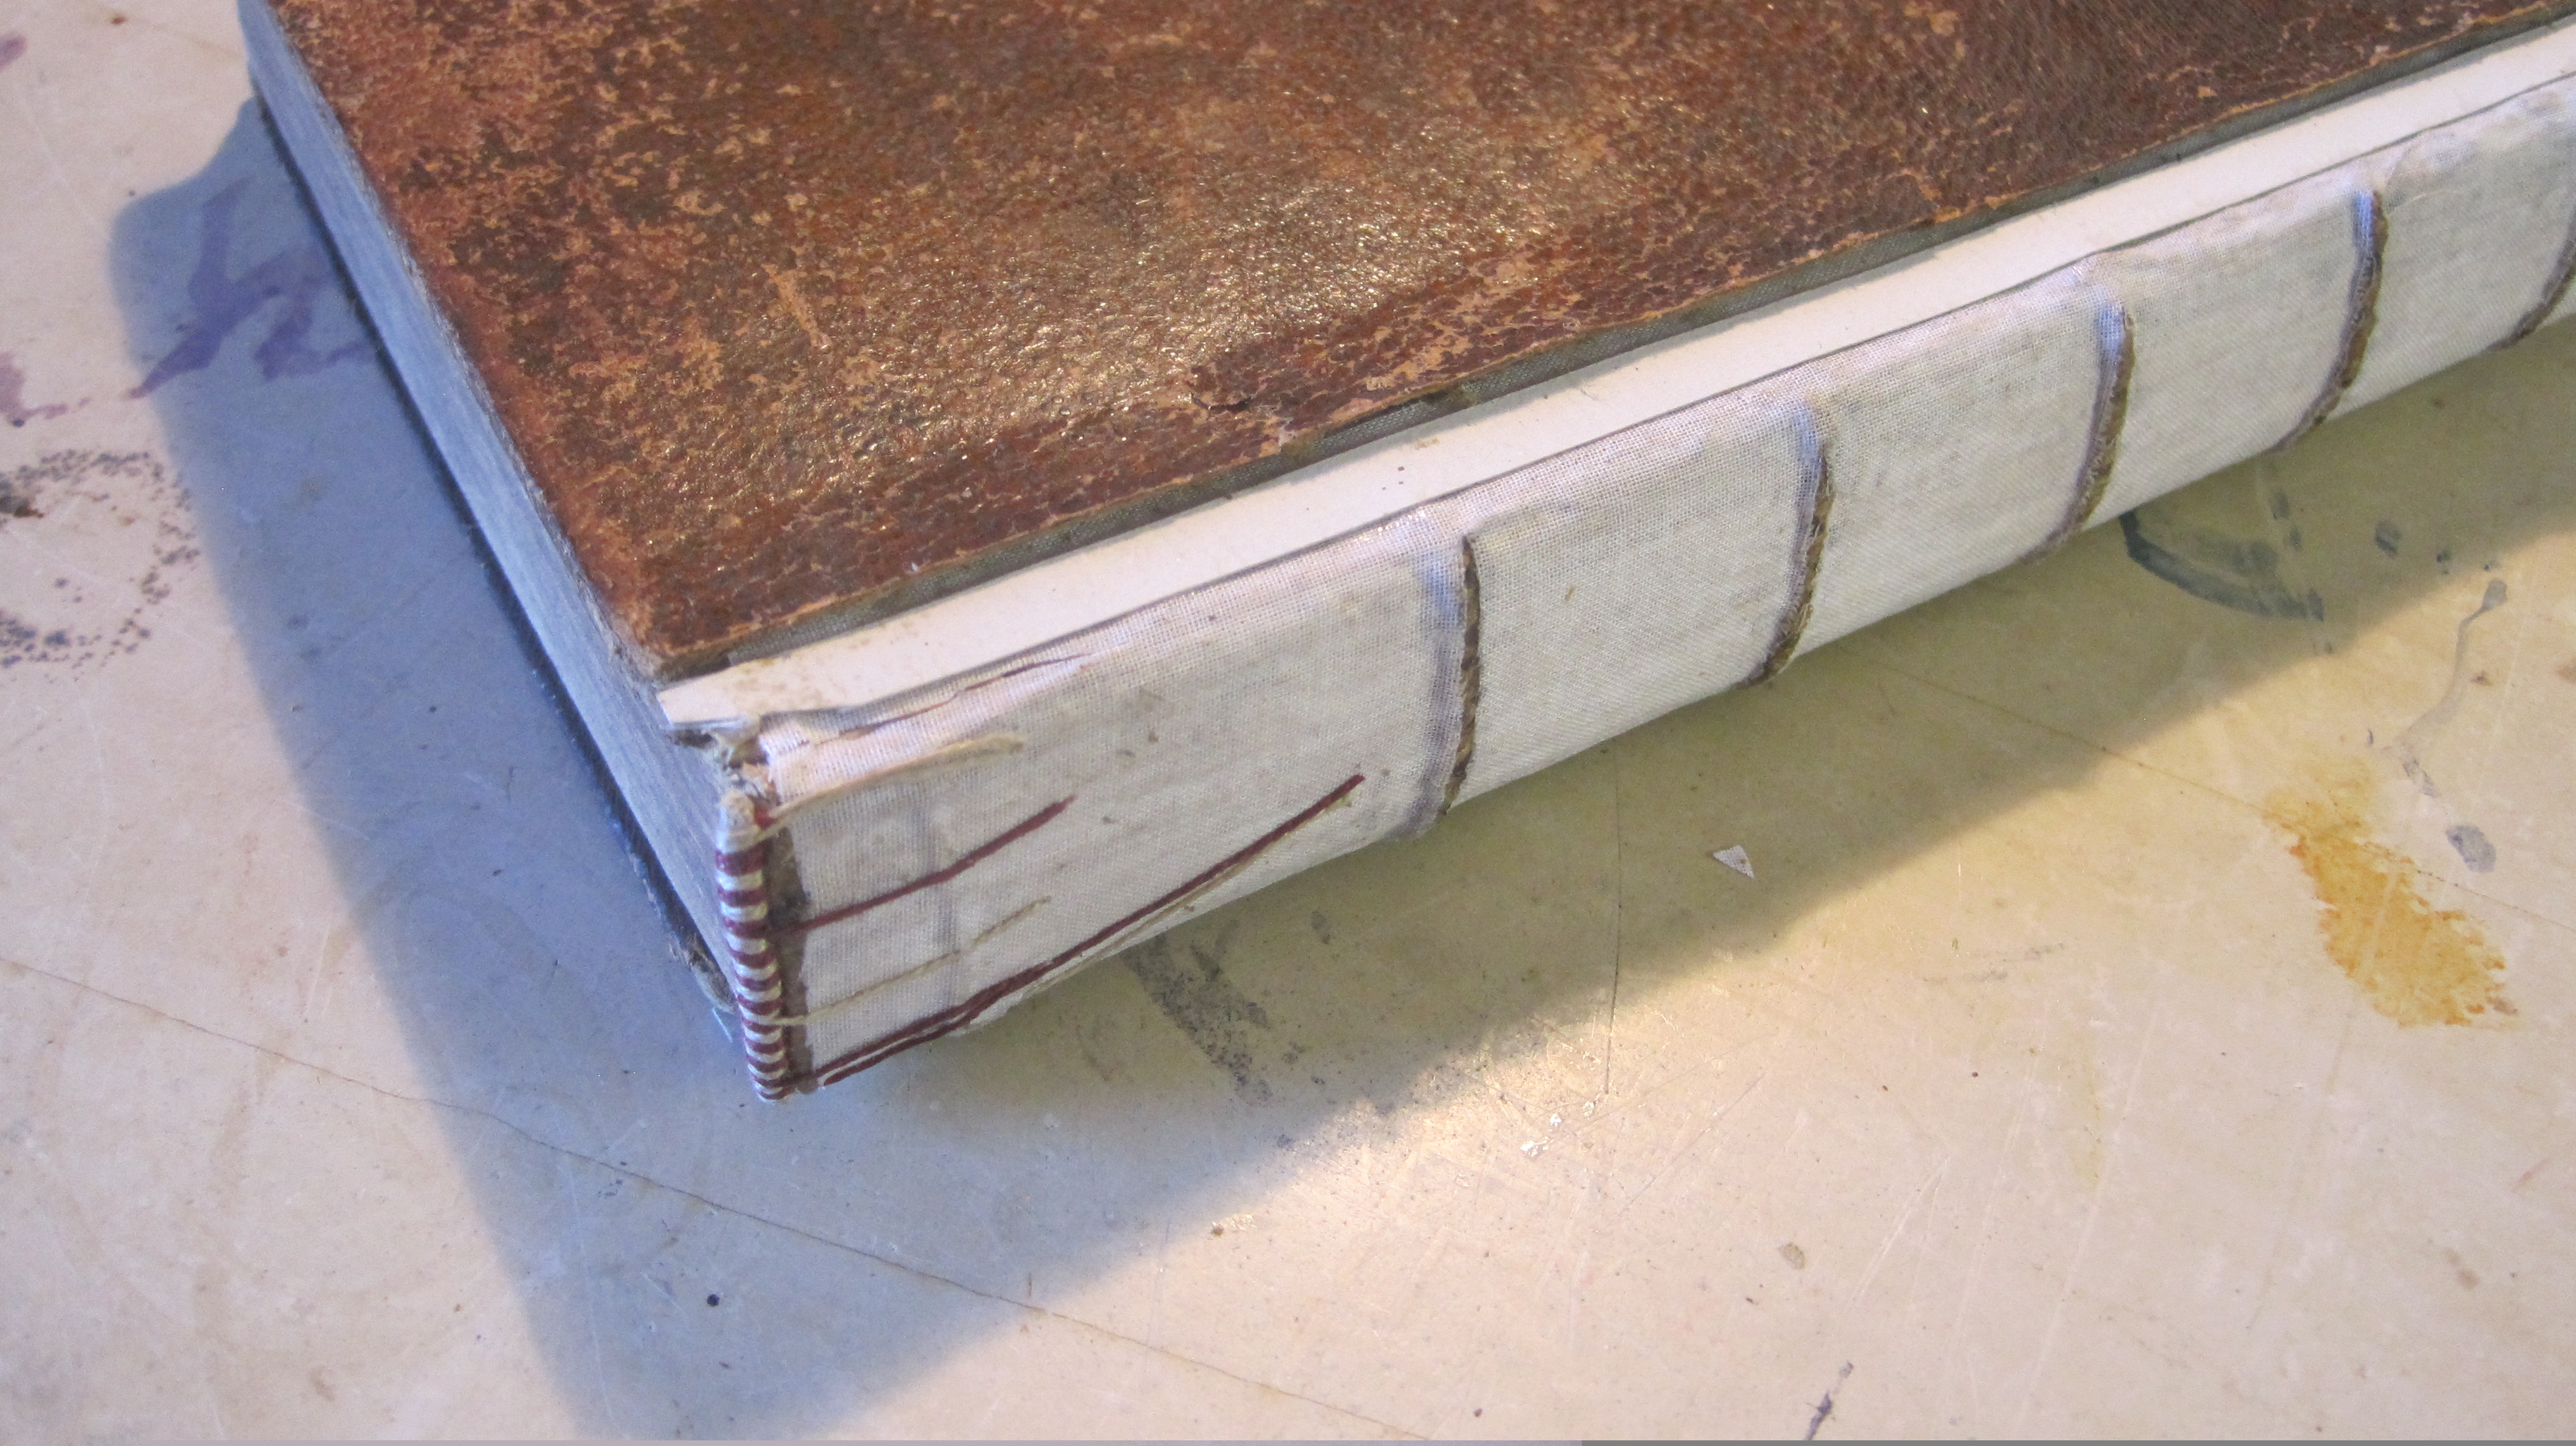
Now glue the new spine leather into one side of the book, press firmly and allow to set. Place the pre-formed spine strip in position, dampen the upper surface of the leather, glue the underside of the spine strip and put the book in a lay press or finishing press with pegs or tacks along the sides (every repair bindery must have one modified this way) and tie down ensuring the cord is close up against the bands.
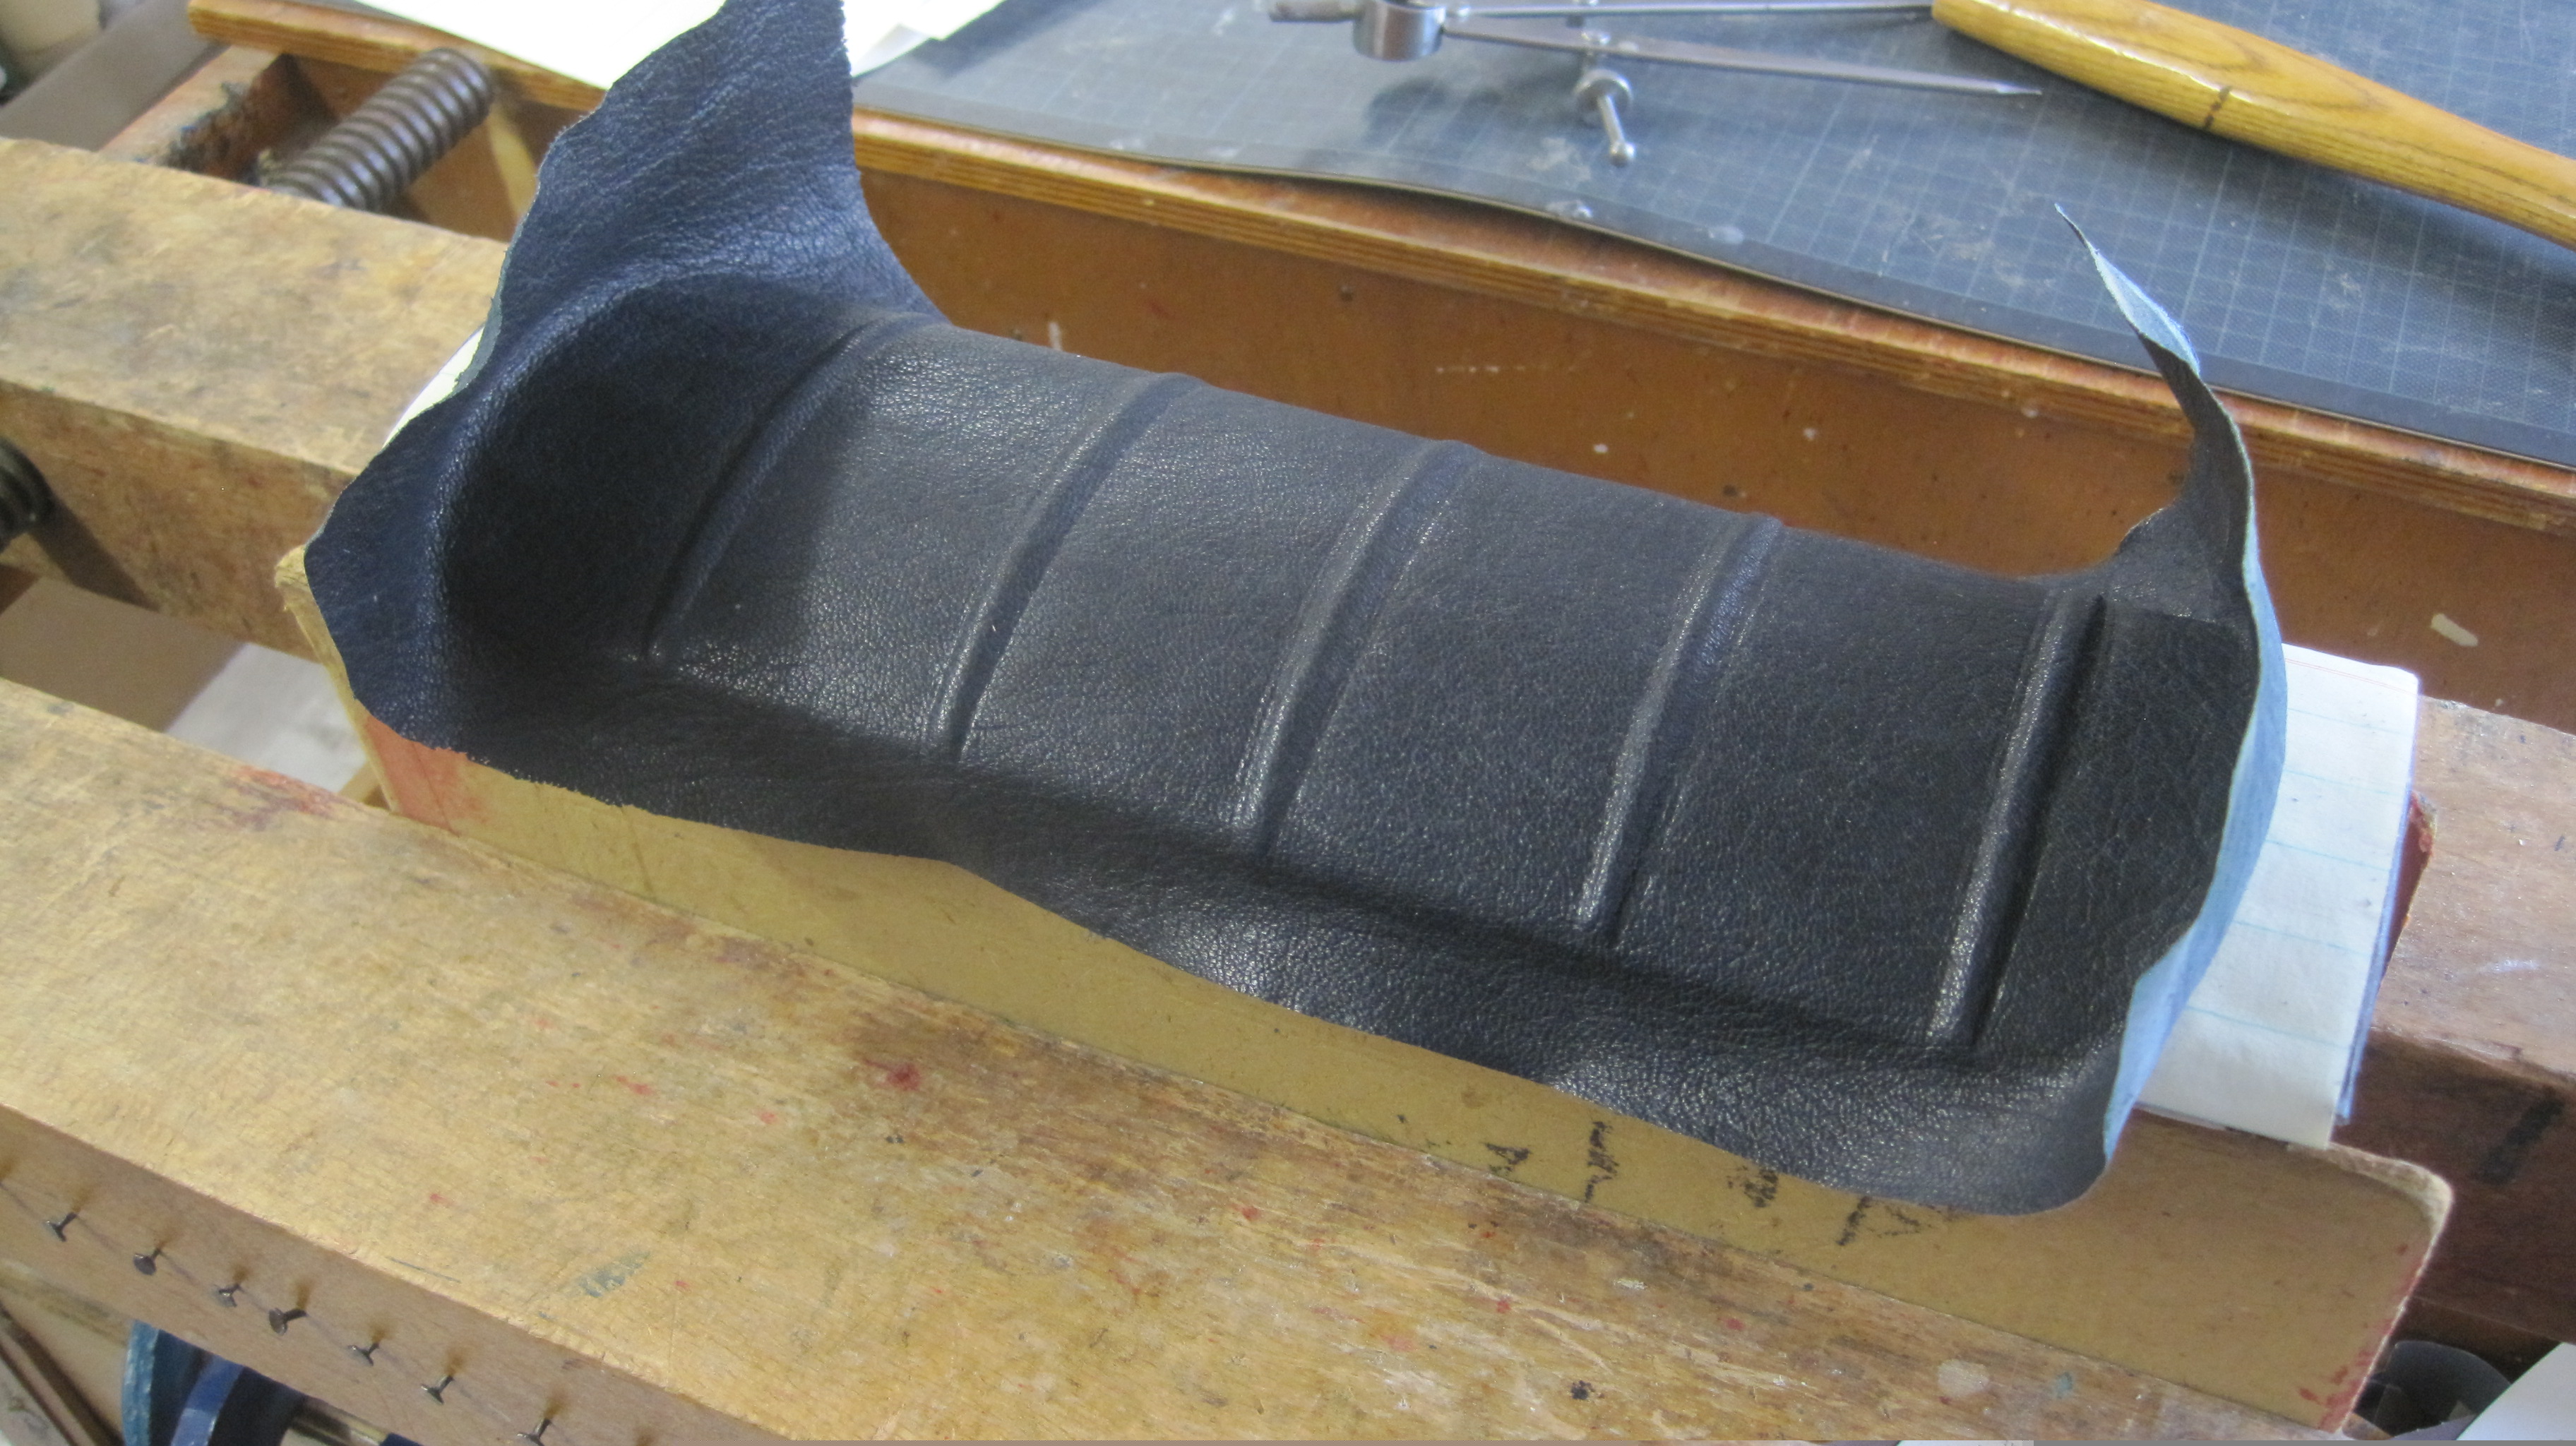
4. If the new spine had been glued straight down on to the back of the text the headband tie-downs would show through, unless covered with paper and sanded down – tedious and messy. 5. Note that the near side of the new spine leather is not yet put into the lifted slot on the remaining board.
When dry the hollow looks like this:
And the other side:
Now the loose flap is glued into the slot on the other board, the head and tail turned in just as for a normal hollow back.
And headcaps formed. The book opens well, which is the whole point of the method, whilst preserving the appearance of raised cords on the finished spine.
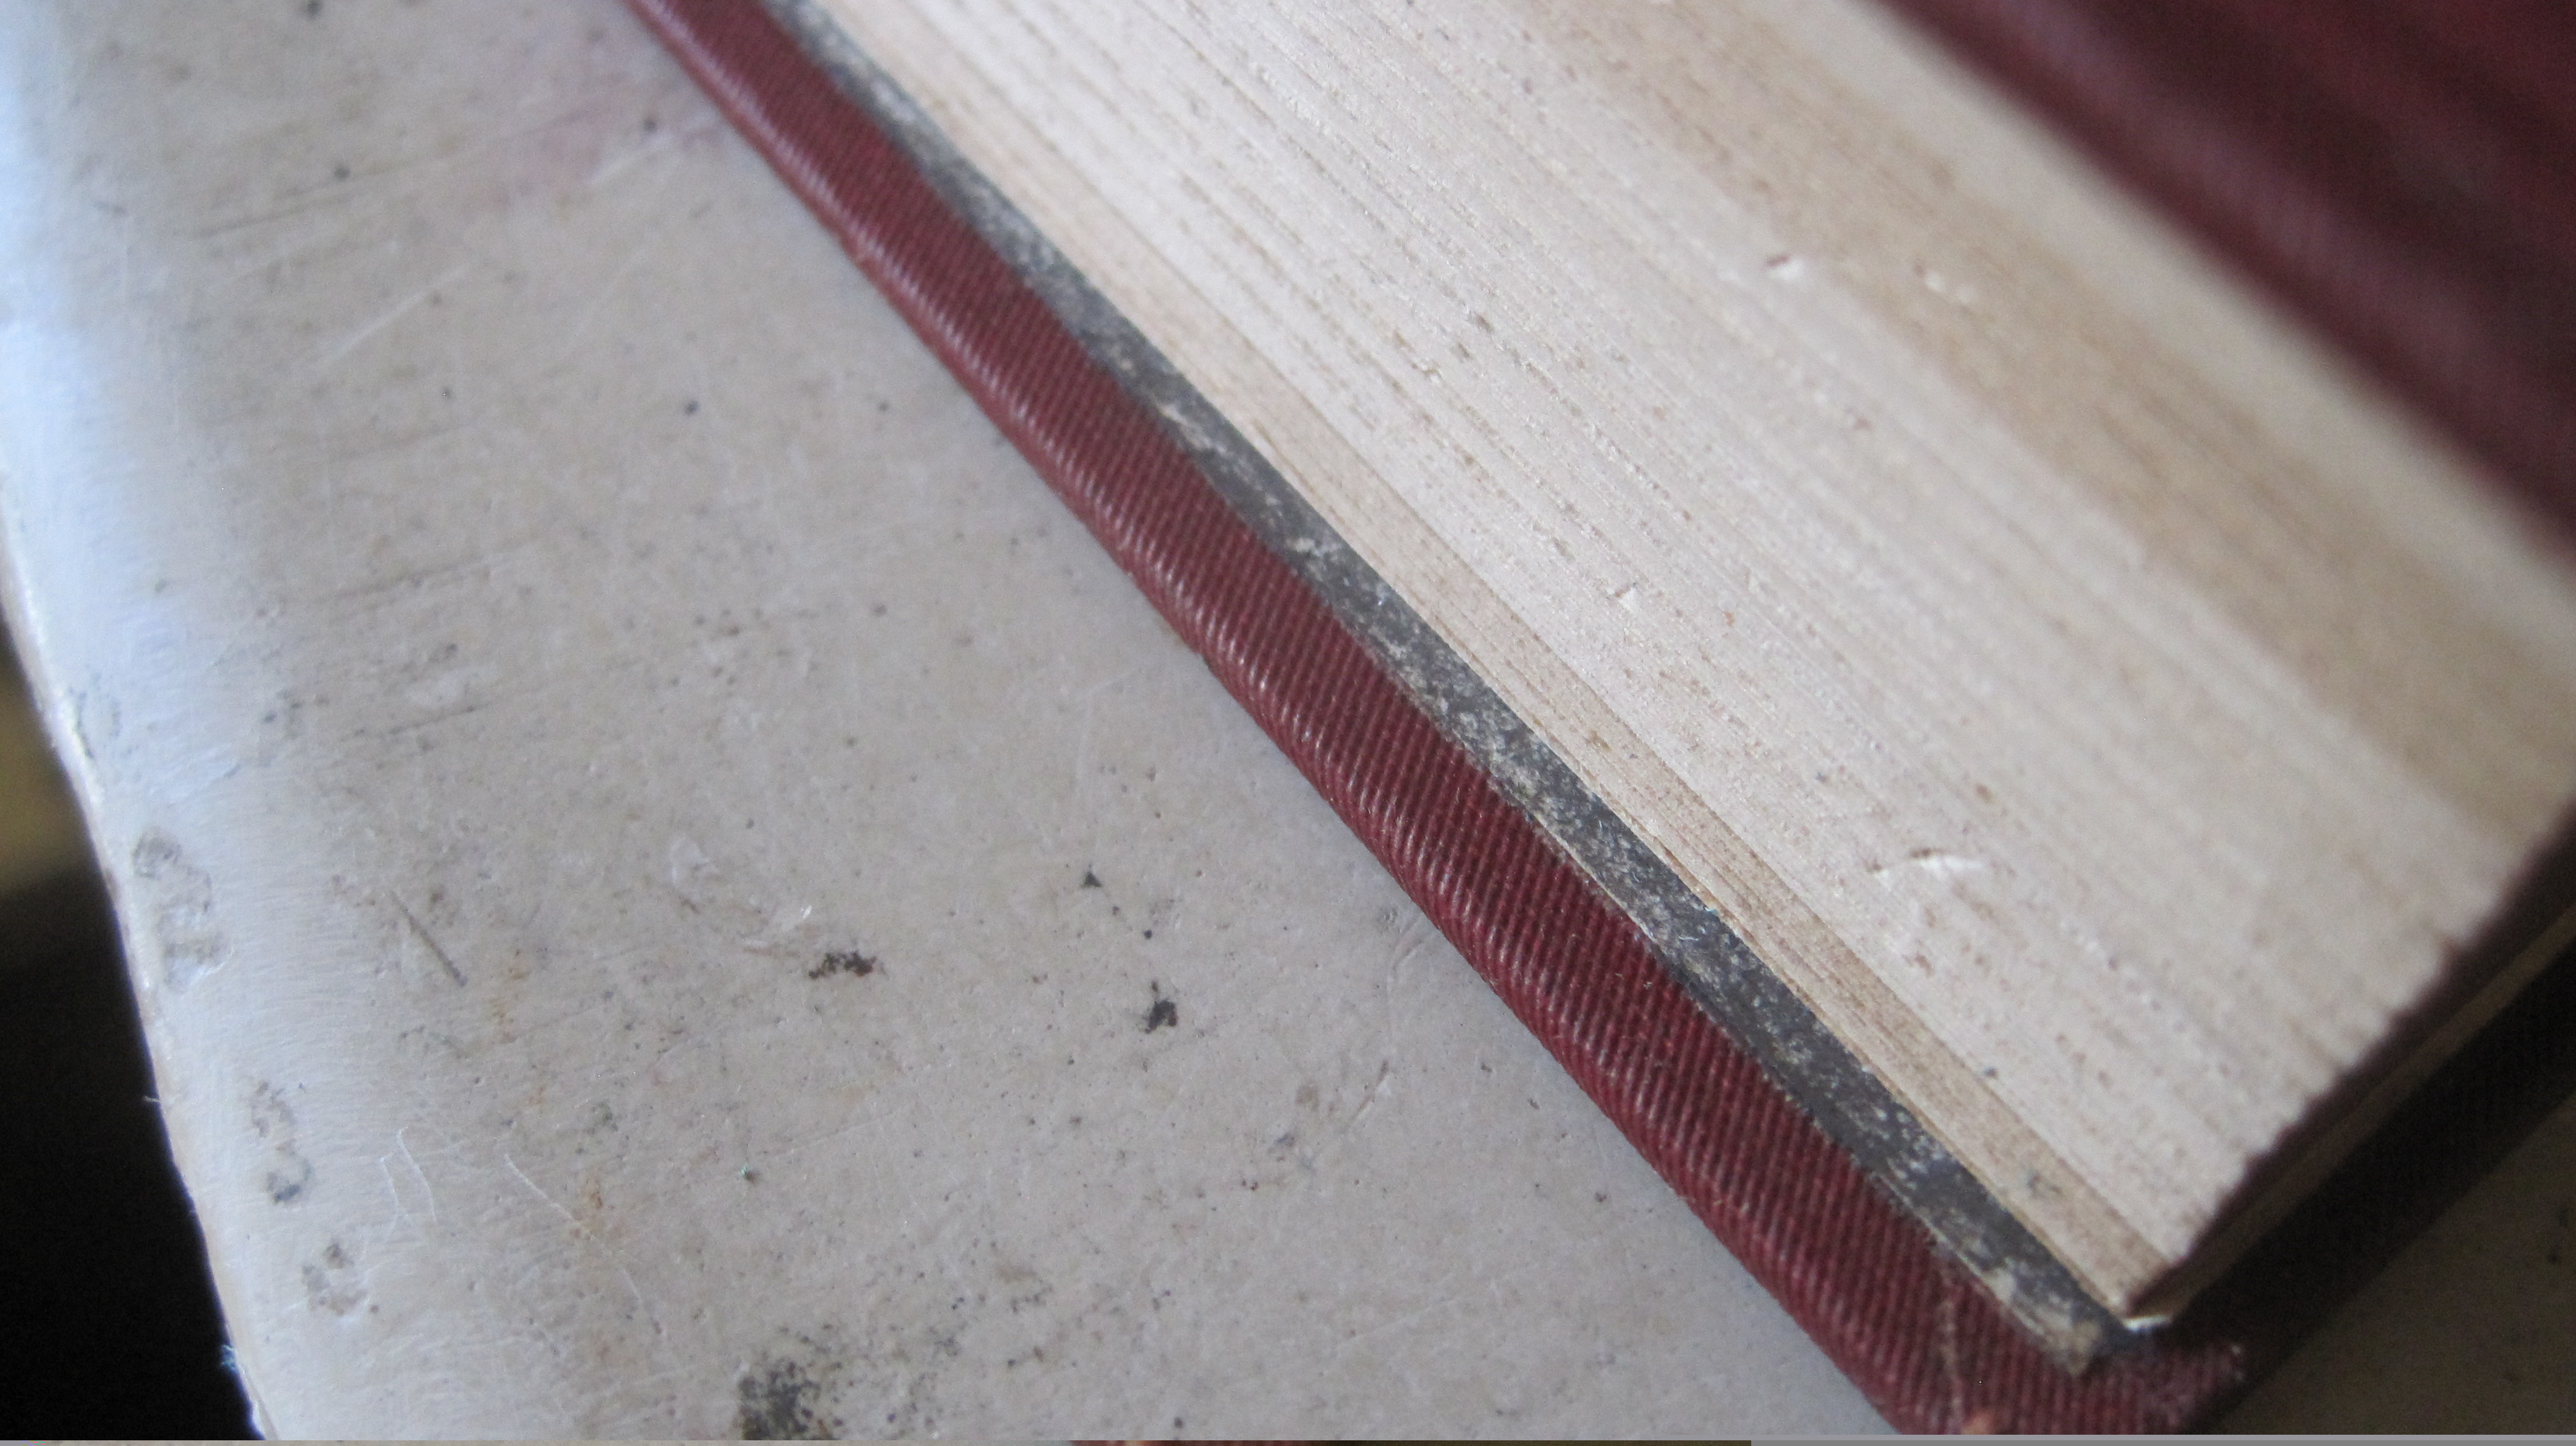
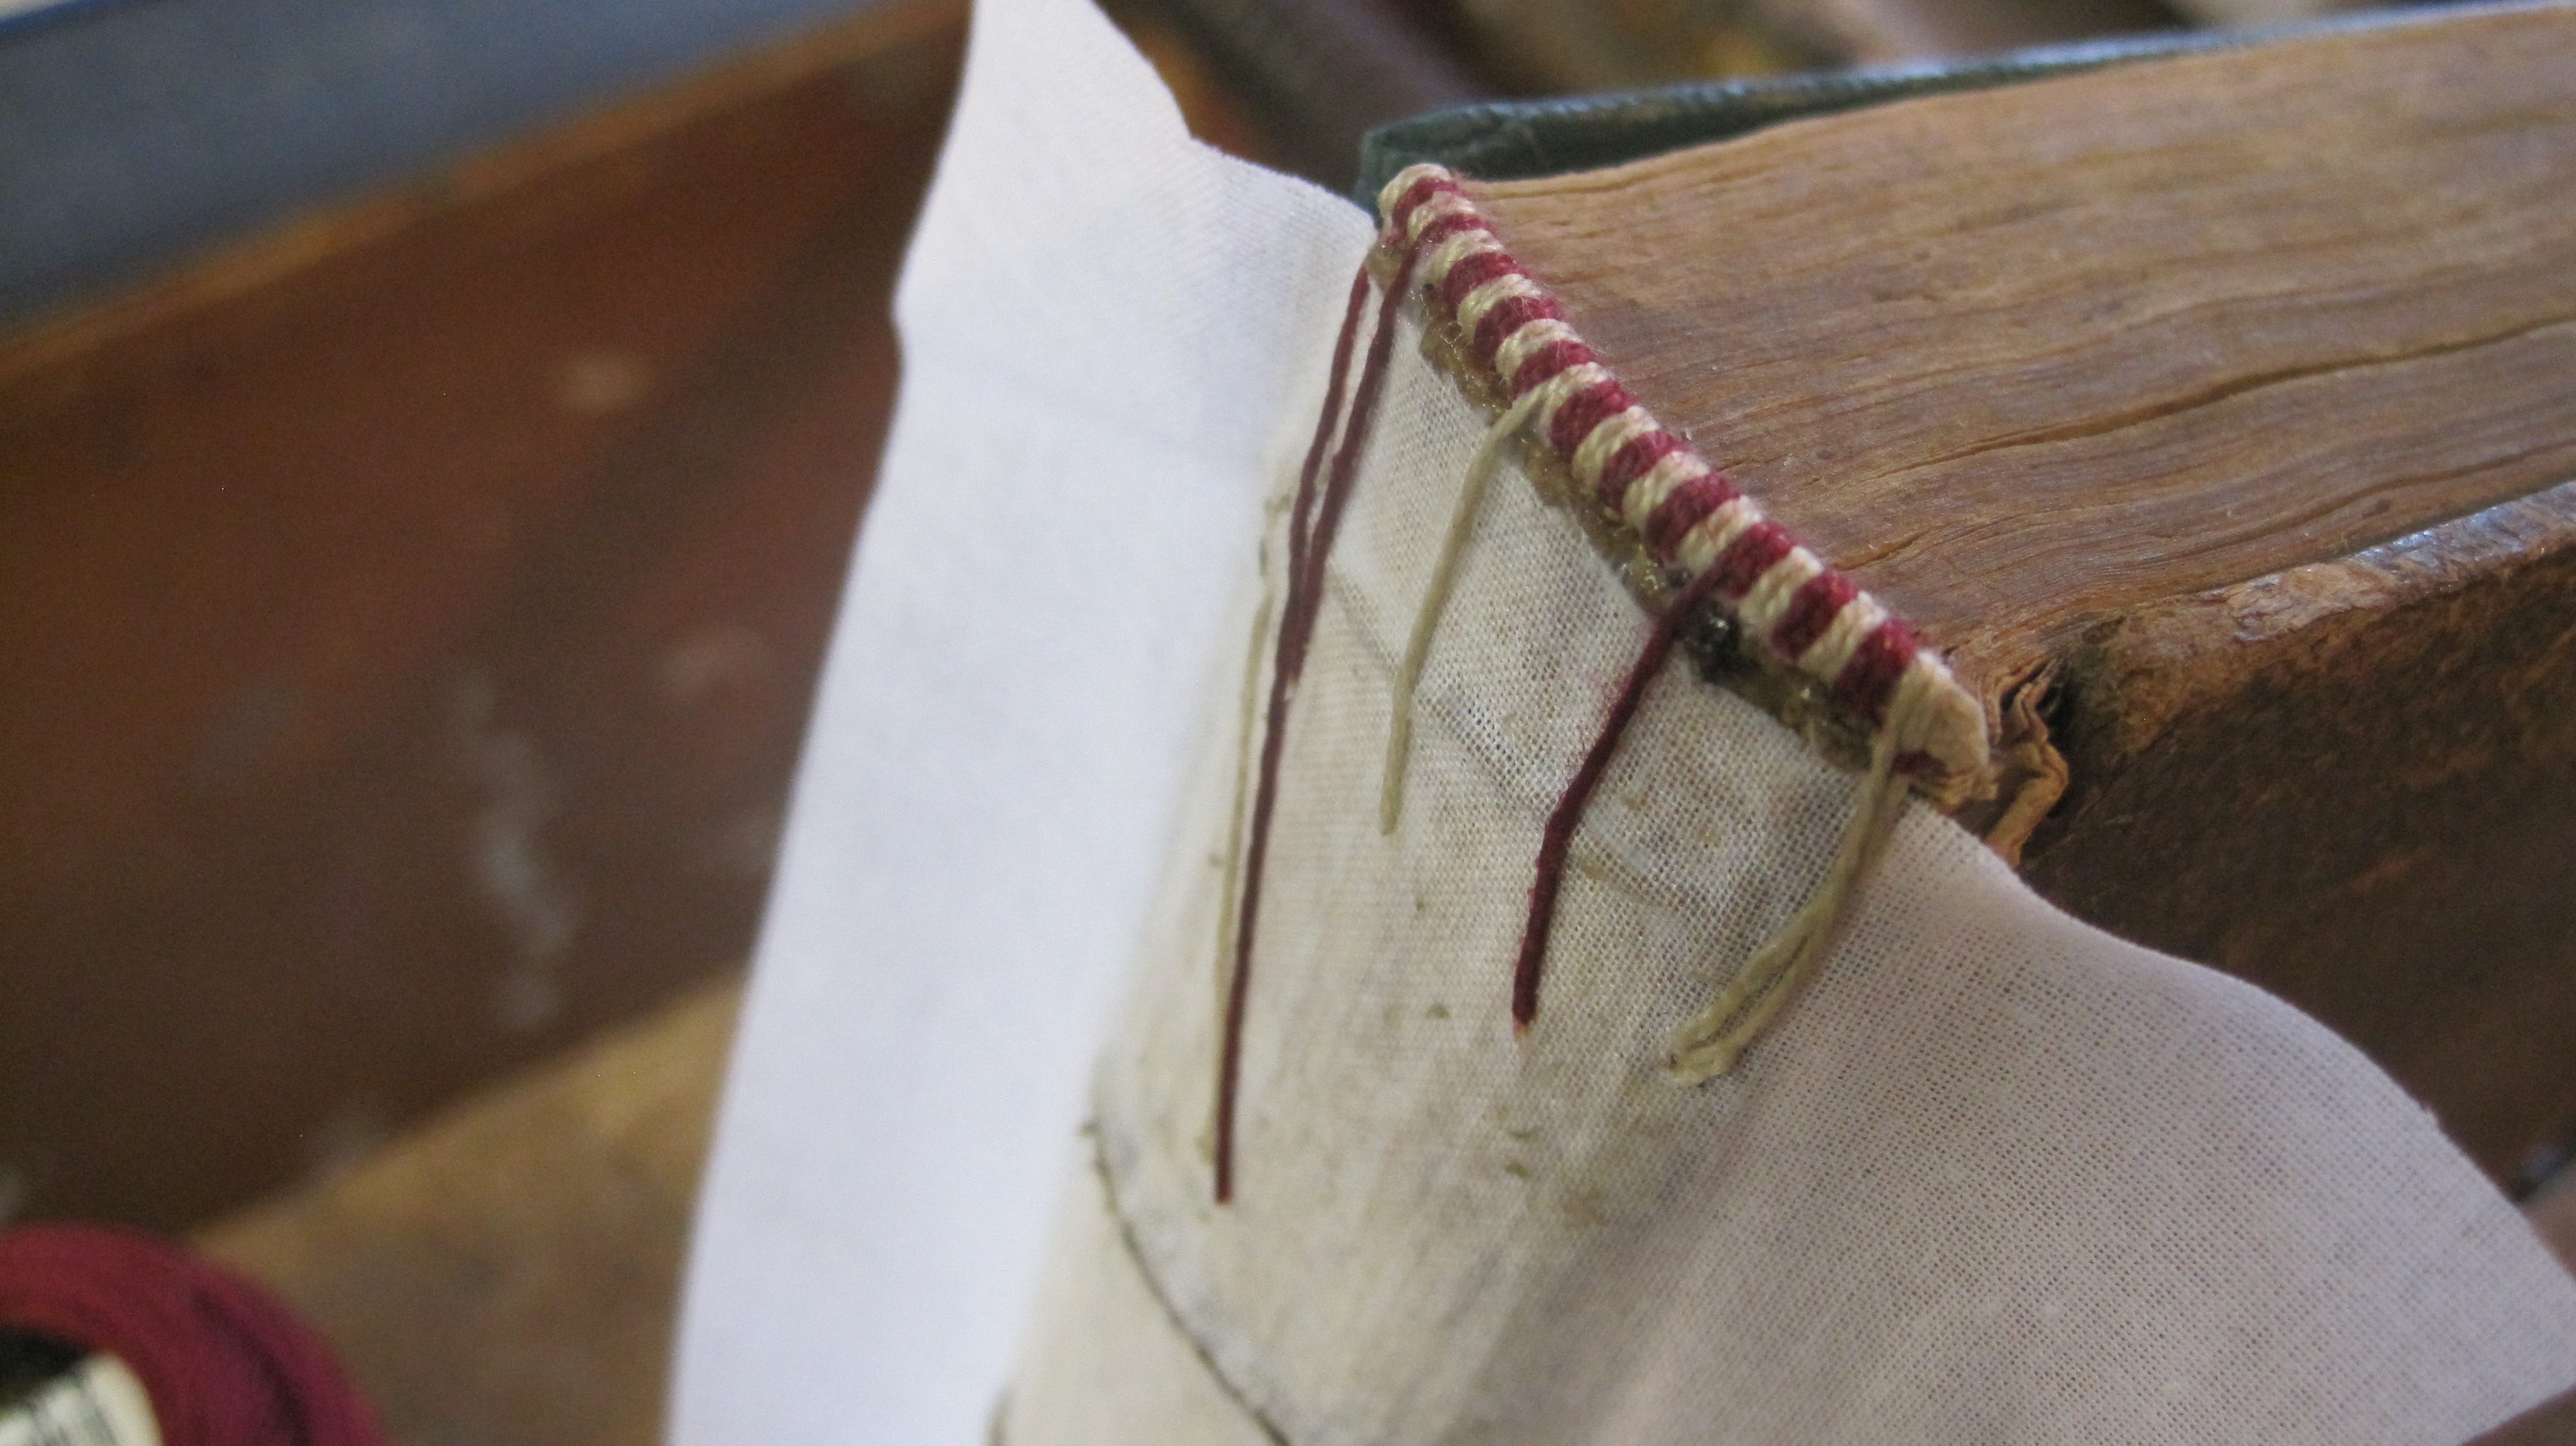
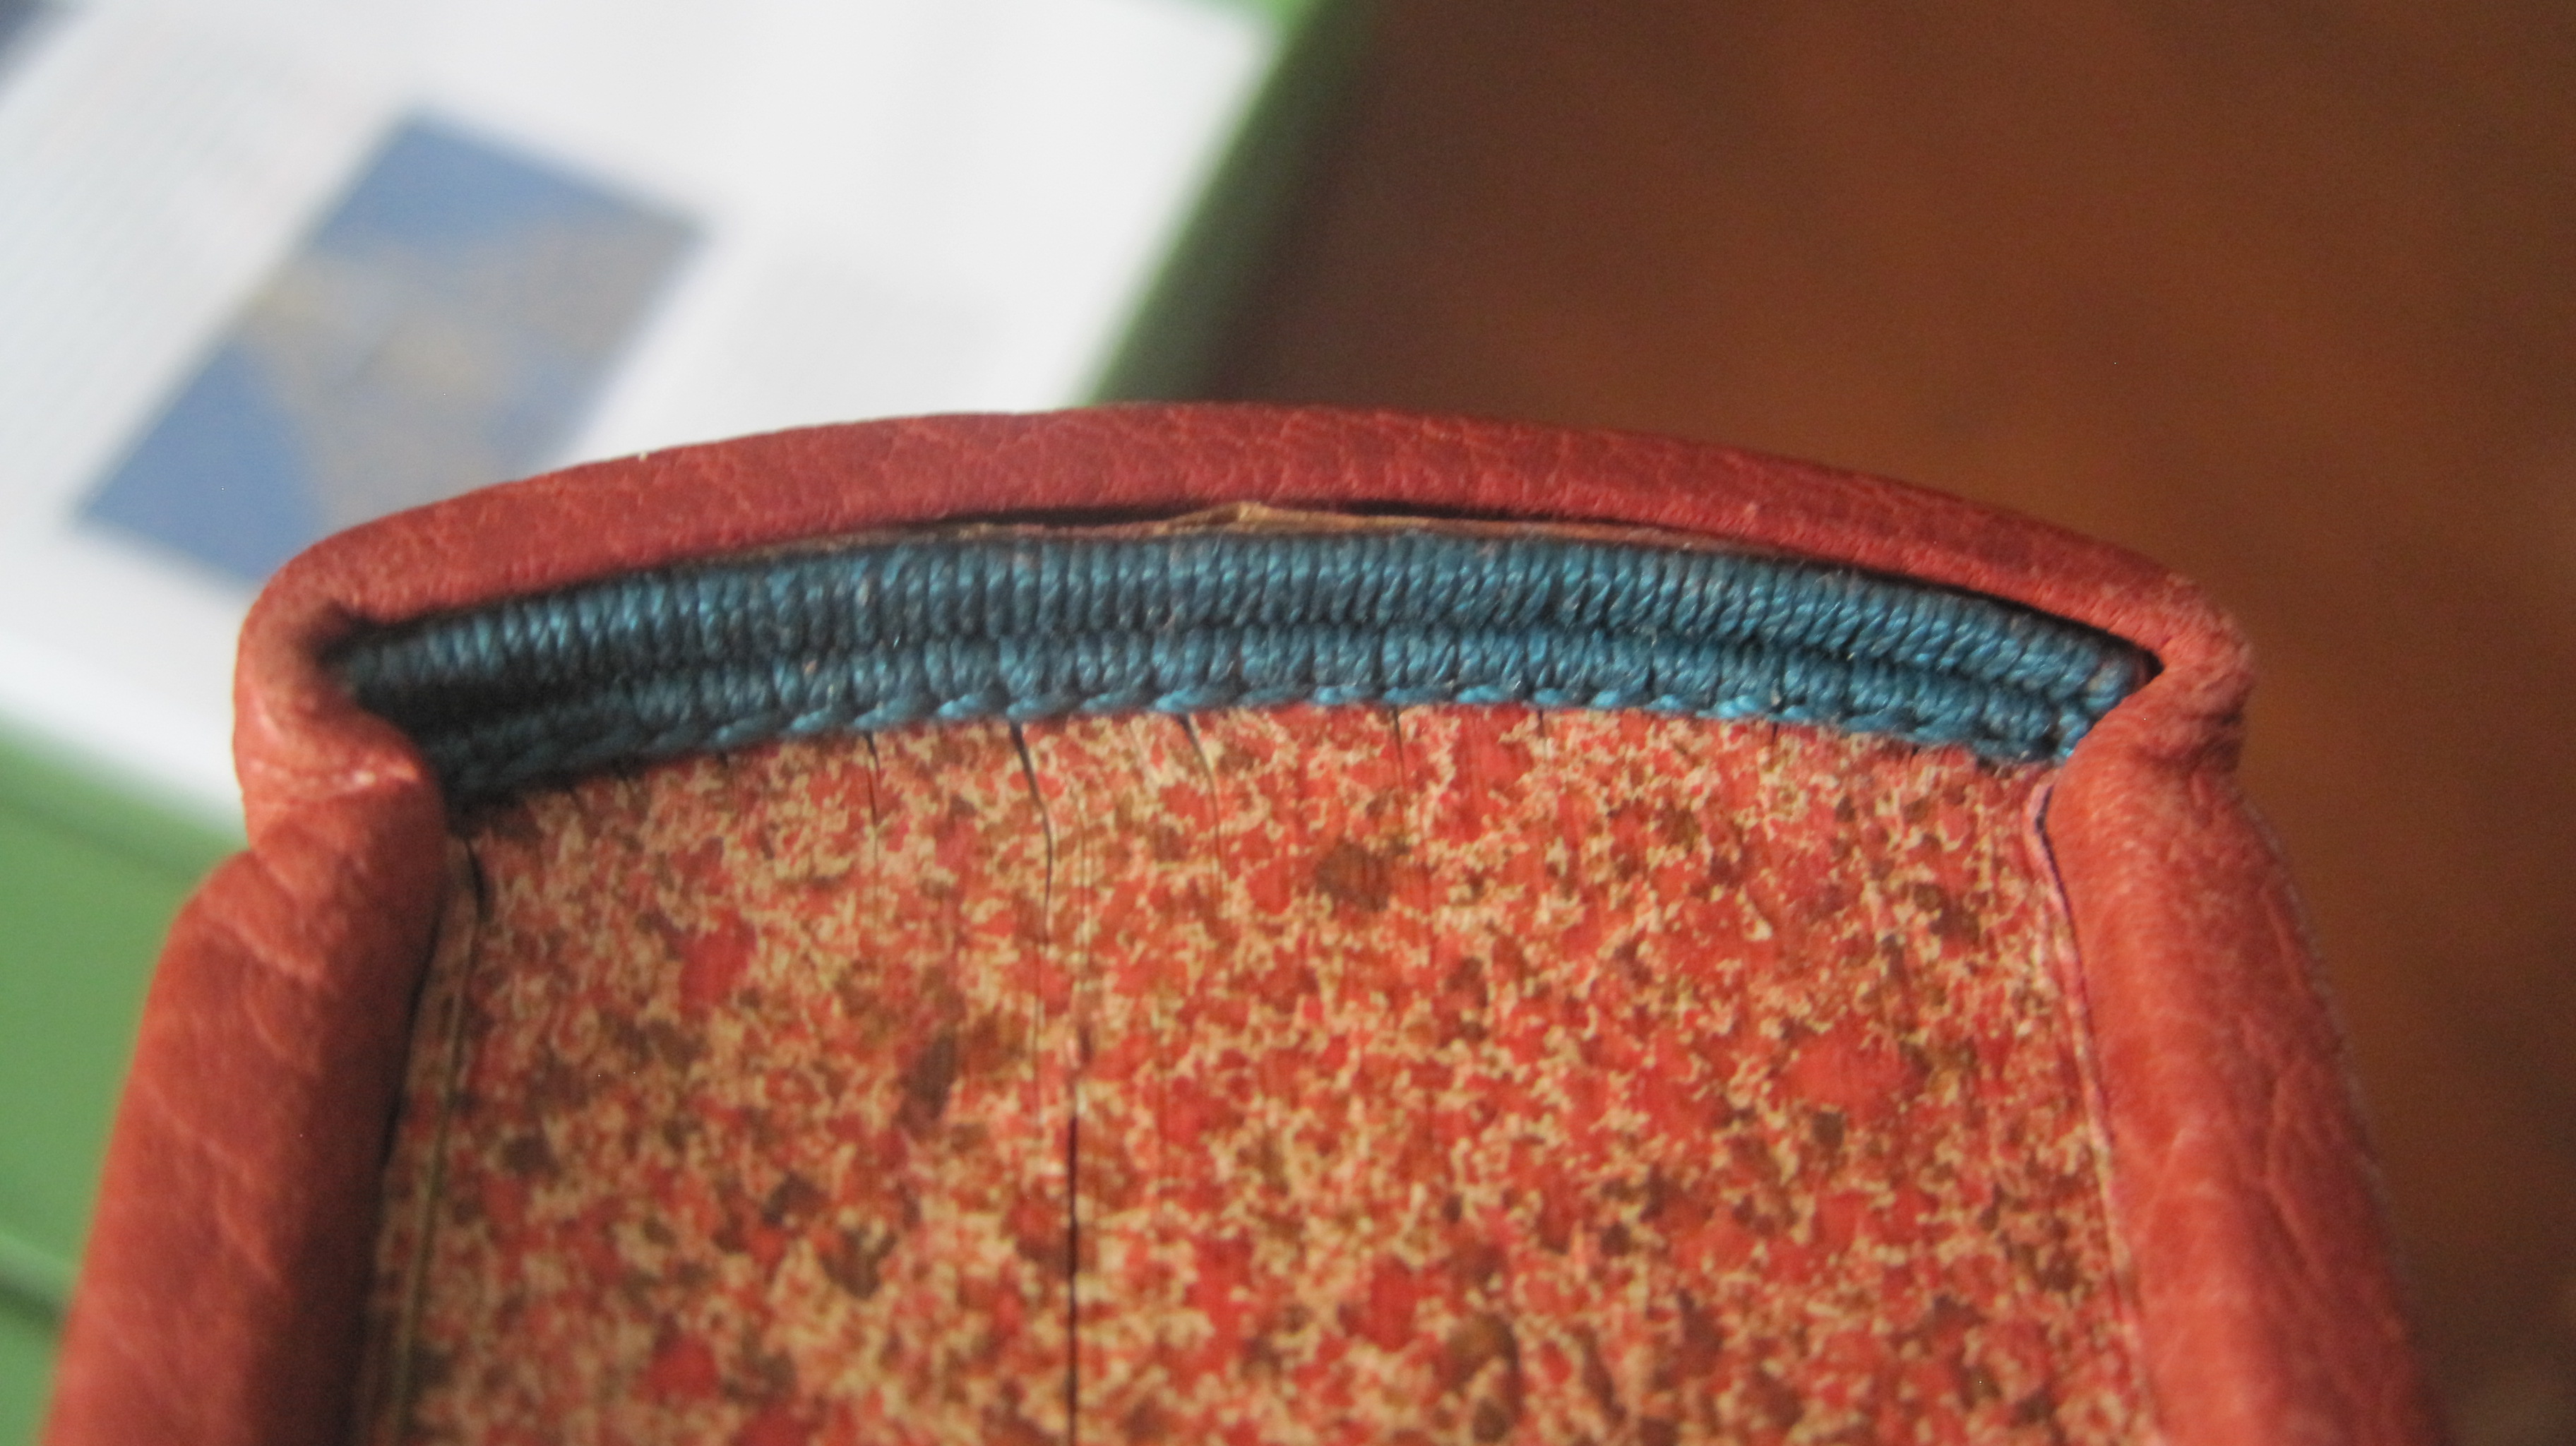
First; headbands are not difficult. But the ‘right’ headband for the book in question is important and needs forethought. In this example the book is a relatively rare cookery book dated 1760. The band at the tail is present but worn and the client wants it kept. The band at the head is missing. The surviving band is on a single core, in red and white thread. That is normal for eighteenth century books bound in England. The end product will look like this:
Core of eight-ply hemp cord, glued to stiffen it, thread is embroidery cotton, dark red and cream – NOT white, which is far too bright.
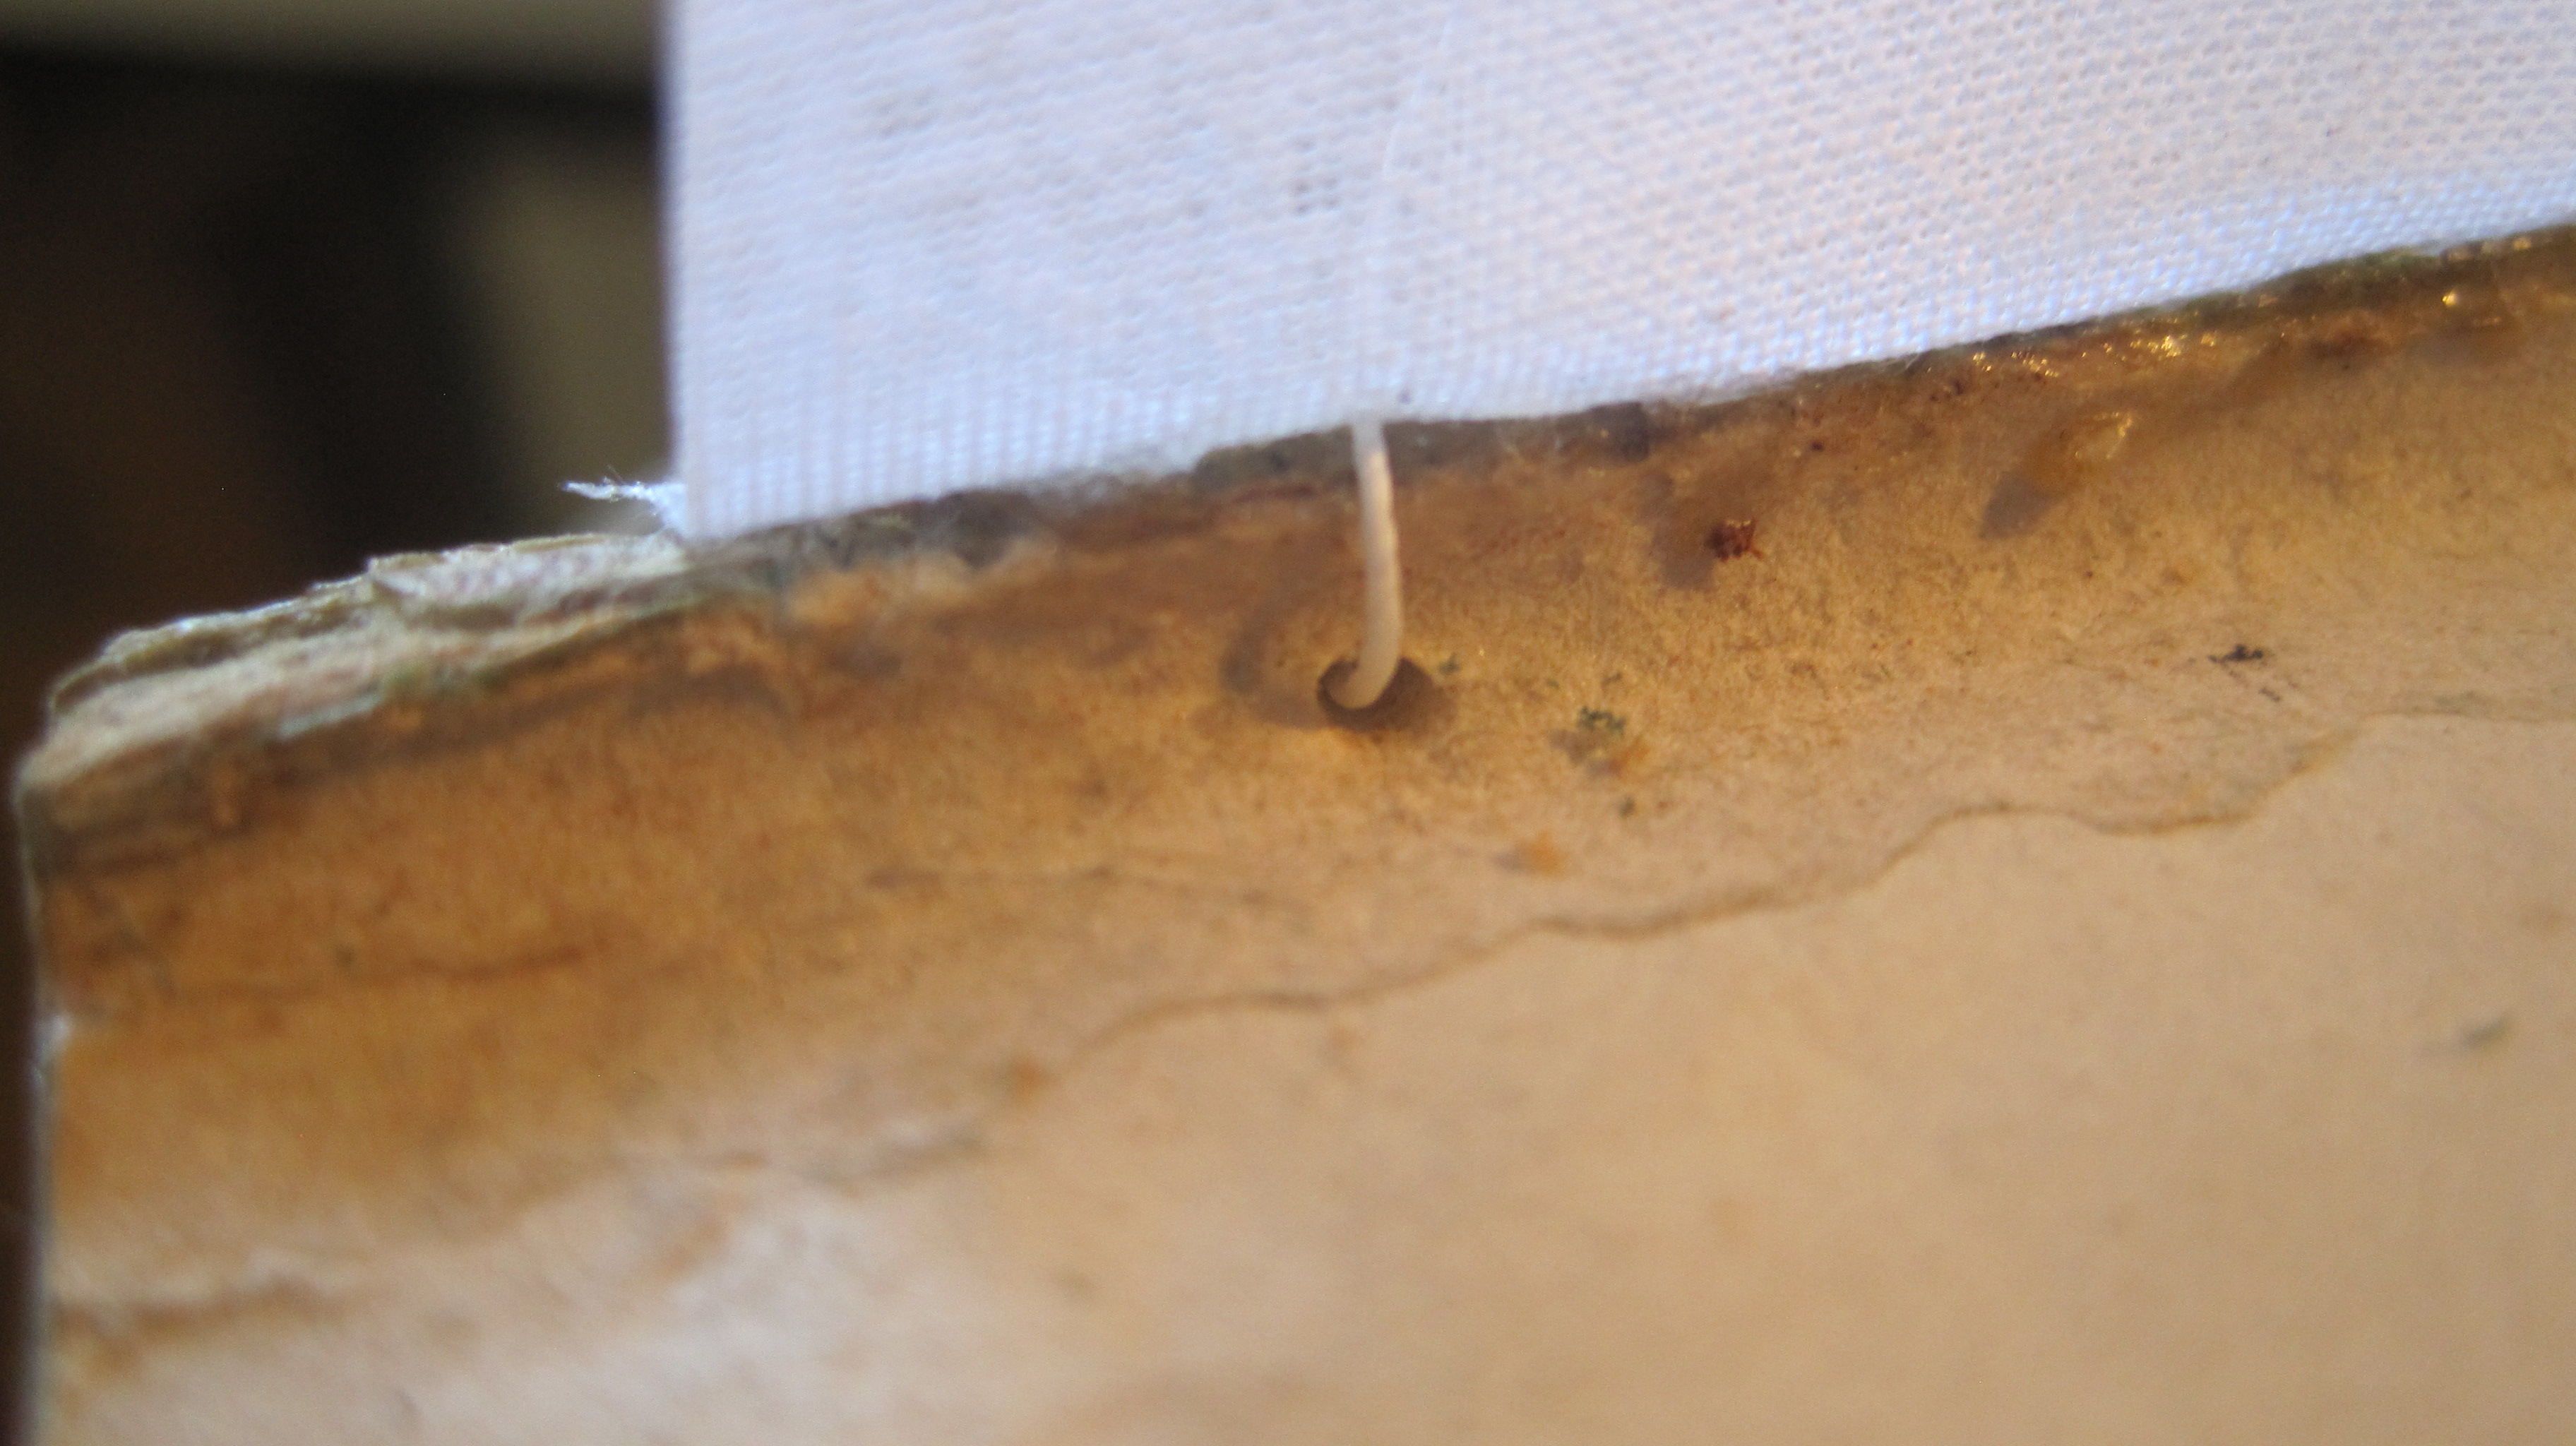
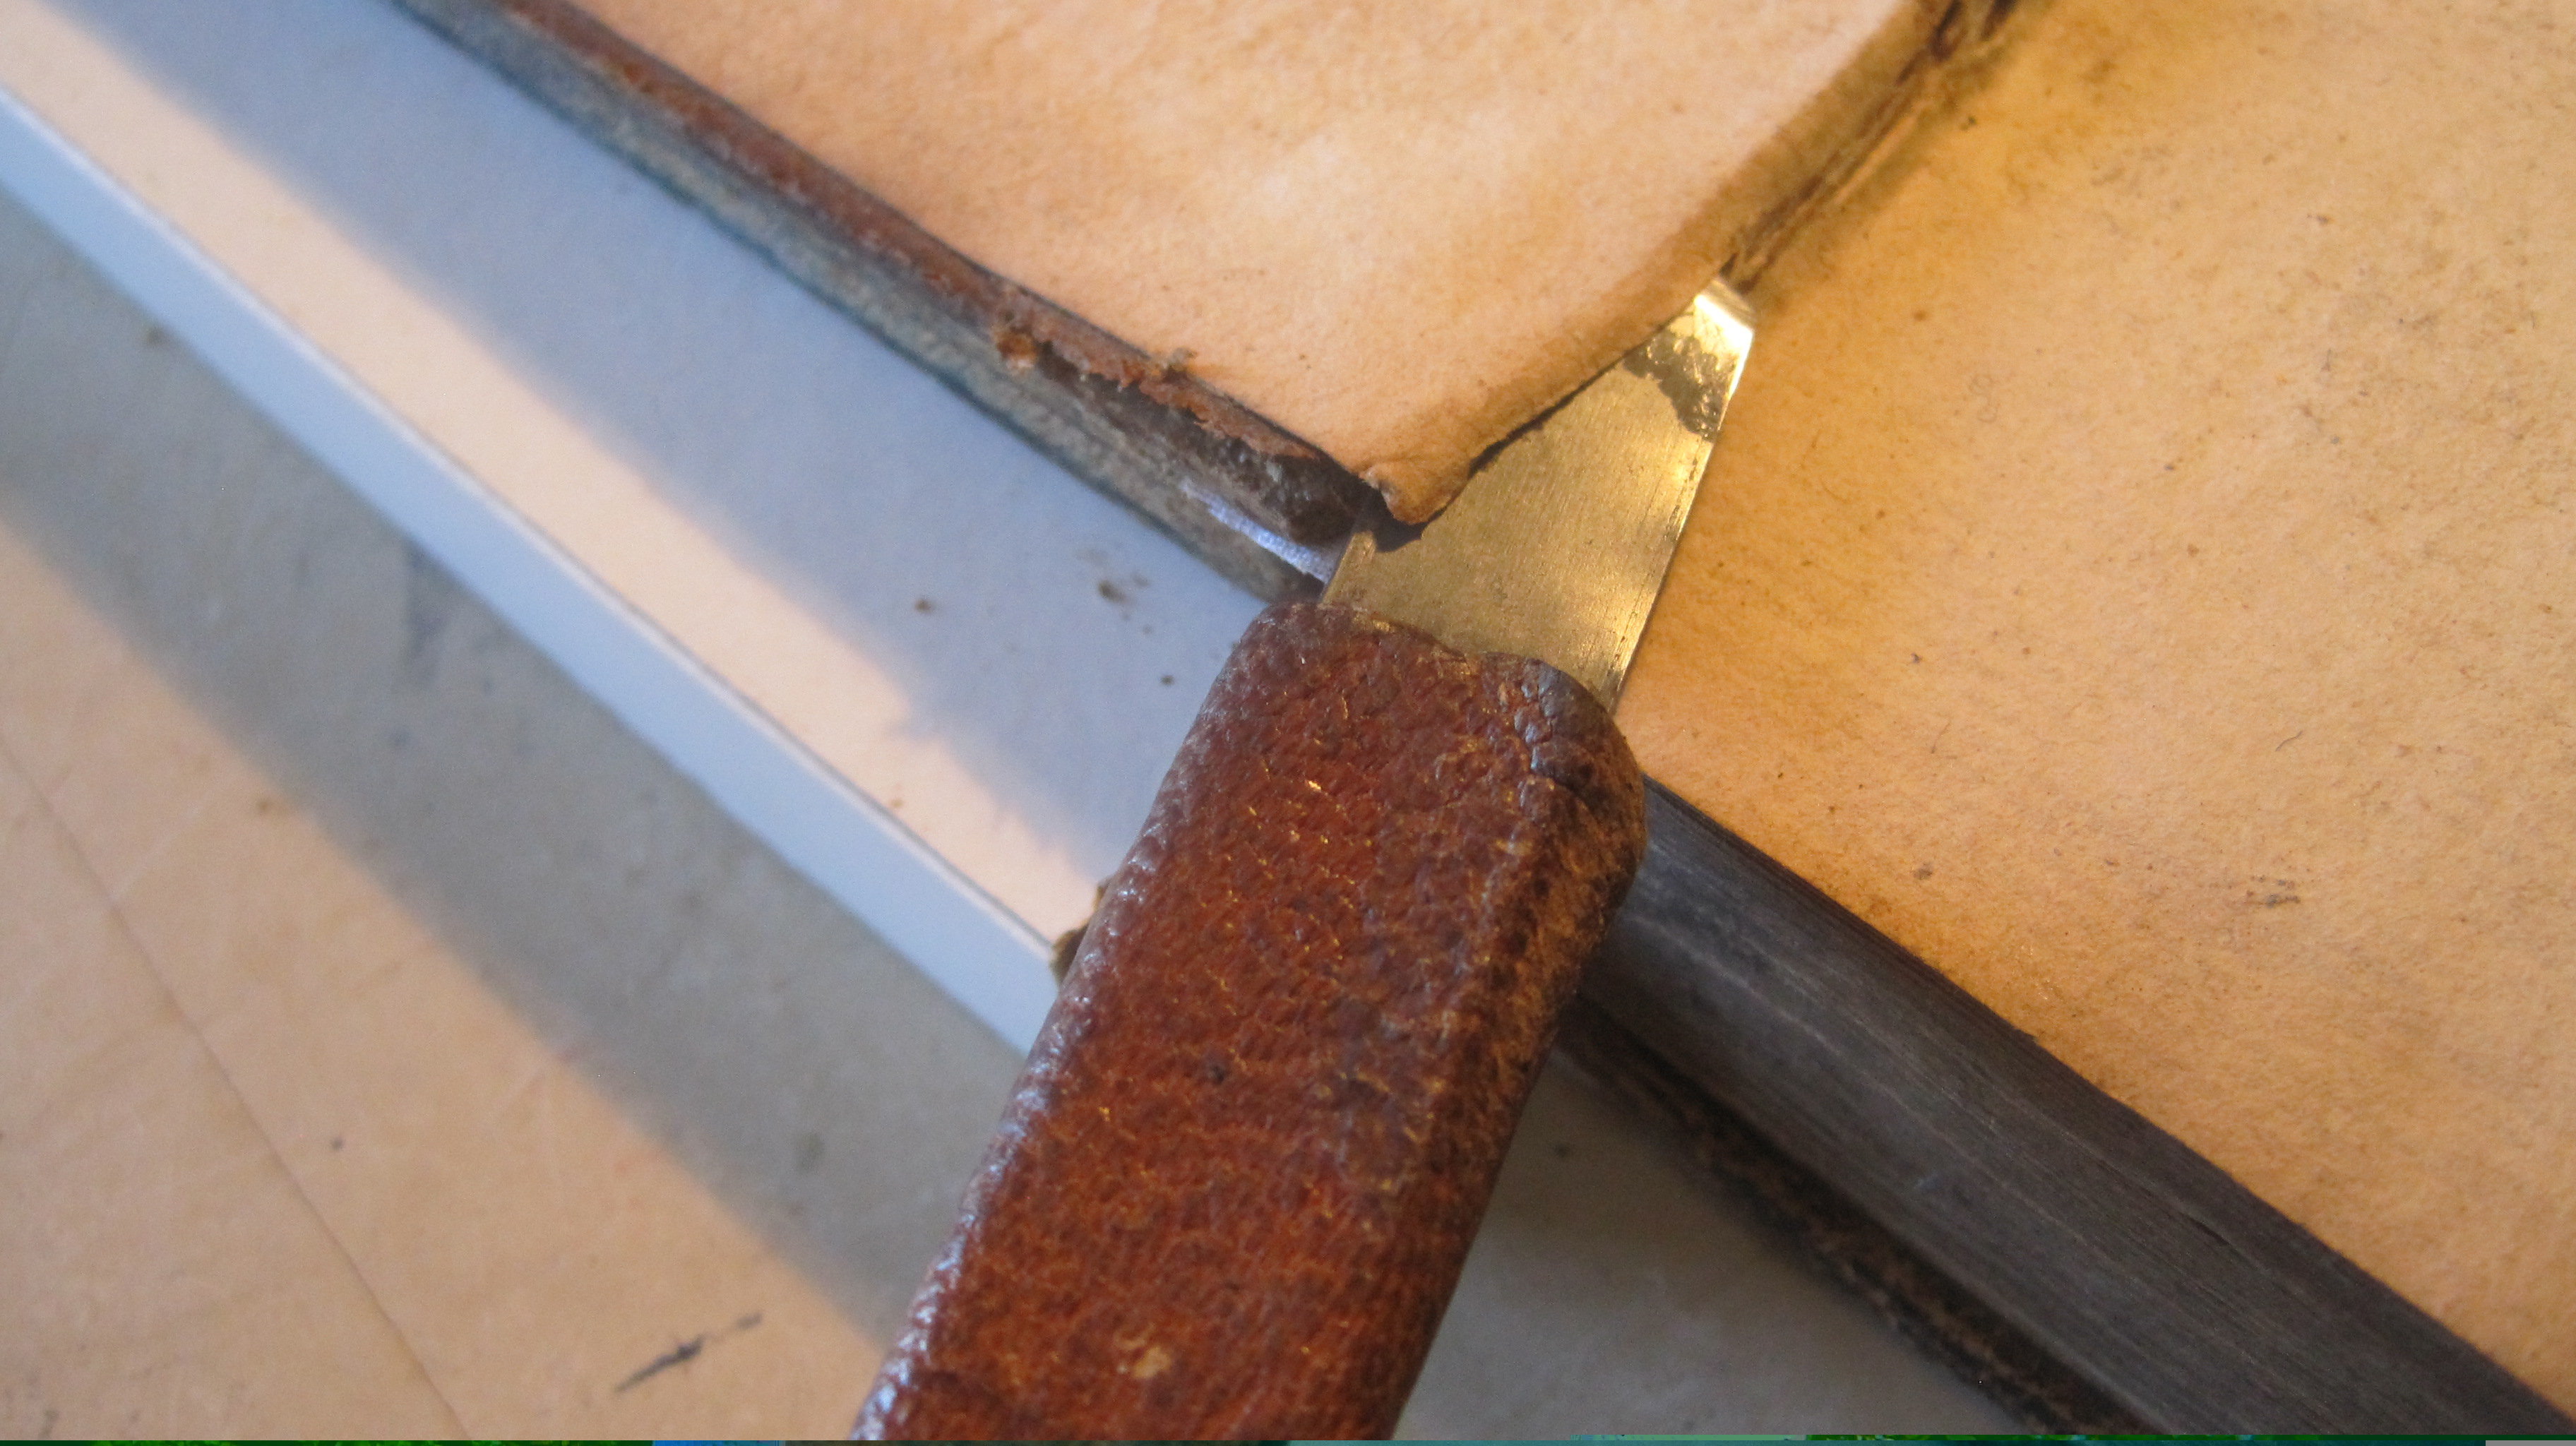
I always start on the left of the head. The two threads are tied at one end and a needle is tied to each of the other ends. Fix the core in place with a pin into the cover board. First step is to put either needle down into the second section – NEVER the first – and pull the knotted ends right down inside. Make a single hitch:
Position the core over the curve of the back, under the white thread and put the white thread needle back through its first position. Bring it back over the core and tuck it in between the pages at the foredge. This keeps it sufficiently taut.
Now bring the red thread over the white one and under the front of the core, bringing it back over the core flush against the white thread, back under and over so you have two turns of red thread, just as you had two turns of white thread – that’s the regular pattern of a two colour endband.
This sequence continues to the first tie-down at about a quarter of the distance across the curve:
In principle the tie-down thread should go into the middle of a section. I have often found in old books that it doesn’t. So long as the thread comes out below the kettle stitch it does no harm.
Two more tie-downs plus the final one is sufficient – on many old books there were only three – one at each end and one in the middle.
The two loose ends are secured with a smear of glue and the back of the band and the previous tie-downs also and well smoothed over with a bone folderThe ends of the core have been sliced off at an angle
The spine will be lined with paper and sanded smooth to remove any unevenness from the tie-down threads.
This work was always done by the ‘women’s department’ of a bindery. Apparently a woman worker would be expected to do a normal band in about four minutes, and keep up that pace all day.
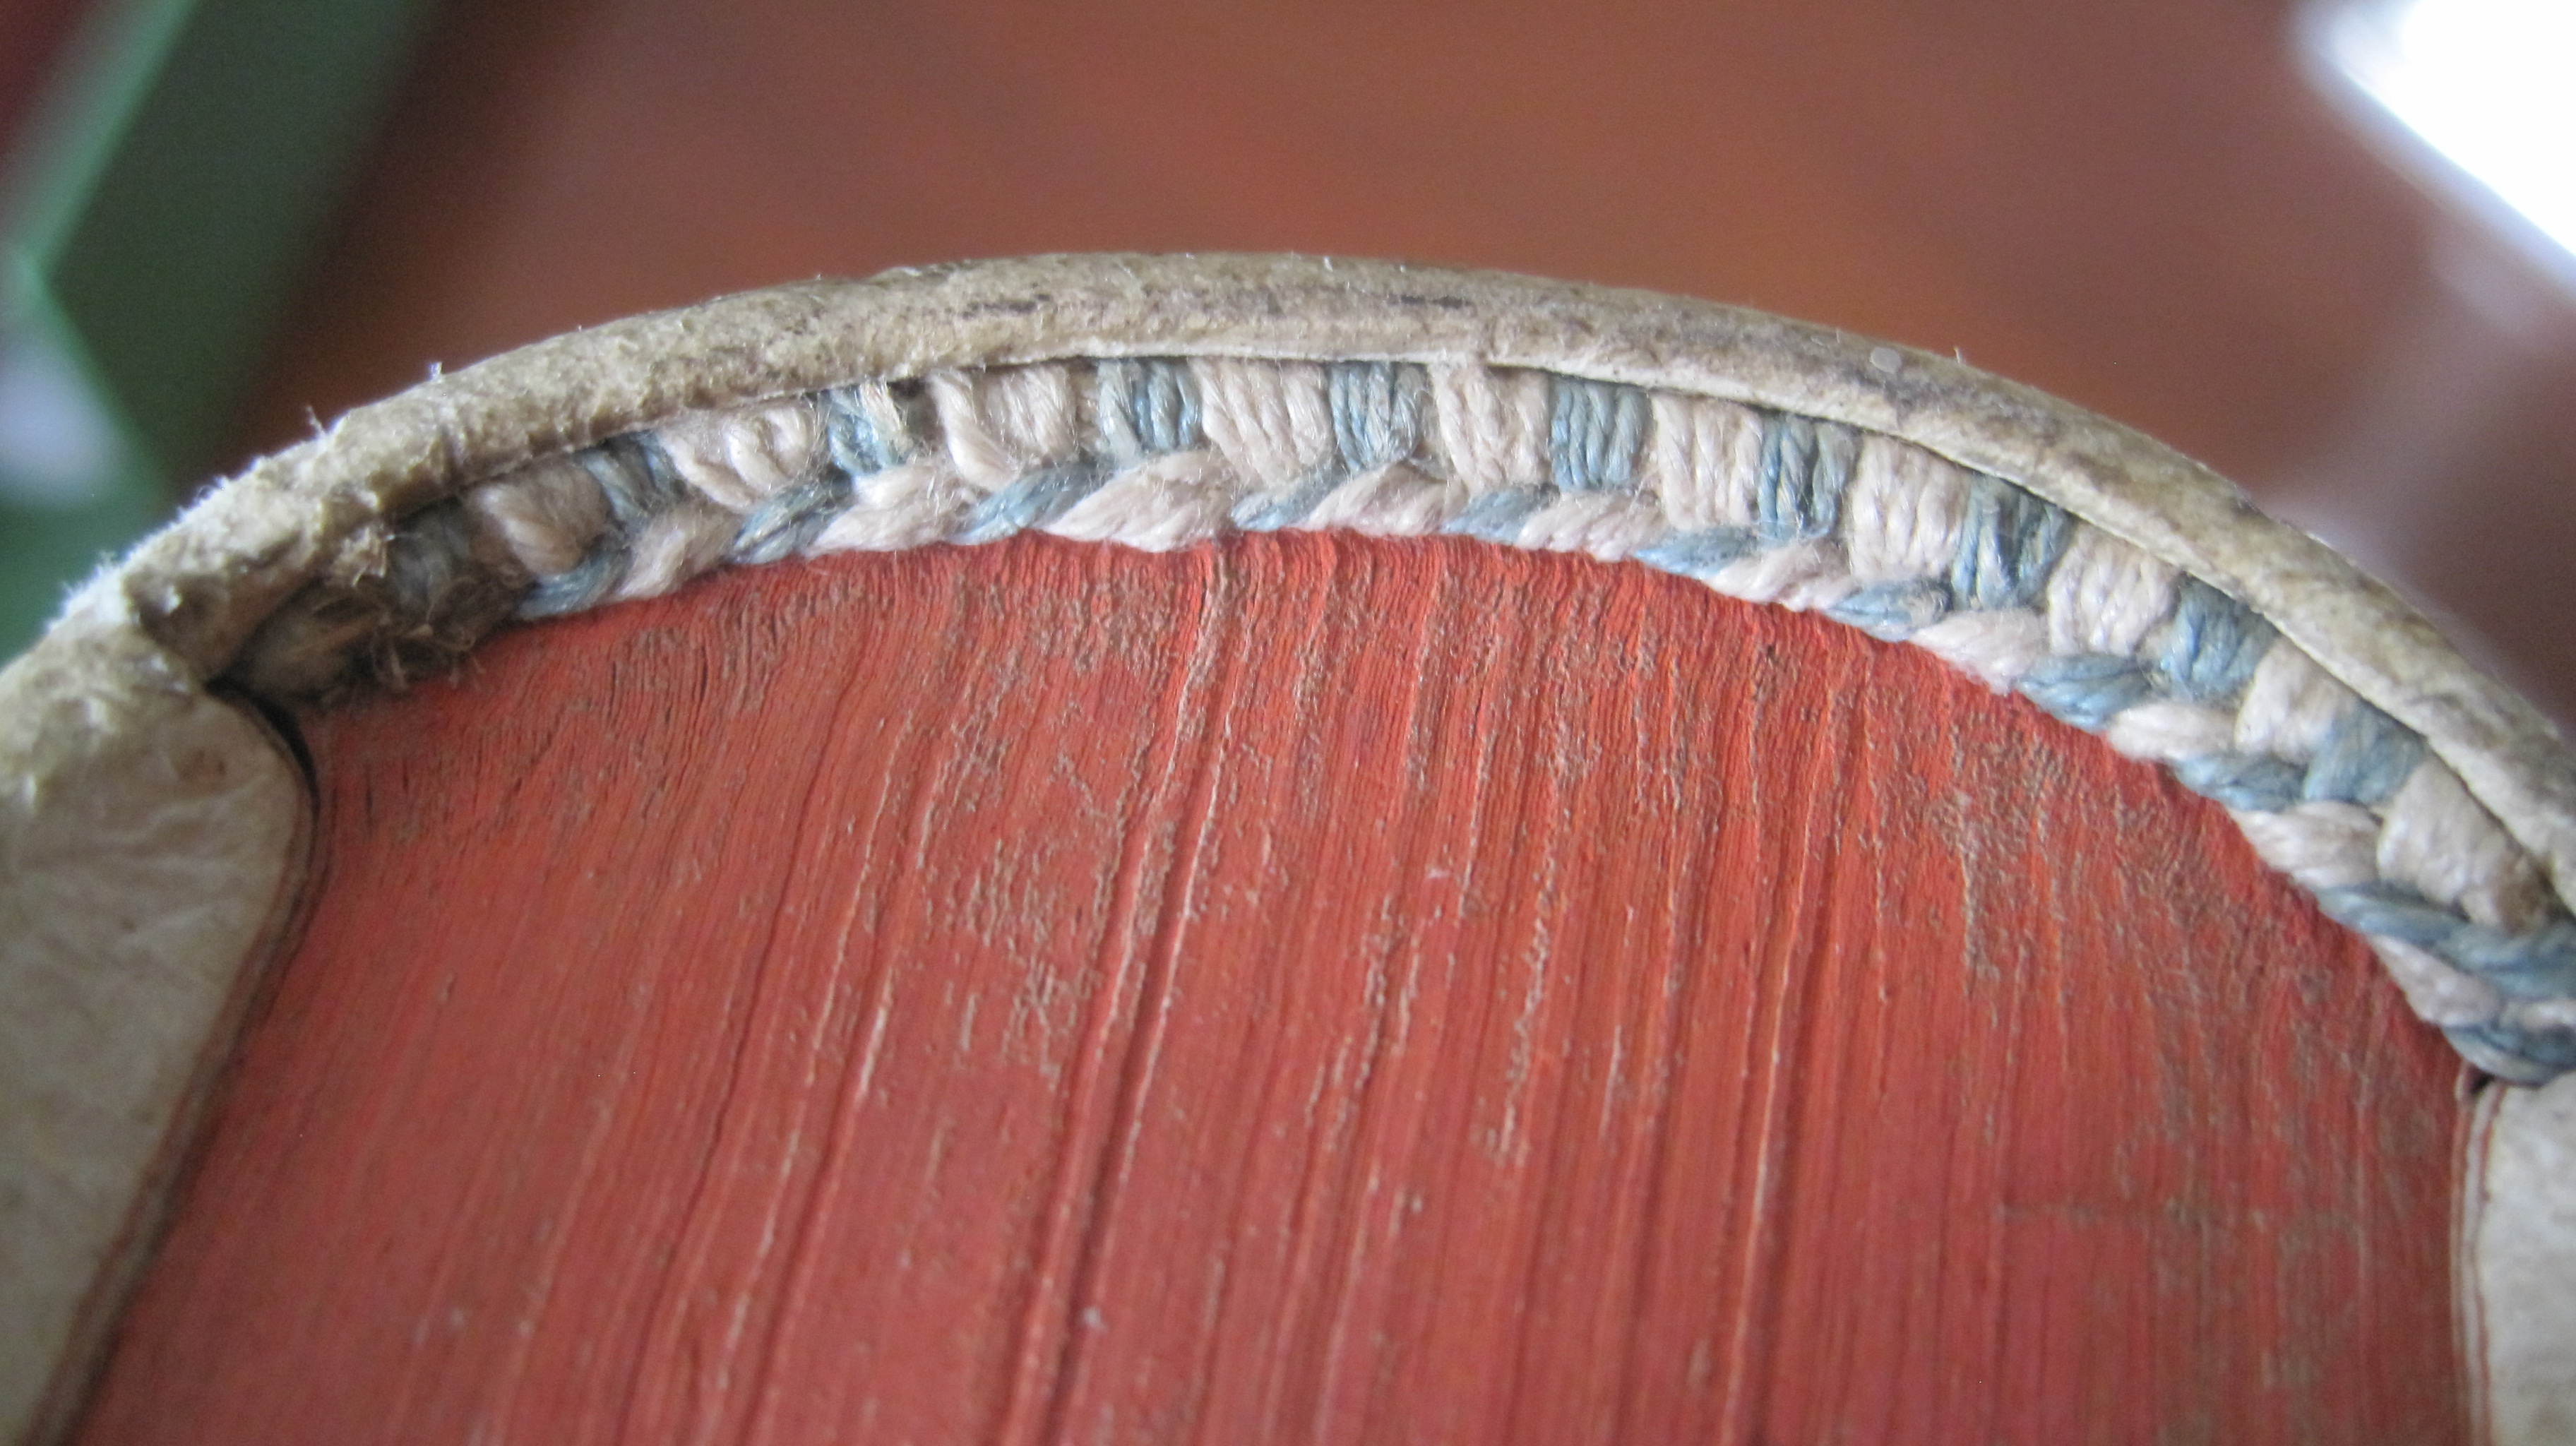
Endbands have been worked in two colours for centuries. The earliest in the age of printing were blue-and-white or green-and-white.
Typical headband of the 16th and 17th centuries – blue-and-white, three turns alternating
I am not a fan of fancy headbands – multi-coloured to fit in with edge-decoration, for example. The band is essentially functional, to strengthen the top of the book so it isn’t damaged by fingers pulling it off a shelf, and with the tail treated the same way simply so they match. It is best, in my view, for it to sit discreetly under the head-cap., thus:
A binding in alum-tawed pigskin that I did about 30 years ago
A double headband is also an affectation: it adds nothing in strength.
My binding of Tidcombe’s book on the Doves Bindery – Doves used plain green thread for their headbands, and my decision to do a double one was a mistake, I think
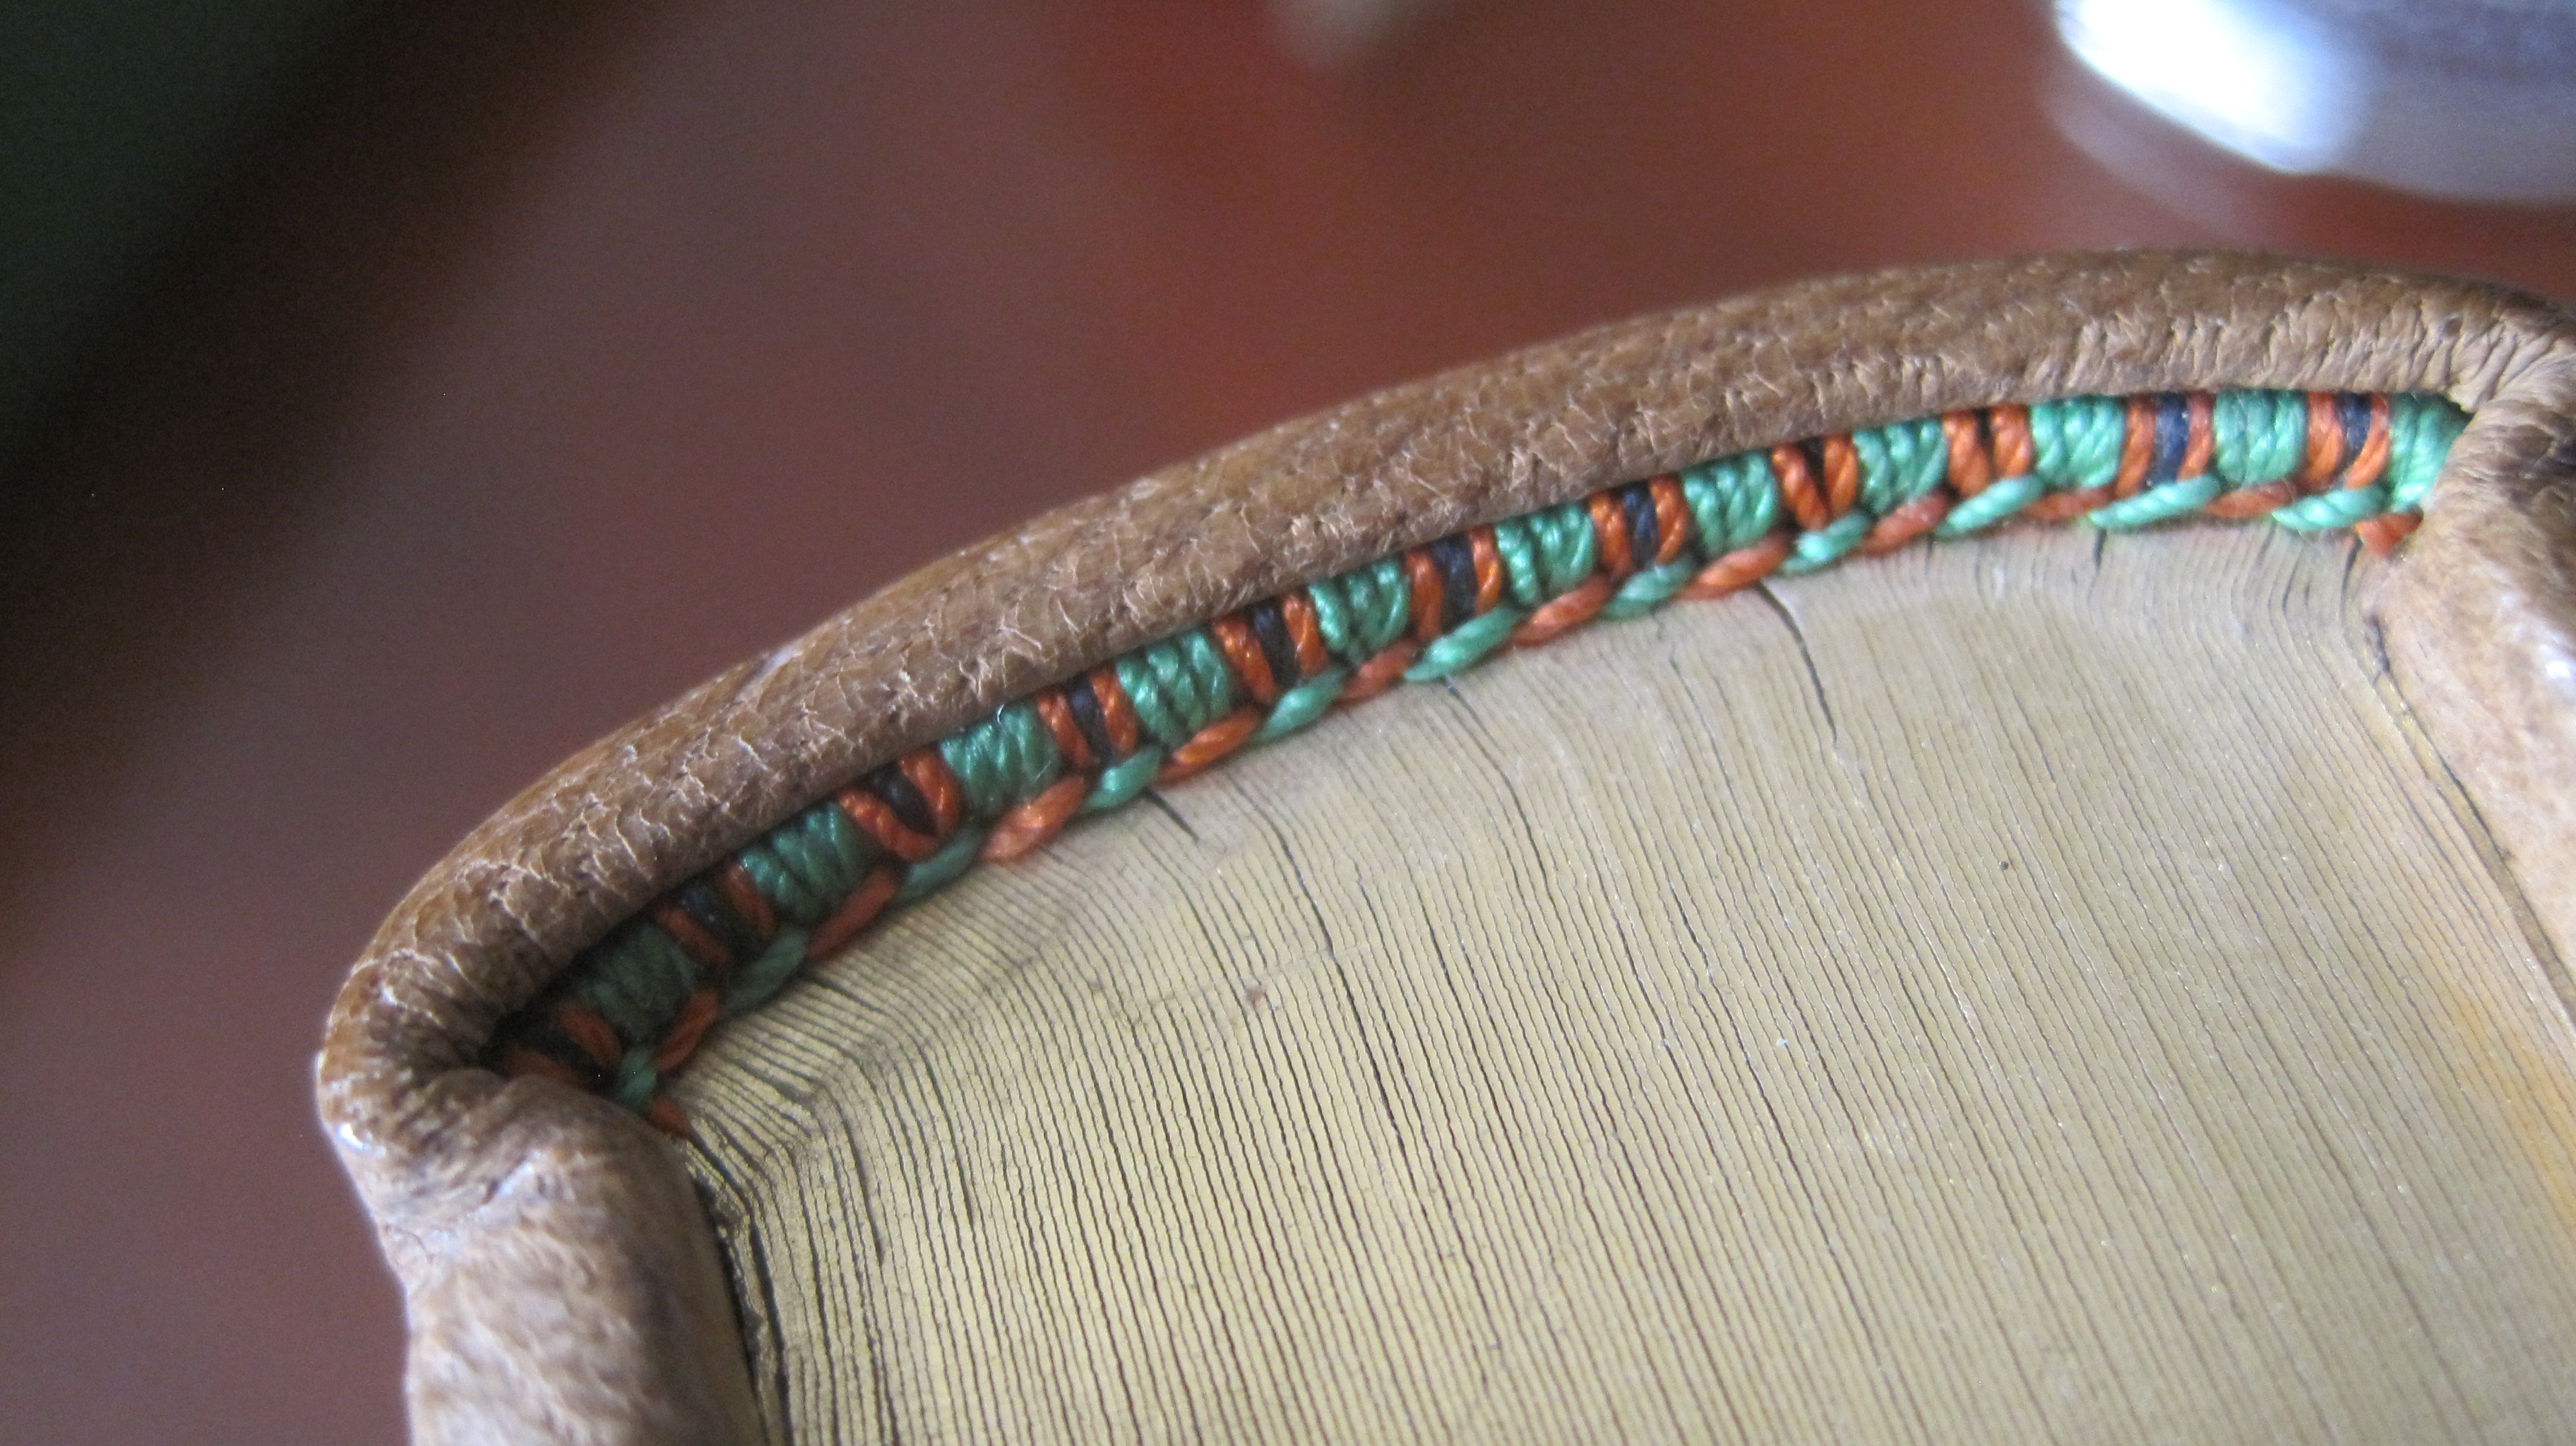
A permissible elaboration is an extra contrasting thread to ‘lift’ the plain alternating two colours:
Can you work out how the black tread is worked? It doesn’t appear in the beads….
Please disagree about any, or all, of the foregoing.